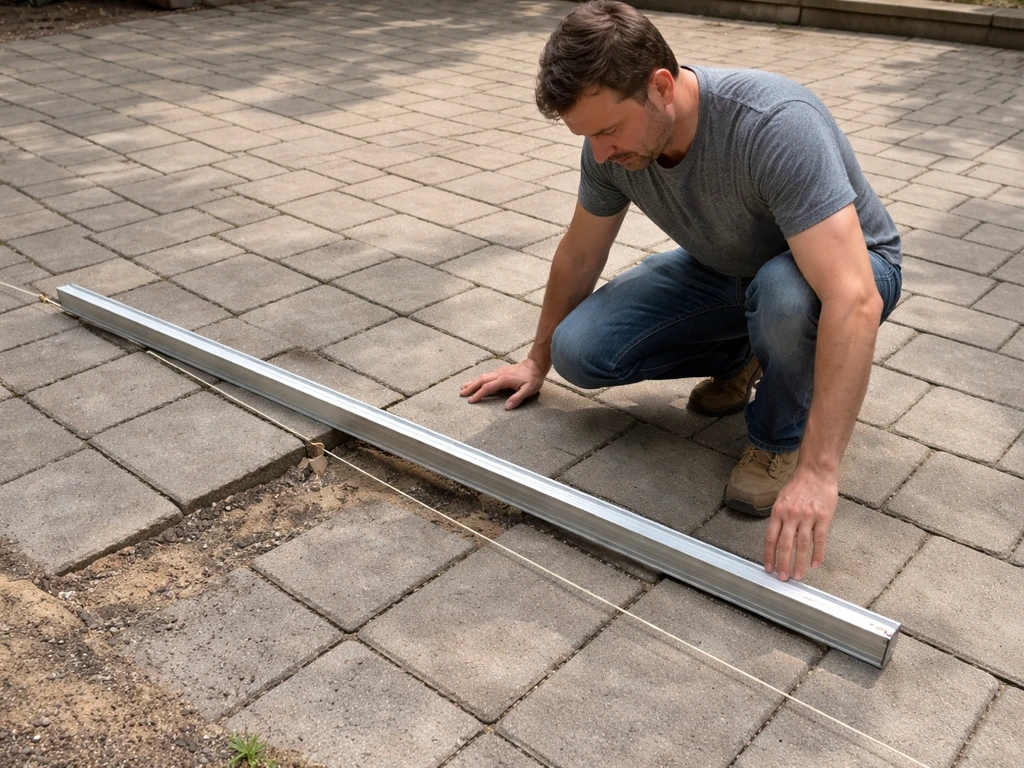
To tile a patio correctly, you need three numbers before you buy a single box: the exact area of the surface, the number of tiles that area requires after accounting for grout joints, and how many extra tiles to order for cuts and waste. On top of that, any outdoor slab needs a verified slope of at least 1/4 inch per foot (about 2%) draining away from your house, and that slope directly affects how your tile layout lines up and how many cuts you end up making at the edges. Get those numbers right on paper first, and the installation becomes a straightforward execution problem rather than a series of expensive surprises.
Tiling a Patio Math Problem: Calculate Tiles, Slope & Waste

Talia Lang
24 Jul 2026
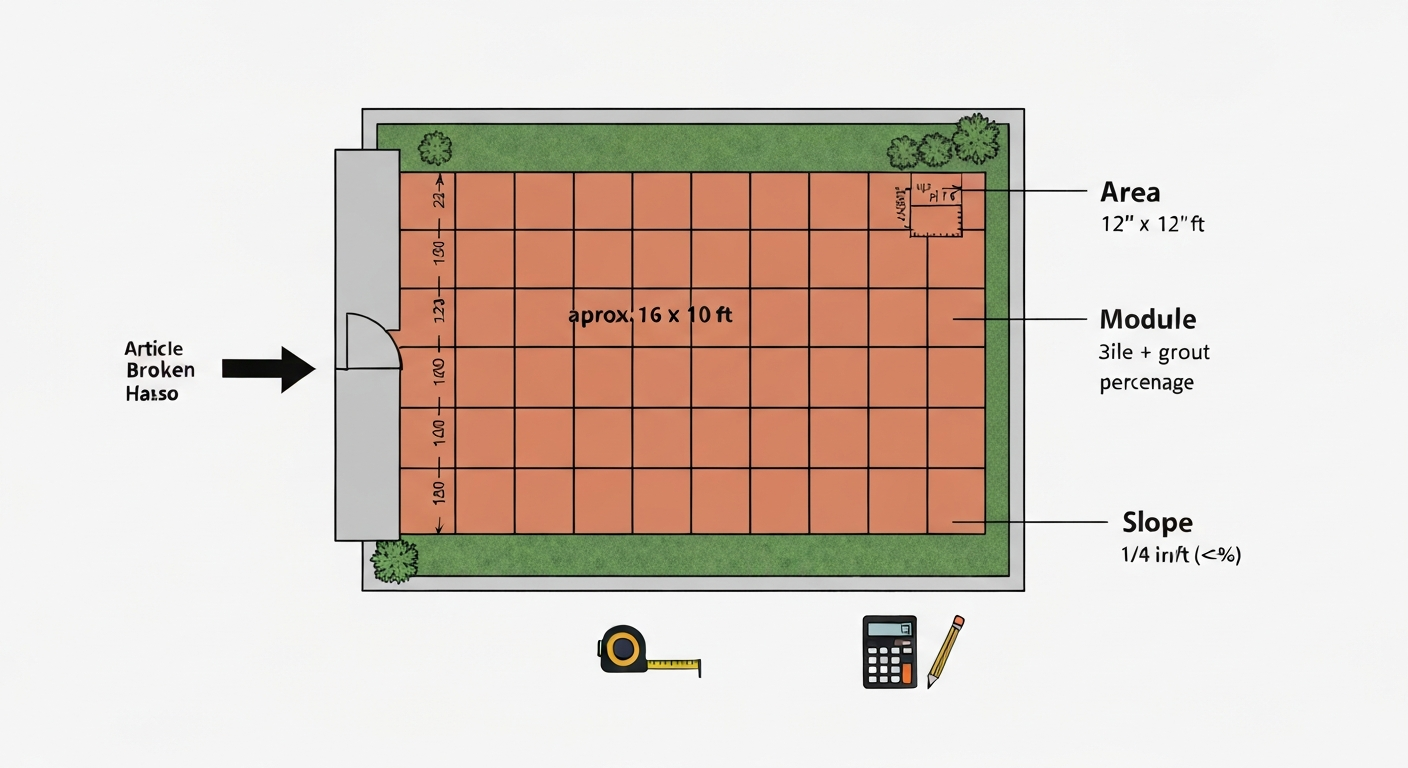
What this guide covers and your pre-project checklist
This guide walks through every calculation a DIYer needs to plan, order and lay outdoor patio tile: how to measure the space accurately regardless of its shape, how to calculate tile counts using grout joints, how to choose and verify the drainage slope, how to pick an appropriate waste factor, and how to pull all of it together in worked examples for small, medium and large patios. If your patio has bigger structural issues, like sinking sections, persistent pooling near the house, or a slope that already tilts the wrong direction, those problems need to be solved before any tile goes down. If your patio is sinking, read guidance on diagnosing causes and repair options for sinking patios what to do if your patio is sinking. This guide focuses on the math of the tiling job itself; the structural fixes are their own separate projects.
Before you start measuring and calculating, run through this checklist to make sure the project is actually ready for tile:
- Concrete slab or base is structurally sound with no active settling, heaving or sinking areas
- Existing cracks are assessed: hairline cracks under roughly 0.012 inches (0.3 mm) wide are usually cosmetic; wider or moving cracks need repair before tiling
- Slab surface is flat within 1/4 inch over 10 feet (TCNA/ANSI standard for exterior tile beds)
- Drainage slope is confirmed at 1/4 inch per foot minimum, running away from the building
- You have a tile selection with a water absorption rating of 0.5% or less (ASTM C373) and a wet DCOF rating appropriate for exterior use (ANSI A137.1)
- You know the finish dimensions of your tile including any spacer lugs
- You have decided on a grout joint width and grout type
- You have a tape measure, level, long straightedge, chalk line, and calculator ready
Quick measurements first: tools, units and conversions
Most tile is sold in metric sizes (300 mm, 400 mm, 600 mm) but most North American patios are measured in feet and inches. Mixing the two without converting is a common source of ordering errors, so sort this out before you start. The cleanest approach is to do all your calculations in one system and convert only at the end when you're comparing to tile dimensions or checking against the IRC drainage requirements.
The tools you need for measurement are simple: a 25-foot tape measure (minimum), a 4-foot level or a long straightedge with a smaller level, a pencil and graph paper or a notebook with a rough sketch. For slopes on larger areas, a laser level or a water level tube saves a lot of frustration. For irregular shapes, a long measuring tape and some stakes or chalk marks let you triangulate distances across the slab.
The key unit conversions you'll actually use
| To convert | Multiply by | Example |
|---|---|---|
| Inches to millimetres | 25.4 | 12 in × 25.4 = 304.8 mm |
| Millimetres to inches | 0.03937 | 600 mm × 0.03937 = 23.62 in |
| Feet to metres | 0.3048 | 10 ft × 0.3048 = 3.048 m |
| Metres to feet | 3.2808 | 3 m × 3.2808 = 9.84 ft |
| Square feet to square metres | 0.0929 | 150 ft² × 0.0929 = 13.94 m² |
| Square metres to square feet | 10.764 | 14 m² × 10.764 = 150.7 ft² |
| Inches per foot slope to percent | ÷ 12 × 100 | 0.25 in/ft ÷ 12 × 100 = 2.08% |
When you're working with tile dimensions from a manufacturer spec sheet, note whether the listed size is the tile face dimension or the modular dimension (face plus one grout joint). Most North American specs list the face dimension, so you add the grout joint separately. European catalogs sometimes list the modular dimension, so check the product data sheet.
Measuring the patio accurately
The shape of your patio determines how you measure and calculate area. Most patios fall into one of four categories: simple rectangles, L-shapes, circles or ovals, and truly irregular polygons. Each has a reliable method.
Rectangles and squares
Measure length and width at their widest points, then multiply to get area. For a patio that isn't perfectly square, also measure both diagonals: if they're equal, the corners are true right angles and your math will be clean. If the diagonals differ by more than about 1/2 inch, the patio is out of square and your tile rows will either need to be shimmed to a reference line or you'll carry a growing gap at one edge. Sketch the shape to scale so you can visualize where cuts will land.
L-shapes and multi-rectangle patios
Break the shape into two or more rectangles. Measure each rectangle separately and add the areas together. Make a clear sketch showing where you split the shape, because that split line often determines where you set your reference chalk lines when you start laying tile. For example, a 16 ft × 10 ft main area plus a 6 ft × 8 ft wing gives a total area of 160 + 48 = 208 sq ft.
Circles and ovals
For a circle, measure the diameter at the widest point, divide by 2 to get the radius, then use: Area = π × radius². For example, a 12-foot diameter circular patio: radius = 6 ft, Area = 3.1416 × 36 = 113.1 sq ft. For an oval, measure the longest dimension (the full length, call it 2a) and the widest dimension perpendicular to it (the full width, call it 2b), then use: Area = π × a × b. Keep in mind that circular patios generate a high proportion of cut tiles at the perimeter, so your waste factor needs to go up accordingly.
Irregular polygons
For an odd-shaped patio with five or more sides, the easiest reliable method is the grid count. Overlay a measured grid on your sketch (1-foot squares work well for most patios) and count the full squares plus estimate partial squares to the nearest half. Alternatively, use the surveyor's formula (shoelace formula) if you have precise corner coordinates: list the x and y coordinates of each corner in order, multiply each x by the next y, subtract each y by the next x, sum both columns, take the absolute difference, and divide by 2. This sounds intimidating but takes about five minutes with a calculator once you've measured all the corners.
Recording slope and fall: the drainage math you can't skip
The IRC (R401.3) requires any hardscape within 10 feet of a foundation to slope at least 2% away from the building, which works out to a minimum of about 1/4 inch per foot. The 2021 International Residential Code (IRC), R401.3 mandates that grade fall not fewer than 6 inches (152 mm) within the first 10 feet (3048 mm), effectively requiring impervious surfaces within 10 ft of a building foundation to slope at least 2% away from the structure blank" rel="noopener noreferrer">2021 International Residential Code (IRC) — R401.3. The TCNA Handbook recommends the same 1/4 inch per foot minimum for exterior tiled surfaces draining to a drain point. This isn't a style choice: a flat or reverse-sloping tiled patio will hold water, degrade the grout and setting bed, and eventually push water into your foundation. If your patio currently slopes toward the house, that's a structural problem to fix before tiling. For step-by-step instructions on how to fix a slanted patio before tiling, see how to fix a slanted patio. For step‑by‑step remedies and repair options, see our guide on how to fix a patio that slopes towards the house.
How to measure existing slope
- Set a 4-foot level flat on the slab surface along the direction you want to check (typically from house toward yard).
- Lift the low end of the level until the bubble centers. Measure the gap between the bottom of the level and the slab at the low end. This gap is your rise over a 4-foot run.
- Calculate slope percent: (rise in inches ÷ 48 inches) × 100. For example, a 3/8-inch rise over 4 feet = (0.375 ÷ 48) × 100 = 0.78%. That's below the 2% minimum and would need correction.
- To find fall in inches per foot: rise in inches ÷ run in feet. A 1-inch rise over 4 feet = 0.25 inches per foot.
- For the full patio, take measurements along at least three lines: centerline, left edge, and right edge. Record the high and low points to understand if there's any cross-slope or bowl effect.
How slope affects tile layout
A 1/4-inch per foot slope across a 12-foot patio means the high end is 3 inches higher than the low end. That's enough to matter for layout: your grout lines will still be horizontal on a drawing, but on the slab they'll run slightly uphill. For most tile sizes this is invisible to the eye and doesn't affect the math. Where slope does affect tile math is at any internal drain point. If you're running tile toward a center drain, each row needs to slope toward that point from all sides, which means the tile courses radiating out from the drain are cut at a slight angle and your waste factor for cuts goes up substantially.
Slope conversion reference
| Slope (inches per foot) | Slope (percent) | Total fall over 10 ft | Meets IRC 2% minimum? |
|---|---|---|---|
| 1/8 in/ft (0.125") | 1.04% | 1.25 inches | No |
| 1/4 in/ft (0.25") | 2.08% | 2.5 inches | Yes (minimum) |
| 3/8 in/ft (0.375") | 3.13% | 3.75 inches | Yes |
| 1/2 in/ft (0.50") | 4.17% | 5 inches | Yes |
| 1 in/ft (1.00") | 8.33% | 10 inches | Yes (steep) |
Calculating area and tile counts
The mistake most people make is dividing total area by single tile area and calling it done. That ignores grout joints, which can meaningfully change the tile count, especially with larger tiles or wider joints. The correct method treats each tile as a module: the tile face plus half a grout joint on each side. Here's the formula that professional tile calculators use:
Module length = tile length + grout joint width. Module width = tile width + grout joint width. Module area = module length × module width. Tiles needed (before waste) = total patio area ÷ module area. Then round up to the nearest whole tile.
Single-size tile example
A 12-inch × 12-inch tile with a 3/16-inch (0.1875-inch) grout joint. Module = 12.1875 × 12.1875 = 148.54 sq in = 1.031 sq ft. For a 150 sq ft patio: 150 ÷ 1.031 = 145.5, round up to 146 tiles before waste. Compare that to the naive calculation: 150 sq ft ÷ 1 sq ft per tile = 150 tiles. The difference here is small, but it grows with larger tiles and wider joints.
Mosaic tile sheets
Mosaic tiles come on mesh-backed sheets, and you calculate by sheet area rather than individual tile area. Measure the sheet face dimensions (usually 12 × 12 inches or 11.8 × 11.8 inches including the joint to the next sheet), then divide total area by sheet area. The grout joints between sheets are already incorporated if you measure the sheet edge to edge. Always verify: some mosaic sheet dimensions are listed as the tile-face-only area, which means the actual sheet with joints is slightly larger.
Plank tiles (long format)
Plank tiles like 6 × 24 or 4 × 24 formats need the module approach applied separately for length and width because the aspect ratio affects how many cuts appear at the ends of rows versus the sides of rows. Calculate: modules across the width = patio width ÷ (tile width + joint), modules along the length = patio length ÷ (tile length + joint). Round each up to the nearest whole number, then multiply for total tile count. This also tells you immediately how many cut tiles you'll have at the perimeter.
Spacing and grout math
The grout joint width isn't purely aesthetic. It's a structural detail: the TCNA and tile manufacturers specify a minimum joint of 1/16 inch for any tile installation to allow for thermal movement and minor substrate variation. For exterior patios exposed to freeze-thaw cycles, a joint of 1/8 to 3/16 inch is more practical because the grout can flex slightly and you have more tolerance for base movement.
Grout type follows joint width. SikaTile product guidance (unsanded vs. sanded grout joint width guidance) recommends unsanded grout for roughly 1/16″–1/8″ joints and sanded grout for about 1/8″ and wider SikaTile product guidance (unsanded vs. sanded grout joint width guidance) recommends unsanded grout for roughly 1/16″–1/8″ joints and sanded grout for about 1/8″ and wider.. Use unsanded grout for joints from 1/16 to 1/8 inch. Use sanded grout for joints from 1/8 inch and wider. Epoxy grout works across a wider range of joint sizes and is more durable outdoors, though it's harder to work with. For most outdoor patios with standard porcelain or stone tile, sanded grout or exterior-rated epoxy grout in a joint of 3/16 inch is a reliable choice.
How joint width shifts your tile count
Let's compare 12-inch tile with different joint widths across a 10-foot (120-inch) run to show the effect:
| Grout joint width | Module size (inches) | Full tiles in 120" | Leftover (cut tile size) |
|---|---|---|---|
| 1/16" (0.0625") | 12.0625" | 9 full tiles (108.56") | 11.44" cut |
| 1/8" (0.125") | 12.125" | 9 full tiles (109.13") | 10.88" cut |
| 3/16" (0.1875") | 12.1875" | 9 full tiles (109.69") | 10.31" cut |
| 1/4" (0.25") | 12.25" | 9 full tiles (110.25") | 9.75" cut |
Notice that joint width shifts your cut size but rarely changes the total tile count for a single row. Its bigger effect is on the cumulative dimension: across a 20-foot run, a 1/16-inch vs 1/4-inch joint difference adds up to nearly an inch of total difference. That matters if you're aligning tile to a fixed feature like a step edge or a wall corner.
Centering the layout
For a professional result, center the tile layout so that cut tiles at opposite edges are equal in size and larger than half a tile if possible. To find the centering offset: calculate the total span occupied by full tiles (number of full modules × module size), subtract from total dimension, divide by 2. That result is your starting offset from the center reference line. If the offset produces a cut tile smaller than about 2 to 3 inches on a 12-inch tile, shift the layout by half a tile module to make all perimeter cuts larger.
Waste factor explained
The waste factor accounts for tiles that break during cutting, tiles that need to be recut after a measurement error, edge cuts that produce offcuts too small to reuse, and the extra tiles you need for a future repair. It is not optional: every experienced tile setter orders more than the calculated count. The question is how much more.
The percentage depends on three factors: the complexity of the pattern, the number of inside and outside corners and curves in the patio boundary, and the tile size. Larger tiles produce bigger wasted offcuts when you cut for a small remainder. Complex diagonal and herringbone patterns require nearly every perimeter tile to be cut at an angle, generating more waste per tile than a straight grid. Here are the industry standard planning allowances:
| Pattern / Scenario | Recommended waste factor | Notes |
|---|---|---|
| Straight grid, simple rectangle | 5–10% | Lowest cut complexity; buy 7% extra as a safe baseline |
| Running bond / brick offset (1/3 or 1/2 offset) | 8–12% | More end cuts; use 10% for most patios |
| Diagonal (45-degree grid) | 15–20% | Every perimeter tile cut at 45°; high offcut waste |
| Herringbone | 15–25% | High cut count; use 20% minimum |
| Mosaic sheets (small individual tiles) | 10–15% | Cut at sheet edge; joints can shift; use 12% baseline |
| Large-format plank tile (6×24 or larger) | 12–18% | Long cuts produce large offcuts with limited reuse |
| Irregular patio boundary (curves, many corners) | Add 5% to above | More perimeter cuts; each corner is a unique cut |
| Circle or curved-edge patio | 20–30% | High perimeter cut rate; circular cuts waste most of each tile |
Always round your final order up to the nearest full box. Check whether any tiles in the same dye lot or shade batch are available, and note the lot number: replacing a few broken tiles five years from now is much easier if you know what batch you originally bought. Order at least one full box beyond your calculated need to keep as spares.
Worked examples: three patio sizes, imperial and metric
These examples walk through the complete calculation sequence for a small, medium and large patio. I've included both imperial and metric versions of each so you can follow along regardless of which system your tile dimensions are listed in.
Example 1: Small patio, 8 ft × 10 ft (2.44 m × 3.05 m), straight grid
Tile chosen: 12-inch × 12-inch (305 mm × 305 mm) porcelain tile, sold in boxes of 10 tiles (10 sq ft per box). Grout joint: 3/16 inch (4.75 mm). Pattern: straight grid. Waste factor: 7%.
- Patio area: 8 × 10 = 80 sq ft (7.43 m²).
- Module size: 12 + 0.1875 = 12.1875 inches (309.75 mm).
- Module area: 12.1875 × 12.1875 = 148.54 sq in = 1.031 sq ft (0.0959 m²).
- Tiles needed (no waste): 80 ÷ 1.031 = 77.6, round up to 78 tiles.
- Add 7% waste: 78 × 1.07 = 83.5, round up to 84 tiles.
- Boxes needed: 84 ÷ 10 = 8.4, round up to 9 boxes (90 tiles total, 6 spare).
- Slope check: 8-foot patio running away from house at 1/4 in/ft = 2 inches total fall from high to low edge. Confirm with level before laying.
- Layout: 8 ft ÷ 12.1875 in = 7.9 modules. Use 7 full tiles + 1 cut per row. Cut size: 120 in − (7 × 12.1875 in) = 120 − 85.31 = 34.69 inches... wait, recalculate: 8 ft = 96 inches. 96 ÷ 12.1875 = 7.88, so 7 full tiles × 12.1875 = 85.31 in, leaving 96 − 85.31 = 10.69 inches for the last cut tile per row across the 8-foot dimension. Centered: offset = 10.69 ÷ 2 = 5.35 inches from each edge. That's a comfortable cut size, no need to shift the layout.
Example 2: Medium L-shaped patio, 14 ft × 12 ft main + 6 ft × 8 ft wing (diagonal pattern)
Tile chosen: 18-inch × 18-inch (457 mm × 457 mm) porcelain, 4 tiles per box (13.5 sq ft per box). Grout joint: 1/4 inch (6.35 mm). Pattern: diagonal 45-degree grid. Waste factor: 18%.
- Main area: 14 × 12 = 168 sq ft. Wing: 6 × 8 = 48 sq ft. Total: 216 sq ft (20.07 m²).
- Module size: 18 + 0.25 = 18.25 inches (463.55 mm).
- Module area: 18.25 × 18.25 = 333.06 sq in = 2.313 sq ft (0.2149 m²).
- Tiles needed (no waste): 216 ÷ 2.313 = 93.4, round up to 94 tiles.
- Add 18% waste for diagonal pattern: 94 × 1.18 = 110.9, round up to 111 tiles.
- Boxes needed: 111 ÷ 4 = 27.75, round up to 28 boxes (112 tiles total).
- Slope check: 14-foot main dimension running away from house needs at least 14 × 0.25 = 3.5 inches total fall. Measure and confirm before establishing tile reference lines.
- Diagonal layout note: for a 45-degree pattern, establish a centerline along the longest axis, set your first tile at the center diamond, and work outward. Every perimeter tile is a triangle cut. Calculate the number of perimeter cuts: approximately 2 × (14 + 12 + 6 + 8 + 6 + 4) ft ÷ 18 in per tile module ≈ 2 × 50 ÷ 1.5 = 67 perimeter cuts. That's why 18% waste is the minimum for this layout.
Example 3: Large rectangular patio, 20 ft × 24 ft (6.10 m × 7.32 m), plank tile running bond
Tile chosen: 6-inch × 24-inch (152 mm × 610 mm) porcelain plank, 8 tiles per box (8 sq ft per box). Grout joint: 3/16 inch (4.75 mm). Pattern: running bond, 1/3 offset. Waste factor: 12%.
- Patio area: 20 × 24 = 480 sq ft (44.59 m²).
- Module dimensions: length = 24 + 0.1875 = 24.1875 in; width = 6 + 0.1875 = 6.1875 in.
- Module area: 24.1875 × 6.1875 = 149.66 sq in = 1.039 sq ft (0.0965 m²).
- Tiles needed (no waste): 480 ÷ 1.039 = 462.0, round up to 462 tiles.
- Add 12% waste: 462 × 1.12 = 517.4, round up to 518 tiles.
- Boxes needed: 518 ÷ 8 = 64.75, round up to 65 boxes (520 tiles total).
- Slope check: 20-foot depth away from house needs minimum 20 × 0.25 = 5 inches total fall. Measure both 20-foot edges and the center to confirm consistent slope with no reverse pitch or bowl. A 480 sq ft slab with a bowl center is a drainage problem that will telegraph through tile; fix it before tiling.
- Modules across 20 ft (240 in) width: 240 ÷ 6.1875 = 38.8, so 38 full tiles + 1 cut of (240 − 38 × 6.1875) = 240 − 235.13 = 4.87 in per row. Center: 4.87 ÷ 2 = 2.44 in from each edge. That's a narrow cut at under half the tile width (3 in). Shift the layout by half a module: offset by 3.09 in so cuts are approximately 5.5 in on each side.
- Thinset estimate: using a 1/2-inch × 1/2-inch trowel for large-format tile outdoors, expect coverage of approximately 35–45 sq ft per 50-lb bag. At the conservative end: 480 ÷ 35 = 13.7 bags, round up to 14 bags. Add at least 10% for back-buttering large-format tile (required for exterior installations to meet 95% coverage): 14 × 1.1 = 15.4, order 16 bags minimum.
Thinset and grout quantities
Once you have your tile count, estimate setting materials. Thinset coverage per bag varies substantially by trowel notch size, and for exterior work you need full coverage (95%+), which means using a larger notch and back-buttering large-format tiles. Grout coverage depends on joint width, tile size and grout type; manufacturer packaging usually states coverage per pound or bag for a given joint width and tile size, so use their numbers rather than guessing.
| Trowel notch size | Approx. coverage per 50-lb bag | Best for tile size |
|---|---|---|
| 1/4" × 1/4" V-notch | 80–95 sq ft | Up to 4" × 4" tiles |
| 1/4" × 3/8" U-notch | 60–70 sq ft | 4" to 12" tiles |
| 1/2" × 1/2" square notch | 35–45 sq ft | 12" tiles and larger (exterior) |
| 3/4" × 3/4" square notch | 25–35 sq ft | Large format 18"+ and pavers |
For exterior installations, ANSI A108 and LATICRETE's installation guidelines both require minimum 95% mortar coverage under the tile. This is non-negotiable outdoors: voids under tiles collect water, freeze, and pop tiles off the slab within the first winter in cold climates. Back-buttering each tile before setting it is how you reliably hit that coverage percentage with large-format tile.
Choosing the right outdoor tile
For any outdoor patio, you need a tile that passes two tests: low water absorption and adequate slip resistance. For water absorption, look for porcelain or impervious tile with a rating of 0.5% or less per ASTM C373. That number should be on the manufacturer's data sheet. Tiles that absorb more water than that will fail in freeze-thaw climates as water enters the tile, freezes, expands, and cracks the face. For slip resistance, the relevant metric is DCOF (Dynamic Coefficient of Friction) as tested per ANSI A137.1 or ANSI A326.3. Exterior wet surfaces require a DCOF of at least 0.42 as a baseline; many specifiers and architects call for higher values (0.55+) on exterior applications. Check the tile's data sheet for the wet DCOF value, not just a generic "slip-resistant" label.
When the math reveals a bigger problem
Sometimes the measuring and slope-checking phase of this process tells you something you didn't want to hear. If you're measuring a 20-foot patio and you find the low point is at the house wall instead of the yard edge, laying tile over that situation will just create a tiled pond next to your foundation. For practical steps to prevent water pooling and protect your foundation, see how to keep patio from flooding. That's a drainage and grading problem, not a tile problem. Similarly, if you find that sections of the slab vary by more than 1/4 inch over 10 feet in flatness, the tile will crack or tent after a season of thermal movement unless you fix the base first. If you're seeing water pooling or reverse slope, read about diagnosing a patio drainage problem for steps to assess and fix it before tiling.
A slab that shows multiple areas of variation might be sinking unevenly, which is a structural issue entirely separate from the tiling project. Putting new tile over a slab that continues to move is a temporary fix that will cost you the full material and labor investment within a couple of years. If your slope measurements show the patio tilts toward the house, or if you find significant unevenness and can't identify a clear, fixable cause, those are situations where getting a concrete or hardscape contractor to assess the base before you tile is money very well spent.
DIY or hire a pro: a straight answer
The math in this guide is entirely within reach of a careful DIYer. The physical work of setting tile on a properly prepared, flat, correctly sloped slab is also manageable if you're comfortable with basic masonry work and have patience for layout. Where most DIY patio tile jobs go wrong is not in the tile-setting itself but in skipping or rushing the base preparation: insufficiently sloped slabs, inadequate thinset coverage, and missing movement joints at the perimeter are the three most common failure modes I've seen. If you've done the measurement and slope checks described here and everything passes, a straight-grid porcelain tile install on an existing sound concrete slab is a reasonable DIY project. If the slab needs regrading, if you're installing over a mortar bed, if the patio is large (over 400 sq ft), or if the drainage situation involves integrating a linear drain system or waterproofing membrane into a build-up, hire a tile setter with exterior experience and ask them specifically about their experience with TCNA exterior method compliance. The savings on a complicated installation aren't worth the cost of a failed one.
FAQ
What building codes and industry standards must I cite and verify for exterior patio tile, drainage and slope?
Collect and cite the applicable code/standards for your jurisdiction and tile work: IRC R401.3 (positive drainage away from buildings; 6" drop in 10' and 2% guidance within 10' of foundation), TCNA Handbook methods and minimum slope recommendations (commonly 1/4" per foot for exterior decks/drains and movement/joint details), ANSI A108/A118/A136 installation and mortar coverage requirements, ANSI A137.1 tile material properties (water absorption, DCOF guidance), and relevant ASTM tests (ASTM C373 water absorption, ASTM C1026 freeze‑thaw where needed). Also reference manufacturer installation guides (LATICRETE, Schluter, etc.) and local plumbing/stormwater rules for drain sizing/location.
What exact measurements and site data must be collected before doing any math or ordering?
Measure and record: overall patio footprint and all sub‑areas (lengths and widths), irregular corners and radii (measure as segments or capture coordinates), slab thickness, existing slope (rise over run at multiple locations), high/low points, location and elevation of nearby foundation thresholds/doors, soil and base condition (compaction, sinkage evidence), presence/location/type of existing drains, frost depth/climate, and utilities. Record units (feet/inches or meters/cm) and a drawn-to-scale sketch with dimensions and a baseline reference line for layouts.
What formulas are required for area, tile-count and grout/joint calculations?
Essential formulas: Area = length × width for rectangles; decompose irregular shapes into rectangles/triangles/circles or use planimeter. Effective module area per tile = (tile_length + grout_width) × (tile_width + grout_width). Tiles_needed = ceil( (area_to_tile / module_area) × (1 + waste_fraction) ). Full_tiles_per_row = floor( room_dimension / (tile_dim + grout_width) ). Remainder = room_dimension − (full_tiles × (tile_dim + grout_width)). Slope (decimal) = rise / run. Percent slope = (rise / run) × 100. Inches per foot to decimal = (inches_per_foot / 12). Angle (deg) = arctan(rise/run). Use ceil() for tile quantities and round up partial bags/boxes as required.
How do I calculate and choose an appropriate tile waste factor?
Use trade guidance tailored to pattern and site complexity: straight/stacked grid: 5–10%; running bond/subway offset: 8–12%; diagonal, herringbone or diagonal brick patterns: 15–25%; mosaics, extensive borders or many small tiles: 20–30%. Adjust upward for many cuts, irregular shapes, or uncertain field conditions. Document chosen percentage and justify by pattern and site complexities in the materials list.
How should grout joint width be included in calculations?
Include grout width when computing effective module area: treat each tile module as tile_dimension + grout_width on each axis. Use manufacturer/TCNA minimum joint guidance (commonly ≥1/16"). For joint selection: unsanded grout for ~1/16"–1/8", sanded for ≥1/8" (manufacturer specifics vary). Record chosen grout width and include it in tile quantity and layout math.
What slope/fall requirements and calculations should be presented for drainage?
State code and TCNA guidance: minimum positive slope away from building (IRC) and typical exterior tile slope of 1/4" per foot (≈2.083%) toward a drain or away from the structure. Show conversions: inches_per_foot ÷ 12 = decimal grade; percent = decimal × 100; angle = arctan(rise/run). Provide worked examples (see next FAQ) and note tolerances: TCNA and drain manufacturers specify minimum slopes to drain channels and waterproofing interfaces.
Next Article
Patio Is Sinking: DIY Causes, Checks, and Repair Steps
Diagnose why a patio is sinking with DIY checks, then prevent damage and choose the right releveling or paver/slab repai