You can resurface a brick patio yourself, but the work is mostly in the prep, not the resurfacing. Slapping a topping over a patio with loose bricks, failed mortar, and drainage problems just buries those issues for another season or two. Do the diagnosis first, fix what's actually broken, then choose a resurfacing method that matches the real condition of your patio. Done in the right order, this is a solid weekend project for most homeowners.
How to Resurface a Brick Patio Step by Step Guide

Talia Lang
4 Jul 2026
Start by figuring out what's actually wrong

Before you buy anything or rent any equipment, spend 20 minutes walking the patio and being honest about what you see. There's a big difference between surface wear (faded color, dusty mortar joints, minor staining) and a patio that's actually failing underneath. These require completely different approaches, and mixing them up is the most common mistake people make.
Surface wear looks like this: the bricks themselves are solid and flat, the joints are mostly intact even if they look tired, there's no movement when you walk on it, and water drains reasonably well. That patio is a good candidate for cleaning, repointing, and a fresh sealer.
Base or drainage failure looks different. You'll see dips where water puddles after rain, bricks that rock or click when you step on them, joints that have washed out with visible gaps or weeds growing through them, and bricks at the edges that have crept or rotated out of position. In some cases, the entire patio may have shifted toward one side or settled in patches. These are signs that water has been eroding the base material (usually compacted gravel or sand) from underneath, or that the original base wasn't adequate to begin with. Freeze-thaw cycles make it worse every winter.
You might also notice a white chalky crust on some bricks. That's efflorescence, and it's caused by water carrying soluble salts from within the masonry to the surface, where they crystallize as the water evaporates. It's not structural damage on its own, but it tells you water has been moving through the bricks, which means drainage and sealing deserve attention.
Be real with yourself here. If water is pooling near your foundation after every rain, or if large sections of the patio have dropped noticeably, that's a drainage failure, not a resurfacing problem. Scroll to the last section before you do anything else.
Clean the surface down to something you can actually work with
Assuming your patio passes the structural check, cleaning is your first real step. You want to work on bare, solid brick and mortar, not a surface coated in old sealer, biological growth, or salt deposits. Skipping this guarantees adhesion problems later.
Remove weeds, moss, and organic growth
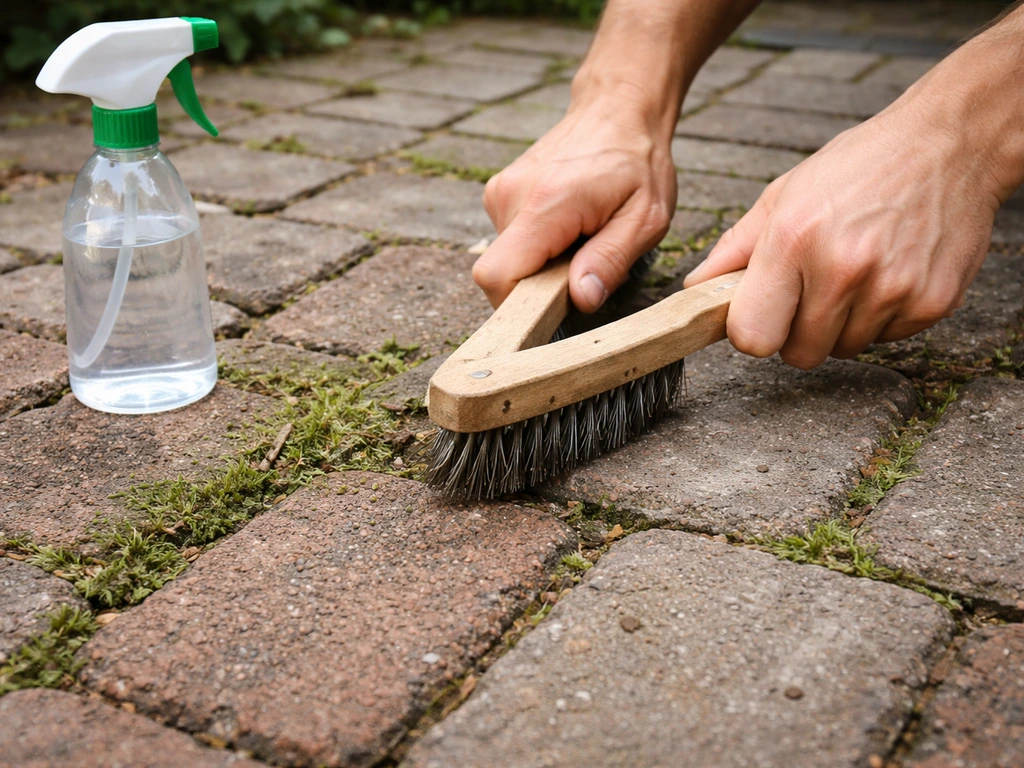
Pull weeds by hand or use a stiff brush to clear joints. For moss and heavy biological growth, a diluted white vinegar solution or a purpose-made patio cleaner works well. Let it dwell for 10 to 15 minutes, then scrub and rinse. Don't reach for bleach as a first choice on brick: it can react with the iron compounds in some bricks and leave rust staining that's harder to remove than the original growth.
Strip old sealer
If the patio has been sealed before, you need to remove or deglaze that old sealer before applying anything new. Old sealer that's peeling, flaking, or going milky white will prevent any new material from bonding properly. Use a chemical sealer stripper matched to the type of sealer on the patio (solvent-based stripper for solvent-based sealers, water-based stripper for water-based sealers). Apply, let it work, then scrub and rinse thoroughly. If you're not sure what type of sealer is there, go with a solvent-based stripper to be safe.
Pressure wash and address efflorescence
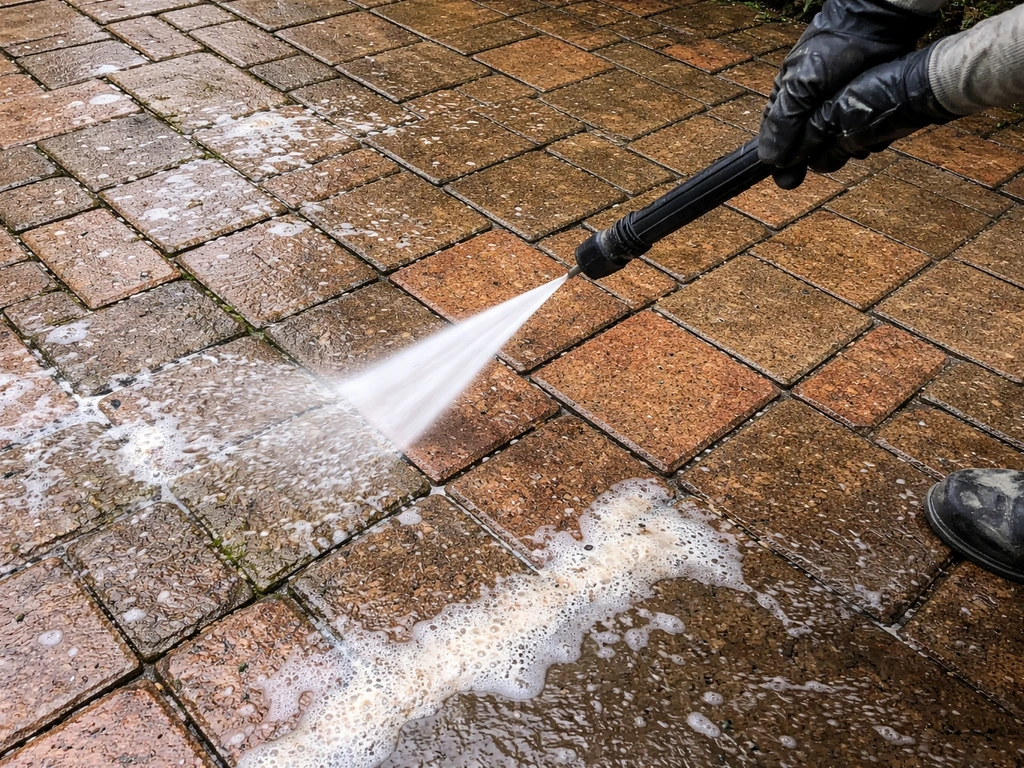
A pressure washer at 1,500 to 2,000 PSI is the right tool for a final clean. It clears loose material from joints, removes surface dirt, and helps you see what's actually there once the grime is gone. For efflorescence, scrub with a stiff brush and a mild acidic cleaner (a diluted phosphoric acid solution works better than hydrochloric acid, which is more aggressive and more likely to cause problems if you're not careful with concentration and rinsing). Brick/stone efflorescence is caused by water dissolving soluble salts in masonry or from nearby sources; as the water moves, the salts migrate and then crystallize at or near the surface For efflorescence, scrub with a stiff brush and a mild acidic cleaner. After any acid cleaning, neutralize the surface with clean water and let it dry completely before moving on. Give the patio a full 24 to 48 hours to dry after washing before you assess or repair anything.
Fix the bricks and mortar joints before you resurface anything
This is the part people want to skip, and it's the part that determines whether your resurfacing job lasts two years or ten. Every loose brick, every blown-out joint, every sunken section needs to be addressed now.
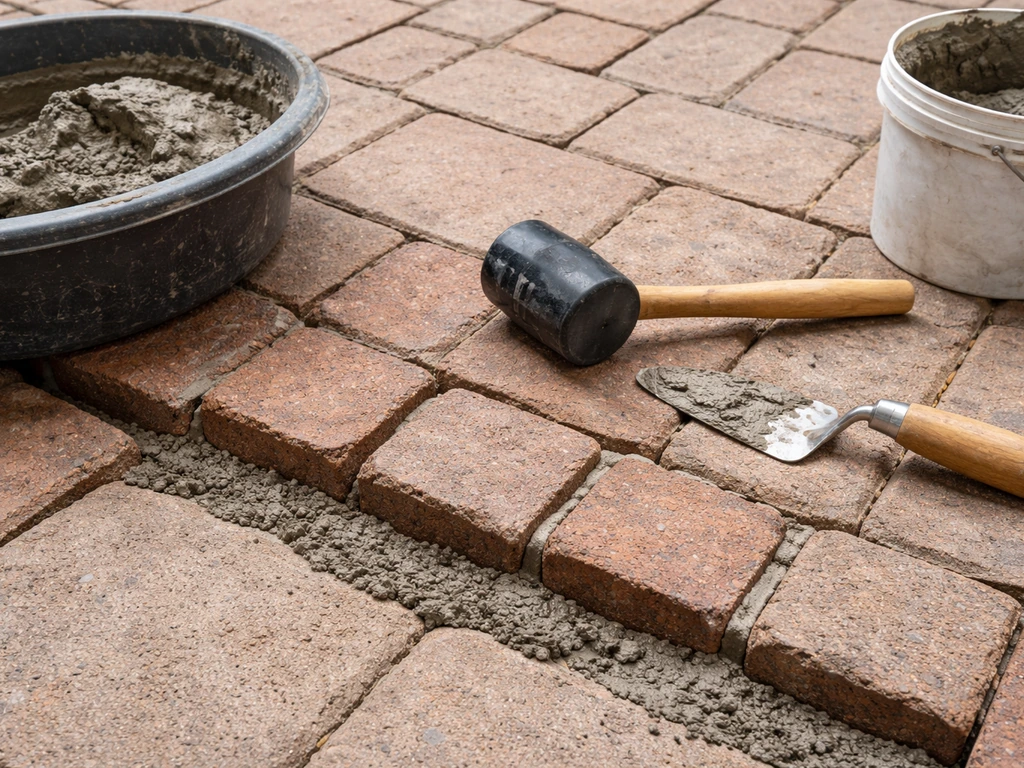
Re-setting sunken or loose bricks
For sand-set patios (bricks laid on a compacted sand bed without mortar), re-setting is straightforward. Pry up the loose or sunken bricks with a flat bar, add or remove sand to level the area, tamp it firm, and reset the bricks. The surface should be roughly 1/8 inch above the surrounding bricks before you tamp them into place, because they'll settle a bit. Use a rubber mallet to seat them, then check with a straight edge. For mortar-set patios, you'll need to chip out the old mortar underneath, clean the base, and re-bed the brick in fresh mortar. Use a polymer-modified mortar mix for better flexibility and adhesion.
Repointing the mortar joints
Repointing means removing the old, failing mortar from joints and replacing it with fresh material. Use an angle grinder with a grout removal blade or a cold chisel and hammer to cut out deteriorated mortar to a depth of about 3/4 inch. Blow or brush out the dust, dampen the joint slightly (not soaking wet), and pack in fresh mortar with a pointing trowel. Strike the joint to a slightly concave or flat profile so water sheds off rather than sitting on a ledge. Let it cure for at least 48 hours before any foot traffic. Repointing is also a sibling topic in its own right, and if your joints are the primary problem across the whole patio, that process deserves its own focused attention. If the mortar joints are the main issue across the whole patio, follow a dedicated guide for how to repoint brick patio.
Replacing damaged bricks
Spalled, cracked, or crumbling bricks should come out completely. Try to source matching bricks from a salvage yard or a brick supplier with original stock close to your existing patio. A brick that's slightly different in color will be obvious forever. Chip out the old mortar bed, clean the opening, and set the new brick in fresh mortar at the same height as the surrounding bricks.
Choosing the right resurfacing method for your patio
Once the bricks are solid and the joints are repaired, you have a few paths depending on what you're trying to achieve and what condition the patio is actually in. There's no single right answer, so here's how to think through it.
| Method | Best For | Skill Level | Approximate Material Cost |
|---|---|---|---|
| Polymeric sand / joint resand | Sand-set patios with good level but tired joints | Beginner | $50–$120 for average patio |
| Mortar repointing | Mortar-set patios with open or crumbling joints | Intermediate | $80–$200 in materials |
| Cementitious topping / thin overlay | Flat, stable mortar-set patios needing surface refresh | Intermediate–Advanced | $200–$500+ |
| Full re-bed and reset | Sand-set patio with widespread settling | Intermediate | $150–$400 in materials |
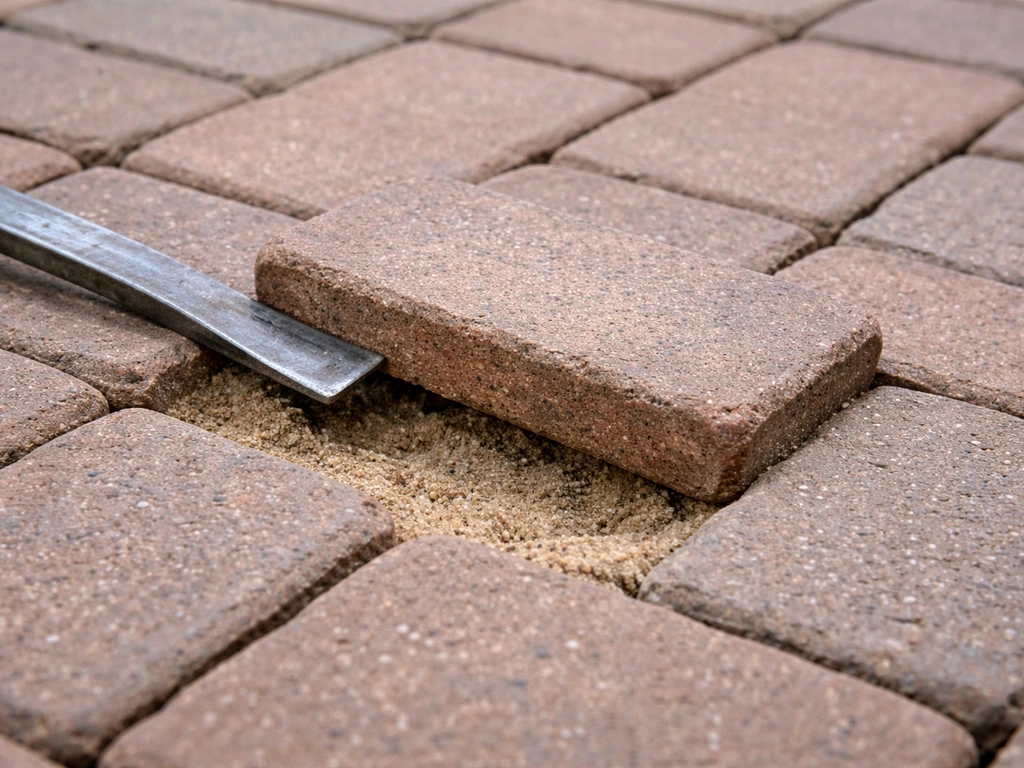
Polymeric sand for sand-set patios
If your patio is sand-set and the bricks are level and solid after repairs, brushing in fresh polymeric sand is the simplest resurfacing you can do. Sweep the dry sand across the surface, work it into the joints with a push broom, blow off the excess with a leaf blower set to low, then activate it with a light mist from a garden hose. Polymeric sand hardens as it cures, resisting washout and weed germination much better than plain sand. It typically needs 24 hours to set before rain or foot traffic.
Mortar repointing for mortar-set patios
If the patio is mortared and the main issue is deteriorated joints rather than surface condition of the bricks themselves, a thorough repointing job is the resurfacing. Clean joints, fresh mortar, and a good sealer afterward can make a mortar-set patio look genuinely new. A professional can also help you choose the right repair or resurfacing option to make your brick patio look new again make a mortar-set patio look genuinely new. This is covered in depth as its own repair process, and it's often the most cost-effective approach for patios that are structurally solid.
Cementitious thin overlay
A thin overlay is a layer of polymer-modified cement product applied over the entire brick surface to create a new, uniform finish. This approach works only on mortar-set patios that are completely stable with no movement, no significant unevenness, and a fully repaired joint and brick surface underneath. The overlay is typically 1/4 to 3/8 inch thick. Key things to know: the existing surface must be clean, mechanically sound, and slightly dampened before application. You apply it with a squeegee or trowel, then texture it (broomed finish is common for outdoor traction). This method changes the look of your patio from individual bricks to a smoother, more unified surface, which is a major aesthetic shift. Make sure that's what you want before you commit.
One honest caution: thin overlays on outdoor brick are not forgiving. If there's any residual movement, any moisture migrating up through the slab, or any spot where adhesion is compromised, the overlay will delaminate. Prep and adhesion are everything. If you're considering this option, a concrete bonding primer applied before the overlay significantly improves adhesion.
Get the slope, grade, and edges right
This step matters as much as the resurfacing material itself. A patio that doesn't drain properly will fail again regardless of what you've put on top of it.
Slope and drainage
Outdoor patios need a minimum slope of 1/8 inch per foot, and 1/4 inch per foot is better in areas with heavy rainfall. That slope should always run away from your house. Use a long level and a tape measure to check your patio's current slope before you re-set bricks or apply any topping. If the patio drains toward the foundation, you have a drainage problem that will undo any resurfacing work. In that case, re-setting the bricks with corrected grade is the only real fix. You can't solve a drainage direction problem with a thin overlay.
Compacting base layers
If you've pulled up sections of a sand-set patio to re-level, you need to compact the base before adding sand and re-setting bricks. A plate compactor (available at any tool rental place for around $50 to $80 per day) is worth renting for anything more than a small patch. Hand tamping is fine for a few isolated bricks but won't give you the uniform density you need across a larger area. Add compactable gravel base if any section has soft spots or visible washout, then compact, add your bedding sand (1 inch depth is standard), screed it level, and set the bricks.
Edge restraints and perimeter details
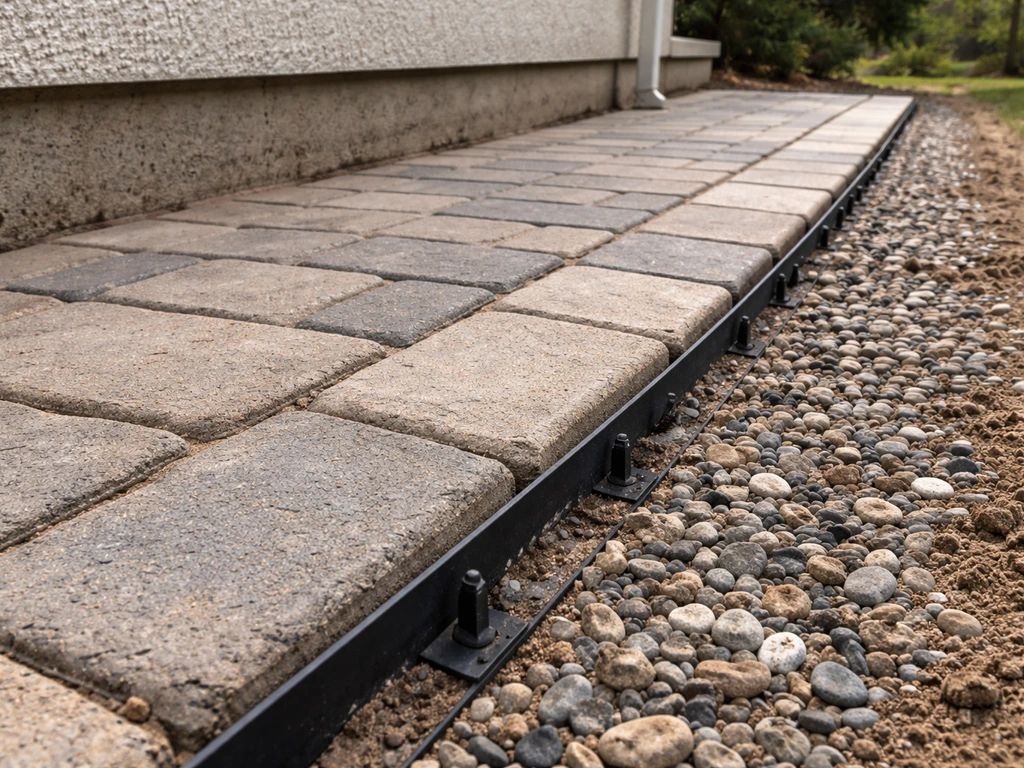
Creeping or rotating edge bricks are almost always a failed edge restraint problem. Sand-set patios need a physical edge restraint, either a metal or plastic paver edging spiked into the ground, a concrete border, or a mortared soldier course, to keep the bricks from spreading outward over time. If your edges are already moving, reset them and add or repair the edge restraint at the same time. This is not optional: without it, the edges will creep again within a couple of seasons.
Sealing the patio for long-term protection
Sealing is the last step, and it's worth doing correctly because the right sealer reduces water infiltration, limits future efflorescence, helps resist weeds in joints, and protects the surface color. Once your brick patio is clean, stable, and sealed, you can focus on decorating it with lighting, outdoor furniture, and plants how to decorate a brick patio. But there are a few things to know before you reach for a can.
When to seal (and when not to)
Let any repaired mortar cure fully before sealing. Fresh mortar needs at least 28 days to reach full cure, though it's hard enough to walk on after 48 hours. Polymeric sand should cure for at least 24 hours, ideally 72 hours in humid conditions. The surface must be completely dry when you apply sealer. Applying sealer to damp brick traps moisture and causes the sealer to cloud or peel. Wait at least 48 hours after rain or washing before sealing.
There are situations where you shouldn't seal at all, at least not right away. If you've had persistent efflorescence, sealing over it without addressing the water source just traps more salts beneath the surface and makes the problem worse. Resolve the drainage or moisture issue first, let the brick breathe and dry thoroughly, then seal.
Choosing a sealer
For brick patios, a penetrating silane-siloxane sealer is usually the best choice for most homeowners. It soaks into the brick and repels water without changing the look of the surface. It doesn't peel or flake, and it doesn't trap moisture in the same way that film-forming sealers can. Film-forming sealers (the glossy or wet-look types) give you a more dramatic visual result but require more maintenance: they can peel, yellow, or go milky over time, and they need to be stripped and reapplied every two to three years. If you want to maintain the natural look of old brick, go penetrating. If you want enhanced color and are committed to maintenance, a film-forming sealer can look great.
Apply sealer with a low-pressure pump sprayer or a roller, working in small sections and keeping a wet edge to avoid lap marks. Two thin coats, with the second coat applied perpendicular to the first, gives better coverage than one heavy coat. Most penetrating sealers need 24 to 48 hours before light foot traffic and a full week before heavy use. Plan your timing so you're not walking on it overnight.
Resealing schedule
Penetrating sealers typically last four to seven years on an outdoor brick patio depending on traffic and climate. A quick test: sprinkle water on the surface. If it beads up, the sealer is still working. If it soaks in quickly, it's time to reseal. You don't need to strip and start over with penetrating sealers. Clean the surface, let it dry, and apply a fresh coat.
When the problem is too big for a DIY resurface
Here's the honest part. Some patio problems look like a resurfacing job but are actually a structural or drainage failure that no amount of new surface material will fix. Before you decide on resurfacing, you may also want to compare it with a full paint option, such as how to paint a brick patio, to make sure you're picking the right finish for your goals. Doing a DIY resurface on these patios is throwing money at a problem that will come back, often worse, because the new material can trap and worsen underlying issues.
Call a professional if you're seeing any of the following:
- The patio has settled unevenly in large sections (not just a few bricks) and the settling keeps recurring even after you've re-set the bricks once before
- Water consistently pools near or against your foundation after rain, regardless of what you do with patio slope
- You can see or feel that the base has washed out in areas: bricks are hollow-sounding when tapped, or there's visible void space under lifted bricks
- The patio is attached to or abutting a structural retaining wall that is itself cracking, leaning, or showing signs of movement
- Multiple large sections have shifted in different directions, suggesting movement from roots, frost heave, or ground instability rather than simple settling
- Drainage problems are tied to site grading issues beyond the patio itself, like a yard that slopes toward the house or a downspout that discharges near the patio base
These situations need a landscaping contractor or masonry professional who can assess and correct the base, grading, or drainage system. Resurfacing on top of a failed base is not a fix. It's a delay. The more work you put into a cosmetic resurface over a structural problem, the more expensive and discouraging it is when it fails again in 18 months.
If your patio is fundamentally sound but you're deciding between resurfacing and a full redo, that's a different question. A complete redo gives you the chance to correct base depth, improve drainage, and install proper edge restraints from scratch. Once you fix the underlying cause, the remaining steps follow a clear, redo-style workflow for getting your brick patio back to a durable finish. For a patio that keeps coming back with the same problems, starting over is often the more cost-effective long-term answer, even if it feels like more work upfront.
FAQ
How can I tell if my patio is sand-set or mortared before I start resurfacing?
Look at the joints closely. Sand-set patios usually have no mortar between bricks, so you can often disturb the joint material and see only sand. Mortared patios have a grout-like mortar in the joints and the bricks typically feel more locked-in, especially at corners. If you are unsure, remove one small section of a loose brick and inspect what lies beneath, sand bedding, or a mortar bed.
Do I need to remove all old sealers before resurfacing a brick patio?
Only if you are applying a new sealer or an overlay that requires bonding. For cleaning, repointing, or brushing in polymeric sand, you might still want to deglaze peeling or milky sealer, because it can create a barrier that prevents new joint material from adhering. If the existing sealer is still intact and not peeling, focus on areas where you will be repairing joints.
What’s the safe pressure-washer PSI range if I’m cleaning joints but want to avoid damaging brick?
Stay in the lower end for brick and mortar work, around 1,500 to 2,000 PSI as a general window. Use a fan tip and keep the nozzle moving rather than holding it in one spot. After washing, inspect whether any mortar is being eroded; if so, reduce pressure and switch to more hand scrubbing for joint corners.
Can I apply polymeric sand right after rain or after power washing?
No. Polymerically sand needs a dry surface so it can properly cure in the joints. Give the patio time to dry fully, especially after washing (the article calls for 24 to 48 hours), then apply dry polymeric sand and activate it with a light mist, not a flood.
What if my bricks are level but water still pools after rain?
That points to a grading or drainage issue, not a cosmetic resurfacing issue. Re-setting bricks without correcting the slope usually will not last. Use a long level and measure slope toward a reliable discharge direction away from the house, then plan for base and grade correction before you seal or apply any overlay materials.
Should I seal after repointing immediately, or can I seal sooner?
Wait for full mortar cure before sealing. Even if you can walk on the joints after 48 hours, mortar can still be releasing moisture for weeks. The article specifies at least 28 days for full cure, and sealing too early can cause clouding, peeling, and trapped moisture.
How do I know whether my efflorescence is active or just old residue?
Do a simple observation test. If white deposits reappear after washing and drying, it indicates ongoing moisture movement through the masonry, meaning sealing over it immediately can trap salts. If it stays gone for an extended period after addressing wetting sources, you may have had a past moisture event rather than an active problem.
What’s the biggest mistake to avoid when choosing between repointing, sand, and a thin overlay?
Choose based on stability, movement, and joint condition. Repointering is for failing joints, polymeric sand is for sand-set patios that are already stable and level, and a thin overlay only works when the entire surface is stable with no movement. If there is any rocking, settlement, or moisture coming through, overlays are likely to delaminate.
If I want the patio to look darker or have a wet-look finish, is penetrating sealer always the best option?
Not necessarily. Penetrating silane-siloxane sealer typically preserves the natural look, while film-forming “wet-look” sealers enhance color but require more maintenance because they can peel, yellow, or turn milky over time. If you want a dramatic visual change and are willing to reseal every couple of years, film-forming can fit, as long as the patio is properly prepped and dry.
How long should I keep foot traffic off the patio after sealing or applying joint materials?
After polymeric sand activation, expect around 24 hours before rain or foot traffic, longer if conditions are humid. After sealing, most penetrating sealers need 24 to 48 hours for light foot traffic and up to a week for heavy use. Plan so you avoid overnight walking while the product is curing.
When is it better to hire a pro instead of resurfacing?
If you see repeated edge rotation, major sinking or dropped sections, drainage that sends water toward the foundation, or widespread brick movement, resurfacing will mostly delay the real fix. Those cases require base, grading, and drainage assessment, because no topping or overlay can stop water erosion or structural settlement.
Can I resurface a brick patio that is cracking in isolated spots but the rest feels solid?
Often yes, but treat it like a localized stability problem. Remove and reset spalled or cracked bricks, repair blown-out joints, and confirm that the area is solid underfoot. If you find the base is soft or washed out even in one section, you may need localized base compaction and new bedding sand, not just surface material.
Next Article
How to Repoint a Brick Patio Step-by-Step DIY Guide
Step-by-step DIY on how to repoint a brick patio, match mortar, remove failed joints, and cure for lasting stability.
