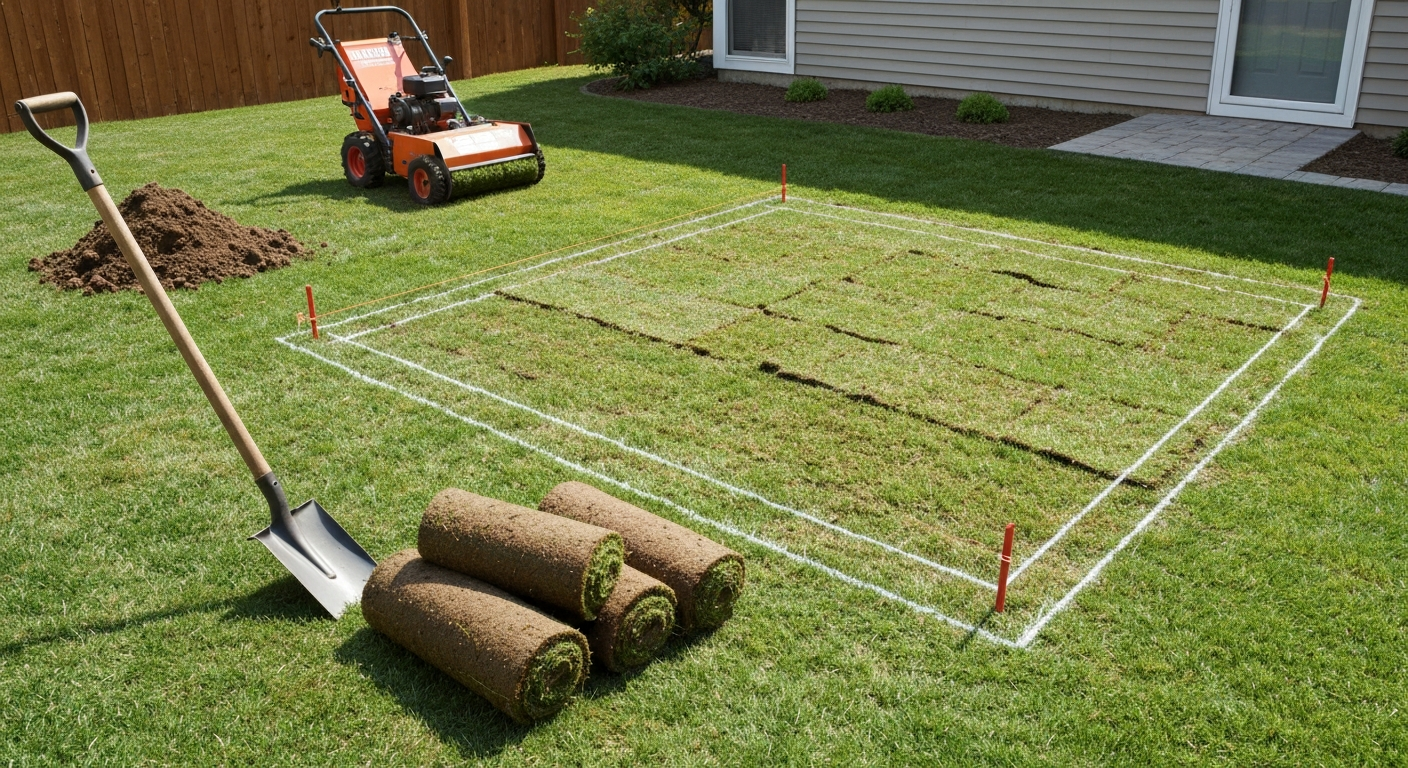
The best way to remove sod for a patio depends almost entirely on how much area you're dealing with. For small jobs under about 100 square feet, a sharp edging spade and a flat shovel will do it without renting anything. For anything between 200 and 800 square feet, rent a powered walk-behind sod cutter for $75–$150 a day and save yourself a half-day of backbreaking work. For large or root-heavy sites above 800 square feet, or anywhere you're fighting rocky soil, rent a mini-excavator or call a landscaper. Once the sod is out, you still need to excavate to the right depth for your patio type, compact the base properly, and get your drainage slope right before a single paver or form board goes in. That full process is what this guide covers.
Best Way to Remove Sod for Patio: Step-by-Step DIY Guide

Best method by project size
Here's the quick version so you can match your project to the right approach before you read anything else.
| Project size | Best method | Typical time | Approximate tool cost |
|---|---|---|---|
| Small (under 200 sq ft) | Hand tools: edging spade + flat shovel | 2–4 hours (one person) | Own the tools or buy for ~$40–$60 |
| Medium (200–800 sq ft) | Rental walk-behind sod cutter | 2–5 hours including setup | ~$75–$150/day rental |
| Large or root-heavy (800+ sq ft) | Mini-excavator or skid steer | Half to full day | ~$200–$600/day rental or hire out |
| Rocky or uneven terrain (any size) | Mini-excavator with bucket/thumb | Varies by conditions | ~$300–$600/day rental or hire out |
One honest note on the large-site option: if you've never operated a mini-excavator, the rental cost adds up fast once you factor in your learning curve and potential yard damage. Many homeowners find it makes more sense to hire a landscaper for the excavation phase only and handle the base prep and finishing themselves.
Before you touch the ground: checklist
Skipping any of these steps is how people hit gas lines or end up with a patio that drains toward their foundation. When removing sod to install a patio: always call the local one‑call (Dig Safe / Call 811 (one‑call locator service), 'Call before you dig' guidance) to have buried public utilities located and marked before digging; it's free and required in most U.S. jurisdictions Dig Safe / Call 811 (one‑call locator service) — 'Call before you dig' guidance. Work through this list in order.
- Call 811 (the national one-call utility locating service). It's free, it's required in most U.S. jurisdictions before any digging, and it takes only a few days for utilities to be marked. Do this before you rent a single tool.
- Check for permit requirements. Many municipalities require a permit for patios over a certain size, especially if you're within a setback zone or adding drainage structures. A quick call to your local building department takes ten minutes.
- Measure and mark your patio footprint. Use spray paint or stakes and string to mark the full area, including a few extra inches on each side to give yourself working room.
- Locate and shut off any irrigation lines that run through the area. Sod cutters and shovels cut right through irrigation tubing. If you're not sure where lines run, probe carefully or consult the original installation layout.
- Plan your disposal before you start. A 200-square-foot patch of sod typically generates one to two cubic yards of material. Know whether you're renting a dump trailer, filling a dumpster, or hauling it to a composting site before it's piled in your driveway.
Tools, equipment, and what's worth renting
You don't need to own any of the powered equipment for a one-time patio project. Here's what you'll need and how to decide between buying and renting.
Hand tools (buy these if you don't have them)
- Edging spade: flat, straight blade designed to cut vertical lines in sod. This is the tool you use to define the edges of each section before lifting.
- Flat shovel (spade): used to slice horizontally under the root zone and pry up the sod roll.
- Mattock: useful for breaking through dense root mats or clay soil that resists a shovel.
- Wheelbarrow: essential for moving cut sod to your disposal pile efficiently.
- Gloves, knee pads, and safety glasses: not optional. Sod edges are sharp and soil debris flies.
Powered equipment (rent for a single job)
- Walk-behind sod cutter: rents for about $75–$150 per day at Home Depot or local rental yards. Cuts a consistent depth (typically 1.5–2 inches under the root zone) and slices sod into manageable strips you roll up and carry away.
- Rear-tine rototiller: rents for about $70–$180 per day. Chops sod into the soil rather than removing it cleanly, which means you'll need to rake out the debris afterward. Useful as a secondary step to loosen subgrade, not as a primary sod-removal tool.
- Plate compactor: rents for about $50–$150 per day. You'll need this for base compaction after sod removal, not for the removal itself. A 100–200 lb walk-behind vibratory plate is the right size for a residential patio.
- Mini-excavator or skid steer: rents for $200–$600 per day depending on machine class and region. Handles large areas, deep excavation, and rocky soil in a fraction of the time. Requires operator experience or a steep learning curve.
- Dump trailer: if you don't have a truck and trailer, rental costs around $50–$100 per day and is worth every dollar compared to hand-loading a pickup truck repeatedly.
Manual method: the shovel and edging-spade technique
For areas under 200 square feet, manual removal is completely reasonable and costs nothing beyond tools you likely already own. The trick is working in a way that doesn't destroy your back or your timeline.
Start by mowing the grass as short as possible the day before. Low grass means less resistance and easier rolling. Then use your edging spade to score the sod into strips about 12–18 inches wide. Narrower strips are easier to roll and carry but mean more total cuts. Wider strips are faster to cut but heavier to lift, especially in wet conditions.
Once your strips are scored, switch to the flat shovel and work it horizontally under the root zone, typically 1.5–2 inches below the surface. Angle the blade slightly downward so you're cutting beneath the deepest roots, not above them. Wiggle the shovel forward in short strokes rather than trying to slice through a full strip in one push. Grab the end of the strip, roll it back on itself like a rug, and carry or wheelbarrow it to your disposal pile.
Realistic manual productivity is about 100–300 square feet per hour for one person, depending on soil conditions and root density. Clay soil slows you down significantly. If you're finding the roots go deep or the sod is fighting you, a mattock to loosen things first helps a lot. Plan for muscle soreness the next day regardless.
Machine methods compared: sod cutter, rototiller, and excavator
Each machine does a different job and has a different place in a patio project. Using the wrong one wastes time and money.
| Machine | What it actually does | Best use case | Main limitation | Rental cost (per day) |
|---|---|---|---|---|
| Walk-behind sod cutter | Cuts sod into uniform strips at a consistent depth and leaves clean soil behind | Medium patios 200–800 sq ft on flat, obstacle-free ground | Struggles around curves, trees, and rocky soil; strips still need manual removal | $75–$150 |
| Rear-tine rototiller | Chops and mixes sod into the top few inches of soil; does not remove sod cleanly | Loosening subgrade after sod is already removed; not a primary removal tool | Leaves organic matter in soil that can decompose and settle under your base | $70–$180 |
| Mini-excavator / skid steer | Strips and removes sod, excavates to full depth, and loads material in one pass | Large sites, rocky or rooted soil, sites where deep excavation is needed anyway | High rental cost, requires operator skill, can damage lawn and hardscape nearby | $200–$600 |
My recommendation: for most homeowner patios in the 200–600 square foot range on reasonably flat ground, rent the walk-behind sod cutter. It's worth the day rate compared to hand digging, and it leaves a cleaner subgrade than a tiller. If your ground is flat but you have a sprinkler system or a lot of curves, factor in extra time for the manual cleanup around obstacles. The tiller alone is a poor choice for sod removal on a patio site because the chopped organic material it mixes into the soil will decompose and cause settling later.
Step-by-step sod removal and excavation procedure
This sequence works for most residential patio installs, whether you're putting in pavers, concrete, gravel, or flagstone. Adjust depths based on the patio type section below.
- Call 811 and wait for utility marks. Do not start until this is done.
- Mow the grass short and shut off irrigation to the zone. If you can't identify which zone covers your patio area, shut off the whole system.
- Mark the patio perimeter with spray paint or stakes and string. Add about 6 inches beyond your finished edge to allow for edge restraints and working room.
- Score the perimeter with your edging spade to define a clean edge before any machine passes over it.
- Remove sod using your chosen method: hand tools for small areas, walk-behind sod cutter for medium, or excavator for large. Roll sod off-site or to your disposal pile immediately rather than letting it pile up in your work area.
- Check for surface roots, rocks, and buried irrigation lines as you go. Sever roots cleanly with loppers or a hand saw rather than yanking, which disturbs the subgrade. Cap or reroute any irrigation lines before continuing.
- Excavate to your target depth (see the section below for exact numbers by patio type). Use a string line and measuring tape to check depth at multiple points across the area, not just at the edges.
- Remove any loose organic material, large roots, or soft spots from the bottom of the excavation. Soft spots indicate poor subsoil that needs to be dug out and filled with compacted aggregate.
- Establish your drainage slope. Run strings across the excavated area to confirm a fall of at least 1/4 inch per foot (about 2%) away from any structures. Mark this slope on your string lines so it carries through into your base and finished surface.
- Install edge restraints before placing base material. Plastic or aluminum edging spiked into the subgrade holds everything in place during compaction.
- Place crushed aggregate base in lifts no deeper than 3–4 inches loose. Compact each lift with a vibratory plate compactor using 4–6 passes before adding the next lift.
- Add bedding sand (pavers only) at approximately 1 inch loose, screed level, then lay pavers or set forms for concrete.
Exact excavation depth by patio type
This is where a lot of DIY patios go wrong. People eyeball the depth or just pull up the sod and call it ready. You need to excavate to a total depth that accounts for every layer in your patio cross-section, not just the surface material.
| Patio type | Surface layer | Bedding layer | Compacted base | Total excavation depth |
|---|---|---|---|---|
| Interlocking pavers (pedestrian) | 2.375 in paver (standard) | 1 in bedding sand | 4–6 in compacted aggregate | 7.5–9.5 in below finish grade |
| Interlocking pavers (thicker/vehicular) | 3.125 in paver | 1 in bedding sand | 6–8 in compacted aggregate | 10–12 in below finish grade |
| Poured concrete slab (pedestrian) | 4 in concrete minimum | None (gravel base under slab) | 4–6 in compacted gravel | 8–10 in below finish grade |
| Gravel / aggregate patio | 2–3 in decorative gravel | Geotextile fabric layer | 4–6 in compacted base | 8–10 in below finish grade |
| Flagstone (dry-set in sand) | 1.5–2 in flagstone | 1 in bedding sand | 4–6 in compacted aggregate | 6.5–9 in below finish grade |
These are minimums for residential pedestrian use in regions without deep frost. CMHA's Guide Specification for the Construction of Interlocking Concrete Pavement, CMHA recommends a compacted aggregate base of about 4–6 inches for sand‑set residential patios, 6–8 inches for residential driveways, and 8–12 inches for vehicular drive aisles Guide Specification for the Construction of Interlocking Concrete Pavement — CMHA. If your area has frost depth deeper than about 12 inches, your aggregate base needs to go below the frost line or you'll get heaving every winter. Check your local frost depth with your county extension office or building department if you're not sure. In northern climates, total excavation depths of 12–18 inches aren't unusual for paver patios.
If you're not sure whether you're building a standard paver patio or something more involved like an old concrete patio tear-out, the process looks different. Removing and breaking up existing hard surfaces is a separate job from sod removal, and you'd approach it as a demolition task rather than a grading task. See the guide on how to remove old patio slabs for step‑by‑step instructions on demolition, breaking up concrete, and safe disposal. For specific guidance on removing an existing aggregate patio, see how to remove an aggregate patio. If you need to lift existing patio slabs without breaking them, consult the guide on how to lift patio slabs without breaking them for techniques and tools. If you need step-by-step instruction, consult our guide on how to break up patio slabs.
Base prep, compaction, drainage, and edge restraints
Removing the sod is just clearing the canvas. What you do with the ground underneath determines whether your patio lasts five years or twenty-five.
Subgrade compaction
After excavation, the exposed subgrade (the native soil at the bottom of your hole) needs to be firm and consistent. The industry target is 95% of Standard Proctor density (ASTM D698) for residential pedestrian applications. In practical terms for a homeowner: walk the subgrade and check for soft spots. If your heel sinks in more than about half an inch, you have a soft spot that needs to be addressed. Dig out the soft area, fill it with compacted crushed stone, and recheck. Running your plate compactor over the subgrade before placing base material is good practice even if it feels solid.
Aggregate base installation
Use compactable crushed angular aggregate, often sold as Class II base, road base, or dense-graded aggregate depending on your region. Do not use smooth pea gravel or river rock as base material since it won't compact into a stable layer. Place the aggregate in loose lifts of no more than 3–4 inches and compact each lift with 4–6 passes of your vibratory plate before adding the next one. Placing a single 8-inch loose lift and running a compactor over it once is one of the most common DIY mistakes and it results in future settling.
Drainage slope
Your finished patio surface needs to slope away from your house and any other structures at a minimum of 1/8 inch per foot, but 1/4 inch per foot (about 2%) is the standard recommendation and what I'd aim for. In high-rain climates, go up to 3/8 inch per foot. Establish this slope in your subgrade and carry it through every layer so it ends up in your finished surface. If you set a flat base and try to create slope only in the surface layer, you'll fight yourself the entire time.
Geotextile fabric
For gravel patios and anywhere you're concerned about fine soil migrating up into your aggregate base (common in clay-heavy soils), lay a nonwoven geotextile fabric directly on the compacted subgrade before placing base material. It separates soil from aggregate without blocking drainage. Skip it if you have clean sandy subgrade and are building a standard paver patio with a full compacted base.
Edge restraints
Install plastic or aluminum paver edging around the perimeter before you start building up your base layers. Spike it into the subgrade with spikes driven every 12 inches. Edge restraints keep your base material and pavers from migrating outward over time. This is especially critical on any side without a wall, step, or existing hard edge to hold things in place.
Handling roots, rocks, and irrigation lines
Surface roots from nearby trees are common and usually manageable. Sever them cleanly with loppers or a hand saw at the excavation boundary and leave the stump end in place rather than trying to pull the whole root out, which can destabilize a tree. If large roots run across the middle of your patio area and can't be removed without damaging a mature tree, reconsider your patio layout or consult an arborist. Roots under a patio will continue to grow and will eventually heave your surface.
Rocks in the subgrade are a judgment call. Small rocks and gravel can stay. Large rocks, especially ones that create high points that prevent uniform compaction, need to come out. Dig them out, fill the void with compacted base material, and recheck your grade.
Irrigation lines are the biggest hidden hazard on a residential site. If you find a line during excavation, stop and trace it before cutting further. Poly tubing used in most residential drip and spray systems can be capped, rerouted, or abandoned depending on whether it still serves a zone you need. Keep the line number marked on your plans so you can reconnect or cap it properly once construction is done.
What to do with the sod you've removed
Fresh sod and topsoil are genuinely useful materials if you handle them quickly. Here are your realistic options.
- Reuse on bare spots in your yard: if the grass is healthy and you have patches that need filling, cut the sod into smaller pieces and transplant it. Water immediately and keep it moist for two to three weeks.
- Compost it: flip sod upside down (grass facing down) and stack it in a pile at least two feet high. It will break down into usable compost in about six months to a year. Don't expect it to be useful before then.
- Donate or offer it for free: post on Nextdoor or Facebook Marketplace as free pickup. Homeowners with bare lawn areas will often haul it away for you.
- Haul to a green waste or composting facility: most areas have municipal green waste drop-off. Call ahead to confirm they accept sod with soil attached, as some facilities don't.
- Dumpster or dump trailer: the most expensive option but the fastest. A standard 10-yard dumpster typically handles a medium-sized patio removal.
One thing not to do: don't bury removed sod under your fill material. Decomposing organic matter underground creates voids and causes settling. Every piece of sod and root mat needs to come out of the excavation area entirely.
Time and cost expectations
Sod removal alone on a 300-square-foot patio takes most homeowners about half a day with a rented sod cutter, including sod disposal. Add a full day for excavation to depth, base prep, and compaction if you're doing it in the same session. Total elapsed time from calling 811 to having a compacted, ready-to-build base is typically a long weekend for a medium patio when the weather cooperates.
Budget roughly $200–$400 for tool and equipment rentals on a medium project (sod cutter plus plate compactor for two days). Add the cost of base aggregate, which runs about $25–$45 per ton depending on region, and you typically need about one ton per 50–75 square feet of patio at a 4-inch compacted depth. Disposal can add another $100–$300 depending on whether you rent a dump trailer or use a composting facility.
When to hire a professional instead
This is worth being direct about. Sod removal and basic excavation are genuinely within reach for most homeowners on flat, obstacle-free sites under about 500 square feet. Beyond that, or when any of the following conditions apply, the math usually favors hiring a landscaper or grading contractor for the excavation phase.
- Your site has significant grade change (more than about 6 inches of elevation difference across the patio area). Grading uneven ground by hand is slow, imprecise, and prone to drainage problems if you get it wrong.
- You have large tree roots crossing the patio area. This is a tree health and structural issue, not just a digging problem.
- You've found buried utilities or irrigation infrastructure that you can't confidently reroute yourself.
- Your soil is heavy clay that won't compact properly without specialized equipment. Poor subgrade prep is the leading cause of paver and concrete patio failure.
- Your patio is over 800 square feet and you're working alone or with one helper. The physical volume of material removal and base installation at that scale is a serious undertaking.
- You're not confident operating a mini-excavator. A machine that size can damage foundations, underground lines, and neighboring property fast.
Hiring out the excavation and grading phase while doing the base prep, paver installation, or concrete work yourself is a reasonable split that keeps costs down without putting you in over your head on the part of the job where errors are hardest to fix.
FAQ
What is the single best method to remove sod for a patio, by project size?
Small patios (≤200 sq ft): hand removal with an edging spade and shovel is cheapest and effective. Medium patios (200–800 sq ft): rent a walk‑behind sod cutter for speed and consistent depth. Large patios (>800 sq ft) or sites with heavy roots/rocks: use a mini‑excavator (or hire an operator) to lift sod and excavate quickly. For very rocky or steep sites, consider pro excavation.
What tools and rentals will I need for sod removal and patio prep?
Hand method: edging spade, flat shovel, mattock or pry bar (for roots), wheelbarrow, knee pads, gloves. Powered DIY: walk‑behind sod cutter (rental), wheelbarrow/trailer, plate compactor (100–200 lb), string line and stakes, rake, tape measure. Heavy work: mini‑excavator or skid‑steer rental plus bucket/thumb, plate compactor, dump trailer. Also: wheelbarrow, broom, safety gear. Rent powered gear — don’t buy for one job.
Step-by-step ordered checklist for removing sod and preparing the patio subgrade
1) Call 811 to locate buried utilities. 2) Turn off irrigation and mark sprinkler heads. 3) Mow and wet turf lightly (easier cutting). 4) Stake outline and set grade strings (allow slope 1/8–1/4 in/ft away from structure). 5) Choose method by size (hand, sod cutter, excavator). 6) Remove sod in strips or rolls; cut around irrigation lines/obstacles. 7) Excavate to final depth (see depth guidance). 8) Remove roots/rocks; shear stubborn roots with mattock or excavator. 9) Install edge restraint/ forms. 10) Place aggregate base in 3–4 in loose lifts and compact each lift to target density. 11) Screed bedding sand (pavers) or set forms/prepare for concrete. 12) Final compaction/finish and reconnect site utilities.
How deep do I need to excavate for different patio types?
Pavers (pedestrian patio): typical total excavation = paver thickness (0.75–1.5 in) + 1 in bedding sand + 4–6 in compacted aggregate = generally 6–9 in below finished grade. Pavers with vehicle use/driveway: increase base to ~6–8 in (total ≈8–11 in). Concrete slab (pedestrian): minimum 4 in concrete + subbase 4–6 in compacted aggregate = total ≈8–10 in. Concrete for light vehicle use: 5–6 in slab + 6–8 in base = 11–14 in. Permeable/underdrained systems: depth varies widely (8–36 in) — follow specific design.
How do I calculate excavation depth on site?
Start from finished surface elevation and subtract components: for pavers: desired paver thickness + 1 in bedding + specified compacted base thickness. Account for compaction (loose aggregate should be about 20–30% thicker than compacted). Use a measuring stick at multiple points and maintain required slope (1/8–1/4 in/ft) while excavating.
What compaction and drainage standards should I follow?
Aim to compact subgrade and aggregate base to ≥95% Standard Proctor for pedestrian residential work; compact each aggregate lift (max loose lift ~3–4 in) before placing the next. Use a vibratory plate compactor appropriate to area (100–200 lb for small patios). Ensure final surface slopes away from structures ~1/8–1/4 in/ft (≈1–2%) for drainage. For poor infiltration or high groundwater use a stone storage bed and underdrain per local BMPs.
How to Lift Patio Slabs Without Breaking Them: DIY Guide
DIY guide: lift patio slabs safely without cracking, assess, tools, techniques, re-bed, and when to call a pro.