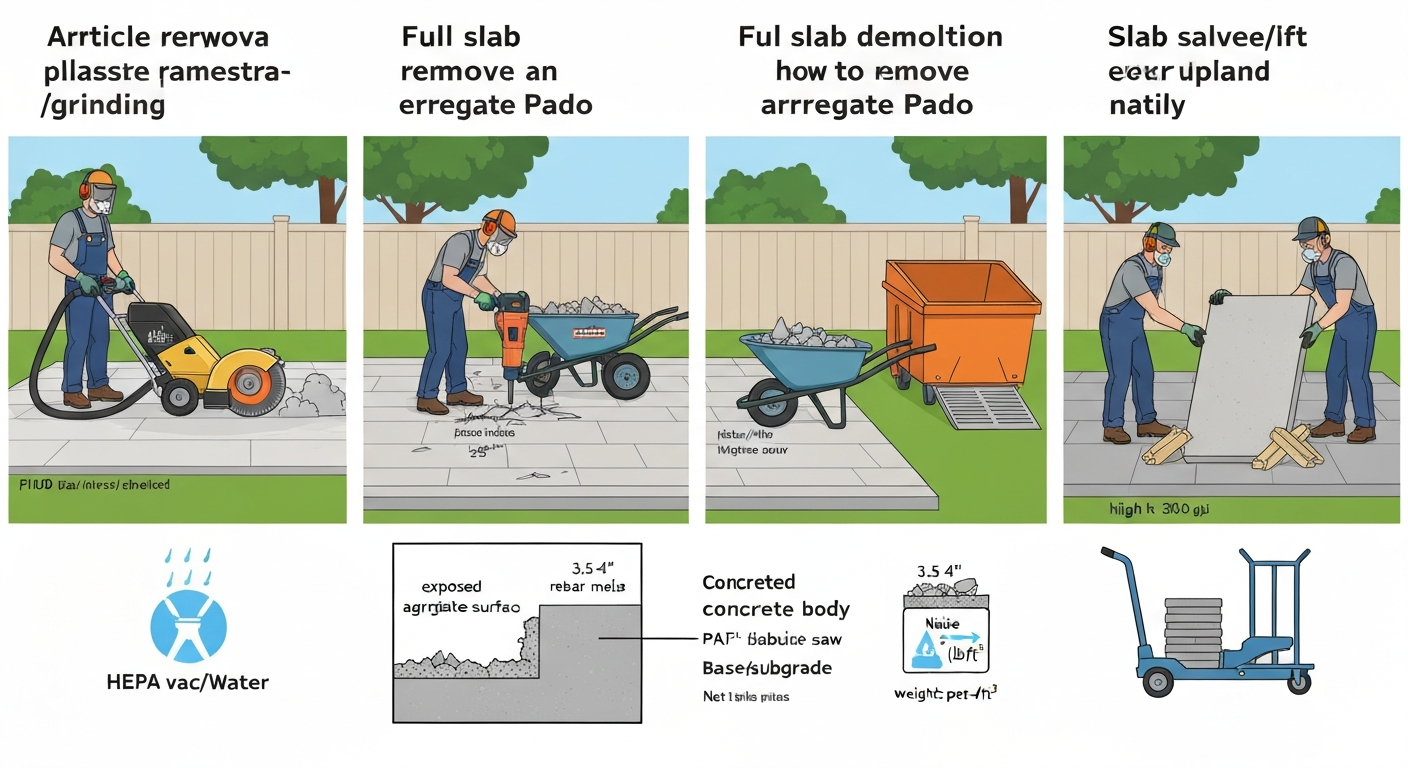
Removing an exposed-aggregate patio means choosing between three distinct approaches: grinding off just the surface layer, breaking the full slab into pieces and hauling it away, or lifting slabs intact for reuse. Which one you pick depends on slab thickness, whether it's reinforced, and what you plan to build next. Most homeowners can handle any of these methods with rented equipment and a weekend or two, but the work is heavy, dusty, and loud, and cutting corners on safety creates real health risks. This guide walks you through every stage, from inspecting the slab before you touch a tool, to prepping the subgrade for your replacement patio.
How to Remove Aggregate Patio: DIY Steps, Tools & Prep

Talia Lang
20 Jul 2026
Inspect before you demolish
Before renting a jackhammer or calling a dumpster, spend 20 minutes walking the patio and taking notes. What you find here determines which removal method makes sense and how long the job will actually take.
Thickness and reinforcement
Residential patio slabs are usually 3.5 to 4 inches thick, but older patios poured in the 1970s and 1980s sometimes run 5 to 6 inches. Check the edge at any exposed corner, step, or crack. If you can't see the edge, drill a small test hole with a masonry bit and a tape measure. Thickness matters because a 4-inch unreinforced slab breaks much faster than a 5-inch slab laced with rebar or wire mesh. Probe any cracks with a screwdriver or wire: if you hit steel, budget extra time and a reciprocating saw with a metal-cutting blade for cutting rebar after the concrete is broken up. Wire mesh generally doesn't slow demolition much, but rebar on 12-inch or tighter spacing can turn a half-day job into a full day.
Surface condition and drainage
Map out cracks, spalling, and low spots that hold standing water. A slab with surface spalling of a quarter-inch or less might be a candidate for resurfacing rather than removal. Deep cracking (cracks wider than 3/8 inch, or cracks that have shifted vertically so one edge sits higher or lower than the other) usually means the base has failed, and resurfacing will just crack again. Check drainage by running a hose on the surface for two minutes: water should sheet off toward a lawn or drain rather than pooling against the house. Poor drainage is often the reason the old slab failed, and you'll need to address it when you rebuild.
Measurements for weight and hauling planning
Measure the patio length and width. Normal-weight concrete runs about 145 to 150 pounds per cubic foot. A simple 10x10-foot slab at 4 inches thick weighs roughly 5,000 pounds (100 sq ft times 0.33 ft times 150 lb/ft³). A 20x12-foot patio at 4 inches is about 12,000 pounds. That number tells you what size dumpster to rent, whether you need a dump truck, and how many people and what kind of lifting gear you'll need if you're pulling slabs intact.
Repair vs. remove: making the honest call
Full removal is disruptive, expensive, and time-consuming. If you can honestly solve the problem with a less invasive fix, that's worth knowing before you rent a 60-pound jackhammer. Here's how to think through it.
| Situation | Likely best approach | Why |
|---|---|---|
| Surface pitting/spalling under 1/4 inch, structurally sound base | Grind surface + overlay or resurface | Base is still functional; removing aggregate profile with a grinder preps for a new topping |
| Isolated hairline or shrinkage cracks, no heaving, good drainage | Fill and seal cracks | Cosmetic issue, not structural; resurfacing can restore appearance |
| Settlement cracks with vertical displacement, water pooling toward house | Full slab removal | Base failure or drainage problem won't be fixed by patching the surface |
| Deep spalling exposing aggregate more than 1/2 inch, freeze-thaw damage | Full slab removal or grinding + thick overlay | Surface is deteriorating past what a thin overlay can bridge |
| Slabs you want to reuse for a path or border | Lift intact | Saves cost and material; intact slabs can be repurposed |
| Exposed aggregate surface, aggregate loose or lifting | Grinding to remove surface layer | Aggregate bond has failed; grinding removes the loose layer cleanly |
A quick note on resurfacing over exposed aggregate: a new overlay bonds to a prepared concrete surface, not to loose aggregate sitting on top. If you're going the resurfacing route, you'll still need to grind the surface first to remove the loose stones and expose clean concrete underneath. That's covered in the step-by-step section below.
Tools, equipment, and PPE you'll need
The right equipment makes this job manageable. The wrong equipment makes it dangerous, exhausting, and slow. Here's what each task actually requires, what to buy versus rent, and what specs matter.
Grinding and surface removal
- Walk-behind planetary concrete grinder (rental): productive rates around 250 to 425 sq ft per hour depending on aggregate hardness and machine size; rent from a concrete supply house or equipment rental center, not a big-box store
- HEPA-filtered vacuum rated for concrete dust, connected directly to the grinder's shroud port (required for silica control)
- Diamond cup wheels or segmented grinding discs sized to your rental machine (most rental grinders take 7-inch or 10-inch discs; harder aggregate requires harder-bond diamond segments)
- Edge grinder or 4-inch angle grinder with diamond cup wheel for corners and edges the walk-behind can't reach
- Garden hose with spray nozzle as backup water suppression if your rental machine doesn't have an integrated water feed
Slab breaking and demolition
- Electric demolition hammer (jackhammer): a tool in the Hilti TE 3000-AVR class weighs about 60 pounds, delivers roughly 63 ft-lb of impact energy per blow, and is appropriate for 4-inch unreinforced or lightly reinforced residential slabs; available at most equipment rental shops
- Moil point and flat chisel attachments for the breaker (both are usually included with rentals)
- Rotary hammer or SDS-Max drill for drilling starter holes at perimeter cuts
- Reciprocating saw with bi-metal or carbide-grit blade for cutting rebar after slab is broken
- 12-pound or 16-pound sledgehammer for finishing breaks and driving wedges on thinner sections
- Pry bars: one 36-inch and one 60-inch (also called a digging bar) for lifting broken pieces
- Diamond blade wet-cut circular saw or walk-behind concrete saw for perimeter scoring (rent the walk-behind for straight cuts longer than 10 feet)
- Wheelbarrow (heavy-duty contractor grade, minimum 6 cubic foot) for moving broken chunks
- Loading ramp for wheelbarrow into dumpster
- Work gloves rated for heavy material handling, steel-toed boots
Lifting slabs intact
- Hydraulic floor jack (3-ton minimum) or long-handled slab lifter
- Pry bars (same as above)
- Cribbing blocks: short sections of 4x4 or 6x6 lumber to support slabs while maneuvering
- Furniture dollies or appliance dollies rated for heavy loads (200 lb or more per slab)
- Nylon lifting straps rated to at least twice the slab weight if using mechanical assistance
- Backhoe, skid steer, or forklift with pallet forks for slabs heavier than 300 lb (rent or hire out)
PPE checklist
- NIOSH-certified respirator: minimum N95 for occasional short tasks; half-face respirator with P100 filters for extended grinding or cutting work
- Safety glasses with side shields and a face shield over them when breaking (flying fragments are common)
- Hearing protection: rated earmuffs or plugs (jackhammers typically produce 95 to 110 dB at the operator)
- Vibration-dampening anti-vibration gloves (reduces Hand-Arm Vibration Syndrome risk during jackhammer use; take breaks at least every 30 minutes)
- Steel-toed, puncture-resistant boots
- Hard hat if working near structures or with overhead hazards
- Knee pads for any work done at ground level
Safety, permits, and disposal before you start
Silica dust: the most serious hazard
Concrete dust contains respirable crystalline silica, a particle small enough to reach deep lung tissue. OSHA's construction silica standard (29 C.F.R. §1926.1153) sets an Action Level of 25 µg/m³ and a Permissible Exposure Limit of 50 µg/m³ as 8-hour time-weighted averages. These limits are reached very quickly during dry grinding or dry cutting without controls. The practical translation for DIY work: always use wet cutting when sawing, always attach a HEPA vacuum to grinders, and wear a P100 respirator any time you're near cutting or grinding operations. OSHA's Table 1 controls for common construction tasks specify that handheld grinders must use a shroud plus HEPA-filtered vacuum and that saws must use an integrated water feed. Those controls dramatically reduce exposure compared to uncontrolled dry work.
Noise and working hours
Most residential zoning codes restrict construction noise to daytime hours, typically 7 a.m. to 7 p.m. on weekdays and 8 a.m. to 5 p.m. on Saturdays, though this varies by city and county. Check your local noise ordinance before scheduling. Neighbors will hear a jackhammer from 200 feet away, so a quick heads-up goes a long way.
Asbestos and lead concerns
Bare concrete patios poured after the mid-1980s are extremely unlikely to contain asbestos or lead. The risk area is coatings and sealants applied to the surface. If your patio has an old painted or coated surface and was installed or refinished before 1980, test the coating before grinding or cutting it. Home test kits for lead paint are available for about $10 to $15 at hardware stores. Asbestos in coatings requires a certified lab test (typically $25 to $50 per sample). If either is present, stop and call a licensed abatement contractor.
Permits and disposal
Many municipalities require a demolition permit for concrete removal, even for a residential patio. The threshold varies, but jobs involving more than 200 square feet often trigger a permit requirement, and some cities require one for any concrete demolition. Call your local building department before starting. For disposal, crushed concrete is classified as Construction and Demolition (C&D) debris and is widely accepted at recycling facilities, where it's processed into recycled concrete aggregate (RCA) used as road base and fill. The EPA's State of the Practice of Construction and Demolition Material Recovery, EPA notes crushed concrete is commonly processed into recycled concrete aggregate (RCA) for use as road base, subbase, riprap, or fill, with facilities typically requiring removal of significant soil, organics, or hazardous contaminants and often accepting rebar with magnetic separation State of the Practice of Construction and Demolition Material Recovery — EPA. Most facilities accept concrete with rebar (they use magnetic separation downstream) but won't take concrete mixed with large amounts of soil, wood, or hazardous material. Roll-off dumpster companies that serve contractors can usually direct you to the nearest C&D recycling facility or will handle recycling disposal themselves.
Step-by-step: removing an exposed-aggregate surface
This method removes just the aggregate-embedded surface layer, leaving the concrete slab body intact beneath. It's the right approach when the slab base is structurally sound and you want to resurface, apply a new coating, or prepare for a thin overlay. For a step-by-step walkthrough on how to remove old patio slabs, see the detailed guide. Expect to move at roughly 250 to 425 square feet per hour with a rented walk-behind planetary grinder.
- Clear the patio completely and sweep off loose debris, sand, or dirt. Any grit on the surface will wear your diamond tooling faster.
- Attach the HEPA vacuum hose to the grinder's dust port. If the rental machine has an integrated water feed, connect it to a garden hose instead. Do not skip this step.
- Put on your respirator, face shield, hearing protection, and gloves before starting the machine.
- Make a test pass in an inconspicuous corner to confirm the disc is cutting the aggregate layer and not just polishing. You should see a dull, slightly roughened concrete surface appearing under the aggregate. If the machine is skipping over aggregate without cutting, switch to a harder-bond diamond disc.
- Work in overlapping passes across the full surface, moving the grinder in a slow, steady back-and-forth pattern. Overlapping each pass by about 2 inches prevents ridging.
- For edges and corners within 4 to 6 inches of walls or steps, switch to the 4-inch angle grinder with a diamond cup wheel. This is slow work; expect edges to take as long as the field area.
- After grinding, run your hand across the surface (once the area is wet-mopped to remove dust). You should feel a slightly rough, uniform texture, not loose stones. This corresponds to an ICRI Concrete Surface Profile of roughly CSP 3 to 4, which is the right prep range for most overlays.
- Vacuum all residual dust and dispose of it with your other concrete debris, not in household trash.
If the aggregate layer is thick (more than 1/2 inch), or if the stones are very hard (granite or quartzite aggregate), you may need two passes with progressively finer diamond tooling, or a switch to shot blasting equipment. Shot blasters remove coatings and surface material at roughly 310 square feet per hour for coatings and somewhat slower for deeper removal. They produce a more aggressive surface profile than grinding and work well when you want a rough texture for a thick overlay, but they are louder and require careful management of spent shot collection.
Step-by-step: breaking up a full concrete slab
Full slab demolition is the right call when the base has failed, when drainage problems need to be corrected below the slab, or when you're changing the patio layout entirely. Best practice for full-slab demolition is to mark limits, saw-cut the perimeter or full-depth relief/control joints with a diamond saw to isolate neat sections, then break the sections between saw cuts with breakers or jackhammers, a sequence detailed in Selective Demolition / Contract Specifications (examples, saw‑cut perimeter and demolish in sections) Selective Demolition / Contract Specifications (examples — saw‑cut perimeter and demolish in sections). Plan for this to take one to two days for a typical 200 to 400 square foot patio, with a second day for hauling.
Score and cut the perimeter first
- Mark the full perimeter of the slab with chalk line or marking paint. Also mark any utility lines: call 811 (Dig Safe in the U.S.) at least three business days before any work that involves cutting or breaking near the ground.
- Set up your wet-cut circular saw or walk-behind concrete saw with a diamond blade. Fill the water reservoir or connect the water supply.
- Cut along the perimeter lines to full slab depth. This isolates the demolition area from adjacent structures (house foundation, steps, adjoining slabs) and prevents cracks from running where you don't want them. Cut all the way through, not just a score line.
- If the slab is larger than about 50 square feet, cut it into sections of 20 to 30 square feet each with a grid of relief cuts. This gives the jackhammer manageable targets and makes chunks small enough to load by hand.
Break each section
- Put on full PPE: respirator, face shield, hearing protection, anti-vibration gloves, boots.
- Start the electric demolition hammer (jackhammer) at the corner of one section, not at the center. Working from the edges toward the middle gives broken pieces somewhere to move.
- Hold the chisel at roughly a 45-degree angle to the surface to start the break, then work more vertically once a crack opens. Let the machine do the work; don't push hard into the tool or you'll wear yourself out and risk losing control.
- Break each section into pieces roughly 12 to 18 inches across. Chunks larger than 2 feet are extremely heavy and awkward to load; smaller is better for your back and for dumpster loading.
- Take a break from the jackhammer at least every 30 minutes to reduce hand-arm vibration exposure. Use the break to load broken pieces into the wheelbarrow and haul them to the dumpster.
- For sections with rebar, the jackhammer will free the steel but it'll stay connected. Use a reciprocating saw with a metal-cutting blade to cut rebar into 3 to 4-foot lengths for easier handling. Rebar can go in the dumpster or to a metal recycler separately.
- Use the pry bar to lever up large pieces that are still stuck to the subbase. A digging bar driven into a crack gives good mechanical advantage.
Loading and hauling
Do not try to carry broken concrete pieces by yourself if they're larger than about 12 inches across; a typical chunk that size from a 4-inch slab weighs 30 to 50 pounds. Use the wheelbarrow for everything. When loading a dumpster, use a ramp (a rented aluminum loading ramp or a piece of 3/4-inch plywood works fine). Stack pieces to distribute weight and prevent the dumpster from being overweight on one side. For a 200 square foot patio at 4 inches thick, you're dealing with roughly 5,000 pounds of concrete, so plan for at least a 10-yard dumpster (check with your rental company for their concrete weight limits, as many cap concrete loads at 4 to 5 tons).
Step-by-step: lifting slabs intact for reuse
If your patio is made of individual precast concrete pavers, flagstones, or smaller poured panel sections and they're in decent shape, lifting them intact is worth the extra care. You can reuse them for a path, a border, or lay them back down in a new pattern. The key is not rushing the extraction, since most slab damage during lifting happens from impatience.
- Calculate the weight of each slab before you start (length in ft x width in ft x thickness in ft x 150 lb/ft³). A 2x2-foot slab at 2 inches thick weighs about 100 pounds. A 2x2-foot slab at 4 inches thick weighs about 200 pounds. Anything over 150 pounds should not be lifted by one person.
- Cut any mortar joints or filler between slabs with an oscillating tool and a grout removal blade, or with a cold chisel and hammer. Getting clean separation at the joint prevents edge chipping during prying.
- Insert a flat pry bar into the joint at one edge and lever up just enough to slip a cribbing block (a short piece of 4x4 lumber) under the corner. Work around the perimeter of the slab, inserting cribbing blocks at each corner so the slab sits elevated on all four corners and can't pinch the pry bar.
- Slide a hydraulic floor jack under one edge and raise the slab to a workable height (4 to 6 inches off the ground is usually enough). Keep cribbing blocks positioned so if the jack slips, the slab doesn't fall flat.
- Tilt the slab onto its edge and walk it upright, then lean it against a stable surface (a wall, a fence post, or a stack of cribbing). Slabs stored upright on edge are much more stable than leaning at a shallow angle.
- For heavy slabs (over 200 pounds), use a dolly. Tip the slab onto the dolly from its upright position rather than trying to pick it up flat.
- If slabs are too large or heavy for manual handling, a skid steer with pallet forks or a backhoe with a chain sling can pick them cleanly. Make sure any lifting straps or chains are rated to at least twice the slab weight.
Lifting pavers versus large continuous slabs requires somewhat different tools and technique. For more detail on working with large individual slabs, the companion guides on how to lift patio slabs without breaking them and how to remove old patio slabs go deeper into rigging, stacking, and transport.
How to cut concrete precisely for removal or salvage
Precise cutting is what separates controlled demolition from a mess. Whether you're isolating a section to break, cutting a slab to a new size for reuse, or making a clean edge next to a structure you want to keep, the technique is the same.
Blade selection
Use a segmented diamond blade for fast cutting through standard concrete. A continuous-rim diamond blade makes a smoother cut and is better for precision work or for cutting pavers you intend to reuse (less chipping at the cut edge). Match the blade to your saw size and check the blade's rpm rating against your saw's spindle speed before cutting.
Wet cutting technique
- Snap a chalk line or use a straightedge and marking crayon to mark your cut line clearly. Use a second chalk line as a guide if the surface is dusty.
- Set the blade depth to about 1/4 inch deeper than the slab thickness. For a 4-inch slab, set the depth to 4.25 to 4.5 inches.
- Start the saw and allow it to reach full speed before contacting the concrete. Push the saw forward slowly and steadily. Let the blade cut; don't force it.
- Keep water flowing over the blade throughout the cut. Run a garden hose alongside the saw, or use a saw with an integrated water feed. Dry cutting generates enormous amounts of silica dust and overheats the blade.
- At the end of a cut, let the blade come to a full stop before lifting it from the kerf. Pulling a spinning blade up through a cut can cause blade grab and kickback.
- For cuts longer than about 10 to 12 feet in a straight line, use a walk-behind concrete saw rather than a handheld circular saw. The walk-behind tracks straighter and reduces operator fatigue significantly.
If you need to break up the slab into smaller sections for easier hauling rather than for salvage, the technique from the full-slab demolition section works well in combination with saw cuts. More detail on breaking techniques, particularly for thicker or reinforced slabs, is covered in the guide on how to break up patio slabs.
Salvaging and storing slabs for reuse
Reclaimed concrete pavers and slabs have real value: they can become a path, edging, a dry-stack wall, or be relaid in a new patio layout. Handling them well during removal and storage is the difference between slabs you can actually reuse and slabs that break into unusable pieces because of careless stacking.
Handling during removal
- Always move slabs on edge when possible: a slab carried flat bends slightly under its own weight and is far more likely to crack than one carried upright
- Wrap edges with rubber or foam padding before moving to prevent edge chipping
- Use a partner or a dolly for anything over 100 pounds; do not drag slabs on their face since surface abrasion damages finished faces you intend to keep
Stacking and storage
- Stack slabs flat on level ground with 2x4 lumber spacers (called stickers) between each layer to allow airflow and prevent moisture trapping and staining
- Keep stacks no more than 4 to 5 slabs high; taller stacks crush the lower slabs and are a tip hazard
- Store on a hard, flat surface (not soft soil that will settle unevenly under the weight)
- Label each stack with chalk or paint pen if the slabs came from different areas and you want to reinstall them in a specific pattern or orientation
Transporting reclaimed slabs
If you're moving slabs off-site, load them flat in a truck bed with stickers between layers and secure them with ratchet straps. Don't pile them loose in a trailer where they'll bang against each other over bumps. For large slabs (over 150 pounds each), a flatbed trailer with a backhoe or forklift loading is the safest option. If you're donating or selling reclaimed pavers, habitat restore programs and local landscape material suppliers often accept them, and it saves you a dumpster charge.
Cost and time estimates
| Task | Typical DIY time | Equipment rental cost (approx.) | Notes |
|---|---|---|---|
| Surface grinding (200 sq ft) | 3 to 5 hours | $150 to $300/day for grinder + HEPA vac | Add time for edges; diamond tooling consumables extra |
| Full slab demolition (200 sq ft, 4-inch) | 6 to 10 hours breaking + 2 to 4 hours hauling | $80 to $150/day jackhammer; $300 to $500 dumpster (10 yd) | Rebar adds time; budget two days to be safe |
| Lifting slabs intact (10 to 20 slabs) | 4 to 8 hours | $50 to $80/day for floor jack + dollies | Mechanical assist (skid steer) adds $300 to $600 if needed |
| Concrete saw cutting (perimeter + grid cuts) | $50 to $120/day handheld; $200 to $350/day walk-behind | Usually done same day as demolition | Diamond blade: $30 to $80 each depending on size |
| Disposal (recycling facility drop-off) | 1 to 2 hours hauling | $50 to $150 per load at C&D recycler | Call ahead; confirm they accept residential concrete |
When to call a professional
Most homeowners can handle a standard 4-inch unreinforced patio with rented equipment and a helper. There are situations where hiring out makes real sense, though. If your slab is post-tensioned (you'll see 'PT SLAB' stamped on the edge, or there will be a 3-inch round steel pocket in the slab edge every few feet), do not cut or break it yourself. Post-tensioned cables are under enormous tension and cutting one is extremely dangerous. If your slab is 6 inches thick and heavily rebar-reinforced, a hydraulic breaker on an excavator will do in two hours what would take you two days with a handheld jackhammer. If the patio abuts your foundation and you're not certain about the connection, have a contractor assess before breaking anything. And if testing reveals asbestos or lead in a surface coating, abatement is not a DIY job.
Prepping the subgrade for your new patio
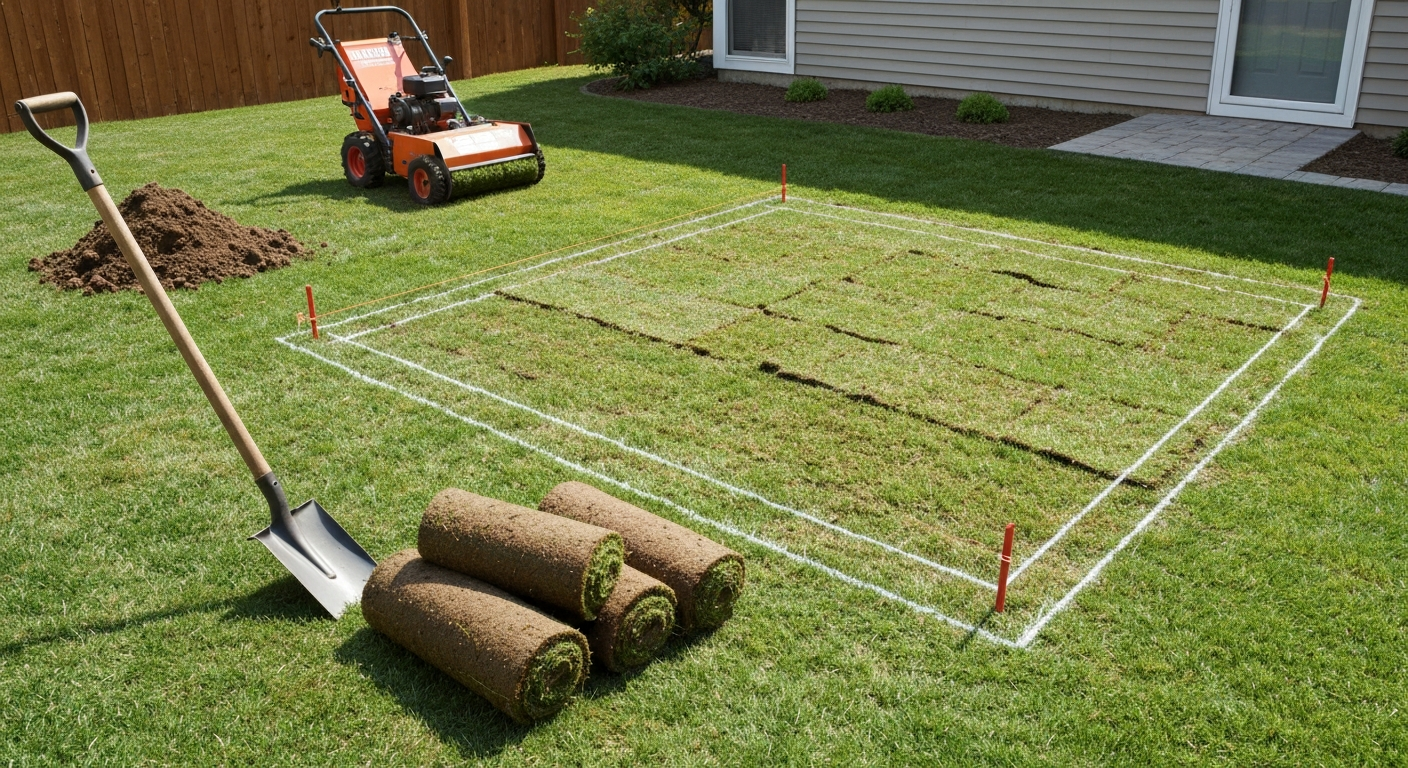
Once the slab is out, don't rush to lay new material. For help clearing grass and sod before laying a patio, see the guide on the best way to remove sod for patio. The subgrade condition is what determines whether your new patio lasts 5 years or 25 years, and most of the failures I see in patios that needed replacement in the first place trace back to a bad base.
- Remove all concrete fragments from the subgrade, including small pieces and fine concrete dust. A metal rake and flat shovel work well. Concrete chips mixed into the soil base create voids as they shift.
- Check the existing grade for drainage slope: the subgrade should slope away from the house at a minimum of 1 inch per 8 feet. If it doesn't, this is the time to correct it with fill and compaction.
- If you see soft spots, dark organic soil, or areas that stay wet after the slab is removed, excavate those areas down to firm native soil and fill with compactable material (crushed stone or Class II base material).
- For a concrete replacement, compact the subgrade with a plate compactor before placing your base aggregate. A plate compactor rental runs about $60 to $80 per day.
- For paver installations, install 4 to 6 inches of compacted crushed stone base followed by 1 inch of bedding sand. For concrete, compact the subgrade directly and plan for a minimum 4-inch slab with 6x6 wire mesh or rebar at mid-depth.
- If sod removal around the patio perimeter is needed before the new pour or paver installation, remove it cleanly so the base doesn't include organic material that will decompose and create settling. The companion guide on the best way to remove sod for a patio covers this in detail.
One last thing: if drainage toward the house was part of why the old patio failed, install a channel drain or redirect grade before you cover it up again. No patio surface, concrete or paver, will last long if water is sitting under it or pushing against a foundation. Fix the drainage now while the ground is open and you won't be doing this job again in five years.
FAQ
How do I assess the condition of my exposed-aggregate or old concrete patio to decide whether to surface-prepare, remove the surface, demolish the slab, or lift slabs intact?
Inspect for cracks (pattern, width, movement), spalling depth, exposed or corroded rebar, heave or settlement, ponding/drainage issues, bonded overlays, and joint condition. Check slab thickness and reinforcement (drill a small test hole or look at exposed edge). If damage is shallow (surface spall, thin delamination) consider surface removal/grinding and overlay. If cracks are structural, slab is heaving/settling, or slab is >25% delaminated, full-slab demolition or slab lifting (if panels are intact and not badly bonded) is usually required. Calculate slab weight (area × thickness × ~150 lb/ft³) to see if slabs are liftable by hand or need equipment. Check local permits and buried utilities before work. For dust‑generating tasks factor in silica controls and whether you can meet OSHA/NIOSH Table 1 controls (wet cutting, HEPA vacuums) — if not, hire a pro.
What DIY methods are available and when should I choose surface removal (grinding/shotblasting), full-slab demolition, or slab lifting?
Surface removal (diamond grinding, scarifying, single-head grinders, or shotblasting) — choose when you want to remove the exposed aggregate or damaged top layer but keep the slab for overlay or to prepare a profile (ICRI CSP targets). Good if damage is shallow, slab structurally sound, or you want a clean profile. Full-slab demolition (saw perimeter cuts + break into sections) — choose for structural failure, thick rebar, differential settlement, or when regrading/subgrade rebuild is needed. Slab lifting/salvage — choose if panels are intact, unbonded or can be pried free, and you want to reuse pavers/slabs; requires rigging or mechanical help for heavy pieces. Consider cost, time, waste handling, and dust controls when choosing.
Step-by-step: How do I remove just the exposed-aggregate surface (diamond grinding or scarifying) safely and effectively?
1) Plan: mark work area, check permits, locate utilities, and set up dust/water containment. 2) PPE & controls: use eye/ear protection, gloves, steel-toe boots; for dry use HEPA vac + shroud and NIOSH-certified respirator (per task); for wet methods use splash protection and ground-fault‑protected power. OSHA silica rules require Table 1 controls (wet cutting or shrouded tool + HEPA vac) or an exposure plan. 3) Equipment: small planetary/edge grinder with diamond tooling, industrial HEPA vacuum or integrated water feed system; or shotblaster with collector. 4) Work sequence: remove loose debris; start at perimeter and make passes with grinder at recommended RPM/segment depth; avoid removing more than needed—target the ICRI CSP required (specify CSP 2–4 for overlays or higher for aggressive profile). Vacuum/wet continuously to control dust. 5) Clean: vacuum and pressure-wash slurry into collection or allow controlled drying and collect residue. Dispose of slurry per local regs (solidify and contain or let collector handle). 6) Inspect profile and repair any deeper defects before overlay.
Step-by-step: How do I demolish a full slab safely and efficiently (saw‑cut + break into sections)?
1) Plan & permits: check local permitting, utilities, and disposal options; size dumpster/haul truck by slab weight estimate. 2) Mark and saw: snap chalk-lines for clean edges and layout relief cuts every 4–6 ft for large slabs; use a walk‑behind diamond saw with water suppression for perimeter and control cuts to full slab depth. 3) Cut then break: after saw cuts isolate sections, use an appropriate breaker (handheld jackhammer for small pieces, larger electric/hydraulic breakers or excavator-mounted breaker for heavy slabs) to break into manageable pieces. 4) PPE & dust control: use wet cutting and/or shrouded breakers with HEPA vac where possible; NIOSH‑certified respirators if engineering controls insufficient; hearing and vibration controls and frequent breaks to reduce HAVS. 5) Load & haul: wheel debris into containers with wheelbarrow/dolly; remove rebar as needed (cut or separate). 6) Clean site: remove fines, rake subgrade; prepare for subbase or new construction.
How can I safely salvage and lift intact concrete slabs or pavers for reuse?
1) Assess slab size/weight: calculate weight using area × thickness × ~150 lb/ft³. 2) Tools & rigging: use pry bars, slab lifters, lifting straps, spreader bars, chain blocks, or mechanical assist (mini‑excavator with pallet fork or forklift). Rental yard sells slab lifters and panel hooks. 3) Rigging steps: undercut edges using a small saw if bonded; place pry bars and cribbing; attach lifting gear to center and lift slowly, maintaining balanced lift. 4) Safety: never exceed rated capacity of straps/equipment; use tag lines to control swing; wear gloves/steel-toe boots and eye protection. 5) Storage & transport: place on wood dunnage, cover to avoid staining, and transport on a trailer or truck rated for the load. If slabs are cracked, consider cutting into smaller pieces to reuse as stepping stones or fill.
What tools, equipment, and PPE should I have on hand for each method (surface removal, slab demolition, slab lifting)?
Surface removal: planetary/single-head grinders, diamond cup wheels/segments, walk‑behind floor grinders, industrial HEPA vacuum or water feed, shotblaster (optional), extension cords/GFCI, pressure washer. Full-slab demolition: walk‑behind diamond saw (plugged with water), handheld jackhammer (30–60 lb class), sledgehammers, pry bars, wedges, wheelbarrow, heavy‑duty gloves, steel‑toe boots, eye/ear protection, hard hat, dust respirator/HEPA vac. Slab lifting: pry bars, slab lifter/panel hook, lifting straps, spreader bar, chains, cribbing, mechanical lift (mini‑excavator, skid steer, forklift) as needed. PPE: ANSI-rated eye protection, NIOSH-certified respirator for silica dust tasks (or PAPR where appropriate), hearing protection, nitrile/LEATHER gloves, high‑traction boots, long sleeves, knee pads. Follow tool manufacturer PPE and vibration guidance.
Next Article
Best Way to Remove Sod for Patio: Step-by-Step DIY Guide
Best way to remove sod for patio: step-by-step DIY guide, tool list, excavation depths, disposal, and pro hire tips.