A broken cement patio can usually be fixed with one of four approaches: patching individual cracks or spalled spots, grinding or leveling sunken sections, resurfacing the whole slab with a concrete overlay, or tearing it out and starting fresh. Which one makes sense depends on how bad the damage is, what caused it, and whether the base underneath is still solid. Most homeowners with moderate cracking or isolated sunken areas can handle this themselves over a weekend. Widespread structural failure, heaved slabs from roots, or crumbling concrete throughout the entire pad usually means it's time to call a pro.
Broken Cement Patio: Fix Cracks, Spalling, Heaving Step-by-Step

Talia Lang
29 Apr 2026
Quick Diagnosis: What Kind of Broken Are We Talking About?
Not all broken cement patios are the same problem. The word 'broken' can mean a dozen different things, and your repair path changes completely depending on which one you're actually dealing with.
- Hairline cracks (under 1/8 inch wide): Mostly cosmetic, common in older slabs, and easy to seal.
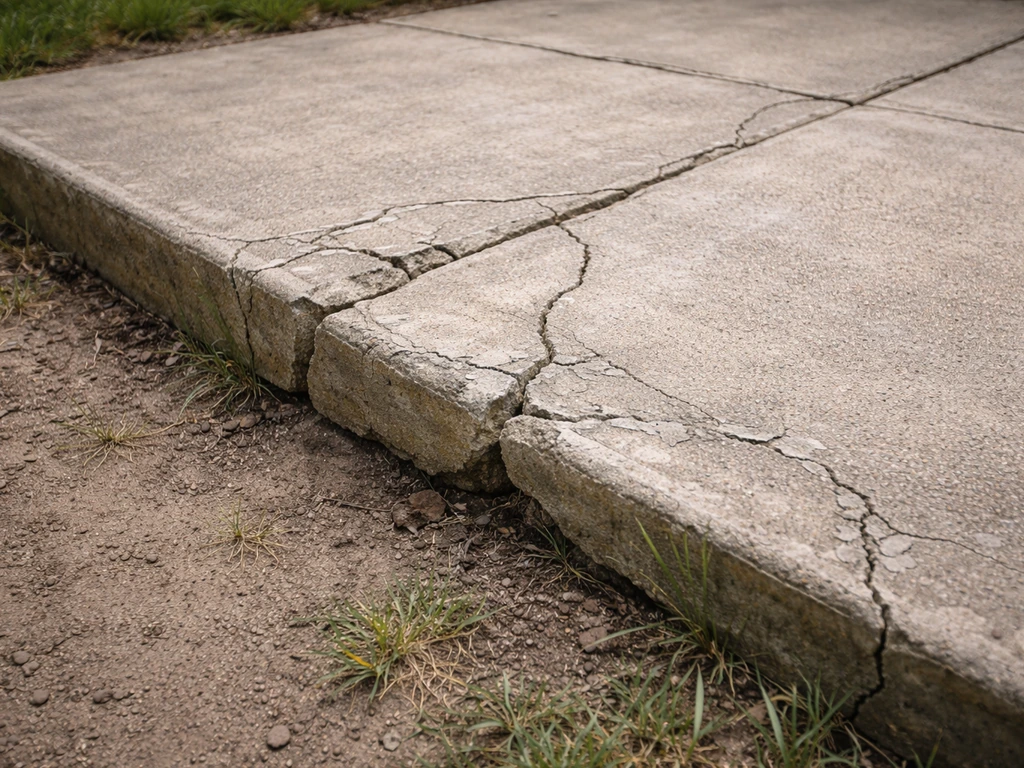
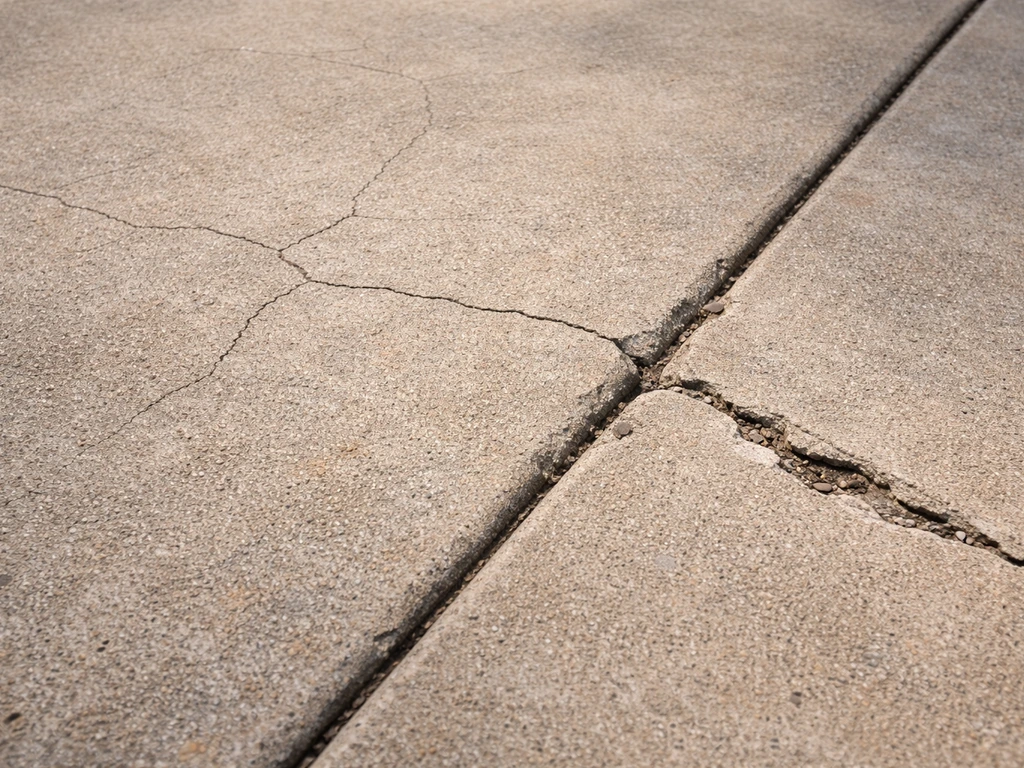
- Structural cracks (1/4 inch or wider, or running completely through the slab): Indicate movement or a failing base underneath.
- Spalling: The surface is flaking, pitting, or scaling off. Usually caused by freeze/thaw cycles or a bad mix.
- Heaving: One section of the slab has pushed upward, creating a raised edge or a trip hazard. Often caused by roots or frost.
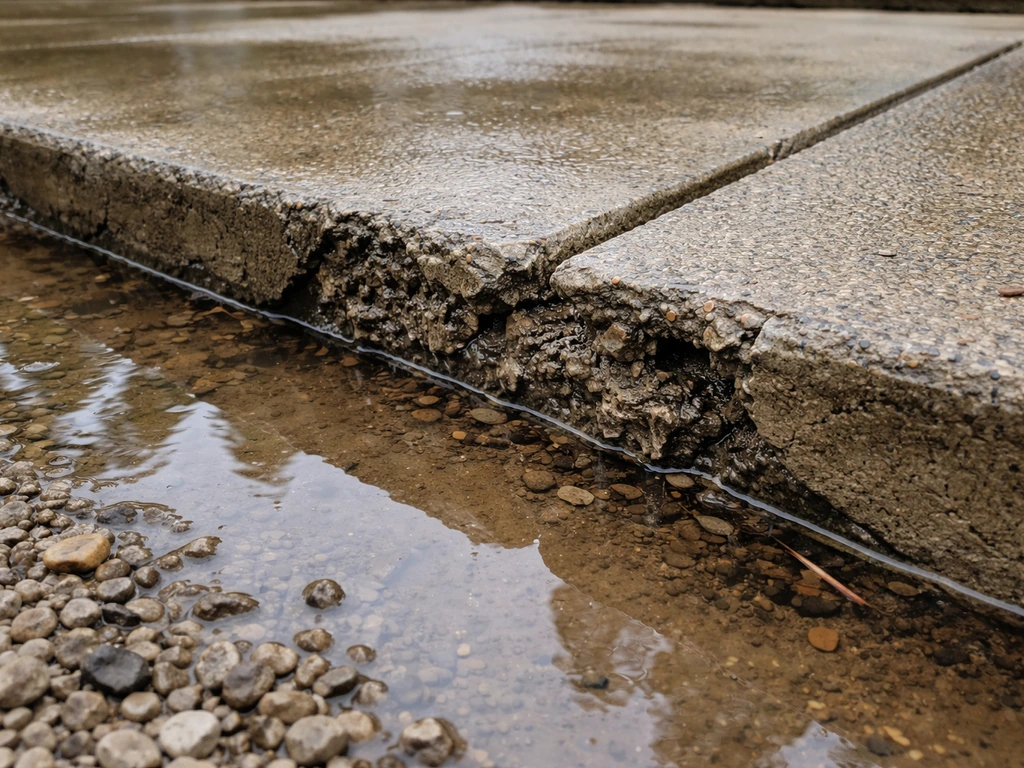
- Sinking or settling: One section has dropped lower than the rest, causing water to pool or a lip between sections.
- Crumbling or disintegrating concrete: The material itself has degraded and holds no structural integrity.
- Water pooling: The slab hasn't cracked visibly, but water sits on it for hours after rain, pointing to a slope or drainage problem.
A quick test: pour a bucket of water on the surface and watch where it goes. It should drain away from the house. Building standards call for at least 0.25 inch of drop per linear foot (some codes require a minimum of 1/8 inch per foot) moving away from the foundation. If water runs toward the house or just sits there, you have a drainage problem on top of whatever else is going on.
Why Your Patio Broke in the First Place
Concrete is strong in compression but brittle under tension. Most patio damage comes down to a handful of causes, and identifying the right one matters because repairing the surface without fixing the underlying cause means you'll be back here in two or three years doing it again.
Settlement and Subgrade Failure
The most common cause. If the gravel or compacted base under the slab wasn't thick enough, wasn't compacted properly, or has eroded over time, the concrete loses support and cracks under its own weight or under foot traffic. You'll see diagonal cracks running from corners, or one section sitting noticeably lower than adjacent sections.
Freeze/Thaw Cycles
Water gets into tiny pores in the concrete, freezes, expands, and then thaws repeatedly through winter. Each cycle forces the concrete apart a little more. This produces classic spalling (surface flaking) and surface cracks. It's especially bad if the original mix had too high a water-to-cement ratio, which leaves more pores for water to enter.
Poor Drainage
Standing water saturates the base material, which leads to settlement. It also accelerates freeze/thaw damage. If your patio slopes toward the house instead of away from it (or if it's basically flat), drainage is almost certainly contributing to whatever cracking you're seeing.
Tree Roots
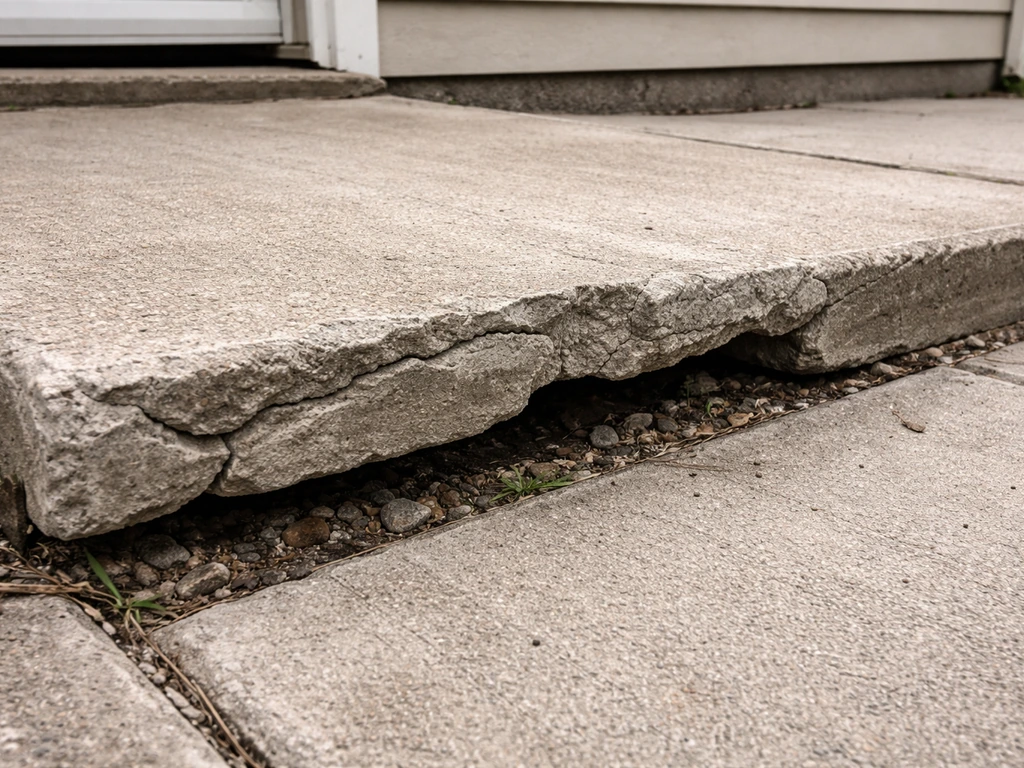
Roots growing under a slab can push sections upward, creating sharp edges and serious trip hazards. This is one of the few cases where patching the surface won't help at all. You have to deal with the root first.
Bad Original Pour
Some patios were poured without adequate thickness (standard residential patio slabs should be 4 inches thick), without reinforcement, without control joints to guide cracking, or with a weak mix. These slabs often start showing problems within five to ten years rather than lasting the 25 to 50 years a well-done slab should.
Safety First: When to Stop DIY
Before you decide on a repair method, do a quick safety walk. Step on every section of the patio. If anything shifts, rocks, or wobbles under your weight, that's a structural hazard. Loose concrete slabs can tip unexpectedly.
- Raised edges of 3/4 inch or more are a serious trip hazard. Tape them off or block access until repaired.
- Crumbling concrete has sharp, jagged edges. Wear heavy gloves and eye protection any time you're around it.
- Slabs near the house foundation: if you see cracks tracking up the foundation wall from where the patio meets it, stop and call a structural engineer. That's a different and much bigger problem.
- Large heaved sections (2 inches or more of lift): if the lifting is ongoing (the slab seems to move season to season), you need a pro to diagnose it before any repair.
- Rebar exposure: rusted, exposed rebar can cut you badly. It also means the slab's structural integrity is compromised.
As a general rule: if more than 30 to 40 percent of the patio surface is damaged, or if you find any signs of foundation involvement, bring in a concrete contractor for an evaluation before you spend money on materials.
Your Four Repair Options
Here's a plain comparison of the four main paths. Use it to narrow down which one fits your situation.
| Repair Method | Best For | DIY Friendly? | Typical Cost (Materials Only) | Lifespan Added |
|---|---|---|---|---|
| Crack/Spall Patching | Isolated cracks and surface damage under 30% of area | Yes | $20–$80 | 5–10 years if base is good |
| Mudjacking / Foam Leveling | Sunken slabs with solid base, no root/heave issues | No (equipment needed) | $200–$800+ (pro cost) | 10–15 years |
| Resurfacing / Overlay | Sound slab with cosmetic or minor surface damage, full-surface refresh | Yes (with prep work) | $80–$300 | 8–15 years |
| Full Replacement | Widespread cracking, root damage, failed base, 4+ inches of settlement | Partial DIY (demo) | $1,500–$5,000+ (pro cost) | 25–50 years |
Patching
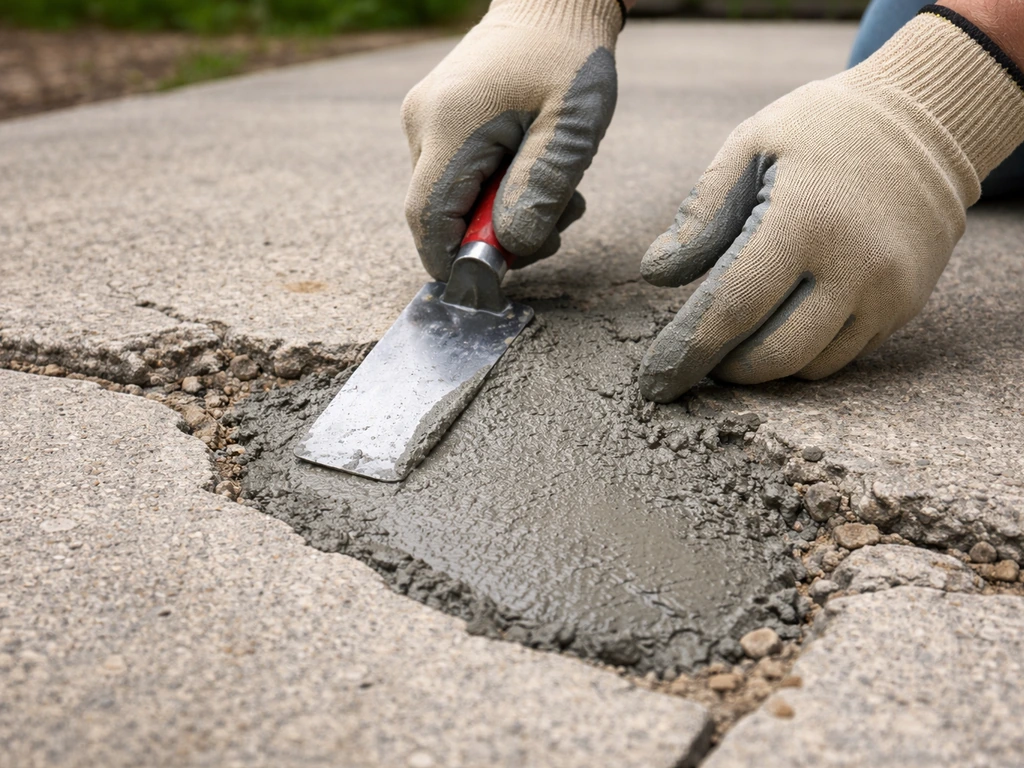
Best for isolated damage. You're filling cracks or replacing small sections of surface concrete. Use a polyurethane caulk or self-leveling sealant for cracks under 1/4 inch wide. For wider cracks or broken-out chunks, use a vinyl-modified concrete patch compound, not plain concrete mix (it won't bond well to old concrete on its own).
Mudjacking and Foam Leveling
If a section has sunk but is otherwise intact, a contractor can pump material underneath to lift it back into place. Mudjacking uses a cement slurry; polyurethane foam injection is a newer alternative that's lighter and faster. This isn't a DIY project because it requires specialized pumping equipment, but it's far cheaper than replacement.
Resurfacing or Overlay
A concrete resurfacer is applied over the existing slab to create a fresh, bonded surface layer. It works well when the slab is structurally sound but looks terrible (pitting, minor cracks, staining, scaling). The slab must be clean, solid, and free of any loose material. You cannot resurface over a slab with active movement or a failing base.
Full Replacement
When damage is extensive, the base has failed, or roots have destroyed structural integrity, replacement is the honest answer. If you’re trying to remove a brick patio instead of repairing a slab, the demo and disposal steps are different, so plan for that up front. It's the most expensive option upfront, but it's often cheaper over ten years than repeatedly patching a slab that's going to keep failing. If you're already thinking about replacing the patio with brick or pavers, this is the moment to make that switch. If you are dealing with a broken brick patio, evaluate the underlying base and drainage first so the new surface does not fail again <a data-article-id="2089F219-BD9F-4A29-BC45-2A67D5359198">replacing the patio with brick or pavers</a>. If you're already thinking about replacing the patio with brick or pavers, this is the moment to make that switch. If you want a brick patio that stays level, plan for proper base depth and drainage before installation brick or pavers. If you want a brick patio that stays level, plan for proper base depth and drainage before installation, and for the finishing touches see how to edge a brick patio. If your goal is to weed a brick patio, start by removing surface debris and pulling weeds by hand from between the bricks so they do not get a foothold. If you want a brick patio instead, make sure you address any settlement, base depth, and drainage issues first so the surface stays level brick or pavers.
Materials and Tools for Each Repair Path
For Crack Patching and Spot Repairs
- Concrete crack filler or self-leveling polyurethane sealant (for cracks up to 1/4 inch)
- Vinyl-modified or polymer-modified concrete patch mix (for wider cracks and spalled areas)
- Wire brush or angle grinder with diamond cup wheel (for cleaning crack edges)
- Cold chisel and hammer (to undercut crack edges for better bonding)
- Margin trowel and finishing trowel
- Bonding adhesive or primer (for patch mixes that require it)
- Concrete sealer for finishing
- Safety glasses, heavy gloves, dust mask
For Resurfacing
- Concrete resurfacer product (brands like Quikrete Concrete Resurfacer or similar)
- Pressure washer (minimum 3,000 PSI strongly recommended)
- Long-handled squeegee or gauge rake
- Mixing drill with paddle bit
- Plastic sheeting or burlap for curing
- Concrete bonding adhesive if slab surface is very smooth or has been sealed previously
- Broom for texture finish
- Safety glasses and gloves
For Full Replacement (Demo Phase)
- Electric or gas-powered concrete saw (rental)
- Electric demolition hammer or jackhammer (rental)
- Pry bar and sledgehammer
- Wheelbarrow and shovels
- Dumpster or disposal plan for concrete debris
- Plate compactor (rental) for base prep
- Crushed gravel (compactable base material, typically 4 inches minimum)
- Rebar (#3 or #4) or wire mesh if re-pouring
- Ready-mix concrete or bagged concrete (4,000 PSI mix recommended for patios)
- Forms (2x4 lumber)
- Float, trowel, and edger
- Plastic sheeting for curing
Step-by-Step Repair Workflow
Step 1: Demo and Removal
For spot repairs, use a cold chisel and hammer (or angle grinder) to remove all loose, crumbling, or delaminated material around the damaged area. You want solid concrete on all sides. Undercut the edges of the repair area slightly so the patch is keyed in mechanically, not just sitting on top of a flat surface. For full replacement, cut the slab into manageable sections with a concrete saw, then break them up with a demolition hammer. Concrete is heavy: a 4-inch slab weighs roughly 50 pounds per square foot. Plan your disposal before you start swinging.
Step 2: Assess and Fix the Base
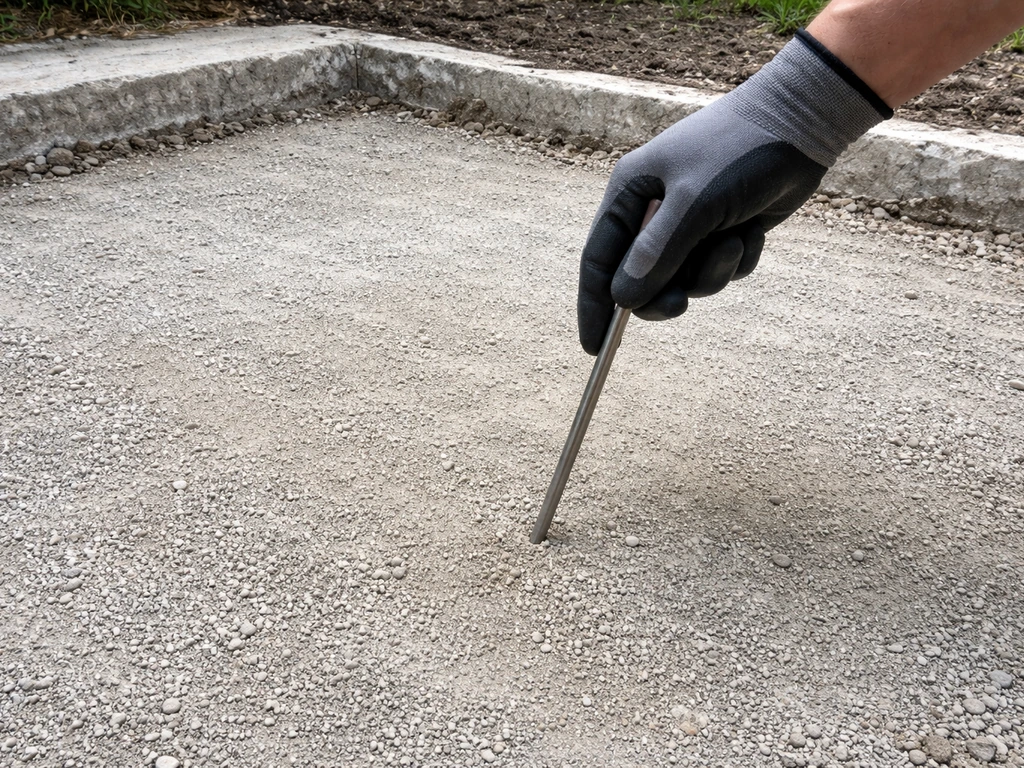
This is the step most DIYers skip, and it's why their repairs fail. After removal, probe the soil with a screwdriver or rod. It should be firm and resist penetration. Soft, spongy, or wet soil means the subgrade needs attention. Add compactable gravel (3/4-inch crushed stone) in 2-inch lifts and compact each lift with a plate compactor. Minimum base depth for a patio slab is 4 inches of compacted gravel. If you found a tree root causing heaving, cut and remove the root, treat the stump if needed, then backfill and compact before any concrete work.
Step 3: Establish Correct Drainage Slope
Before you pour or patch, confirm your slope. The slab surface should drop at least 0.25 inch per foot moving away from the house for the first 10 feet, and not less than 1/8 inch per foot across the full run. Use a long level (4-foot or 6-foot) and tape measure to check your forms or existing surface. Adjust the base gravel height to set the correct pitch before any concrete goes in.
Step 4: Patching or Pouring
For patches: wet the repair area lightly so it doesn't pull moisture out of your patch material too fast (but don't leave standing water). Apply bonding adhesive if required by your product. Mix patch material to a firm but workable consistency and press it firmly into the repair area, working out air pockets. Build it up in layers no more than 1/2 inch thick if you have deep areas. Feather the edges with a trowel. For resurfacing: wet the entire slab surface with a hose, squeegee off excess water, then pour and spread the resurfacer mix. Work in sections and maintain a wet edge to avoid lap marks. Broom-drag the surface before it fully sets to create slip-resistant texture. For full pours: set rebar or mesh, pour concrete, screed to level, then finish with a bull float followed by a trowel or broom. Cut control joints at roughly 8 to 10 feet apart (or every 30 times the slab thickness in inches) to control where future cracking occurs.
Step 5: Curing
Curing is non-negotiable. Concrete gains strength through a chemical hydration process, not just by drying out, and it needs moisture to do it correctly. Cover fresh concrete with plastic sheeting or damp burlap and keep it covered for at least 7 days. In hot or windy conditions, mist the surface twice a day to prevent rapid drying and surface cracking. Don't walk on patches for at least 24 hours, and keep heavy furniture or foot traffic off a full pour for at least 7 days. Full strength (28-day cure) takes about a month.
How to Stop It From Breaking Again
The best repair is one you never have to do twice. Here's what makes a cement patio last for decades instead of years.
Control Joints
Concrete expands and contracts with temperature, and it will crack somewhere. Control joints (the tooled or saw-cut lines in slabs) give it a place to crack in a controlled, invisible way. If your patio was poured without them, you can cut them retroactively with a concrete saw, or at minimum seal existing random cracks to stop them from spreading. Joints should be spaced no more than 8 to 10 feet apart in each direction.
Drainage
Make sure the slope away from the house is maintained. Don't let flowerbeds, mulch, or landscaping build up against the slab edge to the point where water is redirected back onto or under the patio. Install channel drains at low spots if needed.
Sealing
A penetrating concrete sealer (silane-siloxane type) applied every two to three years dramatically reduces freeze/thaw damage by blocking water absorption. Apply it when the slab is clean and dry, using a low-pressure sprayer or roller. Don't use a film-forming sealer (the shiny kind) on an exterior patio in a freeze/thaw climate: it can trap moisture and make spalling worse.
Annual Maintenance
- Inspect and refill control joint sealant every 2 to 3 years (it shrinks and cracks over time).
- Seal hairline cracks immediately, before water gets in and makes them worse.
- Keep the patio surface clean of organic material (leaves, soil) that holds moisture.
- Avoid using rock salt or ammonium-sulfate ice melt on concrete: use sand or calcium magnesium acetate instead.
- Trim back tree roots early before they reach the slab.
Cost, Timelines, and When to Call a Pro
Here's a realistic picture of what each repair path costs and how long it takes, whether you do it yourself or hire someone.
| Repair Type | DIY Material Cost | Pro Total Cost (Labor + Materials) | DIY Time | When to Hire a Pro |
|---|---|---|---|---|
| Crack patching | $20–$80 | $150–$400 | 2–4 hours | If damage is widespread or near foundation |
| Resurfacing/overlay | $80–$300 for a 200 sq ft patio | $500–$1,500 | Half day to full day | If surface prep or bonding is uncertain |
| Mudjacking/foam leveling | Not DIY-viable | $500–$1,500 | N/A | Always hire a pro |
| Full demo and replacement | $500–$1,500 (materials only, small patio) | $3,000–$8,000+ (200–400 sq ft) | Full weekend to 2 days | When base failure, root damage, or structural issues are present |
If you hire a contractor, expect them to evaluate the base condition first (not just quote on surface area), outline the cause of failure as part of their scope, and provide at least a one-year labor warranty on new concrete work. A good contractor will also talk drainage and slope with you. If they're only quoting you square footage without mentioning the base or cause, that's a red flag.
Get at least three quotes for anything involving full replacement. Concrete pricing varies a lot by region, season, and current material costs. Ask specifically what PSI mix they're using (4,000 PSI minimum for exterior slabs), whether they're including rebar or fiber reinforcement, and how they plan to handle drainage slope.
Your Decision Tree: What to Do Today
- Walk the patio and categorize your damage: cracks, spalling, sinking, heaving, or crumbling.
- Check for safety hazards: anything that rocks, raised edges over 3/4 inch, or exposed rebar. Block access if found.
- Run the water test: pour water on the slab and confirm it drains away from the house at the correct slope.
- Identify the cause: base failure, freeze/thaw, tree roots, poor drainage, or original bad pour.
- Estimate damage extent: if under 30% of the surface is affected and the slab is structurally sound, patching or resurfacing is your path. Over 30% or structural failure means replacement.
- Fix the cause first: address drainage, remove roots, and compact the base before any surface repair.
- Choose your repair method and gather materials (see checklists above).
- Execute the repair on a dry day with temperatures between 50°F and 85°F for best results.
- Cure properly: cover and keep moist for 7 days minimum.
- Seal the finished surface once fully cured, and mark your calendar for resealing in 2 to 3 years.
FAQ
How can I tell if my broken cement patio needs lifting or full replacement instead of a patch?
Check for movement after removing loose concrete: if sections rock, tip, or you can feel hollow spots under a straightedge, the base has likely lost support. Lifting and mudjacking only work when the slab is still mostly sound, there is a stable subbase to recompact, and the problem is isolated settlement rather than widespread heaving or root damage.
Is it okay to patch over spalling if the concrete looks solid on top?
Not reliably. Spalling often means delamination underneath (the bond has failed), so the repair area must be removed until you reach solid, well-bonded concrete on all sides. If you stop at “good-looking” surface, the new patch can flake off with the same freeze/thaw cycles.
What should I do if my water bucket test shows water running toward the house but the cracks are minor?
Treat drainage as the primary repair first. Even small surface cracking can keep worsening if water pools or migrates under the slab, because it saturates the base and accelerates freeze/thaw damage. Fixing slope and keeping mulch or beds from redirecting runoff away from the slab edge can prevent repeat cracking.
Can I seal existing cracks to stop them from growing, even if I have spalling?
Sealing helps primarily when cracks are stable (no ongoing movement, no undermined base) and the concrete is not actively flaking. If you can chisel out flaky material around the crack or the slab feels loose, sealing without removing delaminated areas usually fails quickly.
Why does resurfacing sometimes peel or look worse after a season?
Resurfacing can fail when the old slab is dusty, has loose scaling, has active movement, or has moisture issues from below. A practical test is to tape a plastic sheet to the surface overnight, if it darkens with condensation, you likely need moisture and base investigation before you bond a new layer.
What crack width and type can be repaired as a DIY spot repair?
DIY patching is most realistic for stable, non-moving cracks and isolated areas after you remove loose concrete to solid edges. As a rule of thumb, narrow cracks under about 1/4 inch are better suited to polyurethane caulk or compatible sealants, while wider cracks or missing chunks require a bonding patch product designed for concrete repairs.
Do I need rebar or mesh for a full slab replacement, and how do I decide?
Most exterior patio replacements benefit from reinforcement (rebar or welded wire mesh) to reduce break-up and limit crack widening, especially if the slab is over a compacted base that may still settle slightly. Ask your contractor how they’ll support the reinforcement off the base so it sits in the concrete, not on the ground.
What PSI should I ask for when I’m ordering patch or replacement concrete?
For an exterior patio, ask for an exterior-grade mix of at least 4,000 PSI for the concrete work. For patch materials, confirm they are intended for bonding to existing concrete and appropriate for freeze/thaw exposure, because “plain” mix or the wrong patch chemistry can bond poorly.
How do I prevent joint mistakes when cutting control joints retroactively?
Don’t just cut lines in random spots. Use spacing guidance consistent with slab thickness and keep joints aligned so they intercept expected crack paths. Also remove any loose edges before cutting, because weak perimeter concrete can spall right at the joint.
How long should I keep traffic off repaired areas and how strict should I be?
Treat timing as minimums, not targets. Patches should not be walked on for at least 24 hours, and full pours should have heavy foot traffic avoided for about 7 days, with full strength reached around 28 days. If temperatures are low or the surface is damp, extend the wait time.
What’s the most common DIY reason a broken cement patio patch fails?
Skipping base inspection and removing delaminated concrete too shallow. Many failures start because the repair only bonds to loose or weakened surface concrete, while the underlying cause (settlement, drainage, roots, or poor base compaction) remains active.
If tree roots are pushing the slab up, should I remove all roots I can see?
Yes, but do it methodically. Remove the root causing the lift and follow safe practices for cutting back and treating the stump if needed, then backfill with compactable gravel in lifts and compact properly before any concrete work. Leaving surrounding roots can lead to repeat heaving even after a cosmetic patch.
Next Article
How to Brick Patio: Step-by-Step DIY Guide
Step-by-step DIY guide to brick a patio: base prep, drainage, layout, pavers/bricks, leveling, cutting, and locking join
