To edge a brick patio, you excavate a trench around the perimeter, compact a gravel base (about 4 inches deep), set your bricks in 1 inch of bedding sand or on a concrete haunch, level them flush with or just above the patio surface, then lock everything in with compacted jointing sand. If you’re wondering how to brick patio surfaces too, the same basics of excavation, compacted base, and correct edging restraint apply. Done right, a brick edge acts as a physical restraint that stops the interior pavers from spreading, shifting, or gradually falling apart at the edges. Done wrong, you end up with the same rocking, gaps, and weeds you started with in about two seasons.
How to Edge a Brick Patio: Step-by-Step DIY Guide

Talia Lang
24 Jun 2026
Why patio edges fail in the first place
Before you start digging, it's worth understanding what actually causes a brick patio edge to look ragged or fall apart. The edge course (the row of bricks running around the perimeter) is the only thing keeping the entire field of paving from slowly spreading outward under foot traffic and frost pressure. When that edge fails, the whole patio starts to unravel.
The most common causes are a base that was too thin or never properly compacted, bedding sand that turned fluid during rain and migrated out from under the edge bricks, or edge bricks that were simply set in sand with nothing behind them to hold them in place. Drainage problems make all of this worse: if water is pooling along the edge or running under the patio, it erodes the base and washes out the sand.
If your current edge is shifting, rocking, or separating from the patio field, fixing the base is the actual job. Relaying bricks on top of a failed base just buys you another year of the same problem.
Choosing the right brick edging style and materials

You have a few legitimate options here, and the right one depends on the look you want and how much structural work the edge needs to do.
| Edging Style | Description | Best For | Structural Strength |
|---|---|---|---|
| Flat-laid edge course | Bricks laid flat in the same plane as the patio, perpendicular to the edge line | Matching existing patio field; low-profile look | Good when properly bedded and haunched |
| Soldier course | Bricks stood on end, narrow face outward, in a row along the perimeter | Taller visible border; strong lateral restraint | Excellent when set in concrete haunch |
| Sailor course | Bricks stood on end, wide face outward | Decorative wide-face border | Moderate; depends on haunching quality |
| Rowlock/shiner | Bricks on edge, wide face showing horizontally | Curved edges; decorative patios | Good; easier to cut for curves |
For most residential patios, a flat-laid edge course or a soldier course works best. The soldier course gives you the most physical restraint because the taller profile resists lateral movement better than a flat brick. For materials, use the same brick or paver as your patio field if you want a seamless look, or choose a contrasting tumbled brick for a defined border. Make sure whatever you choose is rated for exterior use and freeze-thaw cycles if you're in a cold climate. Avoid using soft, reclaimed interior bricks on the edge, since they'll spall and crumble within a few winters.
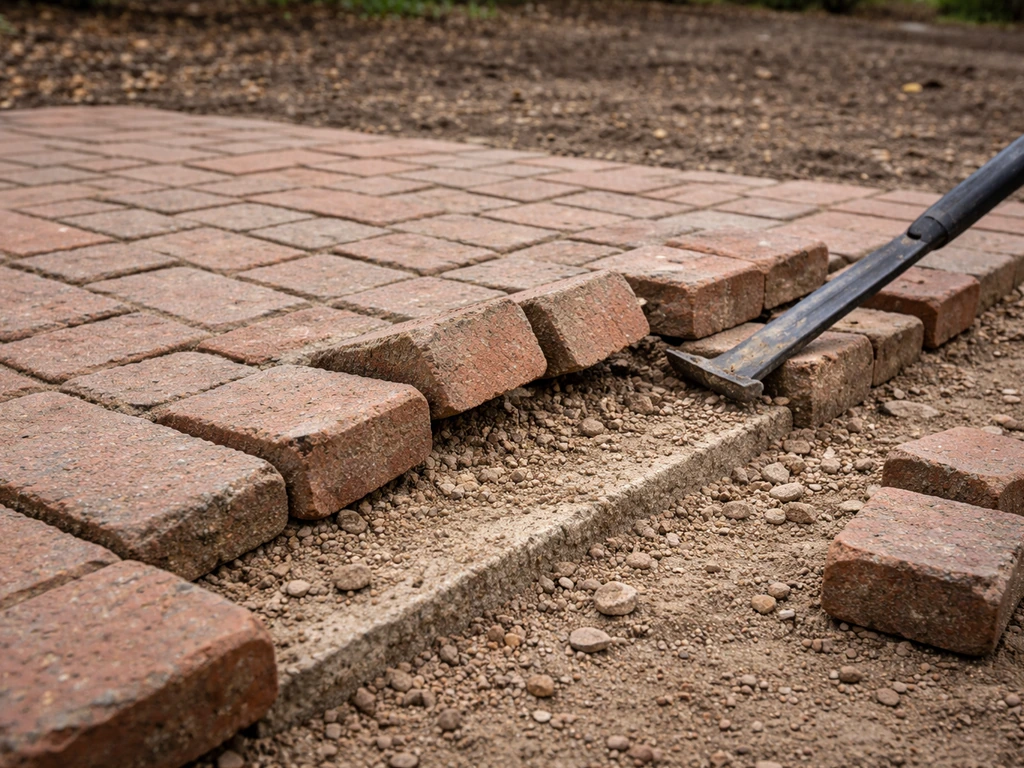
Assessing your existing patio edge and fixing common failure causes
Walk the perimeter of your patio and take an honest look before ordering materials. Press down on edge bricks with your foot. Do they rock? That means the base underneath has either washed out or was never compacted properly.
Pull up a loose edge brick and look at the underside: if the sand is wet, discolored, or the brick is clean on the bottom (meaning it wasn't even touching the sand firmly), your bedding layer has failed. Check the grade along the edge too. Water should be draining away from the patio, not pooling along the border.
If you see a low spot where water sits, you have a drainage issue that will destroy any new edging work unless you fix it first.
If you're dealing with significant settling, sunken sections, or drainage-related washout along the edge, it's worth looking at the broader patio leveling situation before you start. A badly failed base usually means pulling up more than just the edge bricks. If the interior field of pavers is sinking or heaving too, the whole base may need to be addressed, not just the perimeter. That's a bigger job, but it's the only permanent fix.
For edges that are cosmetically rough but structurally intact (bricks just shifted slightly, small gaps, a few weeds), you can often lift just the edge course, correct the base, and relay without a full excavation. If you also need to remove the brick patio itself, the safest approach is to break it up in sections, protect nearby landscaping, and dispose of the bricks and contaminated bedding properly remove a brick patio. Mark which bricks have moved, pull them out, scrape the old sand clean, and you're ready to work.
Tools and materials checklist for a DIY brick patio edge
- Mason's line (string line) and line pins or stakes
- Line level or laser level
- Tape measure and marking chalk
- Spade and flat-bladed edging spade
- Hand tamper or plate compactor (rent one for larger jobs)
- Rubber mallet
- Brick splitter (rental) or angle grinder with diamond blade for cuts
- Stiff-bristle push broom
- Garden hose with a shower-setting nozzle
- Level (4-foot and hand level)
- Screed rail or a straight piece of lumber for leveling sand
- Crushed stone or compacted gravel (4 inches depth for pedestrian patios)
- Coarse concrete sand or stone dust for bedding (1 to 1.5 inches depth)
- Bricks or pavers for the edge course (measure perimeter, add 10% for cuts and waste)
- Polymeric jointing sand
- Paver base fabric/geotextile (optional but recommended in soil-heavy or clay areas)
- Ready-mix concrete or bagged mortar mix (for haunching soldier courses)
- Paver sealer (optional)
On the base material: use crushed angular gravel, not rounded pea gravel. Angular stone locks together when compacted. Pea gravel stays loose and doesn't give you a stable base. For the bedding layer, use coarse concrete sand or granite stone dust. Avoid building sand (also called soft sand or masonry sand): it turns semi-liquid when saturated and will let your bricks move.
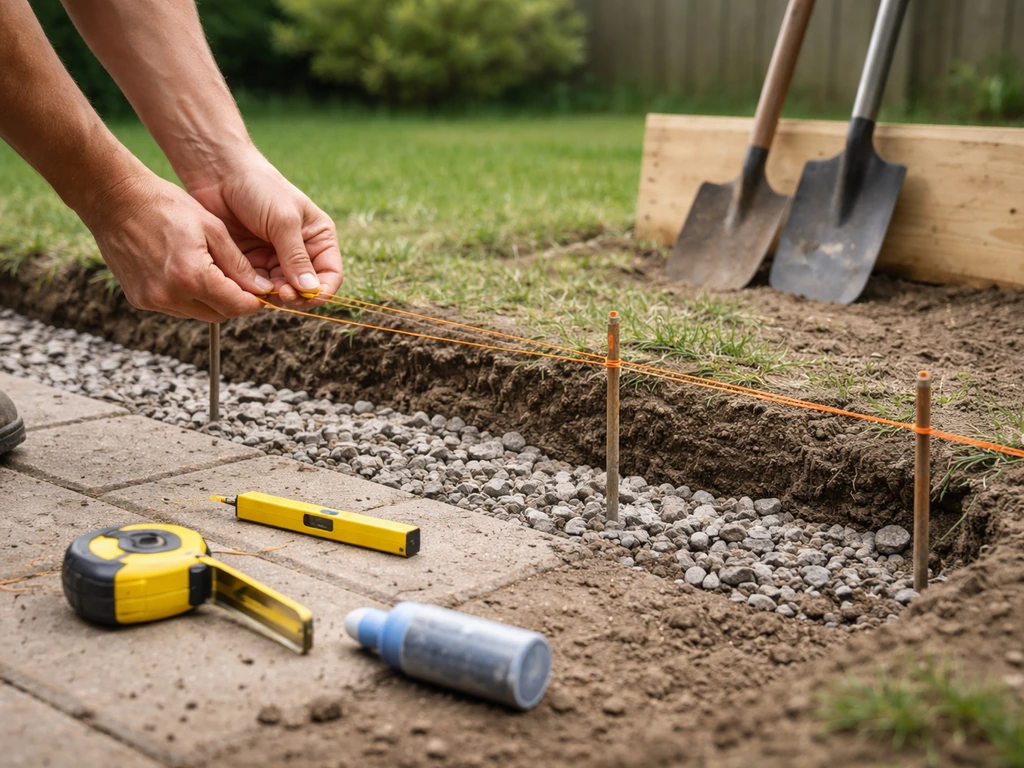
Layout and measuring: setting the line, height, and angles
Good edging starts with a precise layout. Set stakes at each corner of your patio and run a mason's line tightly between them along the planned edge. This line controls both the horizontal alignment and, once you set its height, the finished surface elevation of your edge bricks. The line should sit at the height you want the top of the edge bricks to finish, usually flush with the patio field or 1/4 to 1/2 inch above it to create a subtle raised border.
Check your slope as you go. A patio should pitch away from the house at roughly 1/8 inch per foot (about 1% grade) for drainage. If your edge line shows the patio is flat or pitching toward the house, this is the time to correct it in the base work, not after the bricks are down. Use a line level or laser level to confirm the slope along each run of the edge before you excavate.
For corners, decide now how you'll handle them: a mitered cut at 45 degrees looks the cleanest for square corners, while a running overlap (like a brick corner on a wall) is stronger. For curved edges, a rowlock or flat-laid course works better than a soldier course because you can gently rotate each brick to follow the curve without creating large gaps. Pavingexpert calls this approach 'taper cutting,' where you trim each unit slightly so successive bricks follow a curve cleanly. Mark your curve with a garden hose or spray paint on the ground before you excavate so you're cutting a smooth arc, not a jagged zigzag.
Excavation and building a stable base
Dig a trench along the patio perimeter. The depth depends on your edging style: for a flat-laid edge course, you need enough depth for 4 inches of compacted gravel base plus 1 to 1.5 inches of bedding sand plus the thickness of your brick (typically 2.25 to 2.5 inches for standard brick), so plan on digging down about 7.5 to 8 inches from your finished surface height. For a soldier course, add the extra height of the brick standing on end. Make the trench wide enough to set the edge bricks plus a few inches behind them for backfill.
Once you've excavated, compact the soil at the bottom of the trench with a hand tamper or plate compactor. If you're working in clay-heavy soil or an area with poor drainage, lay down a strip of geotextile fabric before adding gravel. Fold the edges up along the sides of the trench. This prevents fine soil particles from migrating up into your gravel base over time.
Add your crushed stone base in two lifts of 2 inches each, compacting firmly between layers. Skipping the two-lift approach and dumping all 4 inches in at once means the bottom layer never gets fully compacted. After compaction, the gravel surface should feel hard underfoot, with no give. Then spread your bedding sand or stone dust to a uniform depth of 1 to 1.5 inches. Screed it flat with a straight board using your mason's line as a height reference. Do not use the bedding sand to fill in low spots in the gravel: if the gravel base is uneven, fix the gravel. Extra sand in a depression just compresses and causes sinking later.
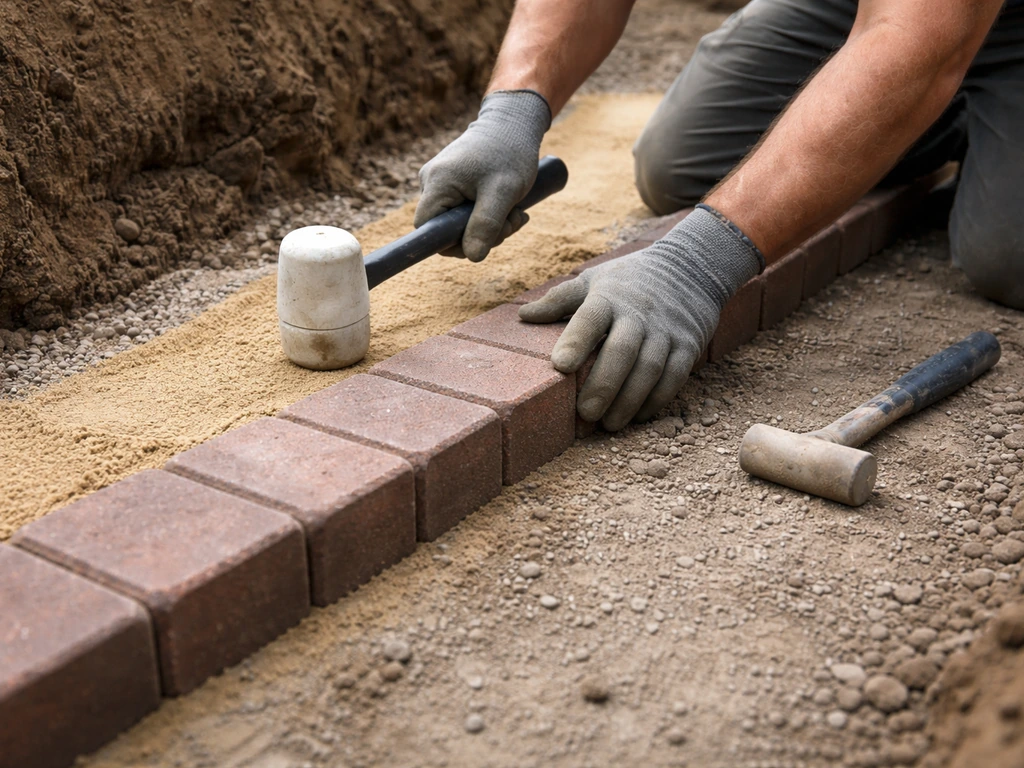
Installing the bricks: pattern, spacing, leveling, and cutting
Start at a corner and work outward in both directions. Set each brick firmly into the bedding sand with a slight downward press and a tap with a rubber mallet. Check every few bricks with your level and your mason's line. The top of each brick should sit at the line height, and adjacent bricks should be flush with each other, with no rocking. If a brick rocks, it means the bedding underneath isn't fully supporting it. If you need the full process, including excavation and brick installation details, follow this guide on how to level brick patio from start to finish beding underneath. Pull it out, adjust the sand, and re-set it.
Keep joint spacing consistent: a 1/8-inch joint is standard for a tight, clean look. You can use tile spacers or simply eyeball it if your bricks are consistent in size. For soldier courses, set each brick snugly against the next with minimal joint, since the goal is a tight restraint wall. If you're using a flat-laid course that matches the patio field, match the joint pattern of the existing paving.
Cutting bricks for corners and curves
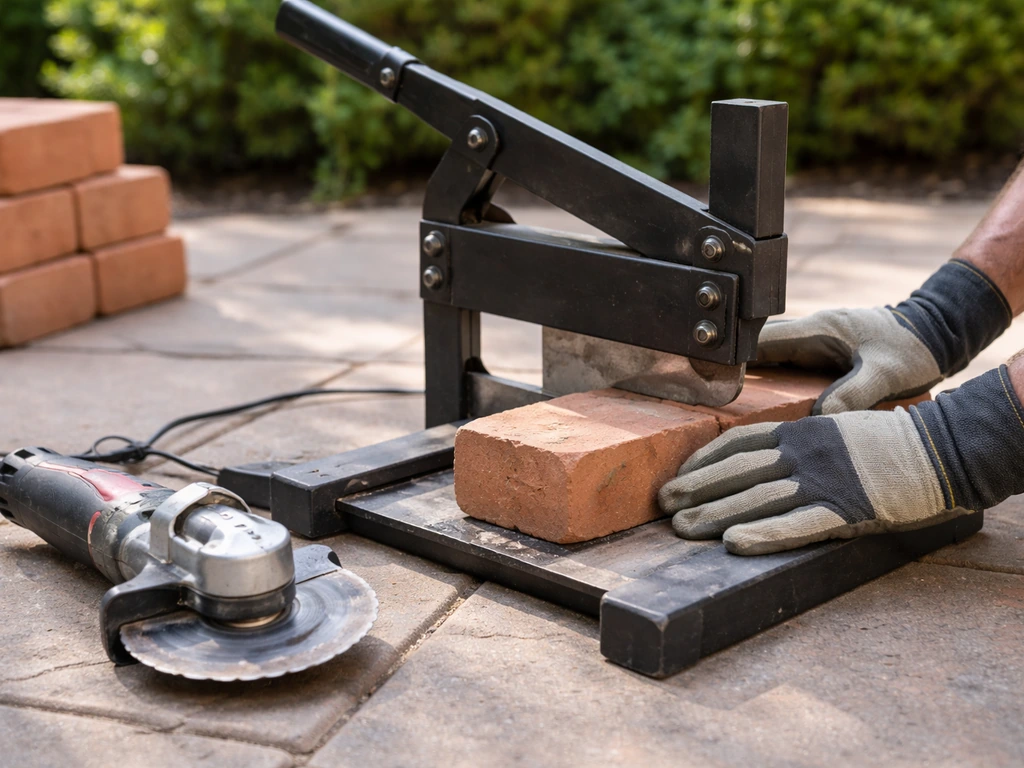
For square corners with a 45-degree miter, a brick splitter (manual guillotine-style) works for straight cuts. For angled cuts and curves, an angle grinder with a dry-cut diamond blade gives you more control. Always wear eye protection, a dust mask, and gloves. Score the cut line first with a light pass, then make the full cut. Wet-cutting with a table saw creates the cleanest edge if you have access to one, but for a DIY job, a grinder works fine. For curves, cut a gentle taper on alternating bricks to close up the joint on the inside of the curve while keeping the outside joint from gaping too wide.
Haunching a soldier course
If you're installing a soldier course for maximum restraint, haunching (packing concrete behind and beneath the bricks) makes a significant difference in long-term stability. Once the soldier bricks are set and leveled, mix a stiff batch of ready-mix concrete and pack it behind the bricks along the outside face of the course, from the base of the trench up to about 2 inches below the finished surface. Keep the concrete off the patio-facing side. Let the haunch harden for 24 to 48 hours before proceeding with the rest of the work. This is not optional if you're on a slope or if the edge is taking lateral pressure from soil behind it.
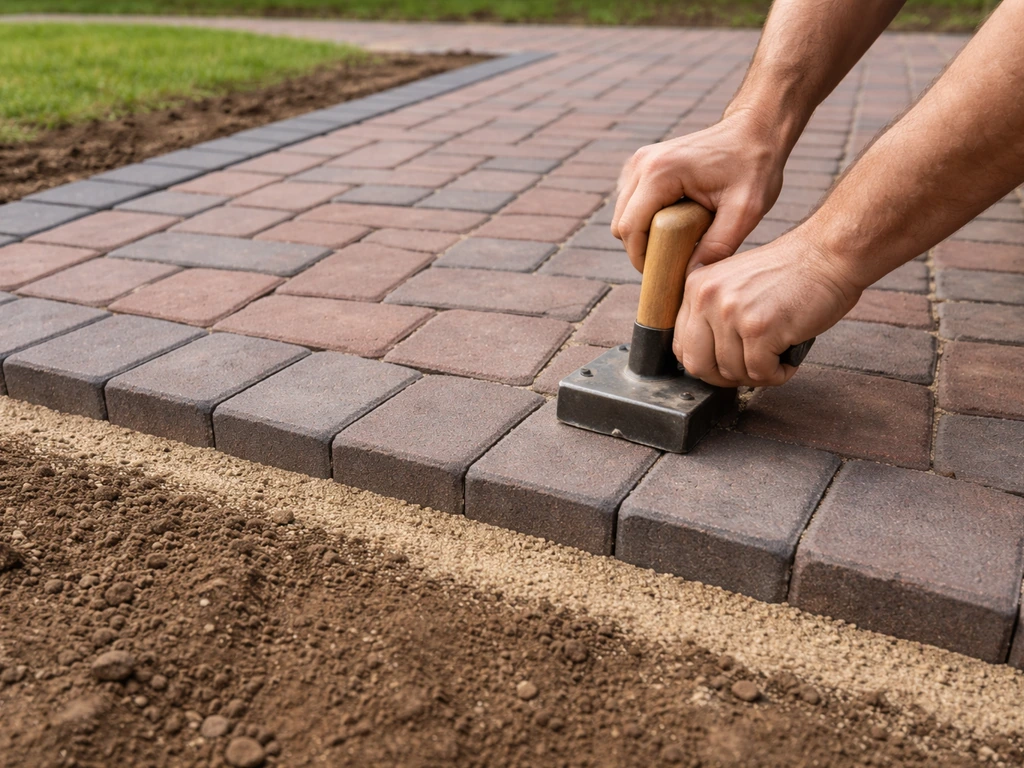
Finishing: compaction, joint sand, backfill, and sealing
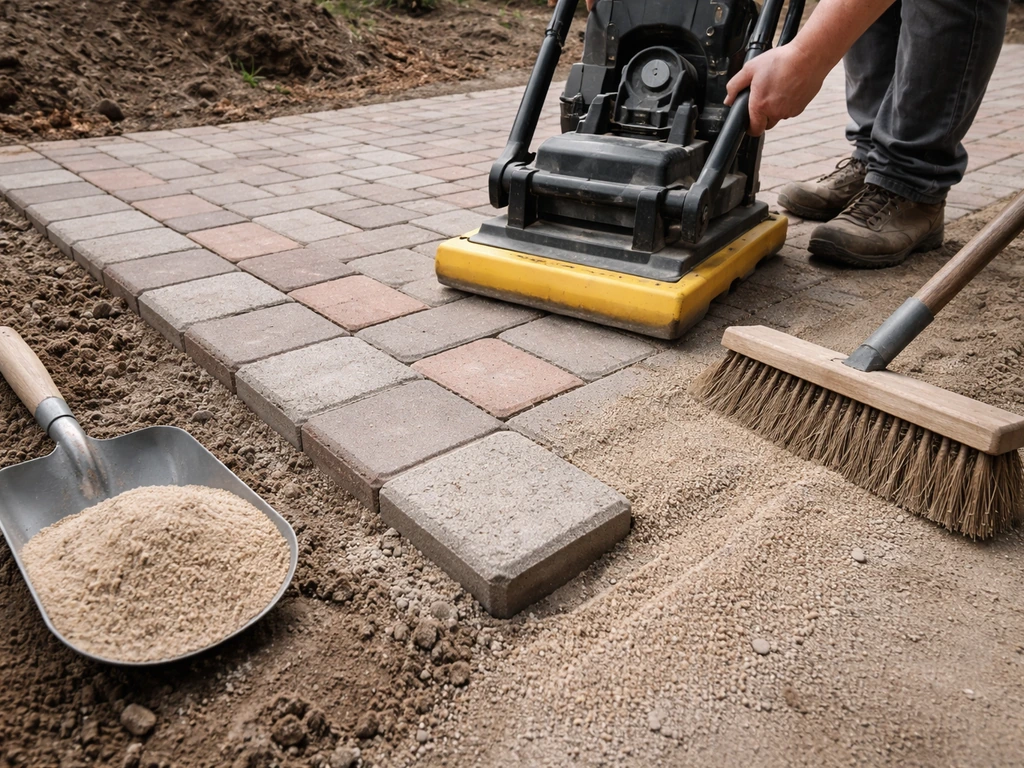
Once all the edge bricks are set and you're happy with the alignment, run a plate compactor over the course (with a rubber pad or carpet scrap under the plate to protect the brick surface). This final compaction seats the bricks firmly into the bedding sand and closes any small voids underneath. For a soldier course that was haunched in concrete, skip the plate compactor over those bricks until the concrete has fully cured.
Next, sweep polymeric jointing sand into the joints. Use a stiff push broom to work it into every gap, then compact again lightly and sweep again. Polymeric sand contains a binder that activates with water and hardens the joints, which dramatically reduces weed growth and sand washout compared to plain jointing sand. Make sure the brick surfaces are completely dry before you sweep the polymeric sand in: if you sweep it over damp bricks, the binder activates on the surface and leaves a hazy film that's very difficult to remove.
Once the joints are filled, mist the surface with a hose set to shower mode. Don't use a jet setting or heavy stream, which can displace the sand from the joints before it activates. Follow the manufacturer's wetting instructions: most recommend one thorough shower pass, then a second lighter pass 10 to 15 minutes later. Let it cure for at least 24 hours before foot traffic and longer before vehicle traffic if applicable.
Backfill the soil behind the edge course (or behind the haunch for soldier courses) with the excavated soil or with coarse gravel if drainage is an issue in that area. Tamp it down so there's no gap between the back of the edge bricks and the surrounding ground. A gap here is a pathway for water to undermine the edge from behind.
Sealing is optional but worth doing if the patio sees heavy use, staining from leaves or tannins, or if you're in a climate with hard freeze-thaw cycles. A penetrating paver sealer (not a film-forming glossy sealer) protects the brick surface without changing the look dramatically. Apply it after the polymeric sand has fully cured, typically 72 hours or more after activation. Reapply every 2 to 3 years depending on wear.
Troubleshooting and maintenance after the edging is installed
After the first rain, go back and inspect the edge carefully. This is when problems show up. Here's what to look for and what each symptom means:
| Problem | Likely Cause | Fix |
|---|---|---|
| Bricks rocking or shifting after first rain | Bedding sand washed out or base was too loose | Pull bricks, recompact base, relay on fresh sand |
| Sand washing out of joints | Used regular sand instead of polymeric, or didn't activate properly | Remove old sand, dry surface, apply polymeric sand correctly |
| Weeds growing through joints | Joints too wide or polymeric sand degraded | Apply fresh polymeric sand; ensure joints are fully packed |
| Edge bricks separating from patio field | No concrete haunch or backfill not compacted; lateral movement | Haunch the outside edge with concrete; compact backfill |
| Uneven height between edge and patio field | Bedding depth inconsistent during install | Lift affected bricks, adjust sand depth, relay and re-level |
| Water pooling along the edge | Grade is flat or pitching inward; drainage not addressed | Regrade the base; consider a channel drain if chronic |
| Haze or film on brick surface | Polymeric sand activated on damp or wet bricks | Use a polymeric sand haze remover; prevent recurrence by ensuring dry surface next time |
For ongoing maintenance, sweep fresh polymeric jointing sand into joints once a year or whenever you notice joints have eroded below the brick surface. Remove weeds as soon as they appear: they grow from seeds landing in the joint, not from below, so keeping joints fully packed is your best prevention. For detailed steps on the right technique, see how to weed a brick patio and keep them from coming back remove weeds. Inspect the edge every spring after the freeze-thaw season. A few rocking bricks caught early are a quick reset. Left for a year or two, that movement migrates inward and you end up needing to relay a much larger section.
When to call a professional
If after pulling up a section of edge you find the soil underneath is soft, waterlogged, or that the problem recurs within a season despite good base work, you likely have a subsurface drainage issue that DIY edging alone won't solve. Chronic water under the base eventually destroys any patio edge regardless of how well it was installed. A drainage contractor or landscape professional can diagnose whether you need a French drain, a re-graded subbase, or a different approach entirely. Similarly, if the entire patio field is sinking or heaving, not just the edge, the repair needed goes well beyond edging work.
Edging a brick patio is genuinely DIY-friendly if the base is sound and the drainage works. The job takes a weekend for most average-sized patios, and the materials for a typical perimeter run in the range of a few hundred dollars depending on brick choice and how much base material you need. Get the base right, use polymeric sand, and inspect after the first rain, and a properly installed brick edge will hold for a decade or more without significant intervention.
FAQ
Can I re-edge a failing brick patio without removing the whole patio?
Yes, but only if you can create a proper restraint behind it. For most repairs, you lift the edge course, remove loose bedding and any washed-out gravel, then rebuild the gravel base and set the bricks back at the correct line height. If you simply tuck new bricks into existing sand, water usually finds the same weak spot and the edge loosens again within a season.
What’s the problem with using pea gravel under the edge bricks?
Typically no. Rounded pea gravel compacts poorly and leaves voids, so the edge bricks can rock and migrate. Use crushed angular gravel for the compacted base, then add a consistent bedding layer thickness (about 1 to 1.5 inches) with coarse concrete sand or granite stone dust.
Why does polymeric joint sand wash out or disappear after the first heavy rain?
If joints erode quickly after rain, the usual causes are damp activation (polymeric sand binder activates on the surface), too much sand swept in before activation, or incorrect wetting method (heavy jet dislodges sand). Make sure the brick faces are fully dry before application, use shower mode, and follow the brand’s two-pass wetting timing.
My new brick edge looks fine, but water pools along it. What should I check?
It often means the patio edge is trapped against water. Double-check that the patio slope pitches away from the house (around 1% grade) and that the area behind the edge is backfilled and tamped with drainage-friendly material if needed. If you see standing water along the border after rain, fix grading or add a drainage solution before relaying the edge.
Is haunching really necessary for a soldier course edge?
For a soldier course, haunching matters because it counters lateral pressure and prevents the bricks from spreading. Don’t skip it if the patio sits on a slope or if soil behind the edge is pushing. Also keep concrete off the patio-facing side so you don’t interfere with brick leveling.
How do I make sure the edge is level, and not just straight?
Use the line to set the top elevation of the edge bricks, then verify slope before digging. After setting the base, reshim with bedding sand only on high-frequency “spot” corrections, but never use bedding sand to correct uneven gravel. If you see low spots in the base, scrape and re-compact gravel rather than trying to float with sand.
What causes that hard-to-remove haze when using polymeric sand, and how do I prevent it?
To avoid haze, keep polymeric sand off damp brick surfaces before activation, and stop sweeping once joints are full. If you accidentally activate on the surface, haze removal is difficult, so prioritize prevention: bricks dry, joints filled, then wet only after. Plan to mist gently and lightly between passes.
Can I salvage bricks when removing an existing brick patio edge?
Yes, but you should plan for controlled access and waste. Label or map moved bricks during teardown, protect landscaping with plastic and plywood, and dispose of contaminated sand and debris appropriately. Reuse is usually best for bricks in good condition, while bedding sand is almost always replaced.
Edge bricks are rocking after a few months. Is it always a drainage issue?
If edge bricks start rocking soon after installation, the cause is usually inadequate compaction at either the bottom of the trench or the gravel base in lifts. Another common mistake is using too much bedding sand thickness, which compresses and leaves voids. When in doubt, lift only the affected edge section, check the underside for firm contact, then rebuild base thickness and compaction.
Should I use the same joint spacing for a flat-laid edge and a soldier course?
Use a spacer strategy that matches the look you want. For tight joints, a consistent gap around 1/8 inch is typical, but for soldier-course edges intended as a restraint wall, you generally want minimal joints to reduce movement and let the course behave more like a continuous barrier.
How do I know whether I should fix only the edge or the entire patio base?
If the whole patio field sinks or heaves, edge work alone will fail because the base is not stable across the interior. Treat it like a system: inspect for soft or waterlogged subgrade, signs of frost heave, and recurring settling. At that point you may need full base stabilization or subsurface drainage rather than a perimeter-only repair.
What weather and timing should I consider for polymeric sand curing?
A good rule is to avoid placing polymeric sand and wetting it in conditions that keep the surface damp for a long time, like heavy overcast with lingering moisture. Also do not allow foot traffic until cure is complete (often at least 24 hours), and longer if temperatures are cool or the surface stays wet.
Next Article
How to Remove an Old Brick Patio Step-by-Step DIY Guide
Step-by-step guide to remove an old brick patio safely, handle mortar and base layers, and prep for new pavers.