You can repoint a patio without a dedicated pointing tool by using a grout bag, a caulk gun loaded with mortar repair cartridges, a trowel and an old stick, or even a gloved finger for small areas. None of these are the "right" tool in a professional's kit, but all of them work when you use the right mortar consistency and take your time. The key is removing the old mortar to the correct depth, getting the mix right, and choosing the application method that suits your joint width. Skip any of those steps and the new pointing will crack and fall out within a season.
How to Point a Patio Without a Pointing Tool: Step-by-Step DIY

Talia Lang
5 Aug 2026
What this guide covers and when DIY repointing without a pointing tool makes sense
This guide walks you through the full repointing process using household and trade-alternative tools only. It covers inspection, mortar removal, base checks, mixing, application, finishing, curing, and troubleshooting. It is aimed at patios with standard sand-set or mortar-bedded concrete, natural stone, or porcelain slabs where the joints have crumbled, cracked, or washed out but the slabs themselves are stable and flat.
DIY repointing without a pointing tool is a reasonable approach when: the joint loss is widespread but the slabs are not rocking or sinking; you want to save the cost of hiring a tradesperson for what is largely a time-intensive but not technically complex job; or you simply do not own a proper pointing iron or professional mortar bag. It is not the right approach if slabs are loose, if there is visible subsidence, or if water is draining toward the house. Those problems need fixing first, and this guide flags those situations as they come up.
Household and trade alternatives to a pointing tool
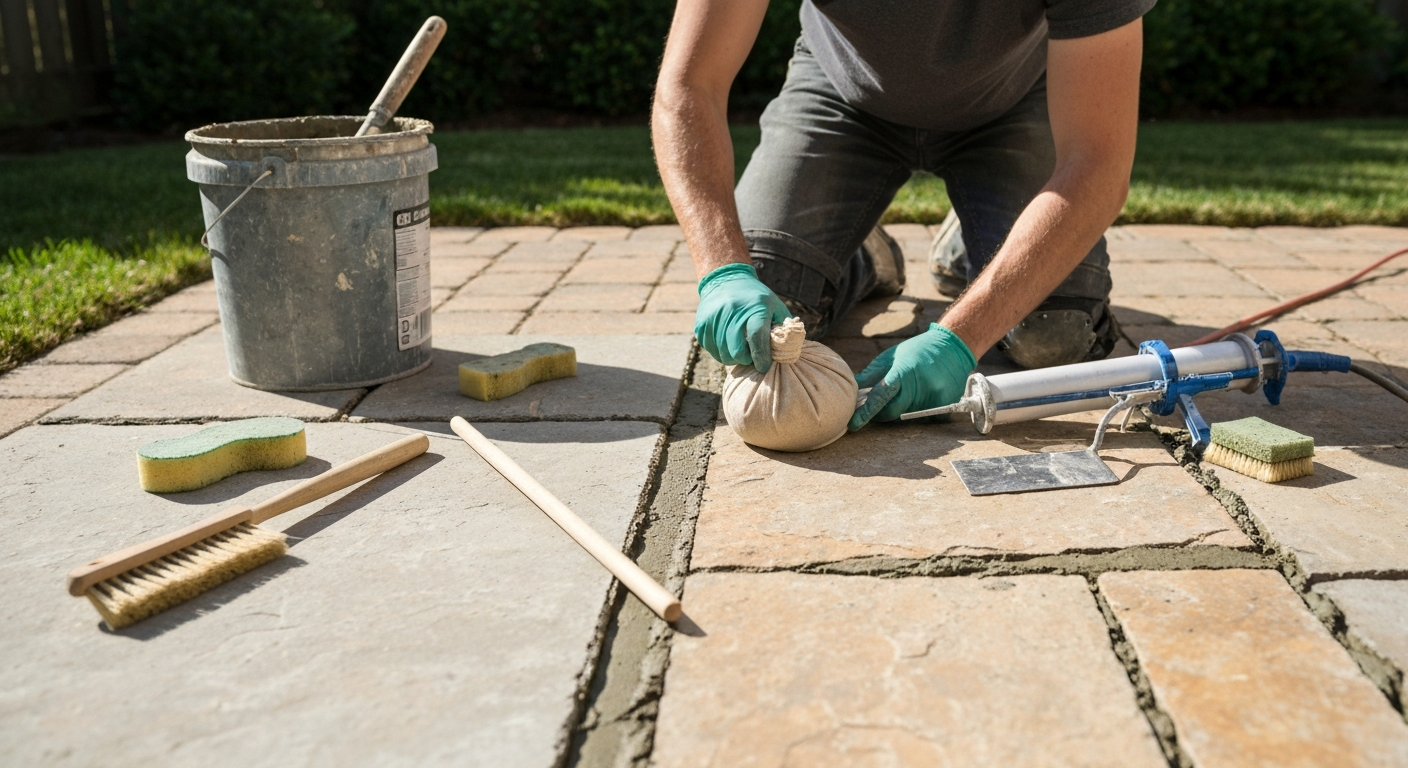
A proper pointing iron or plugging chisel speeds up finishing, but it is not essential. The tools below cover everything from filling to compacting to finishing joints, and most people already own at least two or three of them.
| Tool | Best for | Notes |
|---|---|---|
| Grout bag (mortar bag) | Narrow to medium joints (10–30 mm wide) | Cut nozzle to match joint width; mortar must be stiff (peanut-butter consistency) or it runs |
| Caulk gun + mortar repair cartridge | Small cosmetic repairs, joints up to ~10 mm | Pre-filled cartridges (e.g. Quikrete Mortar Repair) are convenient but not cost-effective over large areas |
| Pointing trowel + wooden stick or dowel | Any joint width; best for medium to wide joints | Use the trowel to load mortar in, the stick to press and compact it, then wipe or shape |
| Grout float | Wet slurry and brush-in polymeric systems | Works by pressing slurry into joints across the surface; not suitable for stiff cementitious mixes |
| Gloved finger or thumb | Narrow joints under 10 mm, touch-ups | Wear thick rubber or nitrile gloves; cement is caustic |
| Old kitchen knife or stiff brush handle | Shaping and smoothing a joint after packing | Round the handle slightly to create a neat recessed finish |
| Stiff brush + sponge | Cleaning excess mortar off slab faces during and after work | Natural bristle or nylon brush; wet sponge for wiping before mortar skins |
Of these, the grout bag is the most useful upgrade if you are doing more than a couple of square metres. They cost a few pounds or dollars at a builders' merchant and make the filling stage much faster and neater than loading by trowel alone. How to Use a Grout Bag for Mortar Joints, Week & And (grout‑bag how‑to) notes that grout bags work best with a thick, putty‑like mortar consistency and that you should cut the nozzle to suit the joint width How to Use a Grout Bag for Mortar Joints — Week & And (grout‑bag how‑to). For very large areas, a combination of grout bag to fill and a stick or dowel to compact and shape works well.
Materials you will need
Sand and cement
The most common and cost-effective mix for patio repointing is sharp (coarse) washed sand and ordinary Portland cement at a ratio of 3:1 or 4:1 sand to cement by volume for exterior work. A 3:1 mix gives a stronger, slightly stiffer result suitable for wider joints and high-traffic areas. A 4:1 mix is a little more forgiving and easier to work, and is fine for most residential patios. Use sharp sand rather than builder's sand for joints: it produces a harder-wearing result and is less prone to shrinkage cracking. The mixing section below goes into exact quantities and technique. See our guide on how to grout patio slabs with sand and cement for a step-by-step tutorial and exact measurements.
Dry ready-mix mortars
Bagged dry pointing mortars (sometimes labelled as patio jointing compound or brush-in dry mix) are the easiest option for smaller jobs. See our guide on how to repoint a patio dry mix for step-by-step instructions and activation tips. You simply sweep or brush them into the joints dry, then mist with water or allow rain to activate them. They are faster than mixing from scratch but cost more per square metre and are not always as durable in freeze-thaw conditions. If you are looking at this approach specifically, the method differs enough from wet-mix repointing that it is worth reading up on dry mix pointing separately.
Lime and plasticisers
Adding a small amount of hydrated lime to a sand-cement mix (a 1:1:6 cement:lime:sand ratio is a classic soft-stone mortar) improves workability and slightly reduces brittleness, which matters for natural stone patios where a rigid mortar can crack the slab edge rather than the joint. Liquid plasticisers (a capful per batch) can replace lime and achieve similar workability improvements. Do not use both together without checking the manufacturer's guidance, and do not add more plasticiser than specified: it can weaken the cured mortar.
Other consumables
- Cement pigment (oxide powder) if you want to colour-match existing mortar
- SBR bonding agent (styrene butadiene rubber) for improving adhesion in very deep or previously damp joints
- Curing compound or polythene sheeting for protecting fresh mortar
- Clean mixing bucket or mortar tub (at least 20-litre capacity)
- Spray bottle for dampening joints before filling
Safety, time and rough cost
PPE
Cement is strongly alkaline and will cause chemical burns on prolonged skin contact, which is exactly what happens when you are pressing mortar into joints by hand. Wear thick rubber or nitrile gloves throughout. Safety glasses protect your eyes when raking out old mortar, especially if you use a hammer and chisel or an angle grinder. If you are dry-cutting or grinding, a P3 dust mask is essential: fine silica dust from concrete and stone carries a serious long-term lung disease risk. Knee pads matter more than most people admit on a job like this.
How long it takes
Realistically, expect to spend 1.5 to 2.5 hours per square metre when doing a full repoint from scratch (raking out, cleaning, mixing, packing, and finishing). A slow, methodical first attempt on a 10 m² patio could easily be a full weekend's work across two days. Mortar removal is almost always slower than people expect, especially if the old pointing is hard. Do not plan to start and finish in one day on anything over 5 m².
Rough material costs
For a 10 m² patio with standard 10–15 mm joints, a bag of Portland cement (25 kg) and two or three bags of sharp sand (25 kg each) will cover the job with mix to spare, at a combined material cost typically under £20–£25 in the UK or around $25–$35 USD. A bag of dry polymeric jointing compound covers roughly 5–8 m² depending on joint width and depth and costs around £15–£25 per bag. The caulk-gun mortar repair cartridges are practical for spot repairs but work out expensive across large areas. The labour cost if you were hiring a professional tradesperson for 10 m² of repointing would typically run £150–£350 depending on location and existing mortar condition, which gives you a sense of the saving involved.
Inspect the patio before you do anything else
Walk every slab before you buy materials or pick up a tool. Press down on the corners and centre of each slab with your foot. A stable slab will not move at all. A slab that rocks, clicks, or drops slightly under pressure is not bedded properly, and repointing over it is a waste of time: the new mortar will crack within weeks as the slab continues to move. Make a note of every loose or wobbly unit before you start.
Look at the joint condition across the whole patio, not just the worst areas. Check for weeds rooted into joints (their roots extend further than the visible stem and will dislodge mortar again if not killed first), any dark staining or efflorescence (white powdery deposits on slab faces, which suggests water is moving through the bed beneath), and whether any areas of the patio are visibly lower than they were originally. Low spots point to a base problem, not just a pointing problem.
Check drainage too. Water should run away from the house across the patio surface, not pool or run toward any wall. Failed pointing accelerates water ingress into the bed layer, which can soften or wash away the sub-base over time. If drainage is clearly wrong, repointing alone will not fix the underlying problem and the new joints will not last.
Removing the old mortar
This is the step most DIYers underdo, and it is the most common reason repointing fails. Fresh mortar bonded on top of a shallow scrape of old material will not key in properly and will crack or pop out. The minimum clearance depth is 20–25 mm for standard cementitious mixes. Many polymeric and resin joint products specify 30 mm as their minimum depth for a reliable bond. As a working rule, aim for at least twice the width of the joint in depth.
- Kill any weeds with a contact weedkiller at least a week before you start, so roots are dead and easier to pull free.
- For soft or crumbling mortar: use a hooked patio knife, a weeding blade, or a stiff flat-head screwdriver to rake the material out. Work along the joint, not across it, to avoid chipping slab edges.
- For moderately hard mortar: use a bolster chisel and a club hammer. Hold the bolster at a low angle and work in short strokes. Keep checking depth with a small ruler or nail as you go.
- For very hard mortar (common in older well-built patios or where a cement-heavy mix was used): an angle grinder with a mortar-raking or diamond blade is the most effective approach, but it requires a steady hand. Run the blade along both edges of the joint first, then remove the central fillet with a chisel. Do not let the blade wander onto the slab face.
- Vacuum or brush all loose debris out of the joint once you have reached depth. Blow out dust with a brush or low-pressure air. Any loose grit left behind will prevent a good bond.
- Dampen the joint with a spray bottle immediately before filling. The joint should be visibly damp but not sitting in standing water. This reduces suction from the masonry and helps the mortar bond.
Take care with powered tools near the slab edges. Even a small chip out of a porcelain or natural stone slab edge is visible and impossible to repair neatly. If the mortar is genuinely hard and the joint is narrow, go slowly with a chisel rather than risk damaging the slab with a grinder.
Checking and preparing the base
If your inspection found rocking slabs or low spots, those need to be fixed before you point. Lifting a slab to rebed it is more work than repointing, but it is the only repair that will last. Packing mortar around a moving slab just delays the same failure.
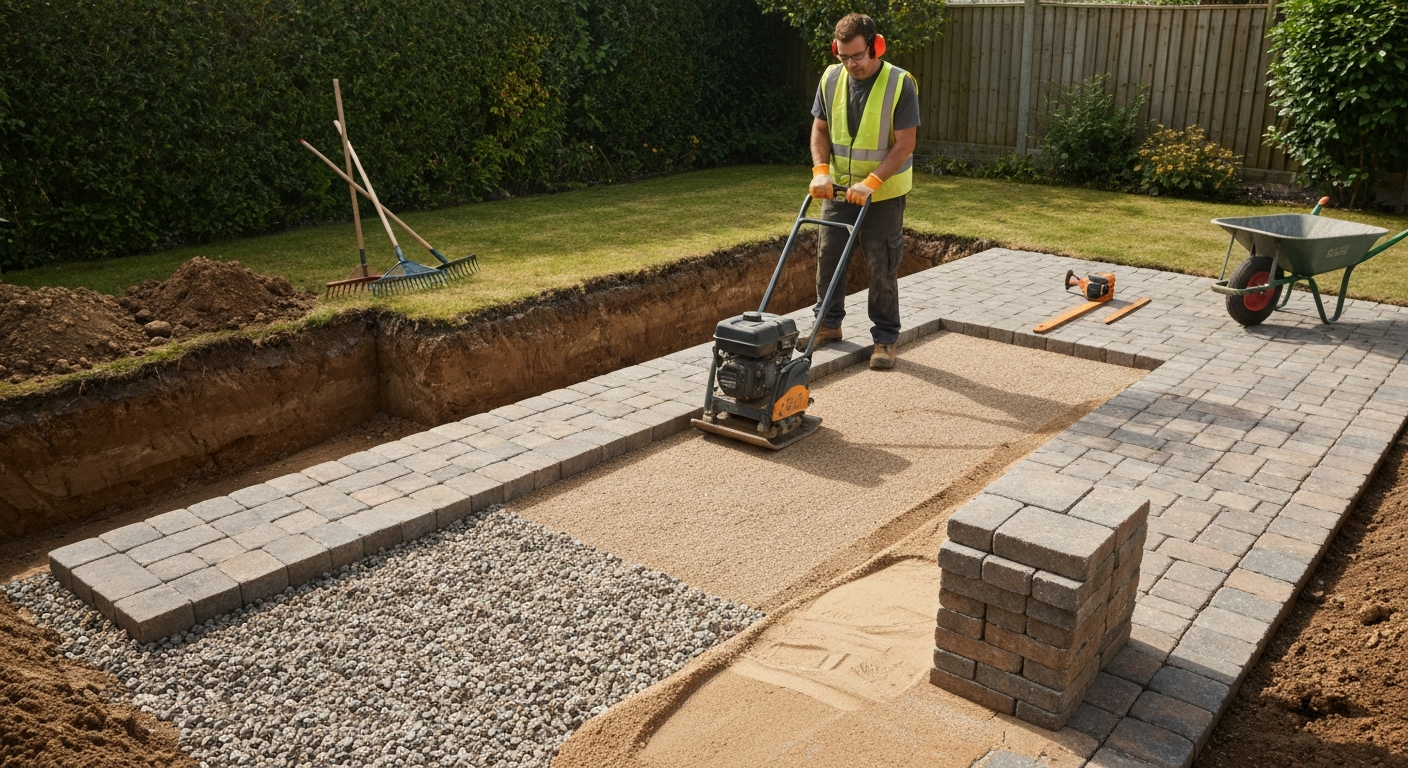
If the base layer beneath a slab feels soft when you press on the slab (you can sometimes feel a slight give or hear a dull sound rather than a solid knock), the sub-base compaction has failed. This can happen from poor original construction, from water undermining the base over time, or from heavy loads. A failed or soft sub-base needs to be compacted or replaced before any surface work makes sense. How to compact a patio base correctly is a separate topic in its own right, and getting that step right is what determines whether any surface repair actually holds long-term.
For stable slabs with no movement, you just need to make sure any rebedding adhesive or mortar from the original installation is not bridging across where the new joint mortar needs to go. Scrape the bed back cleanly to the slab edge at the bottom of each joint so there is no ledge of old material the new pointing will just sit on top of.
Mixing: ratios, water, and batch sizes
The right mix for outdoor patio pointing
For most concrete, porcelain, or hard stone patio slabs, a 3:1 or 4:1 sand-to-cement ratio by volume is the practical range. A 3:1 mix is stronger and better for wider joints (over 15 mm) or high-traffic areas. A 4:1 mix is slightly more workable and tolerates minor imprecision in mixing better. Use sharp washed sand, not soft builder's sand, for pointing work. If you are working with sandstone, slate, or other softer natural stones, consider a 1:1:6 cement:lime:sand mix instead, which is less rigid and less likely to cause stress cracking at the slab edges.
| Application | Cement | Lime | Sharp Sand | Notes |
|---|---|---|---|---|
| Standard patio (concrete, porcelain, hard stone) | 1 part | — | 3 parts | Stronger mix for wide joints or heavy use |
| Standard patio (general residential) | 1 part | — | 4 parts | Good balance of workability and durability |
| Softer natural stone (sandstone, slate) | 1 part | 1 part | 6 parts | Softer mix reduces risk of edge cracking |
| Type N equivalent (general above-grade) | 1 part | 1 part | 6 parts | Good frost resistance and workability |
| Type S equivalent (higher strength) | 1 part | 0.5 part | 4.5 parts | Use where structural strength matters more |
Pre-hydration technique for reduced shrinkage
One tip that makes a real difference to how well the finished joint holds up: mix the dry ingredients with just enough water to make a damp, crumbly, barely-cohesive consistency, then leave it to rest for 30 to 45 minutes covered with a damp cloth or bag. After resting, add small amounts of water and remix to a workable stiff putty. This pre-hydration step allows the cement to begin absorbing water evenly before it starts setting, which reduces shrinkage cracking in the cured joint. It sounds like an extra step that slows you down, but it genuinely improves the result.
Consistency to aim for
Pointing mortar should be stiffer than you might expect: a thick peanut-butter or stiff putty consistency. It should hold its shape when squeezed into a ball and not slump. If you are using a grout bag, it needs to be stiff enough not to pour but soft enough to be squeezed through the nozzle without splitting the bag. If your mix is too wet it will slump out of the joint, stain the slab faces heavily, and shrink badly as it dries. Too dry and it will not compact properly and will be crumbly when cured. If in doubt, err on the stiffer side: you can always add a small splash of water, but you cannot take it back.
Batch sizes and pot life
Mix only what you can use in about 45 minutes. In warm weather or direct sun, mortar can start to stiffen and become unworkable sooner than that. A workable batch for one person repointing by hand is roughly 4–5 litres of mixed mortar at a time, which is about one part cement to three parts sand using a small builders' bucket as your measure. Use a low-speed (300–600 rpm), high-torque drill with a mixing paddle for small batches in a bucket. If you need to mix larger quantities, a small mortar mixer is worth hiring for a day. Do not try to remix mortar that has already stiffened by adding more water: this weakens the final strength and should be discarded.
FAQ
What household or trade tools can I use to point a patio if I don’t have a specialist pointing tool?
Use alternatives matched to joint width and mortar consistency: grout/mortar (grout) bag or disposable pastry bag (narrow to moderate joints); cartridge/caulk gun mortar tubes (very small cosmetic joints); hawk + tuck/pointing trowel and jointer (larger joints or heavy packing); grout float (for brush‑in or wet slurry fills); small pointing trowel + stick or wooden dowel for finishing; gloved‑hand packing for coarse/irregular joints; bolster/chisel, cold chisel, or patio knife/weed knife for removing soft mortar; angle grinder with mortar‑raking blade for very hard mortar (use with care). Also use a bucket, mixing paddle on a low‑speed drill, brushes, garden hose/spray bottle for pre‑dampening, and safety PPE (glasses, dust mask, gloves).
What materials do I need for repointing without specialist tools?
Basic materials: sand & cement (cement:sharp sand mix) or a preblended dry mortar/dry repointing mix (as specified on the pack), clean potable water, and optionally a polymer additive or bonding agent if suggested by the mortar manufacturer. Use joint backing (compressible filler or foam rod) only where required for very deep joints. Buy a bit extra (10–15%) to allow for waste. For polymeric/resin systems follow the manufacturer’s pack instructions and minimum joint depth requirements.
How deep should I remove the old mortar before repointing?
Clear joints to at least 2–2.5× the joint width, commonly a minimum of about 20–25 mm for patio repointing. Many polymeric/resin mortars require a 30 mm minimum. Removing to this depth ensures good bond and reduces premature failure.
What’s the safe, step‑by‑step prep process before packing new mortar?
1) Inspect slabs: if units rock or move, stop — rebedding/relay is required before pointing. 2) Remove old mortar to the required depth using appropriate tools (knife/chisel for soft mortar; bolster/hammer for moderate; angle grinder only for very hard mortar). 3) Clean joints thoroughly of dust and debris with a stiff brush and vacuum or compressed air. 4) Pre‑dampen joints (brush with water or mist) until they are damp but not pooling to reduce suction. 5) Protect adjacent paving faces with tape or masking and cover nearby planting/grass.
What mixing ratios and mixing tips should I use for sand & cement pointing?
Common DIY ratio: cement : sand = 1:3 or 1:4 by volume for exterior pointing (1:3 gives stronger mortar). Use ordinary Portland cement and sharp sand. Mixing tips: dry‑mix ingredients first, then add only enough water to reach a stiff, putty‑like consistency for grout bag/tube work or a workable but not soupy mix for trowel work. Pre‑hydrate by letting the mix stand ~30–45 minutes (slake), then add a little water and remix — this reduces shrinkage. Mix only what you can use in ~30–45 minutes. Use a low‑speed drill with paddle for small batches or a mortar mixer for larger volumes.
How do I use a preblended dry mortar mix instead of sand & cement?
Follow the manufacturer’s water ratio and mixing instructions exactly. Use measured water and a low‑speed mixing paddle; mix to the recommended consistency (often firmer for grout bags, more fluid for brush‑in products). Observe pot life and working time on the pack. Some polymeric blends require dry application or specific sweep‑in techniques—read the label for minimum joint depth and curing guidance.
Next Article
How to Compact Patio Base: Step-by-Step Guide for DIY
How to compact patio base: step-by-step DIY guide for pavers & slabs, tools, layer specs, compactor tips, tests & fixes.