To recement a patio properly, you need to do three things in the right order: find out why it failed in the first place, fix whatever caused that failure (usually the sub-base or drainage), and then use the right bonding agent and repair mix for the specific damage type. Skip any of those steps and you'll be back out there doing it again in a year or two. This guide walks you through the whole process from diagnosis to curing, so you can actually fix it for good.
How to Recement a Patio: Fix Sinking, Cracks, and Failures

Talia Lang
29 May 2026
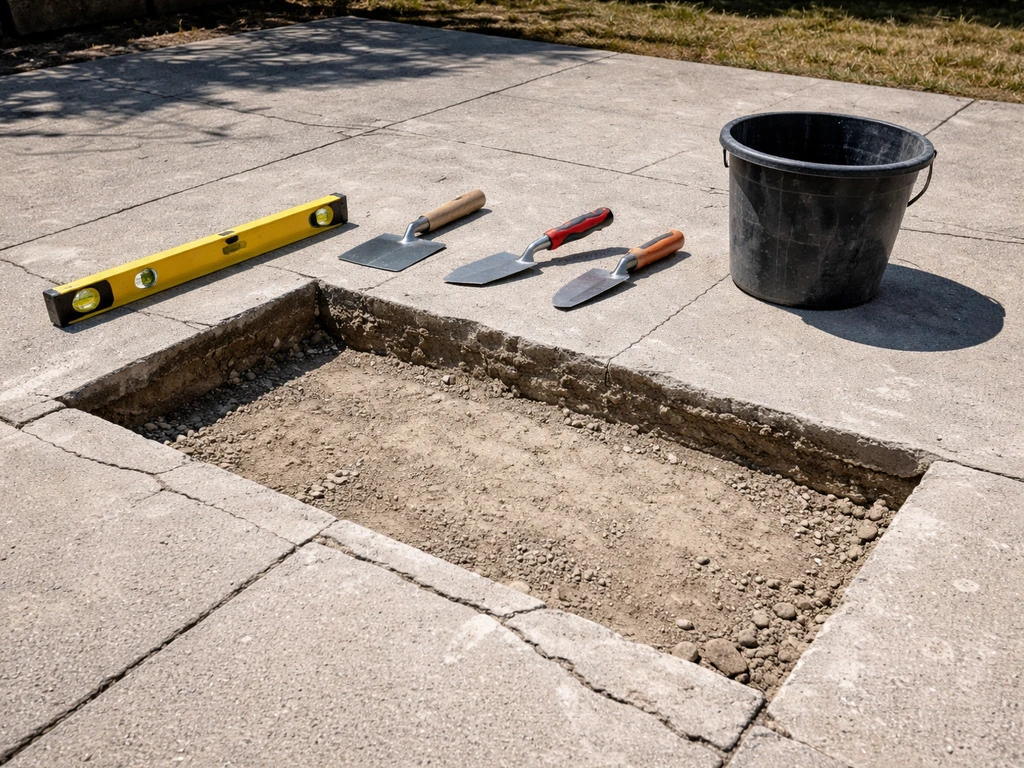
Figure out why your patio needs re-cementing
Before you buy a bag of anything, spend 20 minutes understanding what actually failed. Most people skip this part, patch the surface, and then wonder why the same spot cracks again six months later. The patch didn't fail because you mixed it wrong. It failed because the root cause was never addressed.
The most common culprits are a compromised sub-base (the compacted gravel or soil layer under the slab), poor drainage that lets water pool under or around the slab, freeze-thaw cycles that lift and crack concrete repeatedly, and patches or bonding layers that were applied incorrectly the first time. In cold climates especially, water that gets into the soil below the slab can freeze into an ice lens and physically push the concrete up. Good drainage can reduce how much water feeds that process, but as the American Concrete Pavement Association notes, you can't eliminate it entirely. That's why fixing the grade and drainage before you recement matters more than the product you choose.
Diagnose the damage type before you start
Not all patio damage is the same, and the repair approach changes depending on what you're actually dealing with. Here's how to read what your patio is telling you.
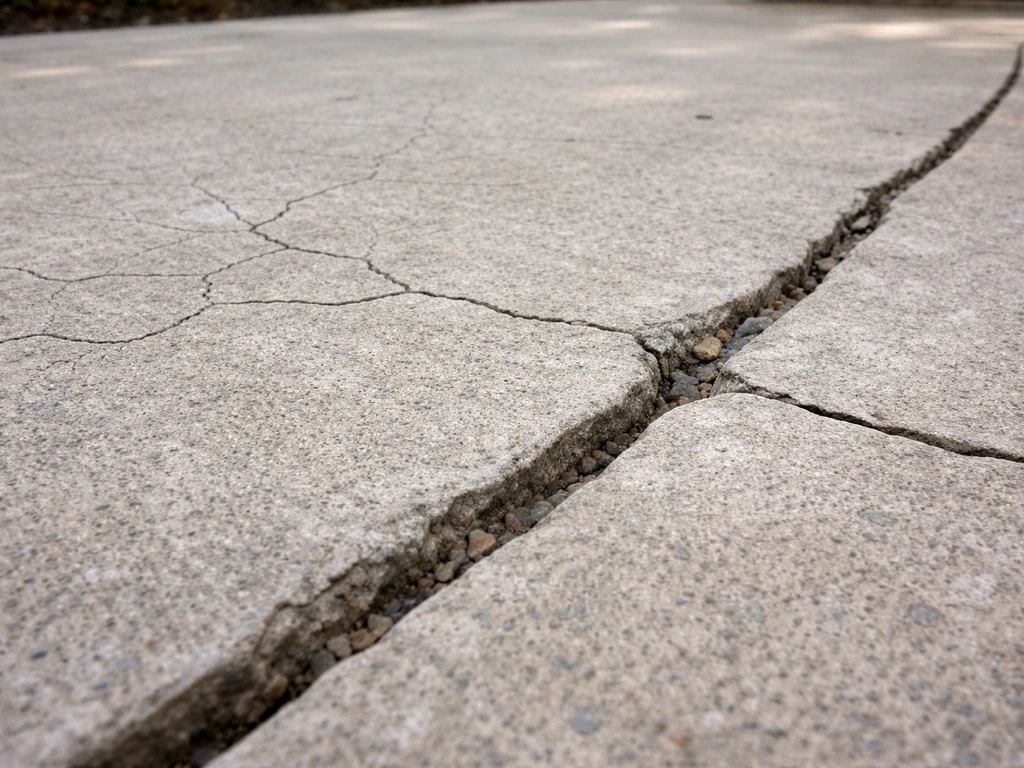
Cracks
Hairline cracks that run across the surface are usually from normal shrinkage during curing or thermal expansion. Wider cracks, especially ones that run all the way through the slab or appear at control joints, suggest movement in the base below. If a crack has one side sitting higher than the other (called a step crack), that's almost always a sub-base problem, one section has settled or heaved.
Sunken or raised areas
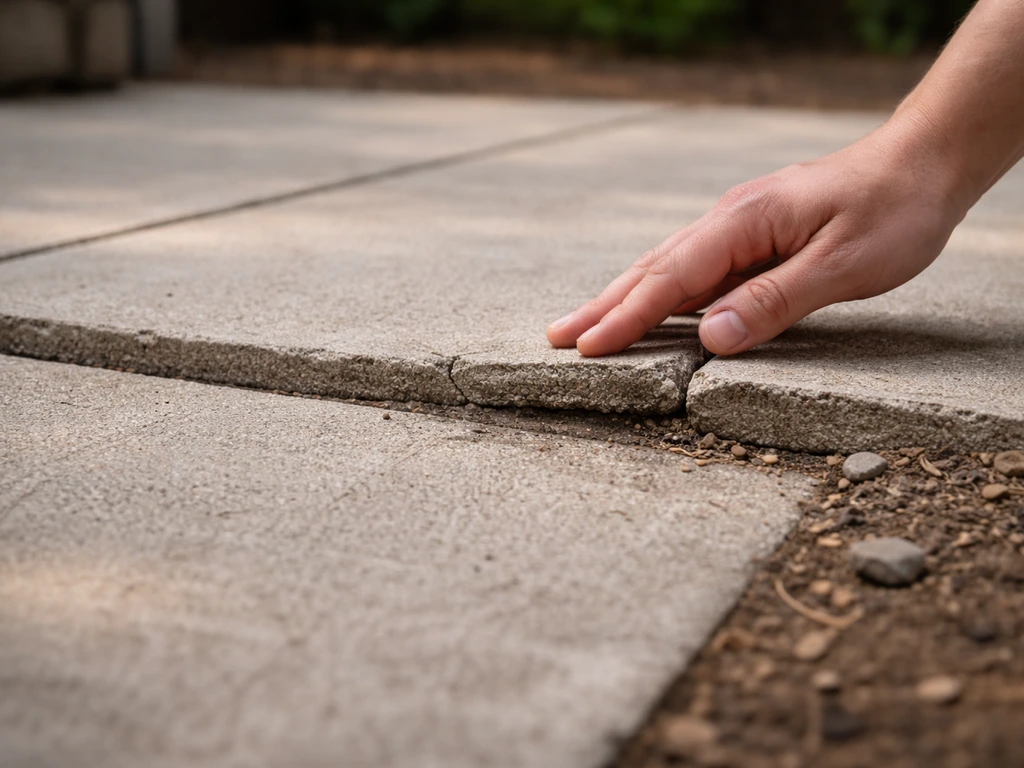
If part of your patio has dropped lower than the rest, or risen up unevenly, the issue is below the slab. Soil erosion, poor compaction during original installation, or frost heave are the usual causes. You can't fix this with surface patching. The sub-base needs to be addressed first, or any cement you apply will just crack and sink again.
Hollow or delaminated areas
Walk the patio and tap the surface firmly with a hammer or metal rod. Solid concrete sounds dense. blank" rel="noopener noreferrer">A hollow, drum-like sound means the top layer has separated from what's below it. This is delamination, and it usually results from water or air getting trapped during the original pour, or from a patch that lost its bond. Any area that sounds hollow needs to come out completely before you recement. There's no way to re-bond it from the surface.
Failed or peeling patches
If you or a previous owner already patched this patio and it's failing again, the bonding agent either dried out before the repair mix was applied, was never used at all, or the patch was applied too thin (feathered edges almost always fail). The patch material may also have expanded and contracted at a different rate than the original slab, which causes cracking along the patch boundary.
Drainage and water problems
Look for water pooling on or near the patio after rain. Check whether the patio slopes toward the house rather than away from it. Persistent moisture under or around the slab causes erosion, freeze-thaw damage, and failed bond layers. If you're recementing an area that stays damp, fix the grade and drainage first, otherwise you're waterproofing a leaking boat from the inside.
Tools and materials: patching vs. re-laying
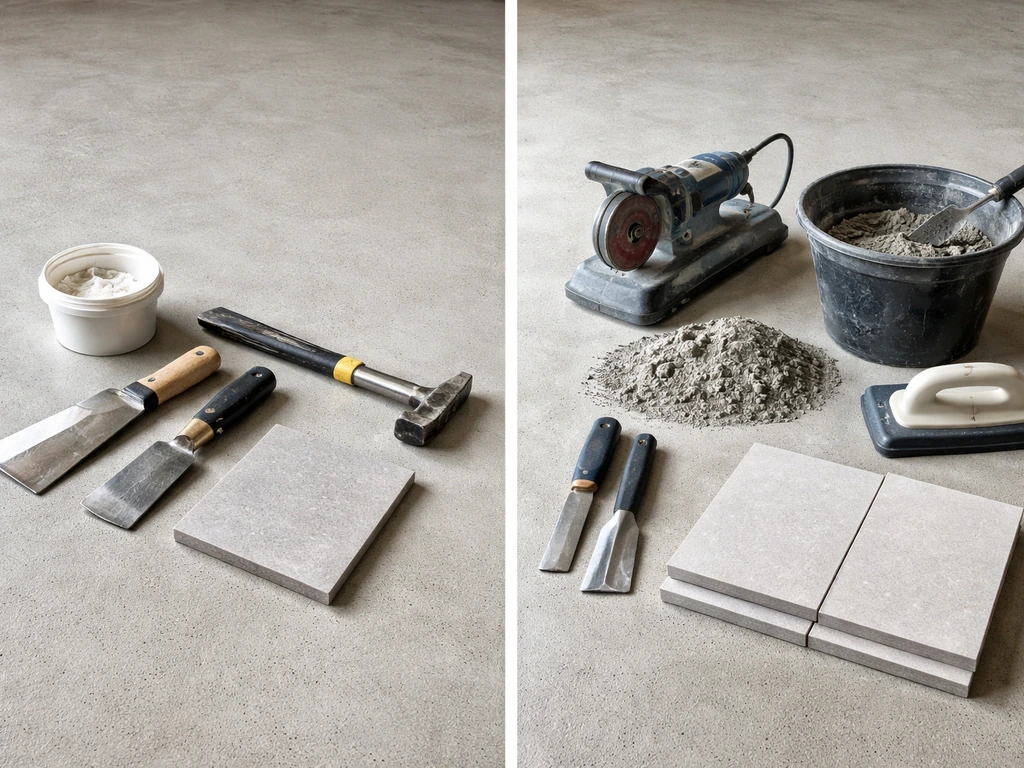
What you need depends on whether you're doing a spot patch or relaying a larger section. Here's a breakdown of the essentials for both.
| Item | Spot Patch | Re-laying a Section |
|---|---|---|
| Angle grinder or circular saw with diamond blade | Yes (for cutting edges) | Yes |
| Cold chisel and hammer (or electric chipping hammer) | Yes | Yes |
| Stiff wire brush or angle grinder cleaning disc | Yes | Yes |
| Wet/dry vacuum or compressor | Yes | Yes |
| Bonding agent (polymer or epoxy-cementitious) | Yes (essential) | Yes (essential) |
| Polymer-modified repair mortar (e.g., QUIKRETE Thin Patch, MEADOW-PATCH T2) | Yes | For thin sections |
| Full concrete mix or bagged concrete | Rarely needed | Yes |
| Compactable gravel or crushed stone (for sub-base repair) | Sometimes | Yes |
| Plate compactor or hand tamper | Sometimes | Yes |
| Screed board and float | Optional | Yes |
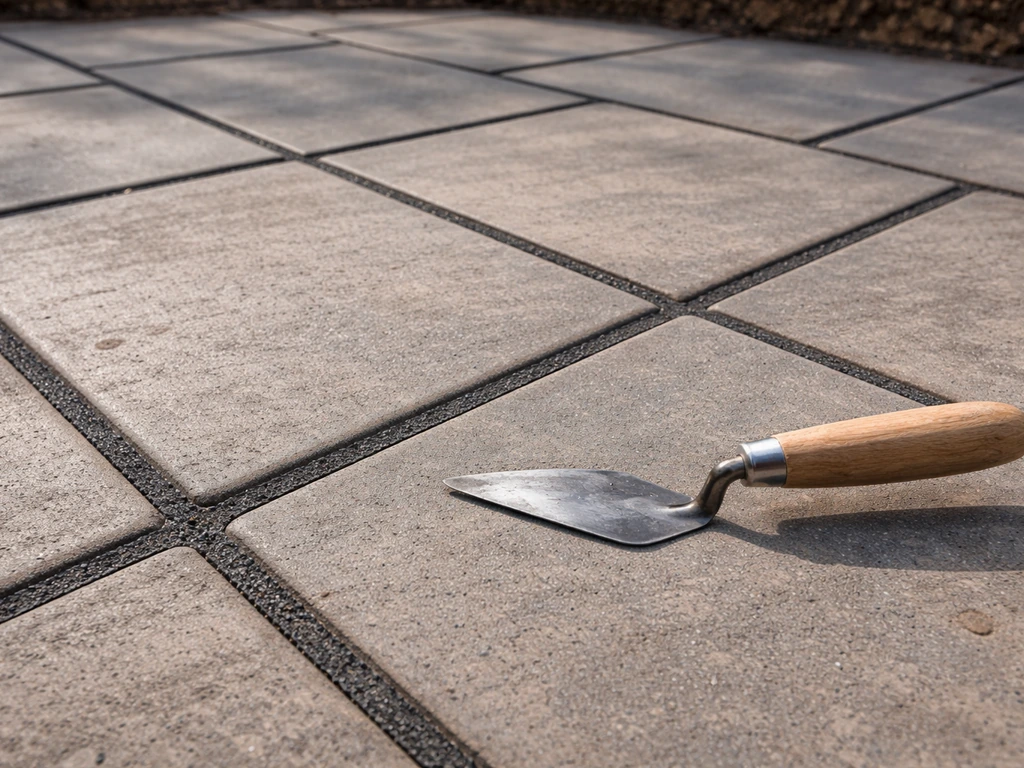
| Jointing tool (for control joints) | Yes | Yes |
| Curing compound or plastic sheeting | Yes | Yes |
| Concrete sealer | Optional but recommended | Recommended |
For bonding agents, two reliable options are Sika Armatec-110 EpoCem (a cementitious epoxy primer that works well as a bonding bridge for both cement and epoxy-based repair mortars) and liquid polymer admixtures like FasTrac MaxBond Pro, which can double as a slurry bond coat. For the repair material itself, QUIKRETE Polymer Modified Thin Patch and MEADOW-PATCH T2 are both solid choices for horizontal repairs. MEADOW-PATCH T2 is rated from featheredge up to 2 inches deep and has good freeze-thaw resistance, which matters if you're in a cold climate.
Step 1: Prep and demo, remove, clean, and fix the base
This is the most important phase and the one most DIYers rush through. Do it right and the rest of the job is straightforward.
Mark and cut the repair area
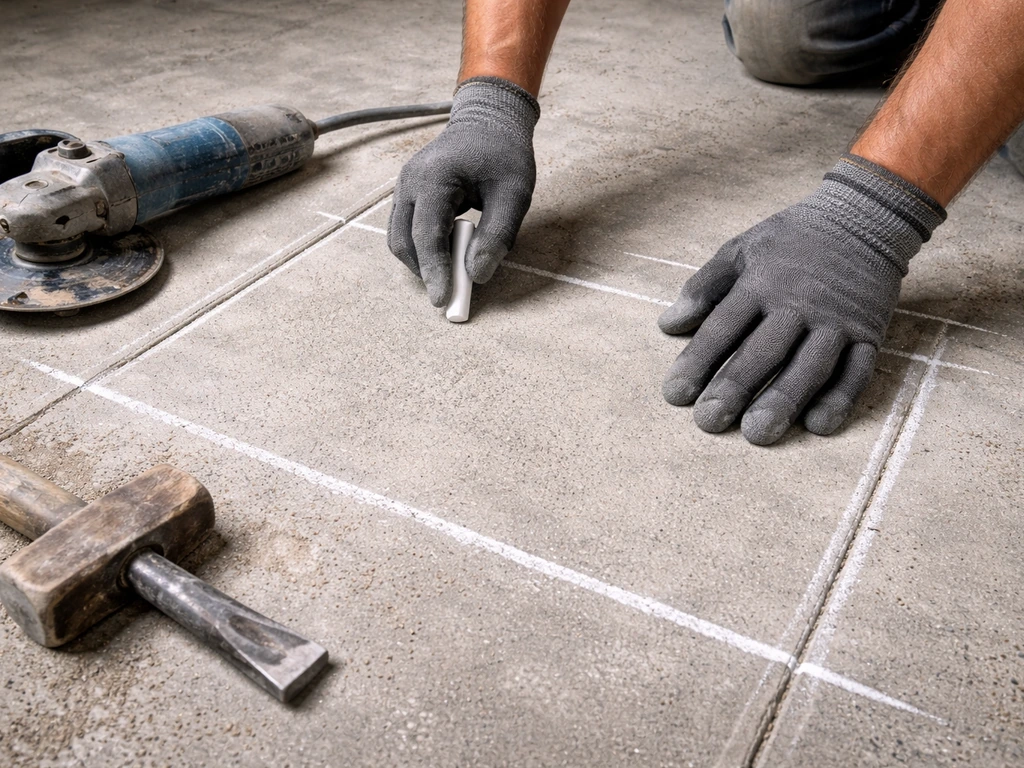
Use a marker or chalk to outline the full damaged area, plus an inch or two beyond any visible cracking. Then use an angle grinder or circular saw with a diamond blade to cut straight, vertical lines around the perimeter. Straight vertical edges are non-negotiable. Feathered or tapered edges will almost always debond under traffic and thermal movement. FHWA repair guidance is clear on this: saw-cut boundaries provide the correct joint shape factor and prevent feathering.
Remove the damaged concrete
Inside your saw cuts, break out the damaged material with a cold chisel and hammer or, for larger areas, an electric chipping hammer rented from a hardware store. Work from the center outward. Keep chipping until every surface sounds solid when tapped. The repair depth for a partial-depth patch generally shouldn't exceed about one-third the slab thickness, so if your slab is 4 inches thick, don't go deeper than about 1.5 inches unless the damage forces it.
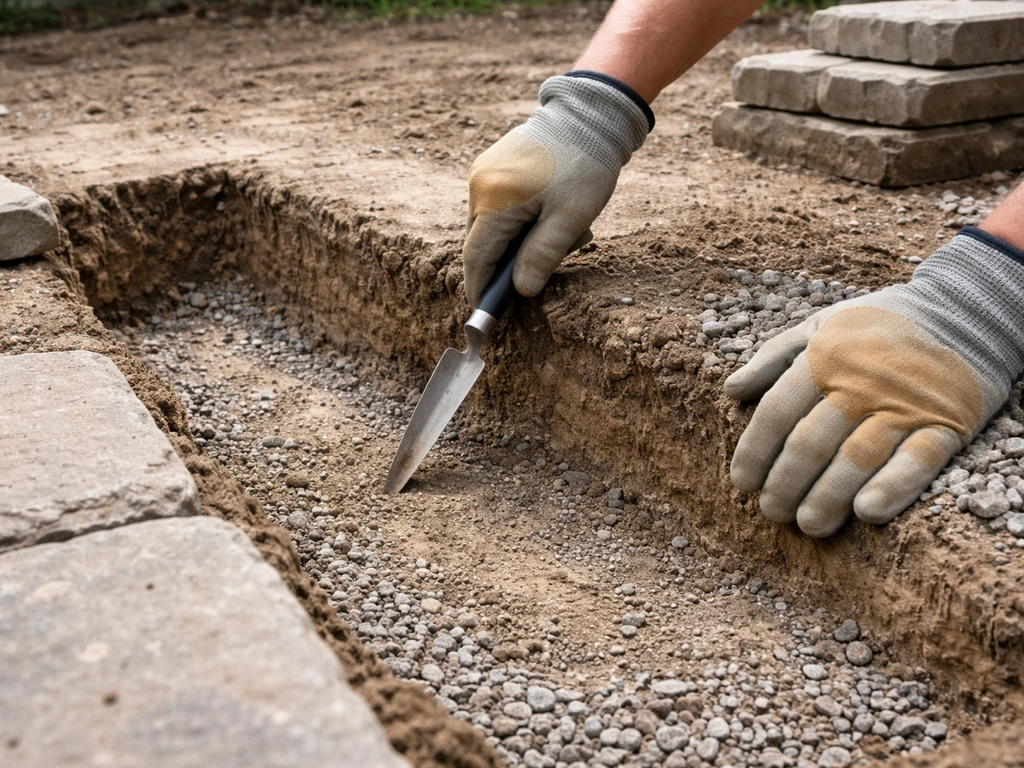
Inspect and repair the sub-base
Once the damaged concrete is out, look at what's below. If you see voids, loose soil, or eroded material, that needs to be addressed before any cement goes back in. Fill voids with compactable gravel, compact it with a hand tamper (or plate compactor for larger areas), and make sure the base is stable. If the slab has sunk significantly, you may need to build the base back up to restore the correct height and slope.
Clean everything thoroughly
Dust, dirt, and debris are the number one reason patches fail to bond. Vacuum out all debris with a wet/dry vac, then scrub the existing concrete surfaces (the bottom and all cut walls of the repair cavity) with a stiff wire brush or angle grinder cleaning disc. If there's any grease, oil, or old curing compound residue, clean it with a degreaser and rinse completely. The surface needs to be visually clean and free of anything that would prevent adhesion. Let it dry or bring it to a saturated surface dry (SSD) condition, meaning damp but with no standing water, before applying bonding agent.
Step 2: Apply the bonding agent, mix, level, and finish
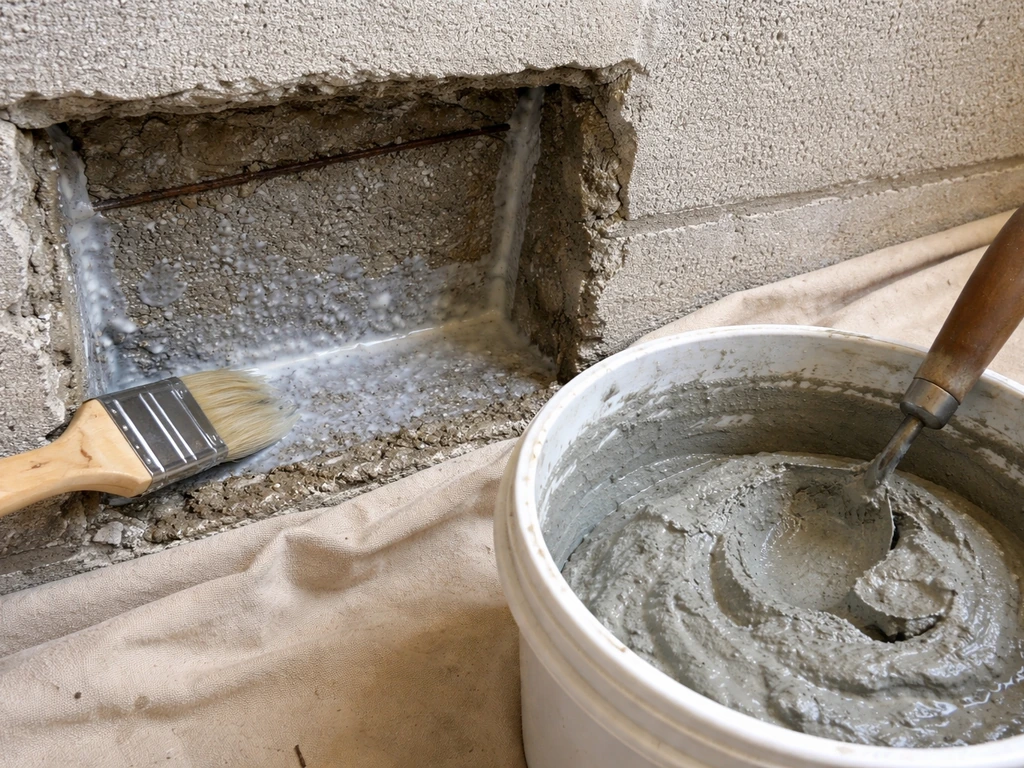
Apply the bonding agent, and don't let it dry
This step is where a lot of DIY patches fail. Brush or roll the bonding agent onto the entire repair cavity: the bottom, all four vertical walls, and overlap slightly onto the surrounding slab surface. The key is timing: you need to apply your repair mix while the bonding agent is still tacky. If it dries out completely before you get the mix in, it stops acting as a bonding bridge and actually becomes a barrier. FHWA research specifically lists drying of the bonding agent as a recurring cause of poor patch performance. Mix your repair material before you apply the bonding agent so you're ready to go immediately.
Mix your repair mortar
Follow the bag instructions for water ratio. More water makes the mix easier to work with but weakens it and increases shrinkage cracking. Aim for a stiff, workable consistency, it should hold its shape when squeezed in your hand but not be crumbly. For polymer-modified products like MEADOW-PATCH T2 or QUIKRETE Polymer Modified Thin Patch, the polymer in the mix improves flexibility and bond, so don't add extra water to compensate. Mix in small batches you can use in 15 to 20 minutes. If you want that real patio magic, focus on getting your mix consistency right and using the correct water ratio how to mix patio magic.
Pack and level the repair
Scrub a thin coat of the repair mix into the wet bonding agent first (this is called a scrub coat), then fill the cavity in layers if it's deeper than about an inch. Compact each layer by pressing firmly with a trowel. Build up to slightly above the surrounding slab surface, then screed it flat with a straight board. Float the surface to match the surrounding texture. If the original patio has a broom finish, drag a stiff brush across the fresh patch to match it.
Address edges and control joints
Run a jointing tool along any existing control joints that cross your repair area to re-establish them in the fresh material. Control joints are intentional weak points that let the concrete crack in a predictable place instead of randomly across the surface. If you fill them in solid, the slab will find its own place to crack, and it won't be pretty. Once the repair cures, you can fill the joint with a flexible concrete joint sealant to prevent water infiltration, which is especially important in freeze-thaw climates. This also applies to the boundary seam between your patch and the original slab.
Curing, sealing, and when you can use the patio again
Curing is just keeping the repair moist and protected while the concrete gains strength. Without it, the surface dries too fast, the top layer shrinks, and you get surface cracking that defeats the whole purpose. As soon as the surface is firm enough not to be marked by light pressure, cover it with plastic sheeting or apply a curing compound like Sika Antisol-250 W. Keep it covered for at least 24 hours, and 48 to 72 hours is better if the weather is dry or windy. Don't apply a curing compound if temperatures are below 45°F (7°C) or if a freeze is expected overnight.
For traffic timing, polymer-modified patch products are generally walkable in about 3 hours under normal conditions (around 70°F). Drive-on time is typically 24 hours. These figures come from QUIKRETE's polymer modified thin patch specs and are consistent with most similar products, but check the bag for your specific product and adjust for temperature. Cold weather slows curing; hot, dry weather speeds up drying but doesn't necessarily mean it's cured through.
Sealing is optional but strongly recommended, especially if the patio sees weather extremes. A good penetrating concrete sealer reduces water absorption, which directly reduces freeze-thaw damage and makes the surface easier to clean. Wait at least 28 days after recementing before sealing, the concrete needs to fully cure before you lock moisture in with a sealer. If you're curious about compatible products or mixing your own maintenance solutions, that's a topic worth looking into separately as part of a regular patio maintenance routine.
Preventing the same problem from coming back
The best way to avoid doing this again in two years is to fix what caused the damage in the first place. If water is the problem, make sure the patio slopes away from the house at about 1/8 to 1/4 inch per foot. Clean or install drainage channels if water pools at the edges. Reseal joint sealant every few years so water doesn't get into cracks and cause freeze-thaw damage. Repointing the mortar joints between pavers or slabs is a closely related maintenance task that addresses the same underlying water infiltration problem. Repointing the patio is similar in concept, since both approaches deal with water infiltration and joint or slab movement how to repoint a patio.
Use control joints properly. If the original patio didn't have enough of them, that's likely part of why it cracked. Control joints should be spaced at roughly 2 to 3 times the slab thickness in feet, so a 4-inch slab should have joints every 8 to 12 feet. Finally, avoid deicers (especially rock salt) on your patio in winter. They accelerate concrete surface breakdown and dramatically shorten the life of any patch you apply.
When to call a professional instead
Spot patching is a reasonable DIY job for most homeowners. But there are situations where calling a concrete contractor is the smarter move, and being honest about that saves you a lot of wasted effort and money.
- More than a third of the patio surface is damaged, sunken, or hollow-sounding. At that point, you're essentially relaying the patio, and a contractor with proper compaction equipment will do it better and faster.
- The slab has sunk significantly and uniformly. This usually means the sub-base has seriously failed, there's an underground drainage issue, or soil erosion is ongoing. A pro can mudjack (pump grout under the slab to lift it) or assess whether full replacement is needed.
- You have repeated water intrusion near the house foundation. This isn't just a patio problem. It's a drainage or grading issue that can damage your foundation and needs proper assessment.
- Deterioration extends deep into the slab, not just the top surface layer. FHWA guidance notes that when damage goes beyond the top portion of the slab, localized partial-depth patches are generally not practical and are prone to rapid failure.
- The patio has cracked or sunk multiple times after previous repairs. Repeated failure almost always points to a structural or drainage problem that surface patching simply cannot solve.
There's no shame in recognizing when a job is beyond a DIY repair. A concrete contractor who can properly diagnose sub-base issues, fix grade and drainage, and pour or resurface a section correctly will save you the frustration of watching another patch fail by next spring. The goal is a patio that actually lasts, not just one that looks fixed for a few weeks.
FAQ
Can I just add more cement or patch over a sunk or cracking patio without removing anything?
No. If the bonding agent is already failing because water is getting under the slab or the base has moved, cement or patch alone will just crack again along the same weak spot. Recementing usually requires removing loose or hollow-sounding concrete, rebuilding or stabilizing the sub-base, and then using a bonding agent that stays tacky until the repair mix is placed.
How do I know if my bonding agent dried out before I applied the patch mix?
Tackiness matters, but not by guesswork. Mix your repair material first, then apply the bonding agent to the cavity surfaces, and get the mix in while the primer still feels sticky (not dry or glossy). If you accidentally let it dry, you generally need to re-apply the bonding agent because dried primer becomes a bond breaker.
What if the damage area includes a slope change or an uneven section, can I still DIY the repair?
Yes, but only if you follow two constraints: keep saw-cut, vertical edges for the repair boundary, and rebuild the base to restore the correct height and slope. You also need to match the original jointing plan, so the new section can crack in the right places instead of randomly at the seams.
Should I follow the exact crack width when cutting out concrete, or remove more than the crack shows?
Don’t chase the crack lines on the surface. If the crack indicates movement (wide cracks, step cracks, cracks through the slab, or cracks at control joints), remove concrete to sound, solid material based on hammer tapping results, plus the extra perimeter inches you outlined. The repair should extend beyond what you can see because the movement zone is often larger than the visible crack.
My patio sounds hollow in one spot, what does that mean for recementing?
It can happen when water or air got trapped during the original pour, or when a previous patch lost adhesion. If an area sounds hollow when tapped or you hear a drum-like sound, treat it as delamination: remove it fully. You cannot reliably re-bond delaminated concrete from the surface.
Why do feathered edges keep debonding, and what’s the correct boundary style?
Feather edges are a common failure because they offer little thickness to resist traffic and thermal movement. For patch boundaries, keep them straight and vertical using saw cuts, and avoid tapering to nothing. If you need a smooth transition, do it with a controlled fill and proper finishing, not a thin feather at the repair boundary.
Can I add extra water to make polymer-modified thin patch easier to spread?
Use the product’s stated water ratio, and aim for a stiff, workable mix consistency. If you add extra water to make it easier to spread, you increase shrinkage cracking and reduce strength. If the mix feels wrong, it usually means batch size, mixing time, or technique, not that you need more water.
Should I recreate control joints inside my repair, even if the crack looks minor?
Yes, but do it intentionally. A broom finish match matters, and you should re-establish control joints that cross your repair area before the patch fully sets. If the joint was part of the original design and you fill it solid, the slab will likely crack somewhere else, often at an ugly location.
What changes if I’m doing the recementing in cold weather?
Not if cold conditions are involved. Don’t apply curing compound below 45°F (7°C) or when freeze is expected overnight, and protect the repair so it doesn’t freeze early. In cold weather, plan around longer curing times because polymer-modified products still need time to gain strength safely.
Should I seal immediately after recementing to prevent water damage?
If the patio stays damp, sealing can delay visible water penetration but it does not fix the cause. Persistent moisture still drives freeze-thaw and joint deterioration from below. Always correct grading and drainage first, and only then consider sealing after the full cure window.
How long should I wait before sealing the repaired area?
Sealer timing depends on cure, typically at least 28 days after the repair. Sealing earlier can trap moisture, which may contribute to discoloration or reduced performance in some conditions. If you’re unsure, wait for the concrete to be fully cured and follow the sealer label requirements.
How long before it’s safe to walk or drive on the newly recemented patio?
In general, you can usually walk on polymer-modified thin patch in about 3 hours under around 70°F conditions, drive on after about 24 hours, but temperature and wind change the timeline. The safe approach is to check the surface firmness and use the bag specs for your exact product and weather.
When is it better to hire a concrete contractor instead of doing a spot patch?
Contact a contractor if the slab has large sinkage, widespread settlement, major delamination over a large area, or repeated failure after prior DIY attempts. Also call in help if you suspect extensive base failure or drainage problems that require regrading or sub-drain work, because those issues are difficult to correct reliably with surface repairs alone.
How does joint sealant maintenance or repointing relate to recementing a failing patio?
Yes. Expansion and contraction can open seams and cracks, and joint movement can reintroduce water infiltration. Recementing works best when you address joint sealant maintenance, and you should consider repointing mortar joints or improving drainage where water can track toward the slab.
Next Article
How to Repoint a Patio: Supplies and Step by Step Guide
Learn what to use and the exact steps to repoint patio slabs, clean joints, fill, finish, cure, and avoid water issues.