To repoint a patio with sand and cement, you mix a 4:1 or 3:1 sharp sand-to-cement ratio to a firm, crumbly consistency, rake out old joint material to at least 1. If you're wondering how to mix patio magic, the ratio is only half the story, so get the consistency right too mix a 4:1 or 3:1 sharp sand-to-cement ratio.
How to Repoint a Patio With Sand and Cement Step by Step

Talia Lang
8 Jun 2026
5 to 2 inches deep, pack the new mix in layers, tamp it firm, and keep it damp for a few days while it cures. That's the core of it. But whether that approach is even right for your patio, and how you prep and finish the joints, makes all the difference between a repair that lasts years and one that washes out the first time it rains.
When sand-and-cement repointing is the right fix
Sand-and-cement repointing works when your patio is made up of individual units sitting next to each other, such as concrete block paving, clay or concrete pavers, or natural stone flags laid with mortar joints between them. The joint is a separate element from the paver itself, so it can be removed and replaced without touching the paving unit. If that describes your patio, you're in the right place.
Where people go wrong is trying to use this method on a poured concrete slab. If your patio is one continuous slab with cracks running through it, or with control joints (the straight lines cut into the surface), that's a different repair altogether. Filling those with sand and cement won't work because you're dealing with slab movement, not a loose joint between two independent units. For cracked slab repairs, you need a flexible filler or a full recement approach, which is worth looking into as a separate job.
Sand-and-cement jointing is also not always the only option for paver joints. Polymeric sand is popular because it's quicker and resists weeds well. But sand-and-cement mortar is harder and more durable in high-traffic areas, handles freeze-thaw cycles well when done right, and is generally cheaper in materials. It does require more care to apply without staining pavers. Both approaches are valid; the rest of this guide focuses on getting the sand-and-cement method right.
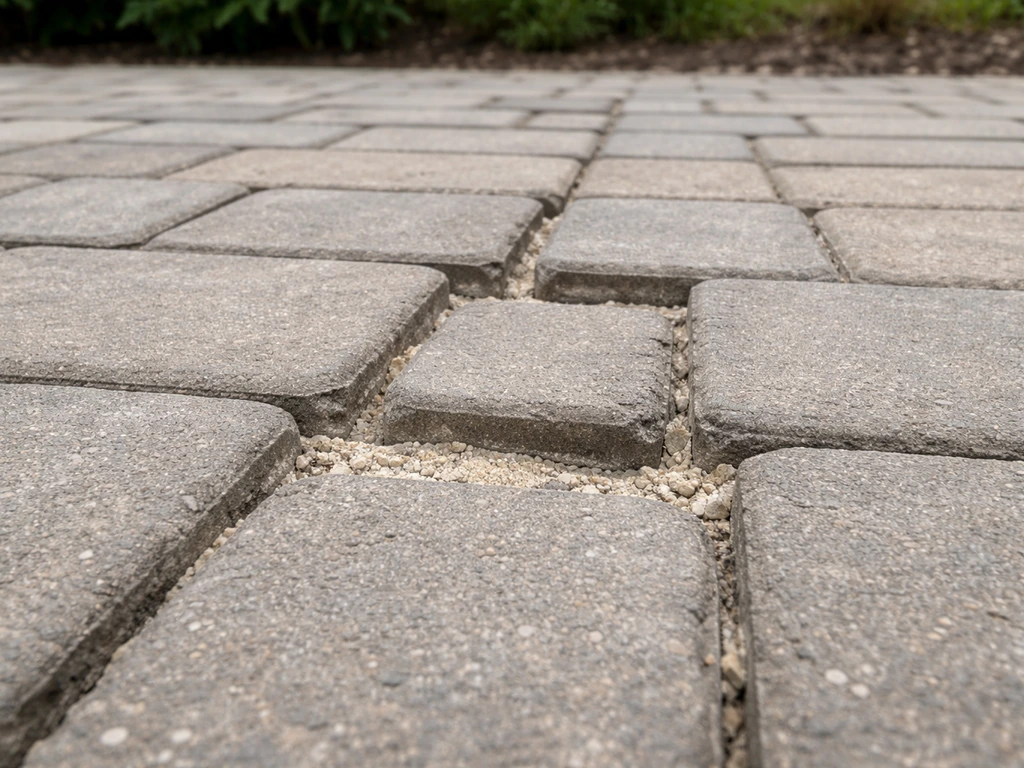
Diagnose why the joints failed before you start
Skipping this step is how people end up doing the same repair twice. Before you mix anything, spend ten minutes figuring out why the joints broke down in the first place.
Lateral movement and edge restraints
The most common culprit for failing paver joints is the pavers themselves moving. When pavers shift laterally, even a millimeter at a time, they widen the joints and eventually crack or eject whatever is filling them. This happens when edge restraints are missing or have failed.
The ICPI construction specification identifies edge restraints as essential to interlocking concrete pavement performance, because without them lateral movement can open joints and lead to joint filling materials failing again [Edge restraints are missing or have failed. ](https://www. lampus. com/files/Resources/ICPI-Construction-Specification.
pdf). Edge restraints are the solid borders (timber, concrete haunching, metal edging) that hold the perimeter of the paving in place. If your paving has no solid edging, or if the edging has cracked away, no jointing product will hold long-term. Fix the edges before repointing, or you'll be back here in 12 months.
Water and drainage problems

Poor drainage is the other main cause of joint failure. If water pools on the patio surface or runs along the joints rather than off the patio, it sits in the joints, softens the mix, and eventually washes it out. Check the fall (slope) of your patio. A minimum fall of 1:60 away from the house is the general standard. You can test this by pouring a bucket of water on the surface and watching where it goes. If it pools or flows toward your house, drainage is contributing to your problem and that's worth sorting out, ideally at the sub-base level, before you repoint.
Freeze-thaw damage and age
In colder climates, water penetrates the joint, freezes, expands, and physically breaks the mortar apart over several winters. This type of failure tends to look powdery and crumbly rather than washed out. It doesn't mean repointing won't work, but it does mean you need to use the right mix ratio and make sure the joints are properly packed with no voids, which is where most DIY repoints fail.
Materials, tools, and getting the mix right
What you'll need
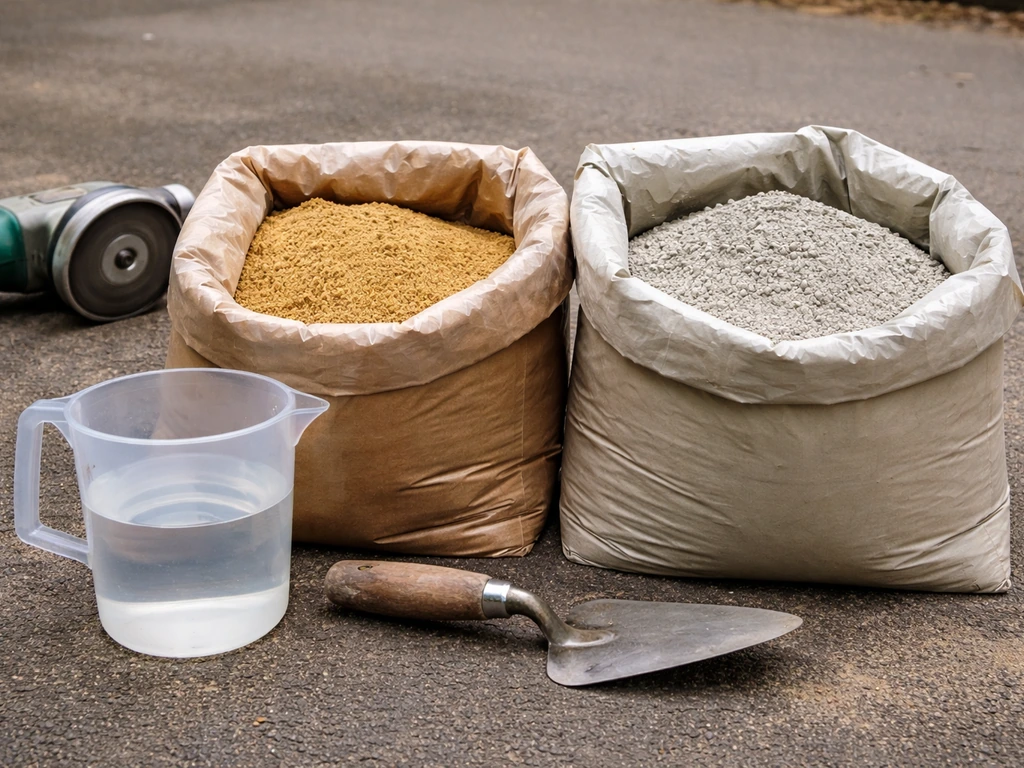
- Sharp sand (not building sand, which is too fine and soft for joints)
- Portland cement (standard grey, or white if you want a lighter finish)
- Cold water
- Angle grinder with a raking disc or pointing disc (for clearing joints quickly)
- Cold chisel and club hammer (for hand-clearing stubborn sections)
- Wire brush and stiff hand brush
- Pressure washer (set to around 1500 psi to clean without damaging pavers)
- Pointing trowel and a margin trowel
- Rubber mallet and a piece of timber or compacting plate (for seating pavers)
- Soft brush or grout squeegee
- Plastic sheeting or hessian sacking (for curing)
- Mixing bucket or spot board, and a small mixing paddle or trowel
- Stiff card or tape to protect paver faces while pointing
The right sand-to-cement ratio
For patio repointing, a 4:1 mix (four parts sharp sand to one part cement) is the standard starting point. If you need a quick walkthrough of the full process, start with the basic repointing steps and work through prep, mixing, packing, and curing in order patio repointing. For narrower joints (under 10mm) or harder-wearing areas, a 3:1 mix gives a stronger, denser joint. Avoid going stronger than 3:1 because a very cement-rich mix becomes brittle, shrinks more on curing, and can actually crack faster than a slightly leaner mix.
Consistency matters as much as ratio. The mix should be damp enough to hold together when you squeeze a handful, but not wet enough to slump or bleed water. A common description is 'damp crumble' or 'stiff putty.' If it's sloppy or wet, it will shrink, crack, and stain your pavers. If it's bone dry and won't compact, it won't bond. Add water in very small amounts and check after each addition. For mixing mortar for patio joints, erring slightly on the drier side is better than too wet.
| Mix ratio | Joint width | Best for | Notes |
|---|---|---|---|
| 3:1 (sand:cement) | Under 10mm | High-traffic areas, narrow joints | Stronger but more brittle if too rich |
| 4:1 (sand:cement) | 10mm to 20mm | General patio repointing | Good balance of strength and flexibility |
| 5:1 (sand:cement) | Over 20mm, wide flag joints | Large stone flags with wide joints | Weaker, use only where movement is minimal |
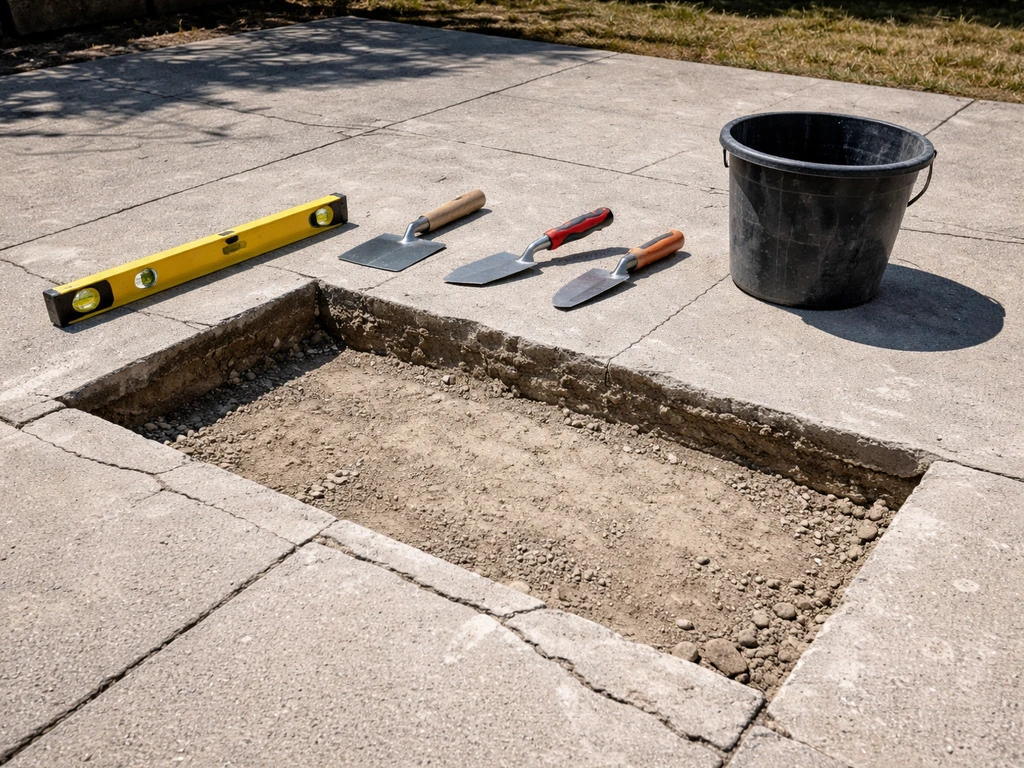
Remove old joint material and prep the joints properly
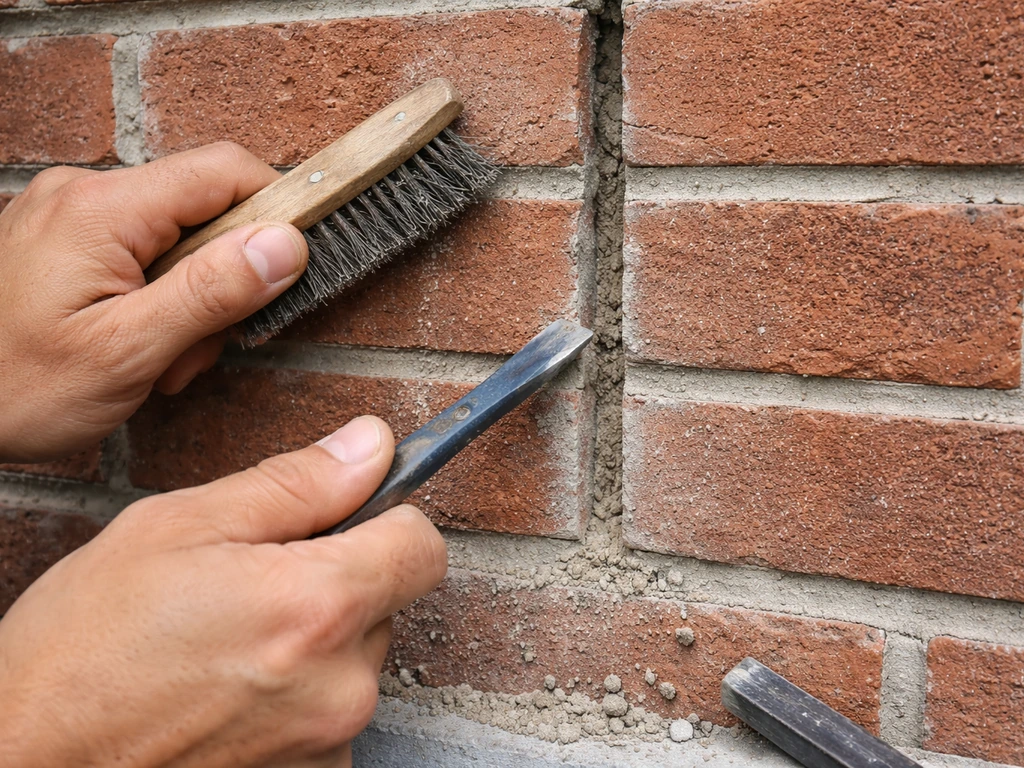
This is the step most people rush, and it's where most DIY repoints fail. Techniseal’s restoration guidance for existing paver installations recommends removing old jointing products down to a minimum depth of 1½ to 2 inches before re-jointing or re-filling blank" rel="noopener noreferrer">removing old joint material down to at least 1½ to 2 inches. If you leave loose or contaminated material in the joint and pack new mortar on top of it, the new joint will pop out within a season.
- Clear the joint to depth. You need to remove old material to a minimum of 1.5 to 2 inches deep. This gives the new mortar enough depth to key in and resist being rocked out. Use an angle grinder with a raking disc for speed on straight joints, and a cold chisel and club hammer for hand-clearing edges, curves, and areas near fragile pavers. Work carefully around the paver faces to avoid chipping.
- Brush out loose material. Once you've raked the joints, go along them with a stiff brush or wire brush to knock out any remaining grit, old mortar crumbs, and debris. Don't skip this. Any loose material left in the joint will stop the new mortar from bonding to the sides.
- Remove weeds at the root. Pull weeds out rather than just cutting them off. If you leave roots in the joint they will regrow through the new mortar within weeks. A narrow screwdriver or weed tool helps here.
- Pressure wash the joints and surface. Set your pressure washer to around 1500 psi, which is firm enough to blast out fine debris but not so aggressive that it damages the paver faces or sub-base material beneath. Rinse from the high end of the patio to the low end so you're always washing debris away from areas you've already cleaned.
- Let it dry. The joints need to be dry or just barely damp when you apply mortar. If they're wet, the mix won't adhere properly and may wash out before it sets. Wait at least a few hours after pressure washing, longer if weather is damp or cold. On a warm, breezy day this can be as little as two hours; on a cool overcast day, you might need to wait until the following morning.
While you're in the prep stage, check whether any pavers are rocking or sitting proud. Tap them with a rubber mallet. If a paver rocks significantly, it needs to be re-bedded before you repoint around it, otherwise the new joint will crack as the paver moves. Lift the paver, add or remove bedding material as needed, re-seat it level with its neighbours, and let it settle before continuing.
Step-by-step repointing technique
Work in manageable sections, roughly one to two square meters at a time. This keeps the mortar from drying out before you've finished compacting and finishing it.
- Dampen the joints lightly. A fine mist of water from a spray bottle along the joint helps the mortar bond without introducing so much water that it dilutes your mix. Don't soak the joint, just a light misting.
- Load and push mortar into the joint. Using your pointing trowel, load a small amount of mortar onto the blade and push it firmly into the joint from one end. Work the trowel in a downward, compacting motion rather than just smearing it across the top. You want to push mortar down to the bottom of the joint, not bridge over voids near the base.
- Pack in layers if the joint is deep. For joints deeper than about 25mm, pack in two layers. Press the first layer in and tamp it down with the end of a pencil, a thin piece of rod, or a purpose-made packing tool, then add the second layer on top. This two-pass method eliminates voids and produces a much harder, more durable joint.
- Tamp firmly. Once a section is filled, go back along it with your trowel held flat and press down with firm, short strokes to compact the mortar. A well-tamped joint is noticeably denser than one that's just been pushed in. You can feel the resistance when it's properly packed.
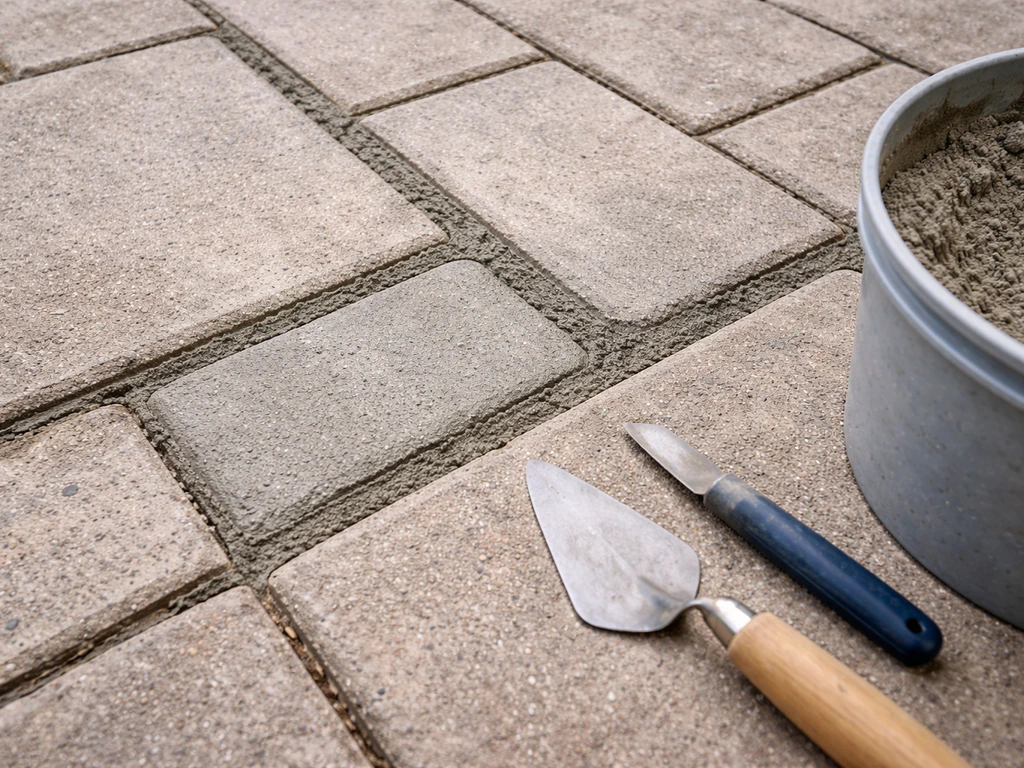
- Finish the joint surface. The joint face should sit slightly below the paver surface (recessed by about 2 to 3mm). A flat flush joint or a slightly recessed joint both work; a raised joint that sits proud of the paver will get scuffed off by foot traffic. Run your pointing trowel along the joint at a slight angle to achieve a neat, consistent finish. Some people prefer a bucket-handle finish (slightly rounded and pressed in); both are fine.
- Remove excess mortar from paver faces immediately. Use a damp sponge or cloth to wipe mortar off the paver surface before it sets. Once it hardens, it's significantly harder to remove and may require dilute acid cleaning. Keep a bucket of clean water nearby and change it regularly.
A note on timing: don't repoint in direct hot sun if you can avoid it. High temperatures dry the surface of the mortar before it has properly cured, which leads to surface cracking. Overcast, calm weather in the 10 to 20 degrees Celsius range is ideal. Don't repoint if frost is forecast within 48 hours, as ice forming in newly placed mortar will destroy it.
Finishing, curing, and preventing washout
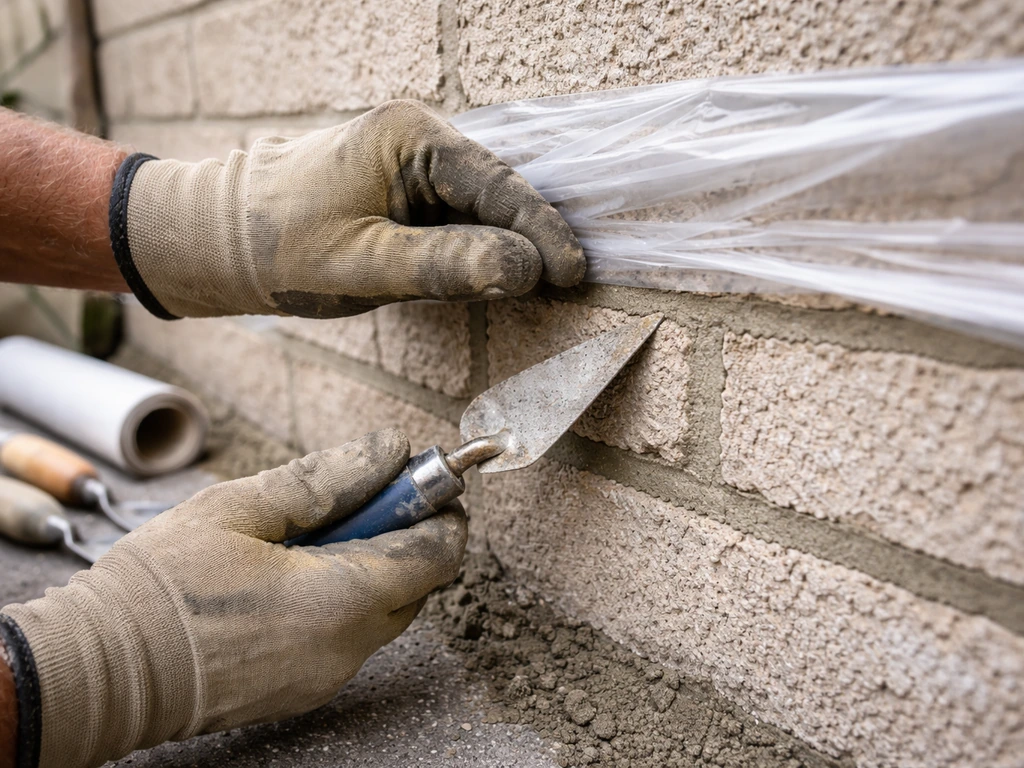
Sand-and-cement mortar needs water to cure (the chemical reaction that hardens it is called hydration), but it also needs protection from rain and foot traffic while it's gaining that strength.
For the first 24 hours, keep foot traffic off the repointed area entirely. If rain is forecast, cover the whole patio with plastic sheeting weighted at the edges. Rain falling on fresh mortar before it has set will wash fine cement particles out of the joints, leaving a weak, porous joint that fails quickly. For a complete walkthrough of how to recement a patio joints properly, follow the full step-by-step method in this guide. This is the most common cause of washout in DIY repoints.
After 24 hours, lightly mist the joints with water once or twice a day for the next two to three days. This keeps the mortar from drying out too fast in warm or windy weather, which causes shrinkage cracking. You're not soaking it, just keeping it damp. In cool, damp weather you may not need to do this at all. Mortar reaches most of its design strength at 28 days, but it's practically usable (light foot traffic) after 48 to 72 hours in normal conditions.
If the joints look slightly lighter in colour than expected once dry, that's normal. Cement-based mortar lightens as it cures. If you want to match existing older jointing, this is genuinely difficult, and slight colour variation between new and old sections is almost unavoidable without tinting the mix. A little weathering over a few months usually closes the gap significantly.
Common problems and how to troubleshoot them
Joints cracking shortly after application
Hairline cracks in new mortar are usually caused by one of three things: the mix was too wet, it dried too fast in hot or windy conditions, or the cement-to-sand ratio was too high (too strong). Small hairline cracks that don't go all the way through the joint are often cosmetic and don't significantly affect performance. Cracks that open up or that you can see through indicate a structural issue with the joint. If the pavers themselves are moving, re-examine your edge restraints. If the cracking is widespread on a new repoint, rake out those sections and redo them with a slightly drier mix and better shading during curing.
Joints washing out again after rain
If new mortar washes out after the first decent rain, the joint almost certainly wasn't cured long enough before it got wet, or the mix was too sloppy when applied. Another possibility is that water is being channelled along specific joints due to a drainage problem, which creates flow rather than just wetting. Go back and check your patio's fall. If water is consistently running along a joint line rather than off the patio edge, no jointing product will hold there until the drainage is addressed.
Gaps reappearing between specific pavers
If the same joint keeps opening up, the paver on one or both sides of it is moving. Press and rock each paver with your foot. If it moves, the bedding beneath it has failed or washed out. You'll need to lift, re-bed, and re-compact that paver before repointing. This is a more involved repair than just repointing, but attempting to mortar a moving paver is a waste of material and time.
Settlement across a whole patio section
If a whole section of patio has sunk, or if joints are failing across a broad area rather than in isolated spots, the sub-base has likely compacted, eroded, or been undermined. Localised repointing won't fix this. You're looking at lifting the affected section, addressing the sub-base, re-laying the pavers, and then repointing. At this stage, it's worth getting a professional to assess whether the sub-base and bedding layer need full replacement. If you're seeing widespread settlement, trying to paper over it with fresh mortar will just lead to repeated failure.
Mortar staining paver faces
If you didn't wipe mortar off the paver surfaces quickly enough and it has hardened, you can carefully remove it with a dilute hydrochloric acid solution (sold as brick acid or patio cleaner), but test a small inconspicuous area first, especially on natural stone, which can be damaged by acid. Rinse thoroughly with plenty of water after use. For most concrete pavers, a stiff brush and water is the first thing to try before resorting to acid.
FAQ
How can I tell if my patio is actually suitable for sand and cement repointing?
Check whether your patio is made of separate units (pavers or flags) with joints between them. If you can lift an individual paver or stone and the joint is only between units, sand and cement is appropriate. If the surface is one continuous slab, control joints or cracks indicate slab movement, and you should not expect sand and cement to hold.
Should I remove all the old joint material, or can I add new mortar on top?
Remove everything down to a clean, sound edge, because adding over loose or contaminated material creates a weak layer that can pop out within a season. If old joint filler is glazed with dust or water-soluble residues, scrape deeper than you think you need and re-pack firmly.
What exact joint depth should I aim for when raking out and packing the new mix?
Aim for at least about 1.5 cm (roughly 5/8 in) of joint depth after removal, then pack in layers no more than a couple of centimeters at a time. Shallow joints tend to wash out faster, especially where drainage directs water along the joint.
Can I use building sand, or do I need sharp sand?
Use sharp sand (angular, not smooth), because it interlocks when compacted. Rounded or washed builder’s sand compacts poorly, which increases shrinkage and can lead to early cracking or crumbling.
My joints are narrow (under 10 mm), what mix should I use and how do I apply it without voids?
For narrow joints, a 3:1 sand-to-cement mix is usually more appropriate for strength and density. Work small sections at a time and pack with a pointing tool or jointing trowel, then re-compact carefully to avoid trapped air, because voids are a common reason joints fail in frost areas.
How do I avoid staining the paver faces while repointing?
Keep the mix slightly on the drier side (damp crumble), and remove excess mortar immediately after finishing. Don’t scrub hard once it starts setting, because that can grind cement into the surface texture. If you must clean, use water and a stiff brush first before considering stronger cleaners.
What’s the best way to finish the joints so rain doesn’t wash them out?
Finish to a profile that is slightly recessed or flush without leaving a proud ridge that can hold water. Lightly compact the final surface as you finish so there are no pinholes, then prevent rain impact during the first set, which is when washout risk is highest.
Is it better to repoint in spring, summer, or autumn?
Milder conditions are easiest, cool to mild weather around 10 to 20 °C (50 to 68 °F) with no hot sun and low wind is ideal. Avoid frost for at least 48 hours, because ice can damage newly placed mortar before it gains strength.
How long should I keep people off the patio after repointing?
Keep foot traffic off for the first 24 hours. If you have rain forecast, cover the entire area to prevent direct impacts on the joints before they set. After 24 hours, allow at least 48 to 72 hours before normal light use, depending on weather.
When and how should I mist the joints during curing?
After the first day, mist lightly once or twice daily for the next two to three days in warm or windy conditions. The goal is to keep the joints damp to support hydration, not to soak them or create runoff that could carry cement particles out of the joint.
Why do I still get hairline cracks even when I followed the mix ratio?
Hairline cracks often come from drying too fast in sun or wind, a mix that was too wet, or over-cemented proportions. If cracking is localized, shade and timing are often the fix. If cracking spreads or opens up, revisit drainage, paver movement, and the bedding under the affected units.
What should I do if the joints wash out after the first rain?
First, confirm the joints had enough set time before the rain. Next, re-check the patio fall, because water that channels along a joint line will undermine any jointing. If one area repeatedly fails, inspect for moving pavers and failed edging or restraints, since movement and edge loss can defeat the repair.
Do I need to fix the patio edges before repointing?
Usually yes. If edge restraints have failed or the perimeter is not holding the pavers in place, jointing will break down again regardless of how well you pack the mortar. Repair or replace edging and haunching first so the paving cannot spread.
If a paver is rocking, can I just repoint around it?
No. A rocking or proud paver means the bedding beneath it has failed. Lift the unit, re-bed and re-level it, then let it settle before repointing around it. Otherwise the new joint will crack because the paver will keep moving.
Can I use pressure washing to clean mortar haze from the pavers after repointing?
Avoid pressure washing on fresh or partially cured joints, as it can erode or dislodge the jointing before it has gained strength. For hardened residue, use a stiff brush with water first, and only use acid-based cleaners after testing a small inconspicuous patch, then rinse thoroughly.
What if the problem is widespread settlement, not just joint failure?
Localized repointing will not stop broad sinking or areas where joints fail across the same zone. That points to bedding or sub-base issues. Plan to lift and re-lay the affected section, and have the sub-base evaluated if the settlement is significant.
Next Article
How to Recement a Patio: Fix Sinking, Cracks, and Failures
Step-by-step DIY guide to recement a patio: fix sinking, cracks, failed patches by diagnosing base and drainage first.