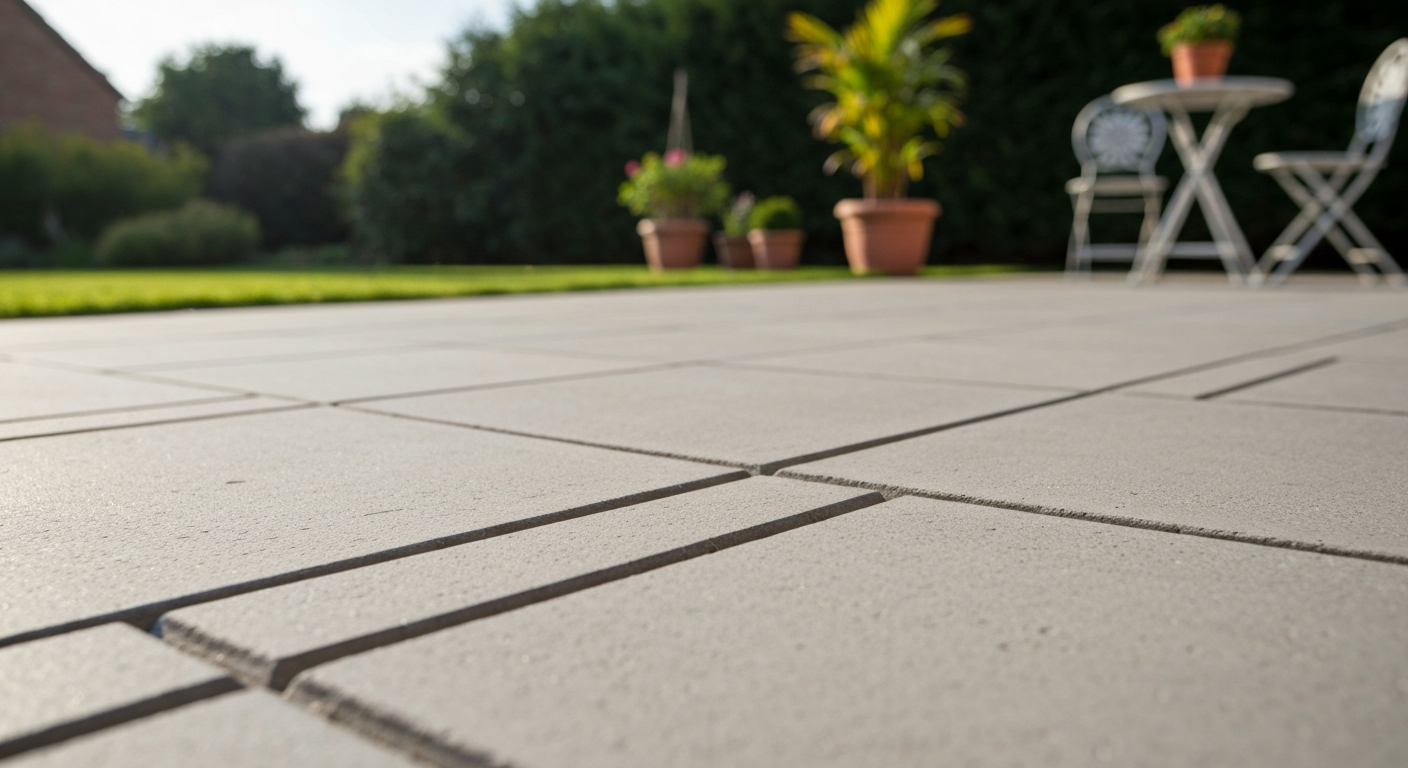
To seal between patio slabs, you clean out the joints completely, let them dry, then fill them with the right jointing material for your joint width and patio type. For most standard slabs with joints between 3 mm and 30 mm, that means either polymeric jointing sand, a ready-mixed paving grout, or a flexible sealant. Get the material choice wrong and you'll be redoing it within a season. Get it right and a well-filled joint lasts 5 to 10 years with minimal attention.
How to Seal Between Patio Slabs: DIY Joint Sealing Guide

Talia Lang
11 Aug 2026
Why sealing between slabs actually matters
Open or failing joints are the number one cause of patio deterioration that I see. Once the jointing material breaks down, water channels straight down into the base. In winter, that water freezes, expands, and shifts the slabs. Through spring and summer, weeds colonise the loose sand or empty channel, and their roots lever individual slabs further out of position. Left long enough, you end up with a rocking, sunken patio that needs a full relay rather than a simple repair. Sealing the joints stops that chain of events before it starts.
That said, sealing joints is not the same as sealing the patio surface. Applying a surface sealer over the face of your slabs or pavers is a separate job with a different purpose: it protects the surface from staining and can enhance colour. If you're trying to figure out whether you need to reseal the surface of your pavers rather than the joints themselves, that's a different process covered elsewhere on this site. For step-by-step instructions on resealing the surface of brick patios, see our guide on how to seal a brick patio. For step-by-step instructions on how to reseal patio pavers, see our dedicated guide. This guide focuses entirely on the gaps between slabs.
Quick decision guide: pick the right joint solution
Before you read the full detail, here's a fast reference. Measure your joint width, think about whether the patio moves or carries vehicle loads, and match it to the right column. This saves you buying the wrong product.
| Joint width | Movement expected? | Best material | Avoid |
|---|---|---|---|
| Under 3 mm | No | Fine-grade flexible sealant or leave as-is if structurally sound | Polymeric sand (too wide to grip) |
| 3–10 mm | No | Polymeric jointing sand | Rigid cementitious mortar on moving base |
| 3–10 mm | Yes (seasonal/thermal) | MS-polymer or neutral-cure silicone sealant with backer rod | Rigid mortar |
| 10–30 mm | No | Paving joint compound / ready-mix grout (e.g. Sika FastFix type products) | Polymeric sand alone (depth dependent) |
| 10–30 mm | Yes | Polyurethane or MS-polymer sealant with backer rod | Rigid mortar |
| >30 mm | No | Resin-bonded jointing compound or packing plus mortar | Polymeric sand (too wide, insufficient depth ratio) |
| >30 mm | Yes or load-bearing (driveway) | Specialist flexible resin compound or professional repointing | DIY flexible sealants alone |
| Building/house edge | Always — treat as movement joint | Backer rod + polyurethane or MS-polymer sealant | Rigid mortar, polymeric sand |
Assess your patio before you buy anything
Spend 20 minutes walking the patio and probing the joints before you go near a DIY store. You need to know what type of slab or paver you have, what's currently in the joints, how wide and deep those joints are, and whether there are any warning signs that the problem is bigger than just the jointing.
Identify your slab, paver or brick type
Concrete flags (the large square or rectangular slabs most people picture) usually have fairly wide joints, often 10 mm or more. Concrete block paving (the smaller interlocking bricks used on driveways and many patios) typically has very narrow joints, 3 to 5 mm, filled with kiln-dried or polymeric sand. Natural stone flags like sandstone or limestone sit somewhere in between and are more sensitive to acidic or alkaline cleaners. Brick patios have mortar joints similar to house brickwork. Knowing which you have tells you which materials are compatible and which will stain or react badly.
Measure joint width and depth
Take a steel ruler or a jointing knife and measure the width at the surface, then probe the depth with a thin screwdriver. Write both down. Width matters because most jointing products have minimum and maximum specs. Depth matters because polymeric sand, for example, typically needs at least 38 mm (about 1.5 inches) of joint depth to bond properly. If you have wide joints but the slabs are only 30 mm thick sitting on mortar haunches, you may need a different approach entirely.
Spot the warning signs
- Weed growth in joints: signals that jointing material has broken down and organic matter has accumulated
- Missing or crumbling joint material: mortar that's powdering, sand that blows out, or empty channels
- Rocking or wobbling slabs: press down on each corner while standing on the slab — any movement means the base needs investigation, not just re-jointing
- Ponding water: if puddles sit on or between slabs for more than an hour after rain, drainage is compromised
- Differential settlement: one slab sitting noticeably lower than its neighbour (more than about 6 mm) is a base or subgrade issue
- Sand washing out repeatedly: if you've re-jointed before and it keeps washing away, the drainage gradient or sub-base is causing water channelling
When this is not a DIY job
I want to be direct about this, because re-jointing a patio with structural problems is wasted money and effort. If you find any of the following, stop and get a professional assessment before spending anything on jointing materials.
- Differential settlement greater than 6 mm between adjacent slabs: this indicates base or subgrade movement, not just joint failure
- Large areas where slabs are rocking, heaving, or have visibly sunk relative to the surrounding area
- Persistent pooling water that doesn't drain within a couple of hours of rain stopping — especially if this is getting worse over time
- Sand or fine material washing out from under the slabs (not just from the joints), which suggests base erosion
- Cracks running diagonally through multiple slabs in the same direction, which can indicate soil movement or tree root pressure underneath
- A patio that has settled away from the house wall significantly, creating a slope back toward the building
In these cases, re-jointing is cosmetic at best. The industry guidance from ICPI and agency maintenance manuals is clear: lift, inspect and rebuild sections with base or subbase failure rather than trying to mask it with new jointing. A contractor will lift the affected slabs, fix the base, re-lay and re-joint. Doing just the re-jointing means you'll be back to the same problem within one or two winters.
Tools, materials and PPE: what you actually need
I'll be honest: the job requires more prep equipment than application equipment. Budget time and money for the prep stage or the new jointing will fail just like the old stuff did.
Tools
- Jointing raker / oscillating multi-tool with grout blade: for removing old mortar or hardened polymeric sand cleanly
- Stiff-bristle brush and hand brush: for sweeping loose material out of joints
- Leaf blower or compressed air: for clearing dust and fine residue before application
- Pressure washer (optional but useful): for deep cleaning joints, but only after the old joint material is already loosened
- Angle grinder with diamond disc: for stubborn mortar joints in brick or concrete (use carefully — it's easy to damage edges)
- Rubber squeegee or float: for spreading paving grout compounds
- Plate compactor with rubber mat (for polymeric sand): to consolidate the sand into joints — hire one for a weekend if your patio is large
- Pointing trowel: for mortar work and pressing jointing compound into joints
- Steel ruler and tape measure
- Spray bottle or garden watering can with rose head: for activating polymeric sand and lightly wetting joints before mortar
Materials
- Polymeric jointing sand: for narrow joints (3–10 mm) in block paving and most paved patios — brands include Techniseal, Alliance Gator and similar
- Paving joint compound / ready-mix paving grout (e.g. Sika FastFix-type products): for joints 5 mm and wider and at least 20 mm deep
- Cementitious pointing mortar or specialist paving mortar (e.g. GftK vdw-series): for wider or deep joints in stone flags and brick
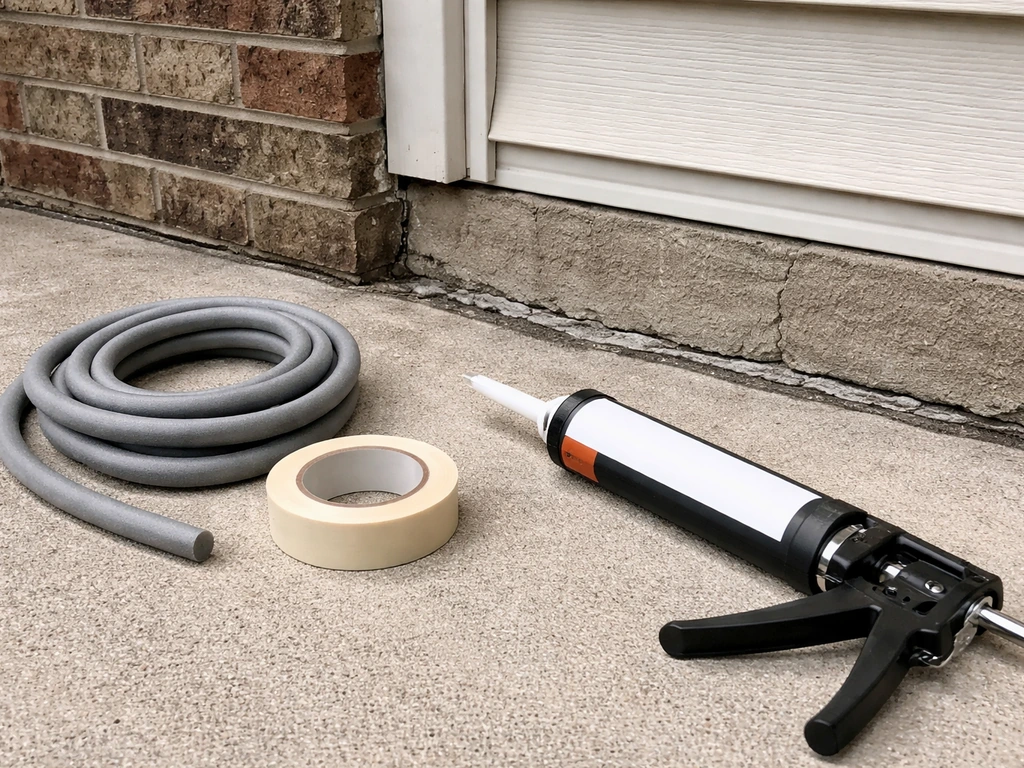
- Flexible sealant (MS-polymer, polyurethane or neutral-cure silicone): for joints subject to movement and for the building-to-patio perimeter gap
- Backer rod (closed-cell polyethylene foam): for filling deep joints before applying sealant — use a diameter slightly larger than the joint width so it sits under compression
- Joint primer: check your sealant TDS — some products require priming on porous substrates like sandstone or concrete
- Masking tape: to keep sealant off the slab faces, especially on light-coloured stone
Safety and PPE
- Knee pads: you'll spend most of this job on your knees
- Dust mask (FFP2 or N95 minimum): joint raking and dry sweeping generates silica-containing dust — this is a real respiratory hazard, not a formality
- Safety glasses: chips from mortar raking and grit from blowing debris
- Nitrile gloves: for cement mortars and resin compounds — these are caustic and sensitising to skin
- Hearing protection: if using an angle grinder or plate compactor
Preparing the joints: the step-by-step process
Preparation is where most DIY patio re-jointing goes wrong. Applying new material over dust, damp joints, or partial old mortar is the single most common reason jobs fail within a year. Allow at least a full day for prep, ideally two if the patio is large or the joints are deep.
- Remove all vegetation from joints: pull weeds by hand first, getting as much root as possible. For established moss and creeping plants, cut them back to the surface and treat with a path-safe herbicide a few days before you start work, then scrape out the dead material. If you want a chemical-free approach, boiling water or acetic-acid solution (strong vinegar) can kill surface growth, though they have no residual effect.
- Rake out the old joint material: use a jointing raker, an oscillating multi-tool with a grout blade, or for stubborn mortar, an angle grinder with a narrow diamond disc. The goal is to remove old material to a consistent depth — ideally the full joint depth or at least 40 mm (1.5 inches) for polymeric sand applications. Shallow raking leaves a weak bond zone.
- Brush and blow out all debris: use a stiff brush followed by a leaf blower or compressed air. Every grain of dust and crumbled mortar needs to come out. If you skip this, the new jointing material won't bond to the joint sides.
- Pressure wash if needed: if joints are still dirty or have algae growth, a targeted pressure wash at this stage works well. Keep the lance moving and don't dwell in one spot — you don't want to undercut the edge of the slabs. Let the water drain and move on to drying.
- Allow the joints to dry completely: for polymeric sand this is non-negotiable — the joints must be bone dry before you sweep sand in. Even slight dampness will cause premature polymer activation and uneven curing. On a warm, breezy day, 24 hours after washing is usually enough. In cool or overcast conditions, wait longer. A useful test: press a piece of kitchen paper into the joint. If it picks up any moisture at all, wait.
- Protect adjacent surfaces: mask off any areas where sealant or grout could stain a surface you care about — particularly natural stone, which can absorb cement staining permanently. Use standard masking tape or decorator's tape on the slab edges when applying flexible sealants.
Choosing the right jointing material: the full breakdown
The material you use should match your joint width, your substrate, the expected movement in that area of the patio, and how long you want it to last. Here's a straight comparison of the four main categories.
Polymeric jointing sand
Polymeric sand is kiln-dried sand blended with a polymer binder that activates with water and sets into a firm, semi-flexible mass. It's the right choice for narrow joints (3 mm to roughly 25 mm) in interlocking concrete block paving and many flag patios. It resists weed germination reasonably well because it closes the joint surface, though manufacturers are honest that it doesn't guarantee zero weed growth, wind-blown seeds can still land on top. Most products require a minimum joint depth of 38 mm (1.5 inches) to work properly, so check your depth before buying.
The key weakness of polymeric sand is that it's rigid once set. If your base moves at all seasonally, the jointing will crack and break up. It also hazes badly if you don't brush every trace of surface residue off before activating with water, and once that haze cures, it's extremely difficult to remove from textured surfaces. Brands like Techniseal SmartSand, Alliance Gator Maxx G2, and similar products are widely available, and their technical data sheets list exact joint width and depth limits for each product. Always check the specific product sheet, because the limits vary more than the bag labels suggest.
Cementitious paving mortar (pointing mix)
Traditional sand-and-cement mortar and specialist paving mortars like the GftK vdw series are rigid and strong, which makes them good for wide joints in natural stone or large concrete flags where stability is the priority. The catch is that they don't flex. Any base movement will crack them, and the cracks re-open the joint to water and weeds. They also have a short pot life once mixed (often 10 to 20 minutes for specialist products), require the joint substrate to be damp but not wet, and are sensitive to colour variation if you vary the water ratio or mix in different batches.
For a patio with a well-consolidated, stable base and wide natural stone joints, a specialist paving mortar is a durable and professional-looking result. For anything on a sand-set base or in a frost-exposed location with known seasonal movement, expect to repoint every few years regardless.
Ready-mix paving joint compound
Products marketed as paving grout or jointing compound (Sika FastFix is one widely available example) are a middle-ground option. They're typically cement- or resin-enhanced, come ready to use or requiring only minimal mixing, and are specified for joints of 5 mm or wider and at least 20 mm deep. They're easier to apply than traditional mortar, more forgiving on timing, and some formulations are marketed for use in damp or wet conditions. They're a reasonable choice for flag patios with moderate joint widths and a stable base.
Flexible sealants: silicone, polyurethane and MS-polymer
Flexible sealants are the correct choice wherever movement is expected: the joint between your patio and the house wall, expansion joints cut into large areas of concrete, or any joint in a driveway subject to vehicle loading. Neutral-cure silicone handles movement of around plus or minus 25 to 35 percent of the joint width (check the product data sheet, Sikaflex-11 FC, for example, is listed at around ±35% movement capability). Polyurethane sealants and hybrid MS-polymers offer similar or greater movement capability, are typically easier to paint over, and bond better to porous substrates like sandstone. High-performance polyurethane products like Tremco Dymonic 100 can handle significantly greater movement, making them suited to driveways or areas with pronounced thermal cycling.
For any flexible sealant to work correctly, you need to control the joint geometry. The standard rule of thumb is that sealant depth should be roughly half the joint width, a 10 mm wide joint should have roughly 5 mm of sealant depth. This 2:1 width-to-depth ratio allows the sealant to deform properly under movement instead of tearing. If the joint is deeper than this, install a closed-cell backer rod first. This is a foam rod you push into the joint to the right depth before applying sealant, the rod also prevents the sealant from bonding to the base of the joint (three-sided adhesion causes sealant to fail in movement). North Carolina DOT standard specifications (backer rod types and requirements; bond breaker guidance) define closed‑cell Type L and Type M backer rods and specify their use as bond breakers to prevent three‑sided adhesion. Choose a backer rod diameter slightly larger than the joint so it sits under compression and doesn't fall through.
Matching material to joint width and movement
Here's how the material recommendations break down by joint width and traffic type, based on the specs above and real-world performance.
| Scenario | Recommended material | Notes |
|---|---|---|
| Very narrow joints under 3 mm, no movement | Fine-grade flexible sealant or leave if structurally sound | Most polymeric sands specify a 3 mm minimum — check your product TDS before applying |
| Narrow joints 3–10 mm, stable base, pedestrian only | Polymeric jointing sand | Joint depth must be at least 38 mm; sweep and compact dry before activating with water |
| Narrow joints 3–10 mm, some seasonal movement | MS-polymer or polyurethane sealant with backer rod | Rigid mortar will crack within 1–2 frost cycles |
| Medium joints 10–30 mm, stable base, patio use | Paving joint compound / ready-mix grout | Check depth requirement on the TDS — minimum 20 mm depth typically needed |
| Medium joints 10–30 mm, movement or thermal cycling | Polyurethane or MS-polymer sealant with backer rod | Size sealant depth to half the joint width; primer may be needed on porous stone |
| Wide joints over 30 mm, stable base | Specialist cementitious or resin-bonded jointing compound | Fill in stages if depth is large; follow pot life instructions strictly |
| Wide joints over 30 mm, movement or driveway loading | Professional resin compound or consult a contractor | DIY flexible sealants alone are generally not adequate at this width |
| House-to-patio perimeter gap (any width) | Closed-cell backer rod + polyurethane or MS-polymer sealant | Always treat as a movement joint regardless of how tight it looks |
Applying the jointing material: step-by-step
Polymeric sand application
- Confirm joints are completely dry — no surface moisture anywhere.
- Pour polymeric sand over the patio and sweep it into the joints with a stiff brush, working in multiple directions. Keep the surface dry throughout this stage.
- Run a plate compactor (with rubber protection mat fitted) over the patio to consolidate the sand down into the joints. This is the step most people skip, and it's why their polymeric sand fails — uncompacted sand activates unevenly and blows out.
- Top up joints if the compaction has settled the sand below the joint surface, then sweep and compact again.
- Before activating with water, blow or brush every trace of sand residue off the slab surfaces. Use a leaf blower at low angle. Take your time — haze from surface residue is the most common complaint with polymeric sand and it's very difficult to remove once cured.
- Activate by applying water in multiple light passes using a watering can with a rose head or a garden hose on a fine mist setting. Follow the product TDS exactly — over-watering washes the polymer out and under-watering means incomplete cure. Most products become rain-safe within 15 to 90 minutes, but full cure for foot traffic is typically 24 hours.
- Keep foot traffic off for the manufacturer-specified cure period, usually 24 hours, longer in cool or damp weather.
Paving grout and mortar application
- Dampen joint sides lightly — cementitious mortars bond better to a damp (not saturated) substrate. Ready-mix grout products vary, so check the TDS.
- Mix or prepare your material strictly to the manufacturer's specified ratio. Varying the water content changes strength, colour and shrinkage — mix consistently.
- Working in small sections (no more than you can finish before the pot life expires, often 10–20 minutes for specialist mortars), squeegee or trowel the compound into the joints and push it in firmly. Use a pointing trowel for tighter spots.
- Tool the joint surface to a consistent finish — slightly recessed or flush depending on the product and your preference.
- Remove excess mortar from the slab surface before it sets. A barely damp sponge works well — wring it out almost completely to avoid dragging water into the fresh joint.
- Protect from rain and frost for at least 24 hours, and avoid foot traffic for the full cure period specified on the TDS — usually 24 to 48 hours for full strength.
Flexible sealant application (including house-to-patio joints)
- Size the backer rod: choose a closed-cell polyethylene foam rod with a diameter about 25% larger than the joint width so it sits under compression. Press it into the joint to set your sealant depth — roughly half the joint width.
- Apply primer if your product's data sheet requires it for the specific substrate (sandstone, limestone and some concrete pavers often need priming for polyurethane adhesion). Let primer dry fully before applying sealant.
- Mask the slab faces on both sides of the joint with masking tape, leaving only the joint opening exposed.
- Load the sealant cartridge and cut the nozzle at a 45-degree angle to a size slightly smaller than the joint width. Apply sealant in a single continuous pass, slightly overfilling the joint.
- Tool the sealant immediately with a wet finger or a sealant tool to push it into contact with both joint faces and form a slightly concave surface profile. The concave shape helps with movement accommodation.
- Remove masking tape immediately while the sealant is still wet — pulling tape off cured sealant tears the edges.
- Allow full cure before foot traffic — typically 24 to 72 hours depending on product, temperature and humidity.
The house-to-patio joint: a special case
The gap where your patio meets the house wall deserves specific attention. This joint will always move, the house structure, the patio base and the soil underneath all expand and contract at different rates. If you fill this gap with rigid mortar, it will crack. When it cracks, water gets behind the patio edge and potentially behind the house's damp-proof course (DPC). In the worst case, water bridges the DPC and causes rising damp inside the building.
The correct approach, consistent with both industry paving guidance and building waterproofing practice, is to treat this as a movement joint. blank" rel="noopener noreferrer">PAV‑GSP‑005 – Cleaning, Sealing and Joint Sand Stabilization (CMHA/ICPI guidance referencing perimeter detail considerations) recommends providing a compressible movement gap, installing a backer rod and elastomeric sealant sized per the sealant PDS, and ensuring building flashing and waterproofing continuity at building abutments. Clear the gap completely, install a backer rod to the correct depth, apply an elastomeric sealant (polyurethane or MS-polymer are better choices than standard silicone here, as they bond more reliably to damp masonry and cope with the heavier movement at a building abutment), and tool it neatly. Check that the patio surface still sits at least 150 mm below the DPC line on the house wall. If the patio is too close to the DPC level, that's a separate issue worth raising with a professional. Sealing the gap between house and patio is covered in more depth in a dedicated article on this site.
Weed prevention: why joints fail and how to stay ahead
Sealed and well-filled joints do inhibit weed growth by removing the loose, organic-rich environment that seeds need to establish. Polymeric sand and resin-bonded compounds are the most effective at this, because they close the joint surface. But no jointing material is a permanent weed barrier. Wind-blown seeds still germinate on top of any joint material if it's textured enough to trap organic debris. I've seen moss establish on sealed joints within two seasons in shaded patios.
The practical approach is to inspect joints once a year, brush off any establishing seedlings before they root, and spot-treat with acetic-acid solution (strong vinegar), boiling water, or a path-safe herbicide. Flame weeding works well for seedlings but carries obvious fire risks near timber, dry vegetation or fuel lines, be careful. The goal is to catch growth early, before roots work into and behind the jointing material. Once roots are established in joints, they lever the material out and undo your repair.
If weeds between your slabs are a persistent problem you want to eliminate rather than manage, the most effective long-term approach is repointing with a resin-bonded compound, which bonds hard to joint sides and leaves no seed bed. That's more work and cost upfront, but it significantly reduces the maintenance burden afterward. For more on stopping weed growth in patio joints, there's a dedicated guide on this site.
Troubleshooting common problems
Polymeric sand hazing on the slab surface
This happens when surface residue was left on the slabs before water activation. Once cured, the haze bonds to the surface and is very difficult to remove from textured slabs. On smooth concrete, a stiff nylon brush and clean water can reduce mild haze. On textured or natural stone, you're often stuck with it or need a specialist paving cleaner rated for polymeric sand residue. Prevention is the only real answer: blow and brush the surface obsessively before you apply any water.
New mortar cracking within one winter
Either the base is moving (a structural problem, see the 'when not to DIY' section above), or the mortar was applied to a dry joint on a hot day and dried too fast before curing properly. Cementitious mortars need moisture to cure, they need to be kept from drying out too quickly in the first 24 to 48 hours. On hot days, dampen the joint before application and mist the finished work with water for the first day. If the cracking is random and widespread rather than at joints specifically, base movement is the more likely cause.
Sealant pulling away from one side of the joint
This is adhesion failure on one substrate. It usually means that substrate needed a primer and didn't get one, or the surface was dusty, damp or contaminated when the sealant was applied. Check the sealant's PDS for primer requirements on your specific substrate. If you're repairing failed sealant, cut the old material out cleanly, clean the joint faces with a solvent-compatible with your sealant, prime if required, and re-apply.
Jointing sand washing out after rain
Either the sand wasn't compacted enough before activation, the polymer wasn't activated properly (common with over-watering), or water is channelling through the joints at volume because of a drainage problem. If it's the latter, re-jointing with the same material will keep failing. Look at where the water is coming from, a blocked outlet, a slope toward the patio, or inadequate falls on the patio surface, and address that first.
Timing, temperature and weather windows
Most jointing materials have temperature and weather requirements that matter more than people realise. As a general rule, don't attempt any of this work if the temperature is below 5°C or if frost is forecast within 48 hours. Cementitious mortars fail to cure properly in cold conditions, polymeric sand activates unpredictably, and flexible sealants cure extremely slowly or remain soft.
For polymeric sand specifically, you also need a dry weather window. Most products specify a minimum of 8 to 24 hours without rain after activation to allow the polymer to cure. Some newer formulations advertise shorter rain-safe windows (some products claim rain-safe within 15 to 60 minutes), but the full cure still needs dry conditions. Aim for a 48-hour dry window for the best results. Late spring through early autumn is the practical working season for most of the UK and Northern Europe.
Maintenance schedule to avoid repeating the job
Even the best jointing material degrades over time under UV, frost, foot traffic and organic growth. A simple annual routine keeps joints in good condition and catches problems early.
| Frequency | Task |
|---|---|
| Every spring | Walk the patio and probe joints — look for cracking, gaps, loose material or new weed growth |
| Every spring | Brush off any moss or seedling growth before roots establish in joints |
| Every autumn | Clear leaves and organic debris from the surface — decomposing material feeds weed and moss growth |
| Every 2–3 years | Top up polymeric sand in any joints where settlement or minor washing has reduced depth |
| Every 5–10 years | Full re-jointing assessment — inspect depth of existing material and plan for a full re-joint if the material is crumbling or significantly reduced |
| After any severe frost event | Check for new cracking in mortar joints and seal any new gaps before water gets in before the next freeze |
The biggest favour you can do your patio is to not ignore small gaps. A 5 mm crack in a mortar joint costs 20 minutes and a small amount of flexible sealant to fix. Left for two winters, it becomes a rocking slab, a damaged base, and a weekend job that tests your patience.
FAQ
How do I identify the type of joint between my patio slabs or pavers?
Use a visual and tactile check: rigid mortar joints are continuous, hard cement paste that resists scraping; loose/granular joints move under a probe and sand pours out; polymeric sand looks like dry sand but becomes hard/cohesive after wet activation (resists brushing out once cured); resin/epoxy grouts are smooth, trowelled or resinous and do not feel granular. Remove a small amount with a screwdriver or joint tool in an inconspicuous spot to confirm.
Which jointing material should I choose based on joint width, depth and movement?
General selection rules: - Narrow joints (<3–5 mm): fine polymeric sand or leave as compacted sand if movement is minimal. - Typical inter‑paver joints (≈3–20 mm): polymeric (polymer‑stabilized) sand for flexibility and weed reduction; check product min depth (often ≈38 mm). - Wider joints (>10–20 mm) or decorative wide joints: cementitious paving mortar or resin/epoxy grout for a rigid fill if the base is stable. - Joints at building abutments or where movement is expected: flexible elastomeric sealant (neutral‑cure silicone, polyurethane or MS polymer) with backer rod sized per joint and sealant PDS. - For vehicle areas use products rated for traffic. Always check the manufacturer Technical Data Sheet for min/max joint width, depth and substrate compatibility.
What tools and materials will I need for a typical DIY joint resealing job?
Common tools/materials: broom, leaf blower, stiff brush, wire brush or joint raker, cold chisel or grinder with diamond cup/rotary joint removal tool (for old mortar), vacuum, plate compactor with rubber pad (for polymeric sand), rubber mallet, jointing sand/polymeric sand, paving joint mortar or resin grout (if chosen), elastomeric sealant + backer rod for movement joints, caulking gun, masking tape, buckets, water sprayer/mist, sponges, safety gear (gloves, eye protection, dust mask), and manufacturer TDS for products used.
Step‑by‑step: how do I prepare the joints before filling?
Preparation steps: 1) Clear surface debris with broom/leaf blower. 2) Remove vegetation: pull weeds, use a joint knife, or spot treat roots if necessary. 3) Remove old joint material to a suitable depth (follow TDS—often ≥1.5"/38 mm for polymeric sand; for sealants match width:depth ratio). Use a joint raker, chisel, or grinder for hardened mortar. 4) Inspect base and subgrade by lifting a few units where concerns exist. If you find soft base, standing water, or >6 mm differential settlement, stop and consider professional rebuild. 5) Clean loosened joints with vacuum/air blower; ensure joints and surface are dry for polymeric sand (or pre-damp per mortar/grout instructions). 6) For movement joints at house abutments, fit closed‑cell backer rod to appropriate depth and tape/plumb the edges if needed.
How do I install polymeric (polymer‑stabilized) jointing sand?
Polymeric sand procedure: 1) Ensure pavers and joints are clean and dry (follow product TDS—many require completely dry surface). 2) Pour/sweep dry polymeric sand into joints, overfilling slightly. 3) Compact sand into joints with a plate compactor fitted with a protective pad or by hand tamping for fragile pavers. 4) Remove all surface residue by sweeping and blowing; any residue left can cause staining. 5) Activate per TDS by misting in light, even passes—do not flood; allow water to soak the joint and polymer binders to react. 6) Repeat light misting passes if specified; avoid overwatering. 7) Allow the manufacturer's cure time before foot/vehicle traffic (ranges from hours to 24+ hours depending on product and weather). Follow temperature/rain restrictions on the TDS.
How do I repoint with cementitious jointing mortar or paving grout?
Cementitious grout procedure: 1) Remove old mortar to an appropriate depth and clean joints; pre‑dampen substrate if the product requires. 2) Mix grout/mortar strictly to manufacturer water ratio—many have short pot lives. 3) Force mortar into joints with a pointing trowel or squeegee and remove excess promptly. 4) Strike or tool joints to provide desired finish before initial set. 5) Protect fresh mortar from rapid drying, rain and frost per TDS; mist or cover as recommended. 6) Expect some shrinkage and potential hairline cracking if the base moves—these mortars are rigid and not suited to areas with significant movement.
Next Article
How to Seal Between House and Patio: DIY Guide
Step-by-step DIY for sealing house and patio joints, fixing leaks, choosing sealants, and preventing trapped water and d