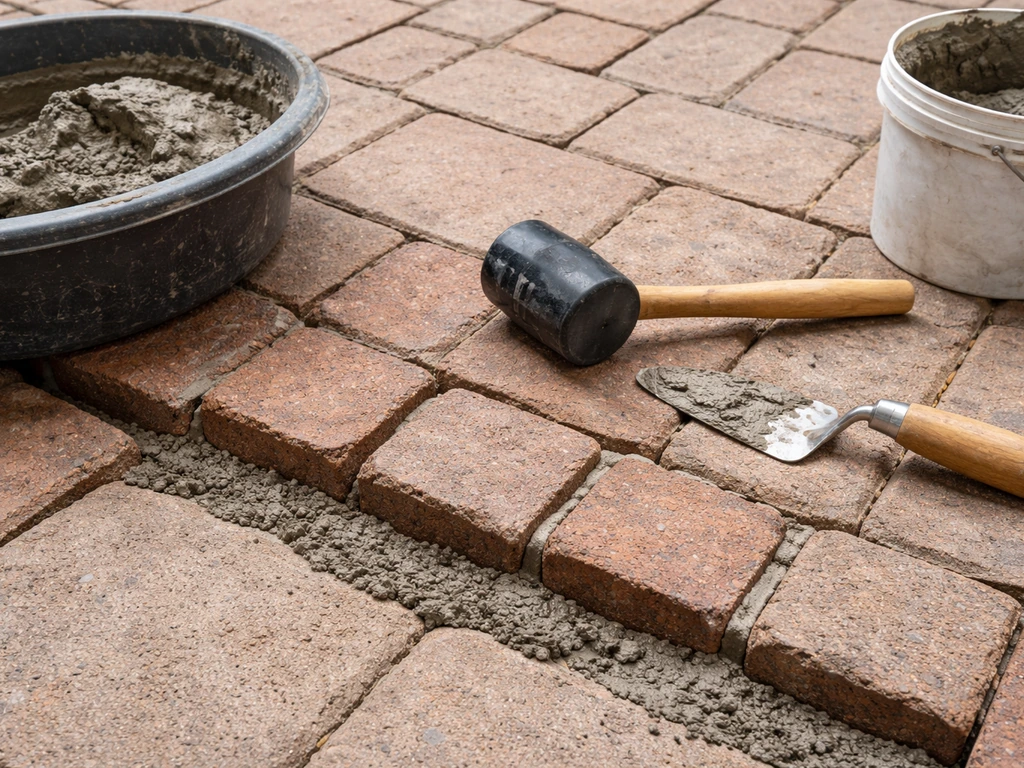
Before you buy a single planter or string a single light, walk your brick patio slowly and look at what you actually have. Most decorating projects on brick patios fail not because the furniture was wrong or the colors clashed, but because someone styled a surface that was already crumbling underneath. Fix the foundation first, then decorate. This guide walks you through the full sequence: inspecting what you have, deciding whether to repair, resurface, or call a pro, doing the actual repair work step by step, and then choosing surface treatments and decoration that will last instead of hiding problems that will only get worse. For detailed, step-by-step instructions on repairing brick patios, see how to repair a brick patio.
How to Decorate a Brick Patio: Repair, Refinish & Style

Talia Lang
22 Jul 2026
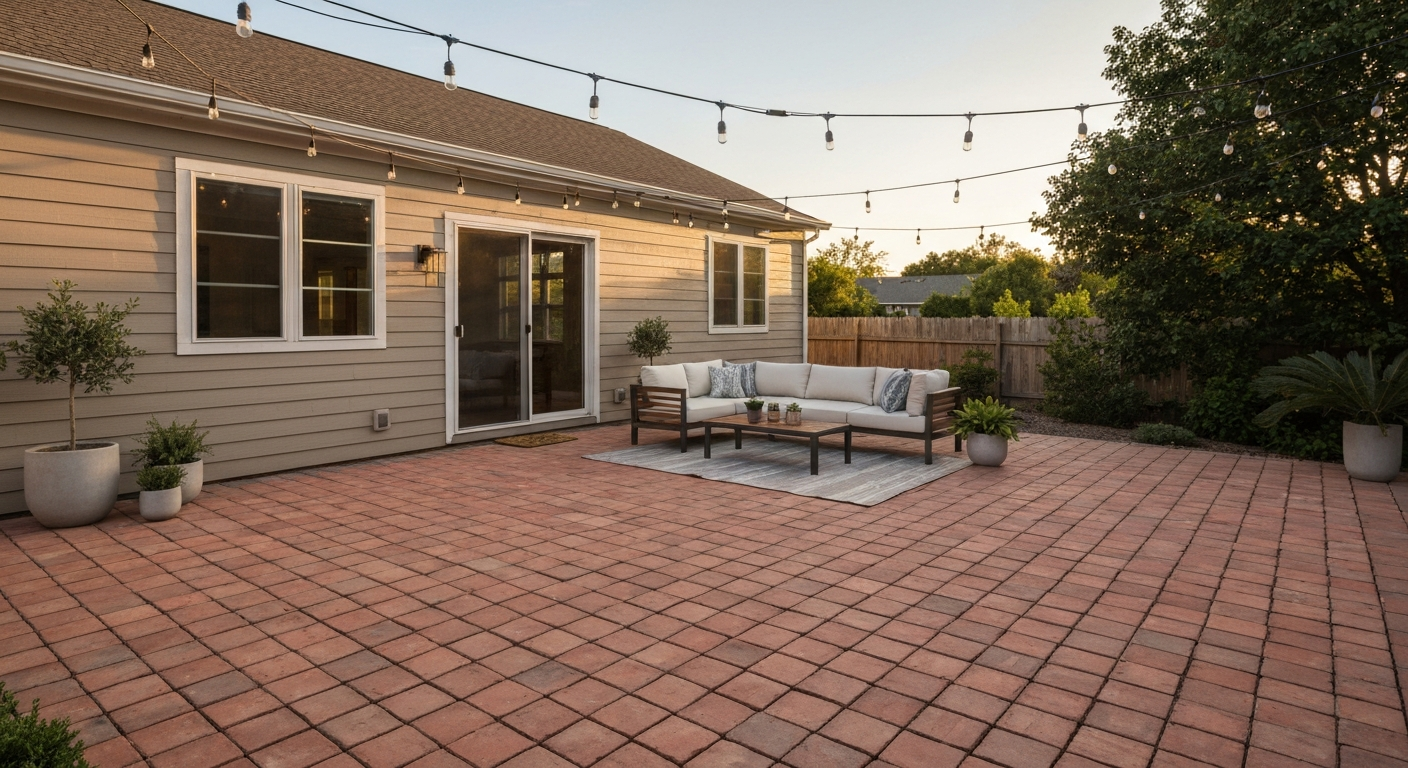
What this guide covers and who it's for
This is written for homeowners with an existing brick patio that needs attention before it can look its best. If your patio is reasonably solid but a bit tired, you might only need a deep clean, some repointing, and a sealer coat before you start decorating. If you have sunken sections, spalled bricks, or failed mortar joints throughout, you're doing real repair work first. Either way, this guide covers the whole arc: inspection, repair decisions, cleaning, replacing damaged bricks, repointing joints, leveling and resanding, surface treatments, and finally practical decorating ideas that work with repaired brick rather than concealing damage. If you're also weighing bigger options like painting the surface or resurfacing the whole patio, those are related jobs worth reading about separately once you've completed the repair work covered here.
Walk the patio first: how to assess what you're dealing with
A proper inspection takes about 20 to 30 minutes and will save you money. Do it on a dry day, ideally a day or two after the last rain so you can also check for drainage pooling. Bring your phone for photos, a flathead screwdriver, and a rubber mallet.
What to look for and photograph
- Spalled or crumbling brick faces: press a fingernail or screwdriver tip against the brick surface. If it flakes or the face lifts away, the brick is spalled and needs replacing, not just cleaning.
- Cracked or missing mortar joints: run your screwdriver along the joint lines. Sound mortar resists; failed mortar crumbles, pops out, or is completely missing. Note how widespread this is.
- Rocking or sunken bricks: step on each section and feel for movement or a soft, spongy underfoot sensation. Individual rocking bricks often mean a bedding sand issue. A whole section that has dropped suggests base failure.
- Efflorescence (white powdery deposits): a cosmetic issue caused by salts migrating through the brick. It looks bad but doesn't usually signal structural failure on its own.
- Pooling areas: after rain, where does water sit? Proper brick patios should slope at least 1/8 inch per linear foot away from the house to drain. Standing water accelerates freeze-thaw damage and erodes joints.
- Drainage channels or gaps clogged with debris: look at the edges where the patio meets lawn or a drain. Blocked edges cause water to back up onto the surface.
- Overall joint condition across the whole patio: if more than roughly a quarter to half of all joints are crumbling, you're looking at full repointing, not spot repairs.
Take photos of every problem area with something for scale, like a coin or a tape measure laid next to the damage. These photos will help you track progress and, if you end up calling a contractor for quotes, give them a clear picture before they even arrive.
Severity levels at a glance
| Severity | What you see | Typical scope |
|---|---|---|
| Minor | Dirty surface, light efflorescence, a few crumbling joints, no movement underfoot | Clean, spot repoint, resand joints |
| Moderate | Several spalled bricks, widespread joint failure, one or two sunken areas, some pooling | Replace damaged bricks, full repointing or partial relay, correct drainage, reseal |
| Serious | Multiple sunken sections, more than half the joints failed, frost-heaved areas, structural cracking | Partial or full relay required; likely needs professional assessment |
| Unsafe | Large subsidence, bricks lifting underfoot, significant drainage toward the house foundation | Stop DIY work; call a licensed masonry contractor |
Repair, resurface, or call a pro: the decision table
This is the decision most homeowners skip, and it's the most important one. Doing the wrong level of repair wastes money and time. Be honest about what your inspection showed.
| Condition | Recommended path | DIY-friendly? |
|---|---|---|
| Surface dirty, joints intact, no movement | Clean thoroughly, reseal | Yes, straightforward |
| Light joint erosion in isolated spots | Spot repoint affected joints | Yes, with patience |
| 25–50%+ of joints failed throughout | Full repointing of entire patio | Yes, but time-intensive (plan a full weekend per 100 sq ft) |
| 1–5 spalled or cracked bricks, stable base | Replace individual bricks | Yes, manageable |
| 6+ damaged bricks in a pattern (suggests base failure) | Lift section, check base, relay | Intermediate DIY or pro |
| One or two sunken areas, base compaction loss | Lift bricks, repack base, relay | Possible DIY if limited in scope |
| Widespread settlement, multiple sunken zones | Full or partial reconstruction | Call a pro for assessment first |
| Drainage slope toward house, water intrusion near foundation | Regrading required | Call a pro — foundation risk |
| Surface intact but visually tired | Stain, resurface, or overlay | Yes — see surface treatment section |
| Structural cracks in mortar bed, base movement | Professional assessment required | No — stop DIY work |
A quick rule of thumb: if a problem is isolated and the rest of the patio is solid, you can DIY it. For a full step-by-step walkthrough on doing the work yourself, see how to redo a brick patio. When you find the same problem in many places, especially settlement or base failure, that tells you something systemic is wrong that surface repairs won't fix. Decorating over a failing base just means you'll be ripping everything up again in two or three years.
Tools, materials, safety gear, and realistic time estimates
Tools you'll need
- Cold chisel and hammer (for breaking out damaged bricks and old mortar)
- Angle grinder with masonry blade or oscillating multi-tool with grout blade (for cutting out mortar joints cleanly)
- Pointing trowel and margin trowel
- Rubber mallet
- 4-foot level and a long straightedge
- Stiff-bristle brush and a softer nylon brush
- Garden hose with a spray nozzle or pressure washer (500–1,000 PSI with a wide-fan 25–40 degree tip)
- Plate compactor with protective rubber pad (rent one for about $60–$90/day — critical for polymeric sand)
- Wet saw or masonry saw (rent if needed for cutting replacement bricks to fit)
- Push broom and shop vac for joint sand cleanup
Materials
- Replacement bricks that match your existing ones as closely as possible (bring a sample to the masonry supplier)
- Type S mortar mix for repointing (matches most residential brick patios — strong enough, not overly rigid)
- Polymeric jointing sand for joint filling (choose a product sized for your joint width — some are formulated for narrow 1/8-inch joints, others for wider ones up to 1.5 inches)
- Concrete or masonry cleaner: a buffered, pH-appropriate product from a manufacturer like Prosoco or EaCo Chem is far safer than undiluted muriatic acid on residential brick
- Compactable gravel or crushed stone (if you're relaying a section and need to address the base)
- Bedding sand (coarse-grained, not fine play sand)
- Penetrating masonry sealer (optional but recommended after repairs are fully cured)
Safety gear
- Safety glasses (non-negotiable when chiseling or grinding)
- Heavy work gloves
- Dust mask or N95 respirator (mortar dust and masonry dust are harmful to lungs)
- Knee pads (you'll spend a lot of time on the ground)
- Hearing protection when using an angle grinder or plate compactor
Realistic time estimates
| Task | Estimated time (approx. 150 sq ft patio) |
|---|---|
| Inspection and photo documentation | 30 minutes |
| Deep cleaning (prep, wash, dry time) | Half day + 24–48 hours drying |
| Replacing 3–5 individual bricks | 2–4 hours |
| Spot repointing (10–20 joints) | 2–3 hours |
| Full repointing (entire patio) | 1–2 full weekends |
| Lifting, releveling, and relaying a small section (20–30 sq ft) | Full day |
| Polymeric sand fill and compaction | 2–3 hours + 24 hours cure |
| Sealing (after all work is cured) | 2–3 hours |
Step-by-step: cleaning your brick patio properly
Cleaning isn't glamorous but it's the single step that determines how well everything else goes. Repointing, sealing, and painting all fail faster on a dirty surface. Do this before any repair work on the joints, and again as a final prep step before applying any finish or sealer.
Pre-cleaning prep
- Clear the patio completely: furniture, rugs, planters, all of it. You can't clean around obstacles.
- Sweep off all loose debris, leaves, and sand with a stiff broom.
- Wet the surface thoroughly with a hose. Pre-wetting prevents cleaning solutions from soaking too deeply into the brick pores and reduces the risk of surface damage.
- Identify any staining type before choosing a cleaner. Efflorescence (white), rust stains, oil stains, algae (green-black), and mildew each need different products. Applying the wrong cleaner makes some stains worse.
Choosing and applying a cleaner
For most residential brick patios, a buffered, purpose-made masonry cleaner (such as products from Prosoco or EaCo Chem) is the right tool. Avoid undiluted muriatic acid on clay brick: it can etch the surface and attack the mortar. Trade bulletins reference BIA Technical Note 20 as the cleaning protocol standard, and that guidance consistently steers you toward controlled, low-concentration cleaners over aggressive acids. Always test your cleaner in an inconspicuous corner first and follow the product's dilution instructions. Apply with a stiff nylon brush, let it dwell for the time listed on the label, then scrub and rinse thoroughly.
Pressure washing: get the settings right
Consumer pressure washers are fine for brick patios. Use a 25- to 40-degree wide-fan tip and stay in the range of 500 to 1,000 PSI. Keep the wand moving and maintain at least 12 inches of distance from the surface. Higher pressure and narrow tips can erode mortar joints and damage softer brick faces, which then require the repair work you're trying to avoid. The National Park Service preservation guidance notes that even a few hundred PSI from a narrow tip can permanently damage vulnerable masonry. NPS Preservation Brief 1 – Cleaning & water‑repellent treatments warns that high‑pressure washing can damage historic or weakened masonry, noting examples of damage at pressures in the hundreds of psi and advising soft, low‑pressure cleaning matched to the substrate and to avoid pressures above roughly 400 psi for vulnerable masonry NPS Preservation Brief 1 – Cleaning & water‑repellent treatments (pressure/abrasion cautions). If you have older, softer, or visibly porous brick, stay at the lower end of the pressure range or skip the pressure washer entirely and use a garden hose with a spray nozzle combined with a brush.
Cleaning checklist
- Patio cleared and swept
- Surface pre-wetted with hose
- Cleaner type matched to stain type
- Small test area cleaned and checked before full application
- Cleaner applied and scrubbed per product instructions
- Surface rinsed thoroughly (no cleaner residue)
- Pressure washer used at 500–1,000 PSI with wide-fan tip only
- Surface allowed to dry completely: minimum 24 hours in warm weather, 48 hours in cooler or humid conditions before any repair or sealing work begins
Replacing broken or spalled bricks
Replacing a single brick or a small cluster is a manageable DIY job if the surrounding bricks are stable and the base underneath is sound. If the brick cracked because something heavy hit it, that's a simple replacement. If it spalled (the face flaked off) because of freeze-thaw cycles or water intrusion, check the adjacent bricks carefully before you declare the repair done.
Tools for brick replacement
- Cold chisel and hammer or angle grinder with masonry blade
- Pointing trowel
- Rubber mallet
- 4-foot level
- Wire brush
- Replacement brick (matched as closely as possible in size, color, and texture)
Step-by-step removal and replacement
- Score around the damaged brick with your angle grinder or chisel, cutting through the mortar joints on all four sides.
- Use the cold chisel and hammer to break the damaged brick into pieces small enough to lift out. Work from the center outward to avoid damaging adjacent bricks.
- Once the brick is out, chisel and scrape away all old mortar from the cavity. Use a wire brush to clean the exposed base and side faces. The bed (bottom) of the cavity needs to be clean, stable, and level.
- Check the depth of the cavity against your replacement brick. If this is a mortared-set patio, you'll bed the new brick in mortar. If it's a sand-set patio, you'll re-level the bedding sand.
- For a mortared patio: mix Type S mortar to a thick, peanut-butter consistency. Butter the bottom and sides of the cavity, set the brick in place, and tap level with the rubber mallet. Check against the surrounding surface with your level. Remove excess mortar from the joint faces immediately with the trowel.
- For a sand-set patio: add or remove bedding sand until the brick sits flush with its neighbors when tapped in with the rubber mallet. Check with the level.
- Tool the joints to match the surrounding joint profile once the mortar is thumbprint-firm (not fully hard). A concave or raked profile matches most older brick patios.
- Keep the repair damp for the first 24–48 hours if possible — mortar cures better when it doesn't dry out too fast. Mist with a hose, cover loosely with plastic sheeting, especially in hot or windy weather.
- Don't walk on the repair for at least 24 hours; allow 72 hours before placing furniture or heavy items.
Matching the mortar and the brick
Mortar matching matters more than most people realize. If your existing mortar is a soft, lime-based mix (common in patios older than 30 years), using a stiff, high-strength modern mortar around it will cause problems: the rigid new mortar will crack the adjacent softer brick faces during thermal movement. For most standard residential brick patios built in the last few decades, Type S mortar (one part Portland cement, half part lime, four and a half parts sand) is the right choice. Bring a photo of your existing joint color to the masonry supplier and look for pre-blended mortar with color additives that come close. An exact match on day one isn't always possible, but it weathers in over time.
Repointing mortar joints: when it's needed and how to do it
Repointing (also called tuckpointing in some regions) means removing deteriorated mortar from the joints and replacing it with fresh mortar. It's the single most impactful repair you can do for a brick patio that looks old and weathered but is structurally intact. For a step-by-step walkthrough on how to repoint a brick patio, see the dedicated repointing section. Properly repointed joints stop water infiltration, which is the main driver of freeze-thaw spalling and further joint erosion.
When to repoint vs. when to walk away from spot repairs
NPS Preservation Brief 2 makes a practical point that applies to patios as well as walls: when 25 to 50 percent or more of the joints in a masonry surface need work, it becomes more cost-effective and more consistent to repoint everything rather than doing scattered spot repairs. Patchy repointing is also visually obvious and weathers unevenly. If more than a quarter of your joints are crumbling, budget a full weekend and do the whole patio.
Step-by-step repointing method
- Remove all loose and deteriorated mortar. Use an angle grinder with a tuck-pointing blade or an oscillating multi-tool with a grout-removal blade to cut out mortar to a minimum depth of about 3/4 to 1 inch, or to sound mortar — whichever is deeper. The goal is to get back to mortar that actually holds. Don't try to just scratch the surface and pack new mortar over old loose material: it won't bond and you'll be doing this again.
- Vacuum and brush out all dust and loose particles from the joints. Compressed air is ideal; a stiff brush works too. Any dust or grit left in the joint will prevent a proper bond.
- Pre-wet the joints with a damp brush or misting spray. This prevents the existing masonry from drawing moisture out of your fresh mortar too quickly, which weakens the cure.
- Mix your mortar. Type S mortar is the right starting point for most residential brick patios. Mix to a stiff consistency — it should hold its shape when packed but not be crumbly. Follow the bag instructions for water ratios.
- Pack mortar into the joints in thin layers. Don't try to fill a deep joint in one pass. Pack a first layer about 1/4 inch deep, let it firm up to thumbprint-hard (roughly 30–60 minutes depending on conditions), then add the next layer. This prevents shrinkage cracking.
- Tool the joints to match the existing profile while the mortar is still workable. A jointing tool or even a dowel rod dragged along the joint creates the concave (half-round) profile most common on residential patios.
- Clean mortar smears off the brick face immediately with a damp sponge. Hardened mortar smears are much harder to remove and can stain the brick.
- Keep repointed areas moist for 72 hours. Mist twice a day, cover with plastic if the weather is hot, dry, or windy. Mortar that dries out too fast doesn't fully cure and will fail prematurely.
- Allow at least 7 days before sealing over repointed joints, and 28 days for full mortar cure before applying any paint or heavy coatings.
Mortar type reference
| Mortar Type (ASTM C270) | Compressive Strength | Best for |
|---|---|---|
| Type N | 750 psi | Soft or older brick, mild climates, above-grade joints |
| Type S | 1,800 psi | Most residential patios, moderate climates, below-grade or exposed joints |
| Type M | 2,500 psi | High-load areas, retaining walls — too rigid for most standard brick patios |
| Type O | 350 psi | Soft historic brick only, interior or sheltered locations |
A word of caution on mortar strength: using a mortar that is stronger than the brick itself forces stress into the brick face rather than the joint when thermal movement occurs. That causes spalling. Type M is almost never the right choice for a standard residential brick patio. If you're unsure, Type S is the safe default for most modern residential brick.
Leveling, refilling, and sanding joints: polymeric vs. regular sand
Sand-set brick patios (where the bricks sit on a compacted gravel base over a screeded bed of coarse sand, rather than in a mortar bed) rely on joint sand to lock everything together and resist weed growth and ant activity. When that sand washes out or erodes, bricks start to shift, rock, and sink. Refilling the joints is one of the most effective things you can do to stabilize a sand-set patio.
Polymeric sand vs. regular sand: the honest comparison
| Property | Polymeric Sand | Regular Joint Sand |
|---|---|---|
| Weed resistance | High (polymer binder inhibits growth) | Low (weeds establish easily) |
| Washout resistance | High once cured | Moderate to low, erodes with rain and pressure washing |
| Ant resistance | Moderate to high | Low |
| Cost | $25–$50 per bag (covers roughly 25–50 sq ft depending on joint width) | $5–$10 per bag |
| Installation complexity | Moderate — requires dry surface, proper compaction, careful cleanup to avoid haze | Simple — sweep in, compact, done |
| Repairability | Harder to add more later without removing old material | Easy to top up at any time |
| Longevity | 5–10 years with proper installation | 1–3 years before needing top-up |
For most homeowners, polymeric sand is worth the extra cost if you want a patio that stays looking good for several years without annual re-sanding. The catch is that the installation has to be done exactly right, or the polymer doesn't activate properly and the product performs no better than regular sand. For another relevant comparison, see how to resurface brick patio.
Step-by-step joint filling sequence
- Check for and correct any rocking or sunken bricks before filling joints. Joint sand cannot fix a base problem. According to ICPI specifications, a proper pedestrian patio base requires approximately 4 inches of compacted aggregate and about 1 inch of screeded bedding sand. If a whole section has dropped, that section needs to be lifted and releveled before you add any sand.
- Verify the surface is completely dry. Polymeric sand especially requires a bone-dry surface. Check the forecast: you need at least 24 hours of dry weather after installation for the polymer to cure properly.
- Sweep all existing loose sand and debris out of the joints using a stiff brush and shop vac. You want clean, empty joints.
- Pre-compact the patio with a plate compactor (no sand in joints yet). Run it over the whole area to seat the bricks firmly before you fill. Use a rubber or foam protective pad between the compactor plate and the brick surface to prevent surface scratching.
- Pour the polymeric sand over the dry surface and sweep it into the joints with a push broom. Work the sand into the joints from multiple directions until they're filled to within about 1/8 inch of the top of the brick.
- Run the plate compactor (with protective pad) over the surface again to vibrate and settle the sand into the joints. Add more sand and sweep again to top up any joints that settled.
- Blow or sweep all loose sand off the brick surface. This is critical with polymeric sand: any excess left on the brick faces when you mist will activate the polymer and leave a haze that is very difficult to remove.
- Mist the surface with a fine spray from a garden hose. Don't flood it. Follow your product's TDS for exactly how much water to apply. The goal is to activate the polymer binder, not wash the sand back out of the joints.
- Keep foot traffic off for 24 hours. Avoid any rain or irrigation for the same period. Full joint hardness takes 24–48 hours in normal temperatures.
Tips to prevent washout and weeds
- Never fill joints with polymeric sand when rain is forecast within 24 hours. Premature wetting before the polymer sets washes the binder out and leaves you with regular sand and a lot of wasted money.
- Don't pressure wash a polymeric-sand patio for at least 30 days after installation, and when you do clean it later, use low pressure and a wide fan tip.
- If weeds are pushing up through joints even after polymeric sand, the issue is usually organic debris sitting on top of the sand providing a growth medium. Regular sweeping and clearing of leaves prevents this.
- For regular (non-polymeric) sand joints, plan to top up every year or two, especially after harsh winters or heavy rain seasons.
- Joint width matters for polymeric sand product selection: narrow joints (around 1/8 inch) need a fine-grade product; wider joints (up to 1.5 inches) need a coarser formulation. Check the product spec sheet before buying.
Fixing minor drainage problems
Pooling water is one of the most common reasons brick patios deteriorate. The standard minimum slope for a paved patio is 1/8 inch per linear foot away from the house (about a 1% grade), with up to 1/4 inch per foot being comfortable and still safe to walk on. If your inspection found standing water after rain, you have a drainage problem that decoration cannot fix. A small dip in one section can sometimes be corrected by lifting those bricks, adding bedding sand to raise the level, and relaying them with the correct slope. Clear any clogged edge channels or drainage gaps at the patio perimeter. If the slope issue is large-scale, or if water is running toward your house foundation, that's the moment to call a licensed contractor: foundation drainage problems are not a DIY fix and the consequences of getting it wrong are serious.
Surface treatments: paint, stain, sealer, and overlays compared
Once your repairs are done and fully cured, you have real options for how the surface looks and performs. For step-by-step tips on refreshing an existing brick patio, from deep cleaning and repointing to resealing and finishing, see our guide on how to refresh a brick patio. Each option has honest tradeoffs. The NPS Preservation Brief 1 cautions that non-breathable coatings on brick can trap moisture and cause spalling, so breathability matters when you're choosing a product.
| Treatment | Appearance change | Breathable? | Typical longevity | Reversible? | DIY difficulty |
|---|---|---|---|---|---|
| Penetrating sealer | Subtle darkening or wet-look, no color change | Yes (penetrating type) | 3–5 years | Yes (wears off) | Easy |
| Concrete/masonry stain | Color tint, semi-transparent | Mostly yes (acid-based or water-based penetrating stains) | 5–8 years | Partially | Moderate |
| Masonry paint | Opaque color, covers brick texture | Depends on product — vapor-permeable paints exist | 5–10 years with prep | Very difficult to remove | Moderate to hard |
| Concrete overlay/resurfacer | Completely new surface texture and color | No — bridges over brick | 10–15 years if done well | Not practical | Hard — requires professional for best results |
Penetrating sealers are the easiest win: they protect the brick from water absorption and staining while letting moisture vapor escape, which is what you want for masonry in a climate with wet winters. They're also the most forgiving if you change your mind later. Painting is a much bigger commitment: paint on brick is very hard to remove and creates a maintenance cycle where you're repainting every several years as it peels. If the brick is in good shape after your repair work, a stain or sealer is almost always the better choice over paint. Painting and resurfacing are related topics with their own step-by-step detail worth exploring once the foundation repair is complete. For step-by-step instructions on choosing paint, prepping the surface, and applying coatings, see our guide on how to paint a brick patio.
Decorating a repaired brick patio: ideas that work with the material
This is the part most people came here for. The good news is that a well-repaired brick patio is one of the best outdoor surfaces you can decorate: it has texture, warmth, and a natural quality that works with almost every style. The rule is simple: decorate to enhance the surface, not to cover up problems. For step-by-step surface treatments and styling tips, see our guide on how to make brick patio look new. If you've done the repair work, you've earned the right to style it properly.
Furniture
Brick patios handle weight well, so almost any outdoor furniture works. The main practical consideration is furniture feet: metal feet without caps can scratch and stain brick over time. Fit felt or rubber glide caps to all metal chair and table legs. Heavy cast iron or stone furniture looks particularly good on brick and won't shift around in wind, which matters if your patio is exposed. For visual balance, keep furniture scaled to the patio: large sectional sofas on a small patio make the space feel cramped and make it harder to inspect and maintain the joints underneath.
Outdoor rugs
Outdoor rugs are one of the most effective ways to add color and define zones on a brick patio, but they can also trap moisture against the surface if left in place permanently. Use rugs with an open-weave backing that allows the brick to dry, move or lift them periodically to let the surface breathe, and inspect the brick underneath a few times a season. A rug left over a slightly damp or problematic area will accelerate mold and mortar erosion, exactly the kind of thing that was causing problems before.
Planters and greenery
Planters on brick patios look great and are low-risk as long as they're on feet or risers that allow water drainage underneath. A planter sitting flat on the brick surface creates a perpetually wet spot that stains the brick, encourages moss, and softens the mortar underneath over time. Elevate every planter by at least an inch using pot feet or a planter stand. Large terra cotta, concrete, or ceramic pots complement brick naturally. Avoid very large, heavy planters over any area you recently releveled: they add concentrated load that can cause new settlement in a freshly repaired base.
Lighting
String lights hung between posts or a pergola structure are the most popular and least disruptive lighting option for a brick patio. They don't require any penetration of the brick surface and can be adjusted easily. For permanent lighting, low-voltage path lights along the patio perimeter work well and are easy to install without disturbing the patio surface. Avoid running wiring across the patio surface under rugs: this traps moisture, creates a trip hazard, and makes future repairs more complicated.
Fire features
A freestanding fire pit or fire bowl works well on a brick patio but needs a few precautions. Keep it on a metal or stone heat-resistant pad to prevent direct heat transfer to the brick surface: repeated thermal cycles from a bare fire pit placed directly on brick will eventually crack the bricks underneath it. Gas fire features should be installed by a licensed plumber or gas fitter, full stop. For wood-burning fire pits, maintain a clear non-combustible zone around the base, and check the brick surface underneath the pad each season for any signs of heat-related cracking.
A few styling principles that hold up over time
- Work with the brick color rather than against it. Warm terracotta-toned brick pairs well with greens, creams, and natural wood tones. Gray or darker brick reads cooler and can take more contrast.
- Leave some of the brick visible. The texture and color variation in handmade or older brick is part of its appeal. Over-decorating hides what makes the surface interesting.
- Keep paths clear. You need to be able to see, inspect, and maintain the joints easily. If furniture and planters make it hard to walk around the whole patio, you'll miss early signs of new problems.
- Avoid anything that holds standing water against the surface: kiddie pools, large planters without drainage, or decorative elements with no drainage gap.
Maintenance schedule and realistic cost expectations
The best way to avoid a major repair project in five years is a consistent light maintenance routine. Most brick patio problems are slow and progressive: a small joint failure leads to water infiltration, which leads to base erosion or frost damage, which leads to settled or spalled bricks. Catch problems early and they're 30-minute fixes. Ignore them for two or three seasons and they become weekend projects.
Maintenance schedule
| Frequency | Task |
|---|---|
| Monthly (spring–fall) | Sweep debris, check planter drainage, look for any new joint crumbling or brick movement |
| Each spring | Walk the full patio inspection (use your original photos as comparison), check drainage slope after frost season, look for efflorescence and new joint failures |
| Each fall | Clear leaves and organic debris from joints (critical before winter), resand any joints that have eroded, check sealer condition |
| Every 3–5 years | Reapply penetrating sealer after cleaning, spot repoint any joints showing early erosion, check for any base settlement |
| As needed | Replace individual spalled bricks, address any pooling areas before winter |
Realistic cost ranges
| Task | DIY material cost (approx.) | Professional labor cost (approx.) |
|---|---|---|
| Deep cleaning (150 sq ft) | $20–$50 in cleaners | $150–$400 |
| Replacing 5 bricks | $30–$80 in materials | $200–$500 |
| Full repointing (150 sq ft) | $80–$150 in mortar and tools | $800–$2,500 |
| Polymeric sand fill (150 sq ft) | $50–$120 | $300–$600 including materials |
| Penetrating sealer (150 sq ft) | $40–$100 | $200–$500 |
| Lifting and releveling a section (30 sq ft) | $50–$100 in materials (plus compactor rental) | $400–$1,200 |
| Full patio reconstruction | Not recommended as pure DIY | $5,000–$20,000+ depending on size and base work |
These are rough ranges and vary significantly by region and material costs in 2026, but they give you a realistic sense of where your money goes. The DIY savings are real, especially for cleaning, repointing, and joint sanding. Where DIY gets complicated is anything involving lifting and relaying large sections, correcting drainage slope, or dealing with a failed base. Those are the jobs where getting it wrong costs more than getting professional help from the start.
FAQ
What’s the first thing I should do when I decide to decorate a brick patio?
Start with a documented inspection. Walk the patio with a notebook or phone photos and check for: loose/rocking bricks or pavers; cracked, spalled, or broken bricks; failing or missing mortar joints; areas of ponding or incorrect slope; efflorescence or heavy staining; vegetation in joints; and soft or eroded bedding/base under foot. Note extent (small area vs. most of patio) and take pictures from multiple angles. This inspection determines whether you can decorate now or need repairs/resurfacing first.
How do I decide: repair, resurface, or hire a pro?
Use this decision checklist: - If damage is isolated (<10–15% of bricks or joints) and the base is solid: DIY repairs (replace bricks, repoint, sand joints). - If joint mortar is failing across 25–50% of surface or more, or multiple areas show settlement: plan full repointing or relay — consider hiring a pro for efficient, code‑compatible repointing. - If base/aggregate is soft, there’s widespread settlement, or multiple bricks sink when stepped on: you need to lift and relay sections — pro recommended unless you have experience and equipment. - If historic brickwork requires matching mortar, special cleaning or breathable coatings: consult a preservation pro. - If drainage slope is <1/8 in/ft causing ponding over large areas: correct grade; pro recommended for excavation and regrading. When in doubt about structural base, pervasive settlement, or historic/heritage value, hire a professional.
What are safe, realistic DIY steps to clean a brick patio (tools, materials, time)?
Basic cleaning sequence (tools: broom, stiff nylon brush, garden hose or low‑pressure washer, bucket, mild detergent or buffered masonry cleaner, rubber gloves, eye protection). 1) Sweep loose debris and remove vegetation. 2) Test-clean an inconspicuous area with diluted detergent or a masonry cleaner per label. 3) Use a wide‑fan nozzle and low pressure (start <500–1,000 psi) and keep nozzle 12–18 in from surface; do not use high‑pressure on soft or historic bricks. 4) Rinse thoroughly and allow to dry. Estimated time: small patio (2–4 hours), midsize (half‑day). Follow BIA/NPS guidance to avoid abrasive or high‑pressure methods on vulnerable brick.
How do I replace a single broken or rocking brick/paver?
Tools/materials: masonry chisel, cold chisel, hammer, pry bar, shop vacuum, replacement brick/paver (match size), bedding sand or mortar depending on original installation, rubber mallet, level, jointer, safety glasses, gloves. Steps: 1) Remove surrounding joint material carefully with chisel. 2) Lift the damaged brick, clearing bedding material. 3) Clean cavity and adjacent units; remove debris. 4) If unit set on sand: add screeded bedding sand and set replacement, tapping with rubber mallet; compact to match level. 5) If brick was mortared: set with matching mortar (see mortar guidance) and tool joints to match profile. 6) Allow appropriate cure (mortar 24–48 hrs). Time: 1–3 hours per unit. Replace multiple units in a day as stamina allows.
How should I repoint mortar joints correctly (DIY steps, mortar selection, depth)?
Follow preservation best practices: tools/materials: angle grinder or hand raker, joint cleaning brush, vacuum, matching mortar (use ASTM C270 as guide for mortar type selection), pointing trowel, joint tool, water spray, safety gear. Steps: 1) Test and match original mortar color/strength. 2) Rake out failed mortar to a sound depth—commonly at least 1" or twice the joint width; remove soft material until firm substrate. 3) Clean joints of dust and dampen. 4) Prepare mortar mix compatible in strength/permeability (avoid overly hard cementitious mixes on old brick). 5) Pack mortar into joints in layers if deep, tooling to match profile. 6) Cure per product instructions (keep damp for 48–72 hours if required). Note: if >25–50% joints need repointing across a wall/patio, consider repointing the whole area or hiring a mason. ASTM E2260 and NPS Preservation Brief 2 are good references.
What’s the correct way to level joints and stabilize pavers with polymeric sand?
Tools/materials: polymeric jointing sand (manufacturer TDS), broom, plate compactor with protective pad, leaf blower or brush, hose with misting spray, safety gear. Steps: 1) Ensure paver surface is dry and pre‑compacted with no loose sand in joints. 2) Sweep polymeric sand into clean joints, filling completely. 3) Compact with a plate compactor using a protective pad to settle sand deep into joints. 4) Remove excess sand and sweep clean. 5) Mist per manufacturer instructions to activate binders (avoid overwatering). Allow full cure time (usually 24–72 hrs). Follow product limitations for joint width and depth to avoid failure or haze.
Next Article
How to Resurface a Brick Patio Step by Step Guide
Step-by-step guide to resurface a brick patio: diagnose issues, repair loose bricks and mortar, fix grade, regrout, and