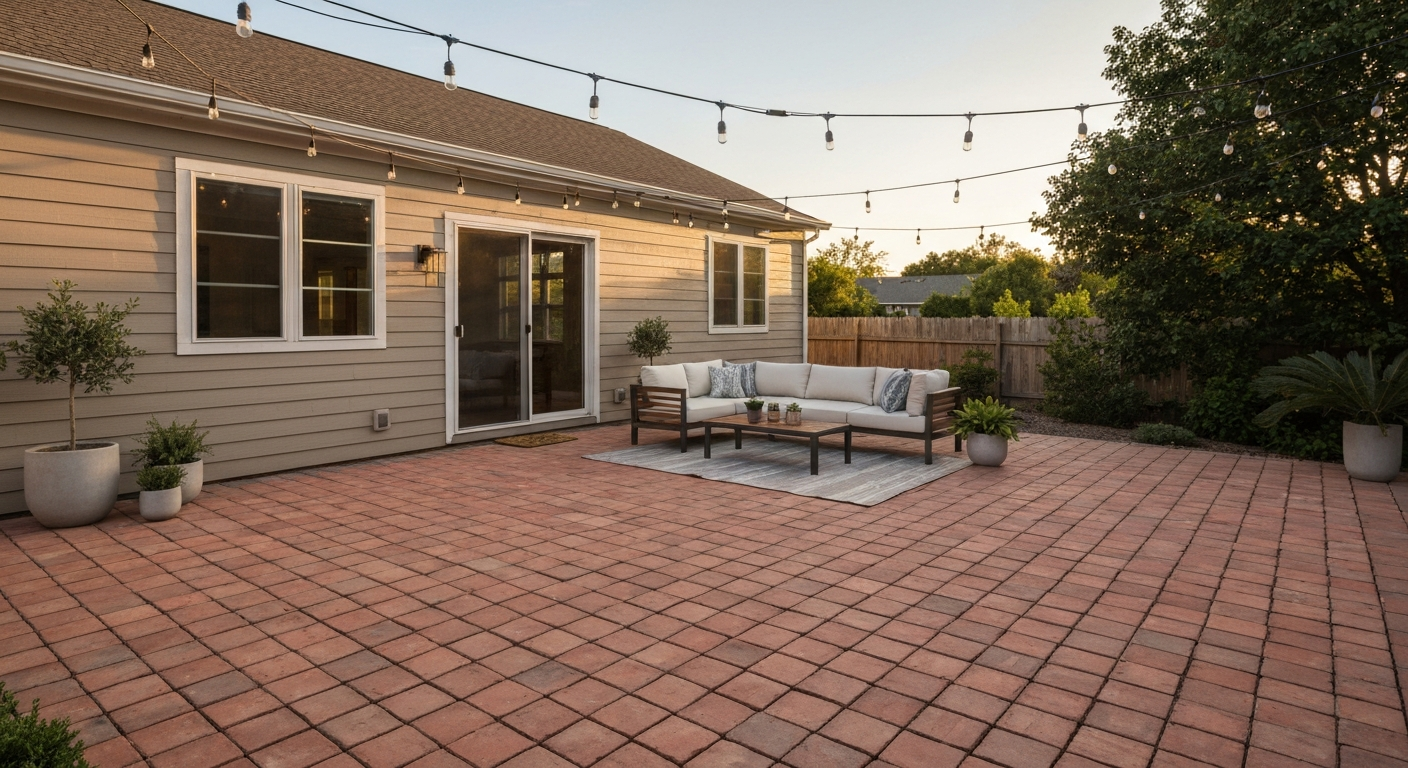
Refreshing a brick patio usually means working through a sequence: inspect what you actually have, clean it properly, fix whatever is broken (loose or cracked bricks, crumbling mortar joints, sunken spots), then decide whether you want to seal, stain, or just leave it natural. Most homeowners can handle the cleaning and basic repairs themselves over a weekend or two. The tricky part is not the work itself, it's diagnosing what went wrong so you're not just covering up a problem that will come back next spring.
How to Refresh Brick Patio: Complete DIY Guide, Costs & Tips

Talia Lang
9 Aug 2026
What this guide covers and who it's for
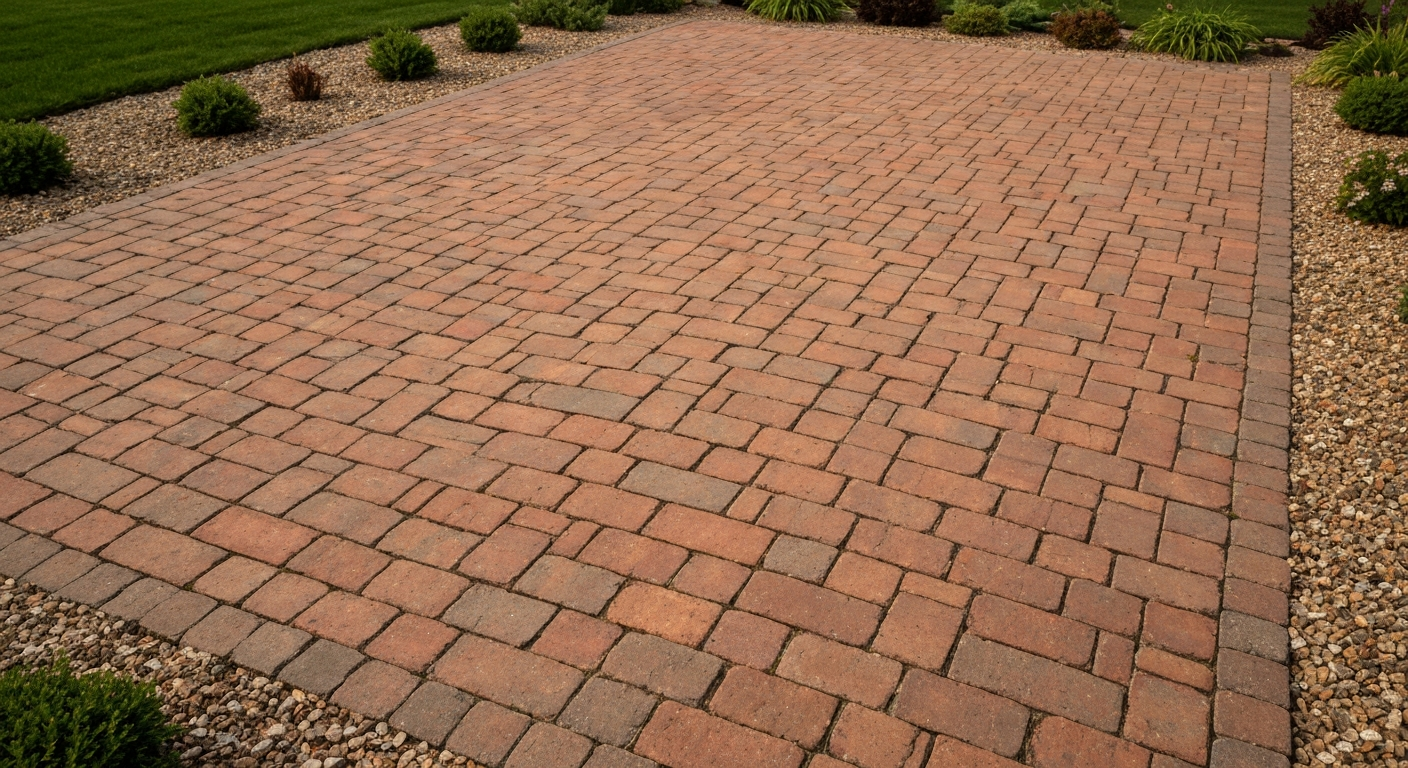
This guide is written for homeowners with a reasonably solid brick patio that has gotten rough around the edges over time: faded color, dirty or mossy surface, crumbling mortar joints, maybe a couple of cracked or sunken bricks. If your patio has widespread structural failure, deep drainage problems that are flooding an adjacent foundation, or bricks that are spalling in large numbers, some of what's here still applies, but you'll want to weigh the professional-help section carefully. I've been through this process on patios ranging from 10-year-old dry-laid jobs to 40-year-old mortared beds, and the same diagnostic logic applies to all of them.
Quick inspection checklist before you buy anything
Before you spend a dollar on supplies, spend 30 minutes walking the patio slowly with your phone camera. Good photos in raking light (early morning or late afternoon when shadows are long) will show you problems that flat overhead light hides entirely. Go through this list and mark each item as none, minor, or significant. That scoring will feed directly into the decision you make in the next section.
- Cracks in bricks or mortar: note hairline (under 1 mm) vs. wide (you can fit a credit card in it) and whether cracks follow a pattern or are random
- Missing, loose, or powdering mortar: probe joints with a screwdriver — if mortar falls out or feels sandy, it's failed
- Sunken, heaved, or uneven areas: lay a straight 4-foot level across multiple bricks; note any spots that rock or drop more than about 3/8 inch
- Persistent damp spots or staining on the surface or any adjacent wall: these point to drainage or flashing failure, not just a dirty surface
- Biological growth: moss, algae, lichen — note how thick and how widespread
- Efflorescence: white, powdery or crusty deposits on brick faces or joint surfaces
- Spalled or flaking bricks: surface layers lifting off or flaking away, not just surface dirt
- Clogged or missing drainage features: check any weep holes, edge channels, or surface drains
- Evidence of previous coatings: paint, thick sealers, or coatings that are now peeling or trapping moisture
For damp-looking areas, run a simple plastic-sheet moisture test: tape a 12-inch square of plastic sheeting flat to the brick surface and leave it for 24 hours. Moisture beading under the sheet means water is migrating up through the brick from below, a drainage or base issue. Moisture on top of the sheet but not below means the problem is surface condensation or rain, not subsurface water. That distinction matters a lot before you apply any sealer or coating. Also tap across the surface with a rubber mallet or the handle of a screwdriver. A solid thunk is good; a hollow, drum-like sound means the brick or mortar beneath is no longer bonded.
Diagnosing the common problems
Understanding why something failed tells you whether cleaning it or patching it will actually hold. Here are the most common issues and what's actually causing them.
Dirt and general grime
Ordinary dirt and carbon buildup is the easiest problem on this list. It looks bad but it's not structural. A stiff brush and some soapy water handles most of it; a pressure washer on a conservative setting takes care of the rest. No diagnosis needed beyond confirming it's surface dirt and not staining from a deeper source.
Moss, algae, and lichen
These grow where surfaces stay damp. If you clean them off and don't fix the moisture or shading problem, they come back within a season. Moss holds water against the brick surface, which accelerates freeze-thaw damage in cold climates. Lichen is trickier because it chemically bonds to the surface; you can remove the top layer but regrowth is common if conditions don't change. Before treating, scrape off thick growth mechanically with a stiff plastic-bristle brush (not metal, wire brushes leave iron particles that rust-stain the brick).
Stains (rust, oil, paint)
Rust stains from furniture legs or metal fasteners respond to oxalic-acid or phosphoric-acid based masonry rust removers. Always test on a hidden area first, some acids will bleach or etch certain brick colors. Oil stains need a degreasing poultice or a dedicated concrete/masonry degreaser. Paint removal is the most difficult: stripping old paint without damaging the brick often requires chemical paint strippers formulated for masonry, applied with dwell time and rinsed carefully. Avoid the temptation to blast paint off with a pressure washer at high pressure, you will damage the mortar joints and may drive water deeper into the assembly.
Efflorescence
Those white, chalky deposits on the brick face are salt crystals left behind when water carries soluble salts through the masonry and evaporates at the surface. Brushing them off is easy. But if you don't fix the moisture source, poor drainage, a missing edge restraint letting water pool under the patio, clogged weep channels, the efflorescence will keep coming back. Treat it as a symptom, not the problem itself.
Cracked or loose bricks
A single cracked brick from a dropped tool or freeze-thaw stress is a straightforward replacement. Multiple cracked bricks in a pattern, especially if they follow mortar joint lines or cluster in one area, often indicate a base settlement problem or a drainage issue that's saturating the bed and causing freeze-thaw cycling. Fix the underlying cause first, then replace the bricks. Replacing bricks without addressing the base just means you'll be pulling them back out in a few years.
Failed mortar joints
Mortar that is crumbling, recessed, or missing entirely lets water into the joint, which accelerates freeze-thaw damage and allows weeds to take hold. Repointing (removing the failed mortar and packing in fresh mortar) is one of the highest-value repairs you can do on a mortared patio. On a dry-laid patio with sand joints, failed joints just need the old joint sand swept out and fresh polymeric sand swept in and compacted.
Sunken or heaved areas
Sunken sections usually mean the base material (compacted gravel or packed sand) has shifted or eroded underneath. Tree roots heave bricks upward. Both issues require lifting the affected bricks, correcting the base, and re-laying them. These are mechanical problems, no amount of surface treatment fixes them.
Drainage issues
Water that pools on the patio surface or drains toward a foundation is a serious problem that no cosmetic refresh will solve. The patio needs a minimum slope of about 1/8 inch per foot (roughly 1%) away from any structure. If that slope is gone because of settlement, you're looking at a partial or full re-lay to restore grade, that falls into redo territory, covered separately.
Tools and materials: what you actually need
Below is a realistic list for a full refresh project covering cleaning, repointing, and a couple of brick replacements on a typical 200–300 sq ft patio. Scale quantities for your actual square footage.
| Item | Quantity / Spec | Notes |
|---|---|---|
| Stiff-bristle brush (non-metal) | 2 | Plastic or nylon bristles only — no wire |
| Garden hose with adjustable nozzle | 1 | For rinsing after chemical treatments |
| Pressure washer | 1 (rent or buy) | Gas or electric; 1,200–1,800 psi max for modern brick; 400–600 psi for older/soft brick |
| Flat fan nozzle (25–40 degree) | 1–2 | Never use a zero-degree (red) nozzle on brick |
| Cold chisel and hammer (or oscillating tool with mortar blade) | 1 set | For raking out failed mortar joints |
| Margin trowel (pointing trowel) | 1 | For packing mortar into joints |
| Jointing/plugging iron (or bent rod) | 1 | For tooling and shaping the finished joint |
| Rubber mallet | 1 | For tapping bricks into place; also used for sounding hollow areas |
| Bolster chisel | 1 | For lifting individual bricks without damaging neighbors |
| 4-ft level and string line | 1 each | For checking slope and surface evenness |
| Shop vacuum or stiff broom | 1 | For dry-sweeping before washing and cleaning out joints |
| Mixing paddle and bucket (5-gal) | 1 each | For mixing mortar; power paddle saves time |
| Oxygen bleach (sodium percarbonate) | 2–3 lbs | For moss, algae, mildew; e.g., OxiClean or dedicated masonry brands |
| Biocidal cleaner (e.g., D/2 Biological Solution) | 1 qt | For stubborn lichen or recurring biological growth |
| Masonry rust remover (oxalic or phosphoric acid based) | 1 qt | Only if rust staining is present; test patch first |
| Type S or Type N preblended mortar | 50-lb bag per 50 linear feet of joint (estimate) | Type N (1:1:6 Portland:lime:sand) for most repointing; Type S for wet/below-grade exposure |
| Replacement bricks | 10–15% over what you count as damaged | Try to source matching bricks; reclaimed yards are useful |
| Coarse bedding sand or mortar for re-bedding | As needed | Match existing bed material |
| Masonry sealer (penetrating silane/siloxane) | 1 gal per 200–300 sq ft (approx.) | Optional but recommended after repointing; penetrating types only |
| Plastic sheeting (for moisture test and curing) | 10-ft roll | Also used to protect adjacent plants during chemical treatment |
| Painter's tape, drop cloths | As needed | Protect adjacent surfaces during chemical cleaning |
Safety first: gear and precautions
None of this work is especially dangerous, but a few things will save you a trip to urgent care. Chemical cleaners (especially acid-based rust removers and some biocides) need nitrile gloves, safety glasses, and adequate ventilation. Brick Industry Association, Technical Note 6 (explicit caution vs. muriatic acid on brick) explicitly warns against using unbuffered muriatic (hydrochloric) acid on many bricks or lime‑rich mortars because it can cause irreversible damage or staining; consult the brick manufacturer or a masonry cleaning specialist before considering acid blank" rel="noopener noreferrer">Brick Industry Association — Technical Note 6 (explicit caution vs. muriatic acid on brick). A paper dust mask is not enough when you're chiseling out old mortar or cutting bricks, get an N95 respirator rated for fine particulate, because silica dust from mortar and brick is a genuine long-term lung hazard. Pressure washers at even modest pressures can lacerate skin; never point the nozzle at yourself or anyone else, and wear closed-toe shoes.
- Nitrile gloves (chemical-resistant, not latex) for all cleaning and mortar work
- Safety glasses or goggles for chiseling, pressure washing, and chemical use
- N95 or better respirator when cutting, grinding, or chiseling masonry
- Knee pads for any extended work at ground level
- Closed-toe shoes or boots — never sandals near a pressure washer or falling bricks
- Keep pets and children away from the work area when chemicals are active
- Wet down or cover nearby plants and lawn before applying any chemical cleaner; rinse thoroughly after
- Never mix bleach with ammonia or acid-based cleaners — the fumes are dangerous
Quick refresh, repair, or full redo: how to decide
This is the most important decision in the whole project, and it's worth spending five minutes thinking it through before you touch a tool. I've seen people spend a weekend cleaning and sealing a patio that needed a base correction, and then watch it crack and settle again the following winter. Here's a straightforward framework.
| Your situation | Right approach | Typical DIY time | Approximate material cost |
|---|---|---|---|
| Surface is dirty, mossy, or faded. Mortar is mostly sound. No sunken areas. | Quick refresh: clean, touch up minor joints, seal | 1–2 days | $50–$150 |
| Several joints are crumbling. A few loose or cracked bricks. Surface is sound overall. | Repair: clean + repointing + brick replacement + seal | 2–4 days over a weekend or two | $150–$400 |
| Multiple sunken areas, widespread mortar failure, poor drainage | Partial or full redo — lift, correct base, relay | 3–7+ days; consider professional help | $400–$1,500+ depending on size |
| Widespread spalling, structural cracking, drainage toward foundation, large heaved sections | Professional assessment required before any DIY work | N/A | Get quotes |
The rule I use: if more than 20–25% of the mortar joints are failed, or if more than a dozen bricks are sunken, cracked, or loose across a typical 200 sq ft patio, you're likely dealing with a base issue, not just surface wear. Patching the surface without fixing the base is money poorly spent. If you're unsure, a one-hour consultation with a masonry contractor costs very little and can save you from a mistake that costs much more.
Step-by-step cleaning and preparation
Cleaning is the foundation of everything else. Even if you're only sealing, the sealer bonds poorly to dirty or contaminated brick. Do this sequence in order, don't jump to the pressure washer first.
- Dry sweep the entire surface thoroughly with a stiff broom and remove all loose debris from joints. A shop vacuum works well for pulling debris out of deep joints.
- Pull weeds by hand, getting as much root as possible. For weeds rooted deeply in joints, use a flat-blade weeding tool. Don't use a propane torch near dry organic debris or adjacent wood.
- Mechanically remove thick moss or lichen with a stiff plastic-bristle brush. Work dry first — wet moss just smears. Get the bulk of the material off before you apply any liquid treatment.
- Mix your oxygen bleach (sodium percarbonate) solution. A common starting mix is about 1 cup of powder per gallon of warm water for heavy biological growth, but follow your specific product's label — concentrations vary by brand. Apply with a brush or garden sprayer, work it into the surface, and let it dwell for 15–20 minutes. Don't let it dry on the surface.
- Scrub with your stiff plastic-bristle brush, then rinse thoroughly with a garden hose. For persistent lichen or recurring biological stains, apply a dedicated biocidal cleaner like D/2 Biological Solution per the product label, then rinse. These products often work over several days with weather and rinsing.
- For rust stains, apply a masonry-labeled oxalic- or phosphoric-acid rust remover to the stained area only. Test a small hidden patch first — some bricks lighten noticeably with acid-based products. Follow dwell time on the label, scrub, and rinse well.
- For efflorescence, dry-brush the deposits off first with a stiff brush. Most efflorescence comes off this way. If residue remains, a diluted masonry cleaner formulated for efflorescence can be applied, but follow label instructions and rinse completely. Fix the drainage or moisture source or it will return.
- Now pressure wash. Use a flat fan nozzle — 25 or 40 degrees. For older or softer brick, stay between 400 and 600 psi and hold the nozzle at least 12 inches from the surface. For modern, dense brick, up to 1,200–1,500 psi is generally safe, but start low and test. Move the wand in smooth, overlapping passes parallel to the joints — never perpendicular into the joint, which drives water and debris deeper. If mortar is coming out under the pressure, you're too close or too aggressive.
- Let the patio dry completely before any further work. In warm weather with good air movement, 24–48 hours is typical. For repointing or sealing, 48–72 hours of dry weather is safer. Any moisture in the brick before sealing or mortaring will compromise adhesion and longevity.
Repointing brick patio mortar
Repointing means removing the failed, crumbled, or missing mortar from the joints and replacing it with fresh mortar that bonds properly to the remaining sound mortar and the brick faces. Done right, it extends the life of a patio significantly. For detailed step-by-step instructions, tooling lists, and mixing tips, see the guide on how to repair a brick patio. Done wrong, with the wrong mortar, or packed poorly, it fails quickly and can actually damage the bricks themselves.
When to repoint
Repoint any joint where the mortar is recessed more than about 3/8 inch, feels crumbly or sandy when you probe it with a screwdriver, or is visibly cracked or missing. A joint that looks intact but sounds hollow when tapped needs to come out too, it's no longer bonded.
Mortar selection
This matters more than most people realize. Mortar that is harder than the brick will cause the brick face to spall over time because the rigid mortar concentrates stress in the softer brick unit rather than allowing slight movement in the joint. For most residential brick patios built in the last 40 years, Type N mortar is the right choice: it has a 28-day compressive strength of around 750 psi, which is softer and more flexible than the brick itself. ASTM C270, Mortar for Unit Masonry specifies standard mortar types (M, S, N, O) with typical 28‑day compressive strengths of roughly M ~2500 psi, S ~1800 psi, N ~750 psi, and O ~350 psi ASTM C270 — Mortar for Unit Masonry. A traditional site-mix proportion for Type N is 1 part Portland cement to 1 part hydrated lime to 6 parts masonry sand by volume. For older, softer, or historic brick, you want an even more lime-rich mix. For patios in consistently wet or freeze-thaw-heavy climates, Type S (approximately 1,800 psi) is sometimes appropriate, but verify it won't be harder than your specific brick. Pre-blended Type N or Type S mortar bags from a masonry supplier are convenient and consistent, I generally use these rather than site-mixing for smaller jobs.
Step-by-step repointing
- Rake out the failed joint to expose sound mortar beneath. The target depth is roughly 2.5 times the joint width — for a typical 3/8-inch joint, that means raking about 1 inch deep. The minimum is about 1/2 inch. Use a cold chisel and hammer, or an oscillating multi-tool with a narrow mortar blade. Work carefully near the brick edges — chipping the brick face is a cosmetic problem you can't easily fix. Do not use a grinder along the joint on older bricks unless you have significant experience controlling it.
- Vacuum or blow all dust and loose material from the raked joint. This is critical — new mortar will not bond to dusty surfaces.
- Dampen the joint with a brush and water. The existing brick and mortar should be damp but not wet — this prevents the dry surrounding material from sucking moisture out of the new mortar too fast, which causes weak, crumbly joints.
- Mix your mortar to a firm, workable consistency — it should hold its shape on a trowel but not be stiff or crumbly. Too wet and it shrinks and cracks on drying; too dry and it won't pack properly.
- Pack mortar into the joint in thin lifts, not more than about 1/4 inch at a time. Use a margin trowel or pointing trowel to press each lift firmly into the back of the joint. Allow each lift to firm up slightly before adding the next. This takes more time but produces a much denser, better-bonded joint than one large dump-in.
- When the joint is full and the mortar has stiffened to roughly the consistency of firm putty (usually 30–60 minutes depending on temperature and humidity), tool the joint surface with a jointing iron or bent rod to match the profile of the existing joints. Tooling compresses the surface of the mortar, closes minor surface cracks, and improves weather resistance.
- Keep the fresh mortar damp for the first 72 hours by misting lightly if weather is hot, sunny, or windy. New mortar that dries too fast is weak. Plastic sheeting over the repointed area (not touching the surface) helps retain moisture in hot conditions.
- Avoid walking heavily on repointed areas or applying any sealer or coating for at least 30 days after repointing. The mortar needs that curing time to reach adequate strength.
Replacing damaged bricks
Individual cracked, spalled, or irreparably stained bricks can be replaced without disturbing the surrounding patio, but the removal step requires patience. Rushing it almost always means chipping the neighbors.
Identifying which bricks need to come out
Replace a brick if it is cracked through more than surface depth, if the face is actively spalling off in layers, or if it has sunk or heaved more than about 1/2 inch relative to surrounding bricks and cannot be leveled by adjusting the mortar or sand bed. A brick that looks ugly but is otherwise sound and level is a candidate for cleaning or staining rather than replacement.
Removing the brick without damaging neighbors
- Rake out all surrounding mortar joints first (same technique as repointing) to fully expose all four sides of the brick. Never try to pry out a brick before the joints are cleared — you will chip adjacent bricks.
- Score across the face of the damaged brick with a chisel to break it into manageable pieces. Start in the center of the brick and work outward, not toward the edges.
- Remove the pieces carefully with a bolster chisel and rubber mallet. Work slowly near the edges where the adjacent brick faces are exposed.
- Clean the cavity thoroughly: chisel out all remaining mortar from the bed (bottom), sides, and if applicable the back face. The cavity walls should be clean masonry with no loose chunks.
Sourcing a matching brick
Color-matching brick is genuinely hard. New bricks from a big-box store rarely match aged brick well, and even the same manufacturer's product changes over time. Reclaimed brick yards, architectural salvage stores, and sometimes the original contractor if the patio is newer are your best sources. Bring a sample brick with you when shopping. Accept that a perfect match may not be available, a slightly different brick is usually preferable to a visibly damaged one.
Setting the replacement brick
- Dampen the cavity walls and the replacement brick before setting — this prevents the dry masonry from pulling moisture out of the fresh mortar too quickly.
- Spread a bed of mortar on the cavity floor to the appropriate depth so the new brick will sit flush with (or very slightly below) the surrounding surface after setting. Test-fit the brick dry first and adjust the bed depth accordingly.
- Butter the sides of the replacement brick (the vertical faces that will face adjacent bricks) with mortar, then press the brick firmly into place. Tap it level with a rubber mallet, checking with your level against the surrounding surface.
- Pack mortar into any remaining gaps around the sides and tool the joints to match the surrounding profile once the mortar has firmed up.
- Mist and keep moist for 72 hours; allow 30 days before heavy foot traffic or sealer application.
Resurfacing and overlay options
If the patio surface is generally structurally sound but heavily stained, chipped, or just visually worn past what cleaning and spot repairs can fix, resurfacing or an overlay might be worth considering. These approaches work best when the base and drainage are correct, they will not hide or fix structural problems.
A thin concrete or microtopography overlay applied over cleaned and properly prepared brick can give the surface a new, uniform look. The key limitation is bond adhesion: overlays applied over brick require thorough cleaning, often a bonding agent, and precise thickness control. They are also prone to cracking if the underlying brick shifts even slightly. For a patio with ongoing movement or settling, overlays will fail at the joints. Resurfacing is most successful on a stable, fully mortared patio where cosmetic improvement is the only goal. For more information on this approach, the full process is covered in its own guide on resurfacing a brick patio. For step-by-step instructions and material lists, see our guide on how to resurface brick patio.
Painting, staining, and sealing: options and honest trade-offs
This is where the most confusion happens, and also where the most money gets wasted on a product that makes things worse. Here's the straight comparison.
| Finish option | What it does | Best for | Biggest risk | Approximate cost (DIY, 200 sq ft) |
|---|---|---|---|---|
| Penetrating sealer (silane/siloxane) | Soaks into the brick and repels water without changing appearance much; breathable | Most patios after cleaning and repointing; best all-around choice | Does not fix existing moisture problems; over-application can trap moisture | $40–$80 |
| Acrylic/film-forming sealer | Sits on the surface; adds visible sheen; can enhance color | Patios where color enhancement is wanted; modern dense brick only | Traps moisture if brick is not fully dry; peels over time; hard to remove | $30–$60 |
| Concrete/masonry stain | Penetrates and adds permanent color; doesn't peel | Faded or discolored brick where uniform color is wanted | Hard to reverse; color may not match existing brick perfectly; test patches essential | $50–$120 |
| Masonry paint | Opaque surface coating; completely changes look | Brick that is heavily stained and beyond matching, or a deliberate aesthetic change | Very difficult to remove once applied; can trap moisture and cause spalling in freeze-thaw climates; once you paint, you're committed | $60–$150 |
My default recommendation: use a penetrating silane/siloxane sealer after cleaning and any repairs, applied when the patio is fully dry and the weather forecast shows 48 hours of dry conditions. Apply it thin, most penetrating sealers should be applied to the point of absorption, not puddled on the surface. One coat is often sufficient; a second light coat within an hour of the first improves coverage. Avoid film-forming sealers on older or softer brick, and think very carefully before painting a brick patio, it is genuinely difficult to reverse and can cause moisture-related damage in cold climates. If painting is your goal, that process and its specific considerations are covered in a dedicated guide on painting a brick patio.
Making the patio look new: practical decorating ideas that don't hide problems
Once the structure is sound and the surface is clean, a few low-cost choices can dramatically change how the patio feels without masking anything that needs fixing. For step-by-step ideas and photos on how to make brick patio look new, see our dedicated guide.
- Edge definition: a clean metal or concrete edge restraint along patio borders makes even an older patio look deliberately designed; it also prevents edge bricks from migrating outward over time
- Joint color refresh: on dry-laid patios, sweeping in fresh polymeric sand and compacting it fills the joints, stabilizes the surface, and gives the whole patio a cleaner, more uniform appearance
- Lighting: low-voltage LED step lights or surface-mount path lights along the border add nighttime appeal and cost very little to install
- Plantings in the border: a low groundcover planted in the adjacent bed framing the patio reads as a finished, maintained space
- Furniture arrangement: a rug rated for outdoor use, consistent furniture legs (rubber-tipped to prevent rust staining), and a clear flow path from door to seating transforms the perceived quality of the space without touching the brick
The main principle here: decorate after you repair, not instead of repair. A patio table placed over a sunken section just makes it harder to diagnose later. More ideas for styling a refreshed patio without covering structural issues are covered in a guide on how to decorate a brick patio.
Realistic time and cost estimates
| Task | DIY time estimate | Approximate material cost | Notes |
|---|---|---|---|
| Full cleaning (200–300 sq ft) | 4–6 hours | $30–$80 | Longer if biological growth is heavy; includes drying time |
| Repointing (per 50 linear feet of joint) | 3–5 hours | $20–$50 | First time takes longer; tool rental adds $20–$40 if needed |
| Replacing 1–5 bricks | 2–4 hours | $10–$40 for materials | Sourcing matching brick is often the longest part |
| Applying penetrating sealer (200 sq ft) | 1–2 hours | $40–$80 | Requires 48+ hours of dry weather before and after |
| Full refresh (clean + repoint + seal) | 2 full days spread across 2 weekends | $150–$350 | Drying and curing require days between stages |
Maintenance after the refresh
The biggest waste of a refresh project is letting the same problems develop again within a couple of years. A few simple habits prevent that. Clear debris and dead leaves from the surface and joints before winter, trapped organic material holds moisture and feeds biological growth. Check joints every spring by probing with a screwdriver; catching a few failing spots early means a 20-minute touch-up instead of a full repointing weekend. Re-apply penetrating sealer every 3–5 years or when water stops beading on the surface (the bead test is easy: pour a small amount of water on the brick and watch whether it beads or soaks in immediately). Check and clear any surface drains or weep channels every fall. And if you have overhanging trees, trim branches that keep the patio in dense shade, biological growth is almost always worse on surfaces that never fully dry.
When to stop DIY and call a professional
I want to be direct about this, because I've seen homeowners spend significant money on DIY patches that failed within a year because the real problem was beyond surface repair. Call a professional mason or patio contractor if:
- More than 20–25% of the patio surface is sunken, heaved, or clearly moving — this is a base failure, not a surface problem
- Water is draining toward a house foundation, garage, or other structure — slope correction requires lifting and relaying, often the entire patio
- Bricks are spalling in large numbers across the whole surface, especially in a cold climate — this often indicates the wrong brick type was used originally and replacement is the only fix
- There is staining or dampness on interior walls adjacent to the patio — this suggests moisture is penetrating a building assembly, not just sitting on the patio surface
- You find that significant structural cracks in the patio follow a consistent pattern (diagonal, radial from a corner) — this can indicate deeper soil movement or settlement that needs engineering assessment before repair
- The patio is mortared and built against a building wall — separating patio repairs from wall or foundation considerations gets complicated fast and mistakes are expensive
Getting a professional opinion doesn't mean handing the whole job over. Even if you do most of the work yourself, a masonry contractor can assess the base condition and drainage in under an hour and tell you whether your plan is likely to hold. That's a small investment against the cost of redoing the work in two years.
FAQ
What’s the first thing I should do before refreshing my brick patio?
Start with a thorough inspection checklist: note visible cracks in bricks or mortar (hairline vs. wide), missing/loose or powdering mortar, sunken/heaved/uneven areas, persistent damp spots or stains (possible drainage issues), biological growth (moss/algae/lichen), efflorescence (white salts), spalled or flaking bricks, clogged or missing joint/drain features, and any previous inappropriate treatments (hard coatings or paint). Perform small diagnostic tests: a plastic-sheet moisture test for trapped moisture, ‘sounding’ (tap) to find hollow or loose areas, and small test-clean patches before using chemicals or pressure-washing.
How do I diagnose the underlying cause of patio problems vs. just treating symptoms?
Look for moisture entry (stains on adjacent walls or interior dampness), check slope and drainage away from the house, test for trapped moisture with a plastic sheet, probe joints to assess mortar depth and hardness, and tap bricks to detect hollow spots (indicating loose bricks or voids). Persistent efflorescence or repeated biological growth usually indicates unresolved moisture or shade/drainage problems—fix the root cause before cosmetic work or sealing.
What’s the safest and most effective cleaning sequence for brick patios?
Work from least to most aggressive. 1) Sweep and remove loose debris. 2) Mechanically remove moss or heavy organic matter with a stiff plastic-bristle brush (avoid metal). 3) Wash with soapy water and low-pressure rinsing. 4) Use oxygen‑based bleach (sodium percarbonate) or a conservation-grade biocide (D/2) for biological stains—test a small area first. 5) For stubborn stains, try masonry-labeled cleaners or poultices (oxalic for rust); avoid muriatic acid and avoid high-pressure washing on soft brick. Always rinse and re-test before scaling up.
Can I pressure-wash my brick patio? If so, how?
Yes—only at low pressure and cautiously. For softer historic brick follow low‑pressure guidance (roughly 100–400 psi), use a fan nozzle, hold the nozzle at least 12 inches from the surface, and keep the wand moving to avoid concentrating pressure. High pressure can erode mortar, drive water into the assembly, and damage brick faces. Test a small hidden area first and avoid pressure-washing after repointing until mortar cures adequately.
How do I remove efflorescence and prevent it from coming back?
Remove efflorescence by dry‑brushing or gentle washing. Do not repeatedly strip without addressing its cause—efflorescence indicates water is carrying salts to the surface. Correct drainage, fix flashing/edge details, repair leaks, and improve drying conditions before or alongside cleaning to prevent recurrence.
What’s the basic process for repointing mortar joints on a patio?
Repointing steps: 1) Remove deteriorated mortar by hand tools to a recommended depth (commonly ~2½× joint width or a minimum of ~½ inch), avoiding power‑tool overcutting that damages brick edges. 2) Clean joints of dust and debris. 3) Select a compatible mortar (match color, texture, and use a slightly softer, lime‑rich mortar for older/soft brick—ASTM C270 mortar types guide selection). 4) Dampen joints, then pack new mortar in thin lifts, compacting each layer. 5) Tool the joint to match historic profile and allow proper curing (protect from rapid drying or freezing). Test a small area to confirm compatibility and appearance before doing the whole patio.
Next Article
How to Decorate a Brick Patio: Repair, Refinish & Style
How to decorate a brick patio: inspect, repair, resurface, paint or seal, step-by-step DIY, costs, when to call a pro.