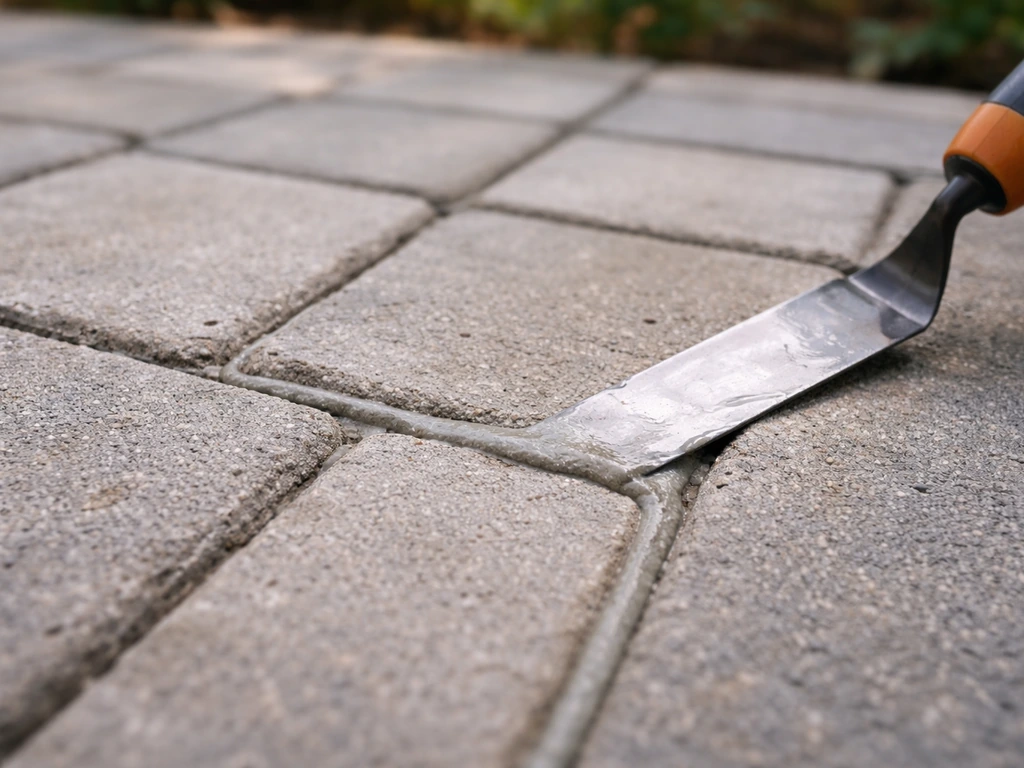
You can regrout a slate patio yourself over a weekend with basic tools, the right grout product, and some patience. The job comes down to four steps: remove the old failing grout cleanly, prep the joints properly, pack in fresh grout that suits your joint width and climate, then seal the stone once it cures. Slate adds one wrinkle that brick or concrete pavers don't: the stone's soft, cleft edges chip easily and its porosity varies by quarry, so you have to test before you buy products and choose gentler removal methods than you might use on harder materials.
How to Regrout Slate Patio: Step-by-Step DIY Guide for Stone, Brick & Pavers

Talia Lang
14 Jul 2026
What regrouting a slate patio actually means (and why it's worth doing)
Grout and pointing mortar are the joint filler between your slate pieces. On a well-built patio they do three things: they lock slabs against lateral movement, they seal the joint line so water sheds off the surface rather than infiltrating underneath, and they stop weeds and insects from finding a home. When those joints fail, everything else starts to fail with them. Water gets under the slate, softens the sand bed or mortar beneath, and the slabs start rocking. Freeze-thaw cycles widen every crack. Weeds push roots in and physically pry slabs apart. What looks like a cosmetic issue is actually the beginning of a structural one.
Regrouting means removing that deteriorated joint material down to sound, intact substrate, cleaning the cavity properly, and filling it with fresh material that bonds to both edges of the stone. For a step-by-step walkthrough and product recommendations, see our guide on how to repair stone patio grout. It is not the same as troweling a thin layer of grout over existing grout, which is a common mistake and one that almost always fails within a year. Done correctly, a regrouting job on a slate patio should last ten to fifteen years before it needs attention again.
Signs your slate patio joints are past their prime
Walk the patio slowly and look closely. You're checking for a handful of specific problems, and finding more than one at the same time tells you the whole surface probably needs attention rather than just a few spot repairs.
- Missing or visibly eroded joint material — you can see a gap or trough where the grout has washed or crumbled away
- Cracked or crumbling grout — joints that break apart when you press them with a screwdriver or rake
- Vegetation growing in joints — moss and weeds are not just cosmetic; their roots actively widen gaps
- Loose or rocking slabs — step on each one; movement means the joint and possibly the base beneath it has failed
- Widening joint gaps — photograph joints and compare to photos from a year ago if you're unsure; growth in gap width confirms active deterioration
- Water pooling at joints rather than shedding off — failed joints stop draining correctly and can pond water against the stone face
- Efflorescence (white salt staining) on joints or stone faces — white powdery deposits signal that water is moving through the joint material and carrying mineral salts to the surface
One or two cracked joints in an otherwise solid patio is a spot-repair job. If you find crumbling grout, loose slabs, and efflorescence across more than about a third of the surface, plan to regrout the whole thing. Partial regrout jobs on a deteriorating patio tend to look patchy and the repaired sections often outlast the untouched ones, which then fail a season or two later and send you back out there anyway.
Safety, weather, and getting the site ready
PPE is not optional on this job
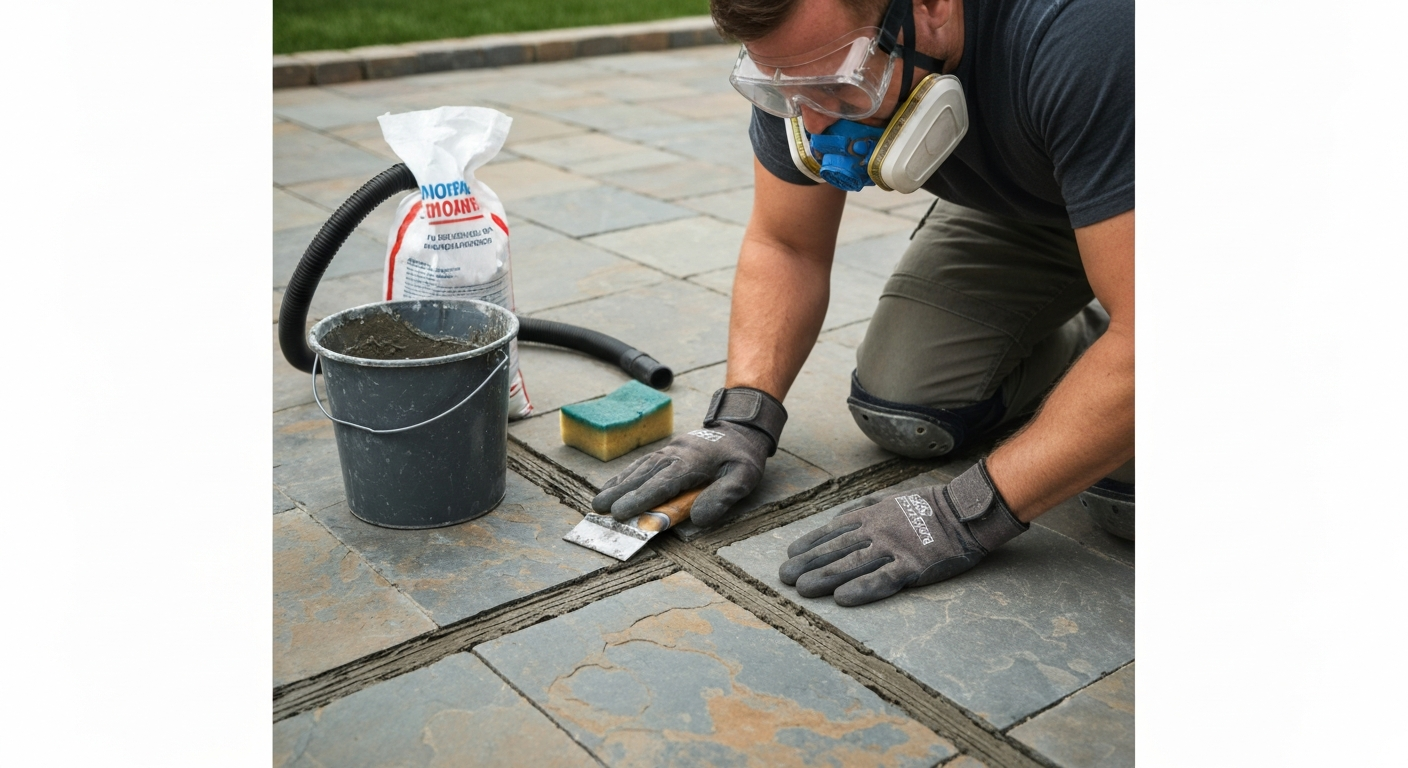
Grinding and chiseling old grout generates fine dust that contains respirable crystalline silica. NIOSH data shows that tuckpointing and grout grinding can generate silica concentrations up to 100 times the recommended exposure limit, which makes this one of the more genuinely hazardous parts of any patio repair job. You need at minimum a NIOSH-approved N95 respirator (not a dust mask), safety glasses or goggles, and heavy work gloves. If you are using a power tool for removal, add hearing protection. A HEPA-filtered shop vacuum connected directly to your tool or positioned to capture dust at the source reduces your exposure dramatically. Wet methods (misting the joint area before and during grinding) help further.
Choosing the right weather window
Most grouts and mortars need air temperatures between roughly 50°F and 90°F (10°C to 32°C) during application and curing. Below 50°F the cement hydration slows and you risk weak, crumbly joints. Above 90°F the mix dries too fast, hairline cracks form during curing, and you lose working time. Avoid working in direct strong sun on a hot day even within those temperature bounds. Plan for at least 24 to 48 hours without rain after application, and longer if you are using a cementitious mix that needs a full 28-day cure before it reaches full strength. Epoxy grouts are more temperature-sensitive: many manufacturers specify a narrower window, so check the specific product datasheet.
Protecting the surrounding area
Cover plants or garden beds adjacent to the patio with plastic sheeting or old towels before you start. Grout wash is alkaline and will burn foliage. If there is grass at the patio edge, wet it down thoroughly before you begin and rinse it again after you finish. Tape plastic sheeting over any drainage channels or downspout outlets nearby so grout slurry doesn't block them. Move all furniture off the surface entirely.
Everything you need: materials and tools checklist
Buy everything before you start. Running to the hardware store mid-job while fresh grout is drying in the joints is a genuinely bad situation to be in.
Grout and joint materials
- Grout product suited to your joint width and conditions (see the grout selection section below for guidance on cementitious, epoxy, and polymeric sand options)
- Polymer or latex additive if mixing a cementitious grout without a pre-mixed liquid component
- Bonding agent if repointing into existing mortar-based joints
- Polymeric joint sand (alternative for wide, dry-lay joints)
- Joint stabilizing sealer (optional, for polymeric sand applications)
Removal and prep tools
- Manual grout rake or hand raking tool (stiff pointed blade)
- Small cold chisel and hammer
- Oscillating multi-tool with carbide or diamond-grit grout removal blades
- Stiff-bristle wire brush and standard stiff brush
- HEPA-filtered shop vacuum with a narrow crevice attachment
- Spray bottle or garden pump sprayer for wetting joints
Mixing and application tools
- Bucket (5-gallon) for mixing
- Margin trowel or pointing trowel for packing joints
- Grout float (rubber-faced, for wider joints)
- Grout bag (for filling deep or wide joints without smearing the stone face)
- Jointing tool or rounded stick for finishing joint profile
- Sponges, clean lint-free cloths, and a second bucket of clean water for cleanup
- Stiff plastic scraper (not metal, to avoid scratching slate)
Sealing and safety supplies
- Penetrating stone sealer or joint sealer appropriate for natural slate
- Foam paint roller or applicator brush for sealer
- NIOSH-approved N95 or higher respirator
- Safety glasses or goggles
- Heavy work gloves (cut-resistant for blade work)
- Hearing protection if using power tools
- Knee pads (you will be on the ground for most of this job)
- Old clothes or a disposable coverall
Slate-specific precautions: what makes this stone different
Slate is a metamorphic rock that splits along natural planes, which gives it that distinctive layered, cleft surface. That's also what makes it mechanically different from ceramic tile or brick: the edges are not smooth or reinforced, they're thin, layered, and can flake off if you apply lateral force or vibration directly against them. This matters a lot when you're removing grout, because a grinder disc or heavy chisel can chip the edge of the slate rather than the grout itself, and those chips are permanent.
The other variable is porosity. Slate is generally described as a low-porosity stone, and that's broadly true, but technical data shows real variation by quarry and source: measured water absorption in different samples ranges from under 0.3% to noticeably higher in some softer or more weathered slates. The practical consequence is that you cannot assume a colored grout or penetrating sealer will behave identically on your patio as it did on someone else's. Grout haze and sealer darkening are real risks on some slates and nearly zero on others.
The water-drop absorption test
Before you buy any grout or sealer, do this test on your actual stone. Natural Stone Institute, Slate care and handling recommendations (advocates testing stone because properties vary) recommends performing a water‑drop absorption test on several slabs to check porosity before choosing grout or sealer Natural Stone Institute — Slate care and handling recommendations (advocates testing stone because properties vary). Clean a small area on the surface of two or three different slabs (not the joints themselves). Drop 5 to 10 drops of plain water onto the surface from about an inch up, then watch. If the water beads and stays on the surface for several minutes, the stone is very low porosity. If it absorbs within 30 to 60 seconds, the slate is porous enough that you need to check whether your grout or sealer will stain or darken it. Mark the result on a notepad. Do this test after the stone is clean and completely dry.
Patch-test grout and sealer before full application
Before you commit to a full regrout, fill one short inconspicuous joint (at a corner or under furniture) with your chosen grout product and let it cure. Check for staining or color change on the slate edges. Then test your chosen sealer the same way on a small area, wait the recommended time, and check for darkening or hazing. If either product changes the stone's appearance in a way you don't like, switch products before you have done the whole patio. This step adds a day or two but saves a lot of grief.
Inspect the joints and check the base before you start removing anything
This step is skipped by most homeowners and it's one of the main reasons regrout jobs fail within a year. If the problem is in the base, the sand bed or mortar beneath the slabs, fresh grout in the joints will crack again within one or two freeze-thaw cycles because the slabs are still moving.
Checking joint depth and condition
Take a small metal probe or a stiff piece of wire and press it into each joint type on your patio. Note the approximate depth from the surface to the base material. For standard regrouting work, the standard is to remove deteriorated material to a depth of at least twice the joint width, or until you reach sound unweathered mortar, whichever is deeper, and no less than about 1/2 inch. So if your joints are 3/8 inch wide, you're targeting at least 3/4 inch of removal depth. Record your joint widths too: this determines which grout products you can use.
Identifying loose slabs and base problems
Walk every single slab. Step firmly on the center, then on each corner. Any rocking, clicking, or hollow sound underfoot means that slab's base has failed. A dry tap test (knuckle-rap or rubber mallet tap on the slate surface) will give a solid thud on a well-bedded slab and a hollow sound on one with a void beneath it. Mark every loose or hollow slab with chalk. These slabs need to be lifted, the base repaired, and the slab reset before you regrout. Grouting around a loose slab is wasted effort.
While you're at it, figure out what your base is. Sand-set patios (where slate sits on a compacted sand bed) are common for DIY installs and behave differently from mortar-set patios (where slabs are bedded on cement mortar over a concrete slab). Sand-set bases are more forgiving to reset but more prone to shifting. Mortar-set bases are more stable but cracks in the mortar bed transfer directly to the joints and sometimes to the slate itself. Knowing which type you have affects the grout product you choose.
Choosing the right grout for a slate patio
The three main categories available to homeowners are cementitious grout, epoxy grout, and polymeric joint sand. Each has a real use case and real limitations.
| Type | Best for | Joint width | Durability | Difficulty | Cost (approx.) |
|---|---|---|---|---|---|
| Cementitious (polymer-modified) | Mortar-set slate, traditional look, larger joints | 1/8" to 1/2"+ | Good; needs sealing | Easy to moderate | $0.50–$1.50/lb |
| Epoxy (two-part) | Heavy use, stain resistance, chemical exposure, wet areas | 1/16" to 1/2" | Excellent; stain/chemical resistant | Moderate to hard (short working time) | $3–$6/lb |
| Polymeric joint sand | Sand-set/dry-lay slate, wide joints, natural look | 1/4" to 1"+ | Good; resists weeds and washout | Easy | $20–$40/50 lb bag |
For most homeowners regrouting a mortar-set slate patio, a good quality polymer-modified cementitious grout is the practical choice. It is workable, widely available, forgiving of beginner technique, and if you seal it properly it holds up well through freeze-thaw cycles. Epoxy grout is worth the extra cost and difficulty in specific situations: around a pool, in a covered outdoor kitchen, or where staining from cooking or heavy traffic is a real concern. Products like LATICRETE SPECTRALOCK or MAPEI Kerapoxy are the common names in this category. Note that epoxy grout has strict temperature requirements during mixing and application, and you absolutely have to follow the manufacturer's datasheet, not general rules of thumb.
For a dry-lay or sand-set slate patio with wider joints, polymeric joint sand is the most practical option. It's compacted dry into the joints and then activated with water, which triggers the polymer binders and locks the sand in place. It resists weed germination and washout far better than plain kiln-dried sand, and it's genuinely beginner-friendly.
Matching grout color to slate
Most grout suppliers sell sample chips. Do not choose a color based on photos online; slate surfaces read differently in different light conditions. Buy a small sample bag of your top two or three color candidates and do the patch test described above. Darker grout colors tend to read as more formal and can hide staining; lighter grays and buffs read more natural with most slate. Grout lightens slightly as it cures and dries, so wet-sample comparisons can mislead you.
Mixing formulas and DIY grout recipes
Pre-mixed or dry-mix bagged grouts from reputable manufacturers are the correct choice for most homeowners. They are formulated with consistent aggregate size, curing chemistry, and color stability. If you genuinely need to mix your own, the standard sanded grout recipe is roughly 1 part portland cement to 3 parts fine silica sand by weight, with just enough water (or polymer latex additive in place of some water) to reach a thick peanut-butter consistency. Do not add extra water to make it easier to spread; it weakens the finished joint substantially. For unsanded grout (joints under about 1/8 inch), the ratio shifts to approximately 1 part cement to 1 part fine sand or pure cement with a latex additive. But honestly, for a slate patio where color consistency and adhesion matter, a bagged polymer-modified product is a much better starting point than a home-mixed batch.
How to remove the old grout without damaging slate
This is the stage where most DIY regrout jobs go wrong. For a clear step-by-step walkthrough on how to replace patio grout, see the guide titled how to replace patio grout (de07ea03-eb7b-42c7-bec8-4dece605a144). Go too fast or use the wrong tool and you chip slate edges. Go too shallow and the new grout doesn't bond properly and fails within a season. The rule is: start with the gentlest method and only escalate to power tools if you genuinely need to.
Manual removal: the right starting point for slate
For soft or heavily weathered grout, a manual grout rake (a stiff pointed steel tool, sometimes called a joint raker) is the safest starting option. Work along the joint, not across it. Apply firm downward pressure and pull toward you. The goal is to scrape out the loose, crumbled material in passes rather than gouging in one aggressive move. For harder old mortar, a small cold chisel (1/4 inch wide or narrower) and a light hammer work well: position the chisel in the center of the joint, angle it slightly downward, and tap steadily. Keep your chisel away from slate edges. Expect this to be slow, but it's genuinely less risky than reaching for power tools immediately.
Oscillating multi-tool: the best power-tool option for slate
When manual methods are taking too long or the old grout is very hard, an oscillating multi-tool with a carbide or diamond-grit grout removal blade is the recommended power-tool choice for slate. Brands like Milwaukee Diamond Max blades or Dremel carbide blades are purpose-built for this. Unlike a grinder, an oscillating tool moves in a very short back-and-forth arc at low amplitude, which generates far less lateral force against the stone edges and much less vibration than a rotating disc. Run it at medium speed, keep the blade centered in the joint, and let the blade do the work. Do not press hard sideways against the slate edge. Connect a HEPA-filtered vacuum to the tool if your model allows an attachment, or position the vacuum nozzle directly at the joint opening as you work.
What to avoid on slate
Angle grinders with narrow disc blades or diamond cup wheels work fine on brick and ceramic tile but are genuinely hazardous on thin cleft slate. The rotational speed and lateral force involved in keeping the disc centered in a narrow joint is difficult to control, and contact with the slate edge causes immediate chipping or spalling of the stone's layered face. Heavy pneumatic chisels create vibration that can delaminate a cleft slate from below. Avoid both tools unless you are highly experienced and working with thicker, more robust slate. Never pressure-wash joints on a mortar-set patio to remove grout debris, the force can undercut the mortar bed and loosen well-set slabs.
Cleaning joints after removal, the step people rush
A clean, dry joint is what determines whether fresh grout bonds or not. Debris, dust, and moisture are the three enemies at this stage, and all three need to be dealt with before you open the grout bag.
- Vacuum all joints with the HEPA shop vac and a narrow crevice tool immediately after removal. Run the nozzle along each joint twice.
- Wire-brush every joint with a stiff wire brush to dislodge any particles stuck to the joint walls. Follow each joint the full length.
- Vacuum again after wire-brushing to pull out the loosened material.
- Wash the joints with clean water using a stiff brush or by spraying with a pump sprayer. This removes fine dust and any chemical residue from old joint stabilizers.
- Allow joints to dry completely. In dry conditions this is typically 24 hours; in humid or shaded conditions allow 48 hours minimum. Check by pressing a dry paper towel into the joint: if it picks up any moisture, wait longer.
- Recheck the joint walls visually once dry. Any remaining loose mortar fragments need to be scraped out now — they will not bond to new grout and they will cause that section to crack.
If you find any oil staining or biological growth (moss, algae residue) inside the joints, clean with a diluted ph-neutral stone cleaner and rinse thoroughly. Do not use acidic cleaners on iron-bearing slate without testing first in an inconspicuous spot, acid can react with iron minerals in the stone and cause permanent rust-colored staining.
Applying the new grout: technique for slate joints
Slightly pre-dampen the joint walls (not wet, just misted) immediately before applying cementitious grout. This slows the moisture absorption from fresh grout into the stone and base, which gives you better bond strength. Do not pre-dampen for epoxy grout application; the surfaces should be dry. For step-by-step instructions on mixing, filling, and finishing outdoor joints, see how to use patio grout.
Grout bag method (best for deep or wide joints)
A grout bag looks like a piping bag for cake icing, and for slate patios it is often the best tool because it lets you fill joints from the top down without dragging grout across the stone face. Load the bag with mixed grout to about two-thirds full, twist the top closed, and cut the tip to a width slightly smaller than your joint. Hold the tip directly over the joint and squeeze steadily while moving along the joint line. Fill in layers for deep joints (below about 3/4 inch): pack the first layer to about half depth, allow a few minutes to firm slightly, then add the second layer. Do not try to fill a deep joint in one pass as the grout can slump.
Trowel and float method (for shallower joints and wider gaps)
For shallower joints or where you're working on a larger area efficiently, spread grout with a rubber-faced grout float held at about a 45-degree angle, working diagonally across the joint lines to pack the grout in rather than pulling it back out. Remove excess from the stone surface quickly using the float edge held nearly perpendicular. Wipe residual haze from the slate face with a damp sponge in gentle circular passes. Rinse the sponge frequently. On slate, do this cleanup sooner rather than later, dried grout haze on a textured cleft surface is significantly harder to remove.
Finishing the joint profile
Once the grout has firmed to a consistency where it holds a thumbprint but doesn't smear (typically 15 to 45 minutes depending on temperature and product), tool the joints with a rounded stick, a purpose-made jointing tool, or the back of a spoon to create a slightly concave or flush profile. A concave joint sheds water better than a flush one on an outdoor surface. Avoid feathering the grout out flat onto the stone face, that thin feathered edge will crack off quickly.
Polymeric joint sand application (for dry-lay patios)
Pour the dry polymeric sand over the surface and use a stiff broom to sweep it into the joints. Compact it with a hand tamper or rubber mallet between the slabs. Sweep and compact in two or three passes until the joints are filled to within about 1/4 inch of the surface. Blow or sweep any excess sand off the slate face, then apply water with a gentle spray, not a pressure washer, not a hard stream. The water activates the polymer binders. Follow the specific product instructions for activation time and any second wetting required.
Curing, sealing, and keeping it in good shape
Curing time
Cementitious grouts reach usable strength in 24 to 48 hours but do not reach full cure strength for 28 days. Keep foot traffic off the surface for at least 24 hours, and avoid heavy furniture or planters on the joints for a week. Protect freshly grouted joints from rain for the first 24 hours by covering with plastic sheeting if the forecast is uncertain. Epoxy grouts cure faster chemically but still need the manufacturer's specified time before traffic.
Sealing: should you and with what
Sealing cementitious grout on a slate patio is a good idea and will extend joint life significantly by reducing water penetration and stain absorption. A penetrating (impregnating) sealer is preferable to a film-forming or topcoat sealer on textured cleft slate: it soaks into the grout and stone pores without leaving a surface film that can peel or become slippery when wet. Apply sealer after full grout cure (typically wait 28 days for cementitious grout). Do your absorption test beforehand to confirm the slate won't darken unacceptably. Apply with a foam roller or brush, wipe off any pooling within the time specified on the product label, and allow full dry time before traffic. Re-seal every two to four years depending on wear and sun exposure.
Maintenance to make the job last
- Clear moss and weeds from joints promptly — the longer roots grow, the more damage they cause
- Inspect joints each spring for hairline cracks or erosion; catch small failures early with spot repairs before they spread
- Reapply sealer on schedule; dried-out sealers let water in and grout deterioration accelerates
- Check that the patio surface still drains correctly; standing water after rain is a sign the surface has shifted or joints are blocking drainage
- Avoid deicing salts on slate surfaces; they accelerate surface spalling and grout erosion
Troubleshooting: when things don't go as planned
Grout crumbling within weeks
Premature crumbling almost always means the mix was too wet, the joints were not cleaned properly before filling, or the grout was applied in cold temperatures. The fix is to remove the failed section, prep properly, and reapply. There is no product you can pour over crumbled grout to harden it.
Staining on the slate face
Grout haze (cement film left on the stone surface) is best addressed immediately with clean water and a sponge. If it has dried, a commercial grout haze remover (ph-neutral formulation for natural stone) is the safest option. For darker staining from iron-bearing grout or water minerals, a poultice material applied and left to draw the stain out is the standard approach. Avoid acid-based cleaners on slate without testing.
Efflorescence returning after regrouting
Efflorescence returns when water is still moving through the joint material and bringing minerals to the surface. If it appears on freshly cured grout, it usually means the base material is wetter than expected (possibly from poor drainage or a high water table below the patio). Address the drainage problem first; sealing the joints without fixing the source just pushes the water somewhere else. Dry brushing and rinsing can remove light efflorescence from the surface; a diluted efflorescence cleaner formulated for natural stone handles heavier deposits.
Loose slabs continuing to move after regrouting
If slabs you identified as solid during your inspection are moving after you've regrouted, the base below those specific slabs has more significant issues than surface grout can fix. The slab needs to be lifted, the compacted base material repaired or replaced, and the slab reset before regrouting. Fresh grout in a moving joint will crack within weeks.
How this differs for pavers, brick patios, and patio slabs
The core process is the same across all these surface types, but the specific techniques shift in a few places. Concrete or clay pavers have much harder, manufactured edges compared to cleft slate, so power tools including angle grinders are more acceptable for grout removal. Brick patios traditionally use a lime-mortar pointing mix rather than portland-cement grout, because lime is softer and more flexible than cement and matches the compressive strength of the brick (portland cement pointing mortar can actually cause spalling damage to soft historic brick). Patio slab joints are typically wider than slate joints, which makes trowel and float application more straightforward and often makes polymeric joint sand a practical option where slab layout allows it. On all surfaces, the inspection, prep, and cleaning steps are the same, and proper joint depth preparation is equally important regardless of the surface material.
Time and cost to expect
For an average-sized patio of around 200 square feet with moderate joint deterioration, plan for a full weekend: day one for removal and cleaning, day two for application and initial cleanup. Add time at each end for the prep work, the patch testing, and the wait for joints to dry before grout goes in. Costs will vary by region and product choice, but rough ballpark figures for materials on a 200-square-foot job are: cementitious grout approximately $40 to $80 depending on product and color, polymeric sand approximately $30 to $60 per bag (one 50-lb bag typically covers 25 to 40 square feet depending on joint width), epoxy grout approximately $100 to $200 for the same area. Add tool costs if you don't own an oscillating multi-tool (a basic model runs $60 to $120) and a HEPA shop vac if needed (around $80 to $150). Sealer adds another $30 to $80 depending on coverage and product type. Total material and tool budget for a DIY regrout on a medium patio: roughly $200 to $500 depending on what you already own.
When to call a professional
There are specific situations where regrouting a slate patio crosses from a practical DIY job into professional territory, and it's worth being honest about them before you start rather than after you're three hours in.
- More than a few slabs are loose or hollow — resetting multiple slabs, especially on a mortar-set base over concrete, requires experience and tools most homeowners don't have
- There is visible cracking in the concrete base slab beneath a mortar-set patio — this is a structural repair issue, not a surface grout issue
- Significant drainage failure is present and the cause isn't obvious — drainage problems that have been ignored for years can involve pipe issues or grade changes that need professional assessment
- The slate itself is historically significant or valuable, or is a very thin, fragile format — the risk-reward calculation for DIY work changes when the stone is irreplaceable
- Efflorescence is severe and persistent despite addressing visible drainage — this can indicate a moisture intrusion problem from below that needs investigation before any surface repair is worthwhile
- You are not comfortable with respiratory protection requirements or don't have access to a HEPA-filtered vacuum — silica dust exposure during grout removal is a genuine health risk that shouldn't be dismissed
A stone mason or experienced hardscaping contractor can often assess the situation in a short site visit and tell you whether the job is DIY-viable or not. That conversation is free or low-cost and can save you from starting a job that turns into something significantly more expensive when the real scope becomes apparent halfway through.
FAQ
How do I know if my slate patio needs regrouting?
Look for missing, eroded, cracked, or crumbling joint material; vegetation or roots growing in joints; loose or rocking slabs/pavers; joints that have widened or that allow water pooling; and white salt deposits (efflorescence) or staining on joints or stone faces. Probe joints with a screwdriver or grout raker and tap slabs to detect looseness. If two or more signs are present or joints are failing over more than a small area, regrouting is needed.
What slate‑specific precautions should I take before starting?
Test the actual slate on site — do a water‑drop absorption test in several inconspicuous spots to see if the stone darkens or absorbs moisture. Slate varies by quarry: some pieces are more porous or have cleft (laminated) edges that chip easily. Avoid high‑speed grinding, heavy impacts, acid cleaners on iron‑bearing slate, and aggressive wetting that could drive stains into the stone. Protect edges and thin pieces; practice removal and cleaning techniques in an out‑of‑sight area first.
What tools and materials will I need for a typical homeowner regrouting job?
Tools: grout raker or narrow joint rake, small cold chisel, hammer, oscillating multi‑tool with carbide/diamond grout blade (optional), hand‑held tuckpointing tool, grout bag, margin trowel, pointing trowel, grout float, stiff nylon brush, shop vacuum with true HEPA filter or wet vacuum, measuring bucket, mixing paddle, mixing bucket, protective gloves, eye protection, NIOSH‑approved N95 (or higher) respirator, knee pads. Materials: chosen grout (cementitious, polymer‑modified, epoxy, or polymeric sand), bonding additive (if manufacturer requires), joint sealer/penetrating sealer (as appropriate), paver/stone cleaner, poultice materials for stains, and replacement edge stones or bedding mortar if needed.
What are safe methods for removing old grout from slate joints?
Prefer hand methods for slate: use a grout raker, narrow cold chisel, and hammer to remove deteriorated material to sound mortar. For tougher areas, an oscillating multi‑tool with a carbide or diamond‑grit grout blade at low force is recommended — it limits vibration and edge chipping. Avoid high‑speed disc grinders, diamond cup wheels, pneumatic chisels, or heavy impact tools on thin cleft slate. Always test removal in an inconspicuous spot, control dust with wet methods or HEPA vacuum shroud, and use appropriate respiratory protection due to silica dust risk.
How deep should I remove the old grout (how much joint depth)?
Remove deteriorated joint material to at least twice the joint width (commonly written as 2× joint width) or until you reach sound, unweathered mortar. In any case do not undercut or remove so deep as to expose bedding in a way that weakens slabs; follow job specifics — many specifications set a minimum removal depth (often ~1/2 in) if joints are shallow.
What types of grout/joint materials are suitable for slate patios, and how do I choose?
Options: - Cementitious (portland cement) grout or mortar: economical, flexible with polymer modifiers; good for wider joints and historic compatibility. - Polymer‑modified cement grouts: better bond and flexibility than plain cement; common for exterior patios. - Polymeric sand: dry sand with additives that locks in joints for pavers (best for narrow joints ~1/8"–1/2"); not ideal where deep mortar bedding or wide joints exist. - Epoxy grout: very stain‑resistant and durable for 1/16"–1/2" joints but expensive, limited working time, and difficult to remove later. Choose based on joint width, expected movement, freeze‑thaw exposure, stain susceptibility, and slate porosity. For sensitive, variably porous slate, do not use pigmented or liquid grouts without stone testing.
Next Article
How to Make Grout for Patio: Mix and Grout Tiles or Pavers
Learn how to mix and grout patio tiles or pavers, with prep, sealing, curing, and troubleshooting for outdoor durability