Regrouting a brick patio is a solid weekend project if the underlying base is stable and you choose the right joint material. If you want a full walkthrough, review the step-by-step regrouting process for patio pavers next regrouting patio pavers. Remove the crumbling or loose old mortar back to sound material (at least 2 to 2.5 times the joint width in depth), clean the joints thoroughly, dampen the brick, then pack in a fresh outdoor-rated mortar or polymeric jointing sand and let it cure properly. That's the whole job. The details below will get you through it without cracking a brick or watching your new joints wash out in the first rainstorm.
How to Regrout a Brick Patio: Step-by-Step DIY Guide

Talia Lang
10 Jun 2026
Why the joints failed and what to check before you start
Before you touch a chisel, spend five minutes figuring out why the joints went bad. If you skip this step and just refill the joints, you'll be back out here doing it again in a year or two.
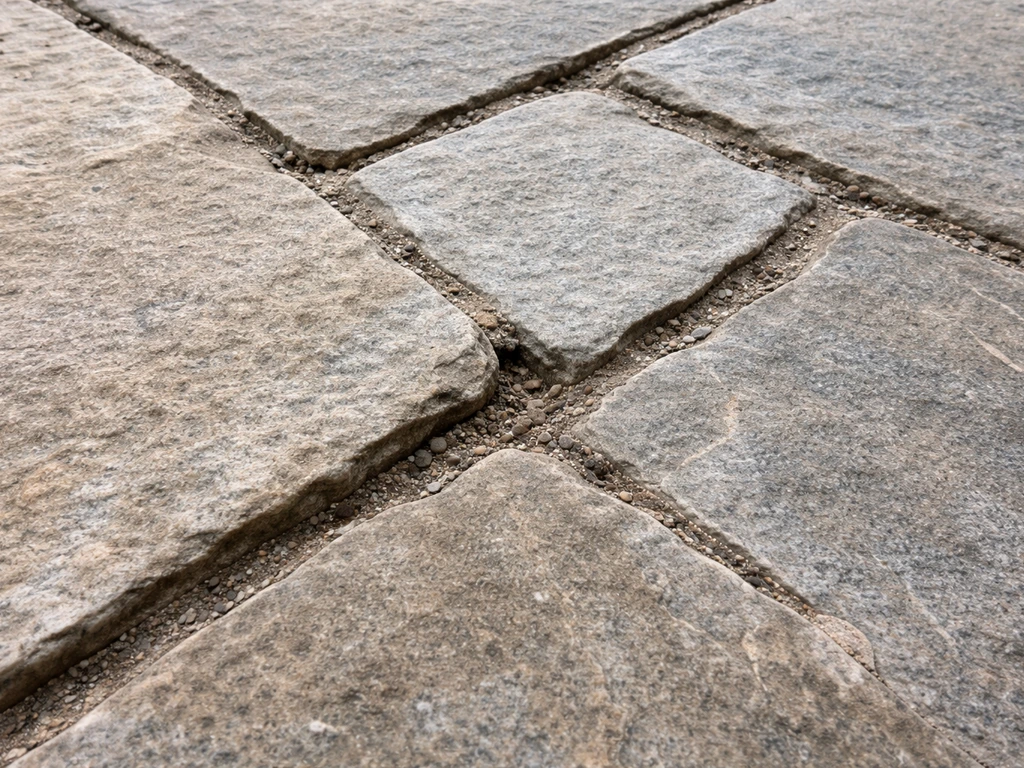
The most common culprit is freeze-thaw damage. Water gets into the joint, freezes, expands, cracks the mortar, and every winter cycle makes it worse. If your patio is in a climate with real winters and the joints are crumbly or spalling, this is almost certainly what happened. The second cause is poor original installation: wrong mortar mix, joints that weren't packed fully, or a base that settled unevenly and put stress on the joints. You'll see this as long diagonal cracks running through multiple joints, or sections where the bricks themselves have shifted.
Walk the whole patio and press on the bricks. If individual bricks rock or whole sections feel spongy, you have a base problem, not just a grout problem. Regrouting over a failed base is a temporary fix at best. In that case, the honest answer is that you need to lift the affected section, re-level the base material, and relay the bricks before you regrout. If the bricks are solid and only the joints are failing, you're in good shape to proceed.
Also check drainage. Does water pool on or around the patio after rain? Standing water accelerates every joint failure mode. Fixing drainage isn't always part of a regrouting job, but it's worth noting so you're not confused when the joints fail again in two years.
Tools, materials, and picking the right grout

Tools you'll need
- Cold chisel (narrow, around 3/8" to 1/2" wide) and a club hammer or mallet
- Angle grinder with a diamond blade (for hard, cement-heavy mortar that won't budge by hand)
- Stiff-bristle brush and a shop vacuum
- Garden hose with spray nozzle
- Margin trowel or pointing trowel
- Grout bag (for fluid mixes) or a stiff brush/broom (for polymeric sand)
- Sponge and clean bucket
- Safety glasses and dust mask (non-negotiable when grinding)
Choosing the right joint material
This is where a lot of DIY regrouting jobs go wrong. There are two main options for a brick patio, and they suit different situations. If you're still deciding what product to buy, see how to use patio grout for a closer look at mixing, applying, and curing by joint type.
| Material | Best for | Joint width | Pros | Cons |
|---|---|---|---|---|
| Polymeric jointing sand | Dry-laid brick patios on a compacted base or sand bed | Up to 2 inches wide | Flexible, resists washout, easy to apply, freeze-thaw tolerant | Not suitable for mortar-set patios; needs misting correctly or it won't cure properly |
| Outdoor cementitious mortar / repointing mortar | Mortar-set brick patios, structural joints, or narrow joints under 1/2 inch | 1/4 inch to 3/4 inch typical | Durable, hard-wearing, looks traditional | Less flexible than polymeric; can crack if base moves; requires more prep and skill to apply cleanly |
| Non-shrink grout (e.g., Sakrete Non-Shrink) | Wide gaps, leveling applications, or where dimensional stability is critical | Varies by product | Won't pull away from edges as it cures | Overkill for standard patio joints; higher cost |
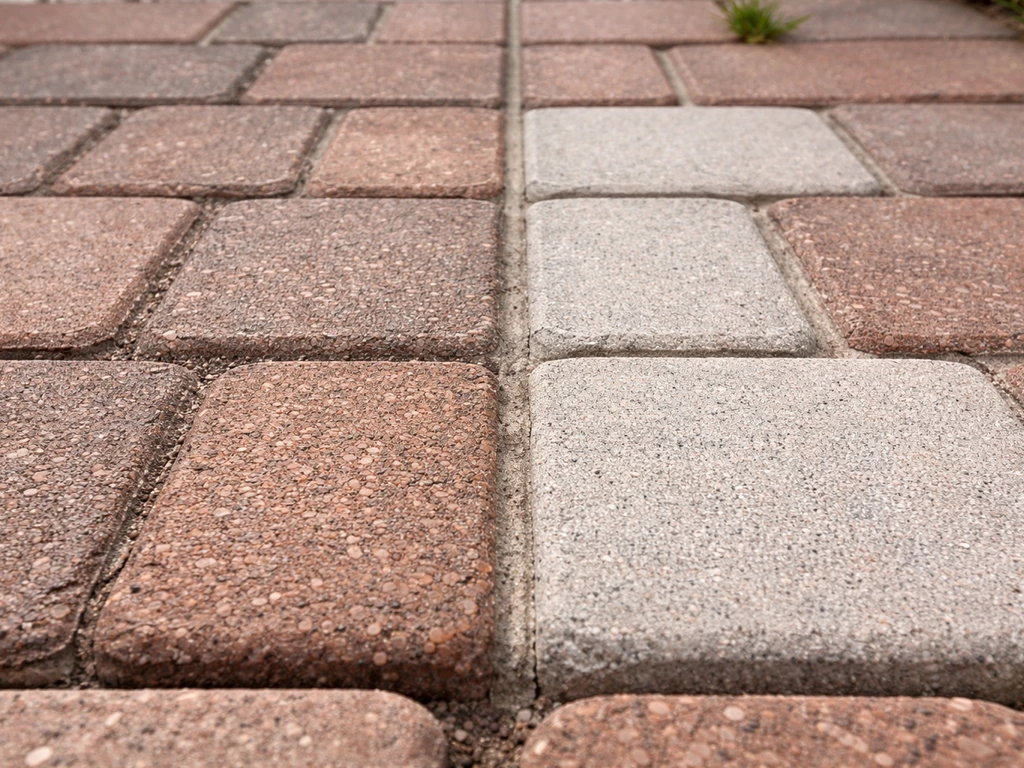
For most dry-laid brick patios, polymeric jointing sand is the practical choice. Products like QUIKRETE HardScapes Polymeric Jointing Sand are designed specifically for this application and handle joints up to 2 inches wide. If your patio was originally mortar-set (brick sitting on a concrete slab with mortared joints), use a proper repointing mortar. Matching the original joint material matters: a soft original mortar paired with a hard Portland-heavy repoint mix can cause the brick faces to spall over time.
Step-by-step regrouting process
Step 1: Remove the old grout
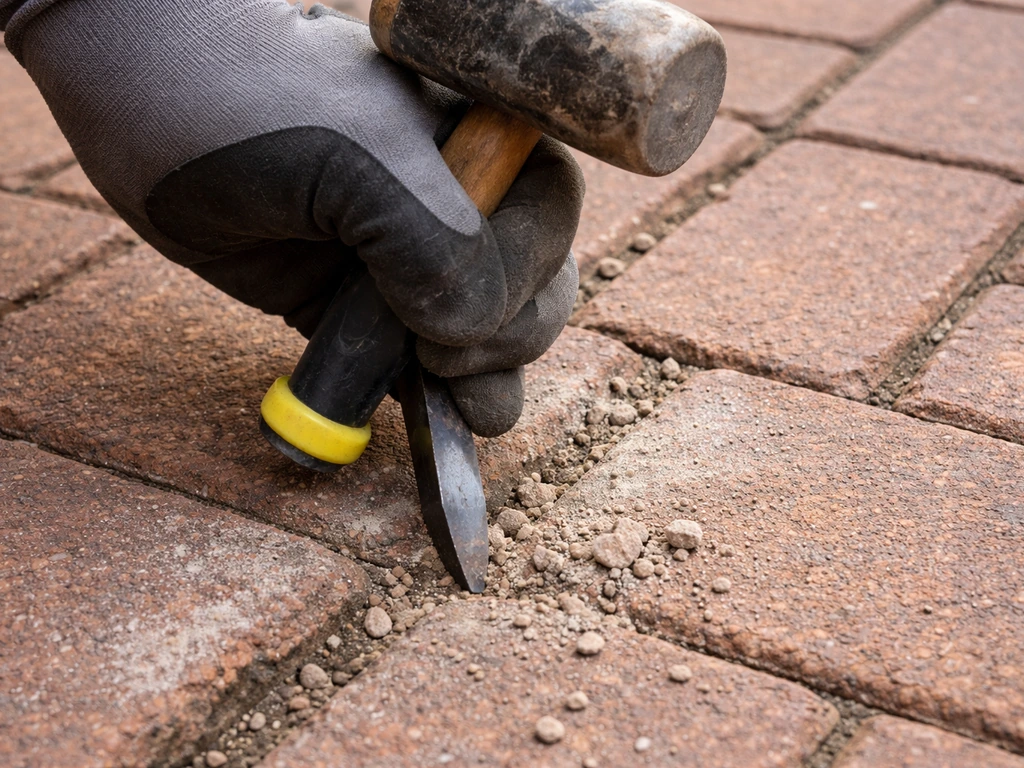
You need to remove deteriorated mortar back to sound, solid material. The rule of thumb is a minimum depth of 2 to 2.5 times the joint width. For a 3/8-inch joint, that's roughly 3/4 to 1 inch of depth. This gives the new material enough room to bond and hold.
Start with hand tools. A narrow cold chisel and club hammer let you feel what you're doing and avoid slipping into the brick face. Work along the joint, not perpendicular to it. For soft, crumbly mortar this goes quickly. For older patios with hard cement mortar, you'll likely need an angle grinder with a diamond blade. If you go that route, run the blade down the center of the joint only, stay well away from the brick edges, and use the chisel to clean up what's left. The grinder gets you through the material fast but has no feel, so it's easy to nick the brick if you're not paying attention.
Remove only what's failed. There's no benefit to going deeper than needed, and cutting too aggressively can undermine stable sections of the patio.
Step 2: Clean the joints
Vacuum out all the loose debris with a shop vacuum. Then use a stiff bristle brush to scrub the joint faces and remove dust, old mortar crumbs, and any organic buildup like moss or algae. Blow or vacuum again. If you see white crusty deposits (efflorescence), scrub them off with a dry stiff brush first, then rinse with water and a brush. Let the area dry before checking whether the deposits reappear. The key to clearing efflorescence is removing the moisture source that keeps bringing salts to the surface, not just scrubbing harder.
The joint surfaces need to be clean and free of dust before any new grout goes in. Contamination is one of the main reasons new mortar fails to bond.
Step 3: Dampen the joints
For cementitious mortar: lightly dampen the brick and joint faces with a spray bottle or hose mist before applying. The goal is surface-damp, not soaking wet. Dry brick will suck moisture out of fresh mortar too fast and leave you with weak, crumbly joints. Wet brick will dilute the mix and prevent proper bonding. This step matters more than most guides let on.
For polymeric jointing sand: skip pre-dampening. The water application comes after the sand is swept in, not before.
Step 4: Apply the grout or jointing material
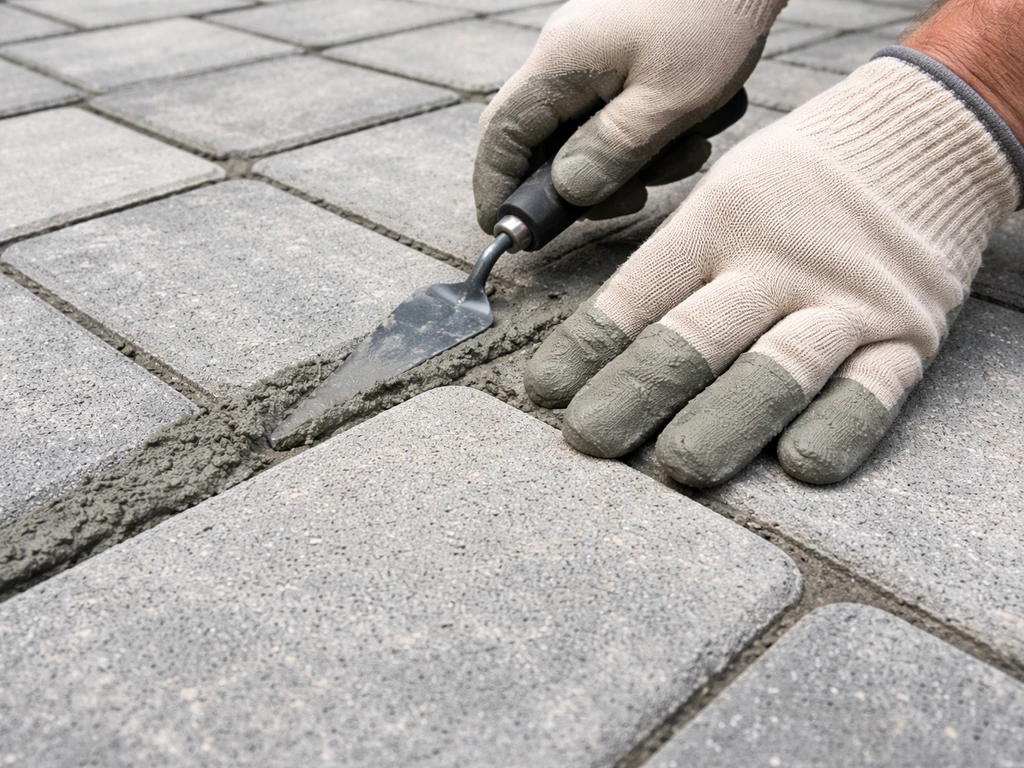
For polymeric sand, sweep it across the dry patio surface with a push broom, forcing it into the joints. Make multiple passes in different directions. Compact it lightly with a plate compactor or tamp it by hand. Sweep off all excess from the brick surface before wetting, because any residue left on the face will bond there. Then mist the surface gently. The goal is to saturate the sand in the joints without flooding or displacing it. Stop when the patio surface stops absorbing water. Repeat the mist-and-wait cycle two or three times over 20 to 30 minutes as specified by your product's instructions.
For mortar, pack it into the joints with a pointing trowel or a grout bag. Start with the deepest sections and work in layers if needed. Press firmly to eliminate voids and air pockets. Overfill slightly, then strike the joint to the correct profile (usually slightly concave, called a "tooled" joint) once the mortar has stiffened enough to hold a thumbprint but not so hard that it crumbles when you press. Clean smears off brick faces with a damp sponge as you go. Don't let mortar skin over on the brick surface or it becomes very hard to remove later.
Mixing mortar correctly (and why this step matters)
If you're working with a bagged mortar or non-shrink grout product, follow the manufacturer's water ratio closely. A common method for non-shrink grouts like Sakrete is to add about 75% of the required water to the mixer first, slowly add the dry material, and mix for at least 3 minutes until fully homogeneous. Do not add extra water to make the mix easier to work with. A wet, sloppy mix looks easier to apply but dries weak and is more prone to cracking and crumbling. The consistency you want for packing joints is stiff enough to hold its shape when you squeeze a handful, similar to very thick peanut butter.
Mix only what you can use in 20 to 30 minutes. Once mortar starts to set, adding more water and remixing (called "retempering") weakens it significantly. It's better to mix smaller batches than to fight with stiffening mortar halfway through a joint.
Curing, sealing, and keeping the joints from failing again
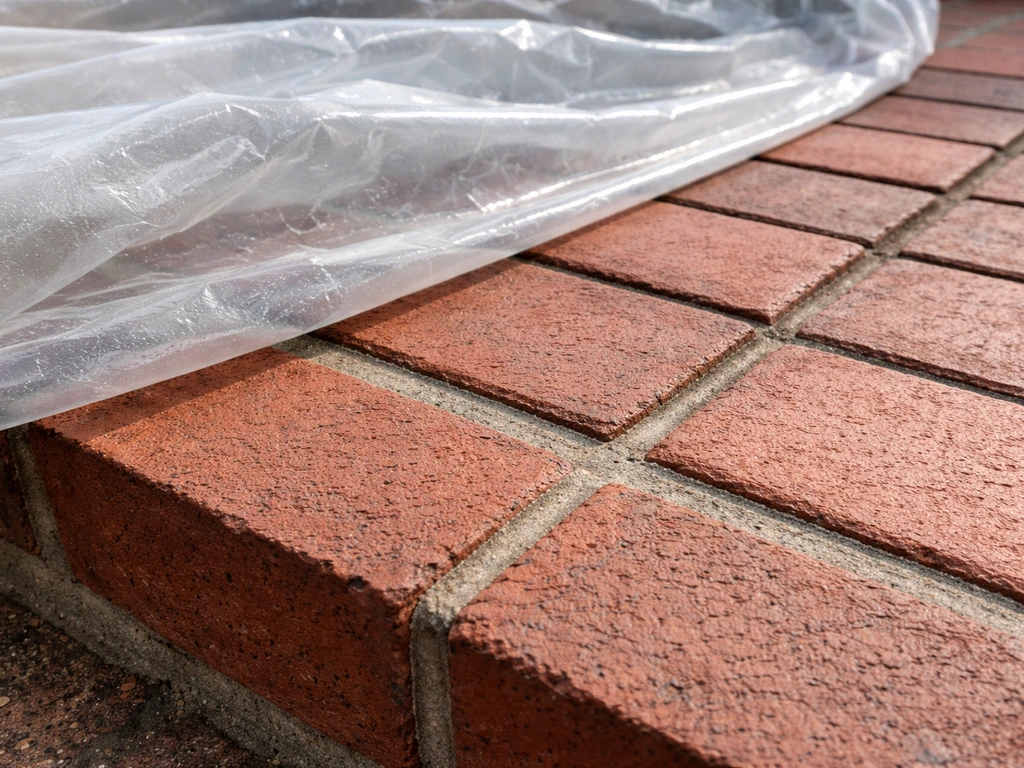
Curing is the step people rush the most, and it's why a lot of DIY regrouting jobs look fine for one season and then fall apart. Fresh mortar needs moisture to cure properly. Keep foot traffic off the patio for at least 24 hours and ideally longer. If the weather is hot and dry, mist the joints lightly once or twice a day for the first 24 to 48 hours to slow the cure down and prevent the mortar from drying out too fast (which causes surface cracking). You can also cover the work with plastic sheeting in hot sun. In cold conditions, below 40 degrees Fahrenheit, fresh mortar should be protected from freezing until it reaches full strength, which takes several days.
Sealing is optional but worth considering for mortar-set brick patios in freeze-thaw climates. A penetrating masonry sealer reduces how much water the brick and joints absorb, which is the root cause of freeze-thaw damage. Wait until the new mortar has cured fully (at least 28 days for cementitious products) before applying sealer. Check that the sealer is compatible with your grout type, especially if you used an epoxy-modified product. Polymeric jointing sand generally does not need sealing.
For long-term maintenance, inspect the joints every fall before freeze season. Catching a small crack early and refilling it takes 20 minutes. Ignoring it means water gets in all winter and you're back to doing the whole patio next spring.
Troubleshooting the problems that actually come up
Old grout won't come out
Hard original mortar, especially older Portland cement mixes, can be stubborn. If the chisel isn't making progress, switch to the angle grinder with a diamond blade and run a single cut down the center of the joint. Let the chisel handle the cleanup. Work slowly and wear eye protection. If sections are so hard and intact that they're genuinely bonded well, you may not need to remove them at all. Only remove what's actually failing. For historic masonry, guidance emphasizes removing deteriorated mortar only as needed to avoid compromising joint stability, typically defined in terms of minimum raking or clean-back to sound material based on joint dimensions Only remove what's actually failing..
New grout is cracking or crumbling
This is almost always a mix or curing issue. Either too much water went into the mix (making it weak), the joints dried out too fast in hot weather (preventing proper hydration), or the brick wasn't dampened before application and pulled moisture from the fresh mortar. You'll need to rake out the failed sections and redo them. This time, stiffen the mix, dampen the brick, and protect the work from direct sun and wind for the first 24 hours.
Polymeric sand washing out
This happens when rain hits the patio before the polymeric sand has had time to activate and set, or when the misting step was done too aggressively and displaced the sand. If rain is in the forecast within a few hours of finishing, cover the patio with plastic sheeting. If it's already washed out, let the surface dry completely, brush or vacuum out the damaged sections, and re-apply fresh polymeric sand following the misting instructions carefully. Use a gentle mist, not a jet or stream.
White stains or haze on the brick
If you're seeing a chalky white haze after grouting, you've got one of two things: grout residue that wasn't cleaned off while still fresh, or efflorescence from salts migrating through the masonry. For fresh grout haze, try scrubbing with a stiff dry brush first, then a damp sponge. For efflorescence, let the area dry fully, brush it dry, then rinse and scrub with water. Avoid aggressive acid cleaning unless you're confident about brick compatibility and have rinsed the surface thoroughly first. The bigger question with efflorescence is where the moisture is coming from, because it will keep reappearing until that's resolved.
Uneven or messy joint lines
Uneven joints usually come from rushing the striking step or trying to tool the mortar when it's too wet. Wait until the mortar holds a clean thumbprint before you run the jointing tool along it. Practice on a non-visible section first to get the feel. If you're dealing with bricks that have uneven spacing from the original install, accept that the finished joints won't look perfect. Work for consistency in depth and profile rather than perfect symmetry.
Joints keep failing in the same spot
Recurring failure in a specific area means there's a structural or drainage issue underneath. Common culprits are a low spot that holds water, a section of base that has shifted or settled, or a tree root pushing up from below. Regrouting the same spot every year is a sign the real fix is lifting that section, addressing what's underneath, and relaying before regrouting. Regrouting patio slabs is a straightforward project as long as you remove the failed material, clean the joints well, and use the right joint product for your setup Regrouting the same spot every year. It's more work upfront but saves you the frustration of the same failure repeating.
FAQ
Can I use polymeric jointing sand on any brick patio, even if the bricks were mortar-set?
No. For a mortar-set patio on a slab, use a repointing mortar (cementitious or polymer-modified as appropriate). For a dry-laid patio, use polymeric jointing sand. Using the wrong product can trap water or fail to bond, leading to rapid joint loss.
What should I do if bricks feel loose or the patio feels spongy?
If you have brick movement, a spongy or rocking surface, or diagonal cracking across multiple joints, stop and address the base before regrouting. Regrouting alone is likely to crack again because the joint is being stressed.
How do I cure mortar on a brick patio if it is hot, windy, or cool at night?
For cementitious mortar, keep the work damp lightly for the first 24 to 48 hours, especially in hot or drying wind, and avoid foot traffic until it has cured at least overnight (longer if temperatures are cool). Do not mist so much that water runs or pools, and protect fresh work from freezing until it reaches full strength.
Why did my polymeric joints wash out, and how can I prevent it?
Most polymeric sands require that you mist gently after sweeping, only until the surface stops absorbing, then repeat in short cycles. If you over-mist, the sand can displace or wash out, especially on slopes. Follow the product instructions for mist frequency and timing.
Can I re-temper or add water to mortar if it starts to set while I’m working?
Do not add extra water to “fix” a mortar that is getting stiff. Instead, mix smaller batches and keep the timing tighter. If mortar is already set, removal and redoing the joints is usually the safest option.
Should I seal the joints, and does sealing depend on the joint type I used?
Yes, but only on compatible products. Wait for full cure first, then use a penetrating masonry sealer made for exterior brick and the specific grout type you installed. Sealing the wrong product or sealing too early can reduce bonding or trap moisture.
Should I dampen the brick before installing polymeric jointing sand?
No for polymeric sand, not the way you would for cementitious mortar. Polymer sand is installed dry, then wetted after it is swept into the joints. Pre-dampening before installation usually reduces the sand’s ability to activate properly.
What’s the difference between grout haze and efflorescence, and what should I do first?
If the haze is fresh residue, cleaning while it is still workable helps most. For dried residue, start with dry brushing then a damp sponge, and only escalate to stronger cleaning if you are sure the brick can handle it. If the haze is efflorescence, the rinse-and-brush approach after the area dries is safer, and you must identify the moisture source.
How do I get straight, consistent-looking joints if the original brick spacing is uneven?
Aim for consistent joint depth and profile, but exact symmetry is not realistic on older brick. If original spacing was uneven, focus on uniform depth, eliminate voids, and tool the joint the same way across the section so the patio sheds water the same way everywhere.
Why do the same joints fail every year, even after a good regrouting job?
When a section fails repeatedly, it usually means water is staying in that area or the base is shifting. Look for a low spot, settlement, compromised drainage, or roots pushing up. The practical fix is lifting and relaying that section after correcting the underlying problem.
Do freeze-thaw climates require different regrouting steps than mild climates?
Yes, especially if the patio is in freeze-thaw conditions. Polymeric sand and many cementitious mortars can degrade when joints repeatedly hold water. Fix any pooling water, ensure joints are fully packed, and consider sealing only after full cure for mortar-set patios in your climate.
What’s the best way to pause a regrouting project mid-day without ruining the joints?
If you must stop mid-day, cover the work to prevent sudden rain and avoid wetting polymeric sand before it is ready to activate. For mortar, protect from direct sun and drying wind and do not walk the area until it has enough set. Plan to finish joints in a workable window so timing and cure conditions stay consistent.
Next Article
How to Repair Stone Patio Grout: Step-by-Step DIY Guide
Step-by-step DIY to repair stone patio grout: remove failed material, match joint filler, pack, finish, cure, and seal.