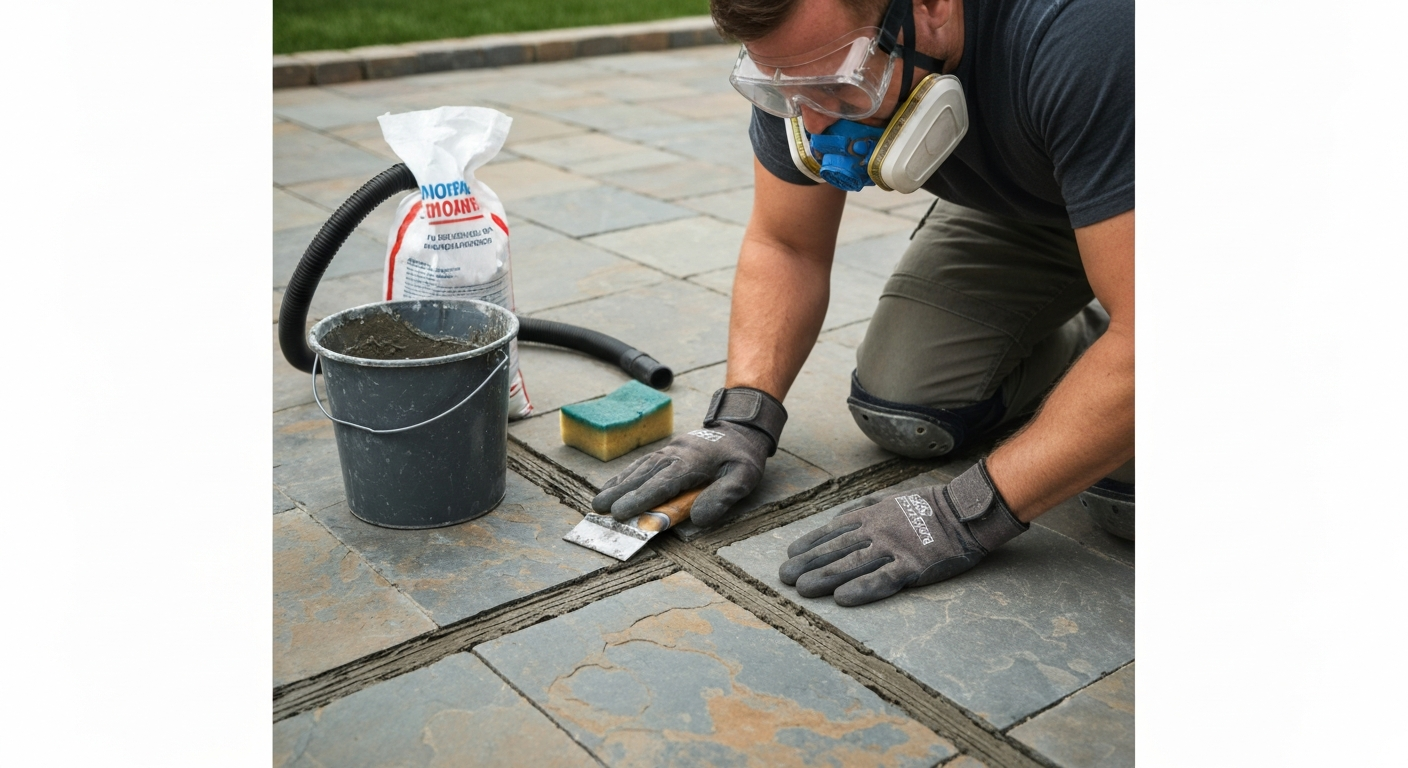
Patio grout is the material you pack into the joints between pavers, bricks, slabs, slate, or stone to lock them in place, shed water, and keep weeds out. Using it correctly means picking the right product for your joint size and surface type, getting the joints bone dry before you start, mixing to the right consistency, working it fully into the gaps, and giving it the curing time it actually needs. Rush any of those steps and you will be back on your knees doing it again within a season.
How to Use Patio Grout: DIY Guide for Pavers, Brick & Stone

Talia Lang
24 Jul 2026
What you can realistically expect from a DIY grout job
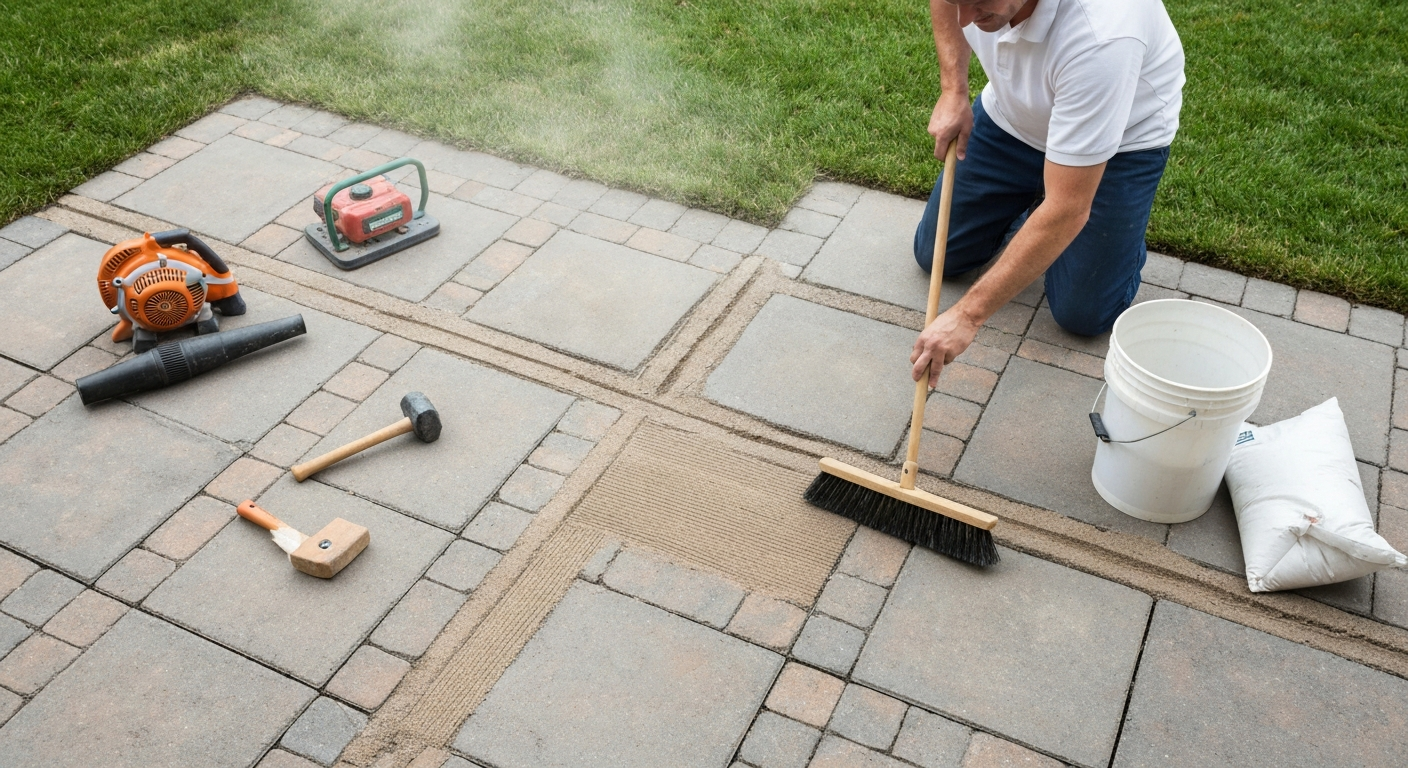
Most homeowners can handle regrouting a small to medium patio over a weekend. The physical work is not heavy, but the prep and drying steps eat up most of your time. A typical 200 sq ft patio takes roughly 4 to 6 hours of active work spread across two days, mainly because you have to wait for surfaces to dry completely before applying any product. Results hold well when the substrate is stable, drainage is good, and the right product is matched to the joint. If the base underneath is shifting, or if joints are wider than the product allows, grouting is a temporary fix at best. This article will help you figure out which situation you are in before you spend money on materials.
Inspection checklist: assess the damage before you buy anything
Walk your patio with a screwdriver or narrow trowel and go through these checks systematically. What you find here drives every decision that follows.
- Joint condition: probe existing grout with a screwdriver. If it crumbles or comes out easily, it is failed and needs full removal. If it is solid but cracked in a few spots, partial repair may be enough.
- Joint width: measure the actual gap width. Most polymeric sands work down to about 1/16 inch (1.6 mm) and up to around 2 inches depending on the product. Cementitious mortar handles wider joints. Narrow hairline cracks in slabs are a different job entirely.
- Surface type: identify your material (concrete paver, clay brick, natural stone slab, slate, or cast concrete). This affects product choice and how aggressively you can clean.
- Substrate stability: press down on individual pavers or slabs. Any rocking, hollow sound when tapped, or visible settling means the base has moved. Grouting over an unstable base will fail again.
- Drainage: look for standing water or puddles after rain. Blocked or failed joints trap water, which accelerates grout failure. Note where water pools.
- Expansion joints: check for gaps at the patio perimeter or between the patio and the house wall. These are intentional movement joints and should be filled with flexible backer rod and sealant, not rigid grout.
- Efflorescence or staining: white powdery deposits on the surface mean water is moving through the substrate and carrying salts. You need to treat this before regrouting or it will come back.
- Weed or moss growth: roots from vegetation in joints physically push grout apart over time. Remove weeds at the root before starting.
Repair, regrout, repoint, or replace: simple decision rules
These four options sound similar but they are different jobs. Here is a straight decision tree based on what your inspection found.
- Spot repair: one or two joints are cracked or missing but the rest are solid and the substrate is stable. Clean out only the failed sections and refill. This is a one-afternoon job.
- Regrout (full joint replacement): most or all joints are failed or crumbling but the pavers, bricks, or slabs themselves are in good condition and the base is stable. Remove all old joint material, clean, and refill completely. This is the most common DIY job covered in this article.
- Repoint: applies mainly to brick or natural stone patios where the mortar joints have receded or eroded but the structural elements are sound. The process is similar to regrouting but uses stiffer mortar packed in with a pointing trowel. Related guides on regrouting brick patios and regrouting patio slabs cover this in detail.
- Replace: one or more pavers or slabs are cracked, heaved, or sunken beyond cosmetic repair, OR the base has clearly shifted (multiple rocking units, visible dips). Grouting over this is wasted effort. Reset or replace the affected units first, then grout. If more than 25 to 30 percent of the surface is affected, consider professional assessment.
Choosing the right product for your patio
This is where most DIY grout jobs go wrong. There is no single product that works for every patio. Joint width, surface material, drainage conditions, and how much foot traffic the patio gets all affect which product is right.
| Product type | Best for | Joint width range | Key limits |
|---|---|---|---|
| Polymeric jointing sand | Concrete pavers, brick, natural stone, concrete slabs | 1/16 inch (1.6 mm) up to approx. 2 inches (check product TDS) | Joints and surface must be completely dry before and during application; no rain or irrigation for 24 to 48 hours after; will not work over saturated base |
| Cementitious (cement-based) grout | Tile-format slabs, some natural stone | Typically 1/16 inch to 1/2 inch | Needs sealing on porous stone; stains some materials; limited flexibility |
| Mortar / pointing mortar | Brick, thick natural stone, flagstone with wide irregular joints | 1/4 inch and wider; handles irregular joints well | Rigid — cracks if base moves; use within approx. 1 hour of mixing; requires dry and damp-cured conditions |
| Epoxy grout | High-traffic areas, areas with grease or chemicals, pool surrounds | Narrow joints; follow product TDS exactly | Short open time; expensive; two-component system must be mixed in exact ratios; difficult to clean off surfaces; not a beginner material |
For the majority of concrete paver and natural stone patios, polymeric jointing sand (products like Techniseal SmartSand or QUIKRETE HardScapes Polymeric Jointing Sand) is the best DIY choice. It sweeps in easily, compacts well, resists weeds, handles rain better than plain sand once cured, and works with joint widths that cover most residential patios. For brick or irregular flagstone with wider, deeper joints, a pre-blended mortar or custom pointing mortar is the right call. Epoxy grout is genuinely difficult to work with and is not recommended for a first-time job unless you have a strong reason for it.
Tools and materials you will need
- Grout saw, oscillating multi-tool with grout removal blade, or joint raker (for removing old material)
- Stiff wire brush and hand brush
- Pressure washer or garden hose with spray nozzle
- Leaf blower or stiff broom (for clearing loose debris and dry-blowing polymeric sand)
- Rubber-faced plate compactor with protective pad (for pavers) or rubber mallet
- Pointing trowel and margin trowel (for mortar work)
- Grout bag (for mortar pointing into deep joints without smearing the face of stone or brick)
- Bucket and mixing paddle or drill with paddle attachment (for mortar mixing)
- Sponge, bucket of clean water, and clean rags (for cleanup)
- Measuring cups or a scale (for getting mix ratios right)
- Kneeling pad
- PPE: waterproof gloves, safety glasses, dust mask (N95 minimum when cutting or grinding old grout)
Mixing ratios and DIY grout options
Polymeric sand does not require mixing. You apply it dry and activate it with water at the end. Everything else does require mixing, and getting the ratio right matters more than most people realize. For step-by-step mixing instructions and recipes, see how to make grout for patio. Too much water makes mortar weak and prone to cracking. Too little makes it unworkable and it will not bond properly.
Pre-blended mortar mix (easiest DIY option)
Products like QUIKRETE Mortar Mix or SAKRETE Mortar Mix are the simplest route for pointing and repointing work. QUIKRETE's mortar mix datasheet gives approximately 5 quarts (about 4.7 litres) of water per 60 lb bag as a starting point. Add water slowly, mix thoroughly, and aim for a consistency like peanut butter, stiff enough to hold its shape but workable enough to press into joints without crumbling. These mixes have a pot life of about 1 hour once water is added. Mix only what you can use in that time, especially in warm weather.
Field-blended (custom) pointing mortar
If you want to mix from scratch, a reliable starting point for outdoor pointing mortar is 1 part Portland cement : 1/4 part hydrated lime : 3 parts sharp sand by volume. The lime adds workability and a small amount of flexibility. This is a commonly cited proportion in masonry trade guidance (SAKRETE Portland cement documentation references similar starting points). Do not substitute regular play sand, sharp or builder's sand gives better bond. Wear your gloves and dust mask when handling dry Portland cement. Wet cement is caustic and will burn skin with prolonged contact.
Cementitious grout for slabs
For cement-based grout products (MAPEI, LATICRETE, and similar brands), the powder-to-water ratio is on the product technical data sheet and varies by product. A common small-batch starting point for many cement grouts is roughly 3 to 4 parts powder to 1 part water by volume, but treat that as a starting point only. Follow the specific TDS for whatever product you buy. LATICRETE guidance also notes that when regrouting, you should remove at least half the depth of the existing grout before applying new material. Skipping this step leads to shallow grout that pops out within months.
Epoxy grout
Epoxy grouts like MAPEI Kerapoxy come pre-packaged as a two-component system. The ratio is set by the packaging and cannot be adjusted. Mix only full batches. The working time is short (typically 20 to 45 minutes depending on temperature) and it sets hard even in damp conditions, which is one of its few advantages outdoors. The trade-off is that it is unforgiving to clean off adjacent surfaces once it starts to set. If you go this route, mask off your surface edges carefully and have plenty of clean sponges ready.
Estimating materials, time, and cost
Rough estimates below assume a standard residential patio. Joint width, depth, and spacing all affect how much product you actually need, so these are starting points for budgeting. Buy 10 to 15 percent extra to account for waste and uneven joints.
| Product | Coverage (approx.) | Cost per unit (approx., 2026) | Time to apply per 100 sq ft |
|---|---|---|---|
| Polymeric jointing sand (50 lb bag) | 40 to 80 sq ft depending on joint width and depth | $25 to $45 per bag | 1 to 2 hours including compaction and activation |
| Pre-blended mortar mix (60 lb bag) | Fills approx. 10 to 15 linear feet of 1/2" x 1" joint | $10 to $18 per bag | 2 to 3 hours including cleanup (slower hand work) |
| Cementitious grout (10 lb bag) | Varies widely by joint size; manufacturer chart on bag | $15 to $30 per bag | 1.5 to 2.5 hours |
| Epoxy grout (unit) | Small coverage; expensive per sq ft | $50 to $100+ per unit | 2 to 4 hours (complex cleanup adds time) |
Realistically, plan for two days on a typical patio job: Day 1 for removal, cleaning, and drying. Day 2 for mixing, application, and initial cleanup. Curing continues after that. Do not schedule the job if rain is forecast within 48 hours, especially with polymeric sand.
Prep steps: the part most people rush
I will be direct here: the prep is the job. Application is almost secondary. Every grout failure I have seen on residential patios traces back to poor prep. Old grout left in, a wet surface, or dirty joints are the three most common culprits.
Step 1: Remove old grout
For mortar joints, use an oscillating multi-tool with a grout removal blade or a manual joint raker. This Old House, Masonry Tools & Jointing (how‑to guide/video) lists the standard DIY toolset for pointing and paver work, including jointing/pointing trowels, grout bags, grout saws or joint rakers (or an oscillating tool with a grout blade), a rubber mallet, a plate compactor with pad, stiff brooms and brushes, and PPE like gloves and eye protection This Old House — Masonry Tools & Jointing (how‑to guide/video). Work carefully along the joint rather than across it to avoid chipping the edges of pavers or bricks. You need to remove material to a depth of at least half the joint depth (LATICRETE guidance on regrouting specifies this minimum). For shallow polymeric sand that has failed, a leaf blower or stiff brush can clear out the loose material, followed by a careful pass with the pressure washer. Avoid the temptation to leave crumbling old material in place and just top it up. That is the most reliable way to guarantee failure.
Step 2: Clean the joints and surface
Once old material is out, blow or brush loose debris from the joints. Then pressure wash the surface and joints to remove dirt, algae, and any remaining loose material. CMHA guidance recommends keeping pressure washing in a practical range, with Techniseal's restoration guidance suggesting around 1,500 psi with the wand held at a 45-degree angle and kept moving. CMHA (ICPI), Cleaning, Sealing and Joint Sand Stabilization of Interlocking Concrete Pavement (Tech Note) recommends low‑pressure application for cleaners (pump sprayers 30–100 psi), provides typical pressure‑washing ranges for paver cleaning (commonly cited around 600–2,000 psi depending on equipment and surface), and warns against focused high‑pressure washing that can remove joint material CMHA (ICPI) — Cleaning, Sealing and Joint Sand Stabilization of Interlocking Concrete Pavement (Tech Note). Do not hold a concentrated stream on one spot or you will gouge soft brick or erode soft stone edges. After washing, treat any efflorescence with a diluted masonry cleaner (follow product directions) and rinse thoroughly.
Step 3: Dry the surface completely
This is non-negotiable. For polymeric sand, even slightly damp joints will activate the polymers prematurely and cause adhesion failures and hazing on the surface. Techniseal's documentation is explicit on this point. In practice, wait 24 to 48 hours of dry weather after washing before applying polymeric sand. For mortar, a surface-dry but slightly damp substrate (no standing water, but not bone dry) actually aids adhesion, so the timing requirement is less strict. For cementitious grout, follow the product TDS. When in doubt, give it more time, not less.
Application: how to actually put grout in
Polymeric sand (broom-in method)
- Confirm surface and joints are fully dry and ambient temperature is above 32°F (0°C) with no rain expected for at least 48 hours.
- Pour polymeric sand across the dry patio surface in manageable sections.
- Use a stiff push broom to sweep sand into joints at a 45-degree angle. Work in multiple directions to fill completely.
- Compact with a plate compactor fitted with a rubber or foam protective pad. This pushes sand deep into joints. One pass in each direction is standard.
- Sweep again to fill any voids that appeared after compaction. Repeat compaction.
- Blow off excess sand from the surface with a leaf blower held low. Remove all sand from the surface before wetting — residue left on the surface will haze and bond permanently.
- Activate with a fine mist of water. Use a garden hose with a gentle shower or mist setting. Saturate the joints without washing them out. A second activation pass 10 to 15 minutes later helps fully wet deep joints.
- Allow to cure undisturbed. Keep off foot traffic and keep water away for 24 to 48 hours minimum.
Mortar pointing (trowel-in method)
- Mix mortar to a stiff peanut-butter consistency. Only mix what you can use in about 1 hour.
- For clean-lined joints (brick, regular pavers), load a grout bag and squeeze mortar directly into the joint. This keeps the mix off the face of the surrounding material.
- For irregular joints (flagstone, natural stone), use a pointing trowel to pack mortar in layers. Fill the bottom half first, tamp with the trowel handle, then fill to the surface. Avoid overfilling — finish the joint slightly recessed or flush depending on the look you want.
- As mortar begins to firm up (usually 30 to 60 minutes after application, depending on temperature), tool the joint surface with a jointing tool or the back of a spoon to compress and shape it. This step improves water shedding and durability.
- Remove smeared mortar from the face of bricks or stone with a damp sponge before it fully hardens. Work quickly — mortar left on the surface for more than a few hours becomes very difficult to remove without acid.
- Keep fresh mortar out of direct sun and wind for the first 24 hours. Mist lightly with water 2 to 3 times over the first day if conditions are hot and dry, to prevent rapid moisture loss and shrinkage cracking.
- Allow to cure for at least 24 to 48 hours before foot traffic, and avoid heavy loading for 7 days.
Cementitious grout for slabs
Mix to the consistency stated on the product TDS. Apply with a rubber grout float held at about 45 degrees, pushing material diagonally across joints. Work in small sections (about 10 sq ft at a time in warm weather). Remove excess grout from the surface with a damp sponge before it skins over. Rinse the sponge frequently. A hazy film will remain on the surface, this is grout residue and is removed with a second clean-water sponge pass once the grout has firmed up slightly. Follow the product TDS for cure time before sealing.
Surface-specific adjustments
Concrete pavers
Polymeric jointing sand is the standard product and handles nearly all residential concrete paver applications. For step-by-step instructions specific to concrete pavers, see our guide on how to regrout patio pavers. The main variables are joint width and depth. For joints narrower than 1/16 inch, most polymeric sands will not penetrate properly, those hairline joints in a concrete paver surface usually indicate the paver itself has cracked and the real fix is replacement, not grouting.
Brick patios
Brick joints are typically deeper and more irregular than paver joints. Mortar is generally the better product here rather than polymeric sand, particularly for joints wider than 3/4 inch. Be careful not to over-wet clay brick during cleaning, clay brick is more porous than concrete paver and takes longer to dry fully. For a full regrouting job on brick, the related guide on regrouting brick patios covers the process in more depth. For step-by-step instructions, see our guide on how to regrout a brick patio.
Concrete slabs (flagged or pre-cast)
Large-format concrete slab patios typically have narrow, uniform joints where a cementitious grout or a fine polymeric sand works well. Always check that the expansion joint at the perimeter (between the slab and any walls or structures) is not confused with a regular grout joint. Expansion joints must remain flexible. For regrouting patio slabs in detail, the dedicated guide on that topic has surface-specific timing and product notes.
Slate and natural stone
Slate and natural stone are porous and can absorb pigment from cement grout, causing permanent staining. Always test your grout product on an inconspicuous offcut or in a hidden corner before committing to a full application. See our guide on how to repair stone patio grout for step-by-step repair techniques and tips. Unsanded or lightly sanded cementitious grout is typically used for narrow joints in slate. Wider, irregular joints in natural stone are better served with a polymer-modified mortar. Apply a penetrating stone sealer before grouting to give yourself a stain barrier on the face of the material. Regrouting slate patios has its own surface-specific considerations worth reviewing if that is your material.
Curing, sealing, and aftercare
Most grout and mortar products reach a workable cure in 24 to 48 hours for light foot traffic and full cure in 28 days for full strength. Do not seal grout until it has cured fully, sealing too early traps moisture and causes discoloration and bond failure. For stone and brick, a penetrating sealer applied after full cure helps protect the grout and the surface from staining, water ingress, and freeze-thaw damage. Polymeric sand does not require a separate sealer, though a paver-specific sealer can be applied over the whole surface after the sand has cured for at least a week.
For long-term maintenance, inspect your joints once a year, ideally in spring. Top up any areas where polymeric sand has eroded before full washout occurs. Clear leaves and organic debris from joints regularly, decomposing organic matter creates the soil conditions that encourage weed germination. Keep irrigation spray off the patio surface during and after any new grout installation.
Troubleshooting common failures
Washout (sand or grout washing out after rain)
This almost always means the surface was not completely dry during polymeric sand application, or rain hit the surface before the activation water had time to set the polymers. The polymer binders need to hydrate from a controlled wet-then-dry cycle, not be immediately saturated by rain. If this happens, allow the area to dry fully, remove the failed material, and start again. Polymer-modified mortars and properly activated polymeric sand are far more resistant to washout than plain sand or unmodified cement mixes, this is supported by material science research on how polymer additives improve early-age washout resistance.
Cracking grout
Grout cracks in a consistent pattern usually indicate base movement. Grout is rigid and cannot flex when the substrate shifts seasonally. The honest answer here is that no grout product will solve a movement problem permanently, you need to address the base or accept that periodic regrouting is maintenance rather than a one-time fix. Isolated random cracks often mean the mortar was mixed too wet or dried too fast. A polymer-modified mortar reduces (but does not eliminate) shrinkage cracking. For guidance specific to replacing failed grout rather than patching it, the related article on replacing patio grout covers that workflow.
Efflorescence (white powdery deposits)
Efflorescence is calcium and other salts carried to the surface by water migrating through the grout or substrate. It is a sign of ongoing water movement, not just a cosmetic issue. You can scrub it off with a diluted masonry acid cleaner (muriatic or proprietary efflorescence remover), but it will return if the water path is not addressed. Look for drainage problems, a failed damp-proof course at a wall, or over-irrigation. Treat the cause, not just the symptom.
Hazing on pavers or stone after polymeric sand
This is dried polymer residue that bonded to the surface before being blown off. It happens when excess sand is not fully removed before the activation water is applied. Light hazing can sometimes be removed with a pressure wash and a specialized polymeric sand haze remover. Heavy hazing may require professional cleaning. Prevention is easy: be thorough with the leaf blower step before activation.
Grout staining the face of stone or brick
Fresh mortar or grout smeared on porous materials must be removed quickly with a damp sponge. If it has hardened, a diluted masonry acid cleaner applied carefully and rinsed thoroughly will usually remove it. Always test in a hidden area first. For natural stone, avoid acid-based cleaners on limestone, marble, or travertine, they will etch the surface. Use a pH-neutral stone cleaner for these materials.
When to call a professional
Grouting is genuinely DIY-friendly when the prep conditions are right and the substrate is stable. Call in a professional when you see any of the following: multiple units rocking or sinking, the patio surface has heaved or dropped noticeably, water is consistently pooling toward the house foundation, grout has failed across the whole patio within a year or two of a previous repair (indicates a base problem), or the patio is bonded to a structure and any base work involves structural elements. Regrouting over a failing base is money spent twice. A professional can assess whether the base needs to be rebuilt, which changes the economics of the whole job.
FAQ
What manufacturer documentation is essential and why?
Product technical data sheets (TDS), installation guides, and FAQs from grout, polymeric sand, mortar and epoxy manufacturers. These provide exact mixing ratios, allowable joint widths, temperature/curing limits, activation/clean‑up steps, safety and warranty conditions. Examples: Techniseal SmartSand TDS (joint width and freeze/curing limits), MAPEI Kerapoxy packaging/mixing rules, QUIKRETE and SAKRETE mortar mix water and pot‑life guidance. Use manufacturer info as the primary source for product‑specific instructions and limits.
Which industry associations or trade standards should be consulted?
ICPI/CMHA (formerly ICPI) tech specs and maintenance guides for interlocking paver systems, jointing best practices, compaction, and cleaning limits. These give system‑level rules (when polymeric sand is appropriate, compaction/activation practices) and safe pressure‑washing ranges. Use them to align DIY steps with accepted hardscape practice and to justify surface‑specific recommendations.
What academic or peer‑review research is useful and why?
Materials science and civil engineering studies on washout resistance, polymer/admixture mechanisms, and early‑age strength. These explain why polymeric binders or viscosity modifiers reduce washout compared with plain cement mixes and help justify recommending polymeric sand or polymer‑modified mortar for exposed jobs. Cite such papers to support troubleshooting and mix‑design choices (e.g., polymer effects on early cure and washout resistance).
Which practical how‑to and tool guides are required?
Trusted DIY/trade how‑to resources (This Old House, trade videos) and manufacturer installation brochures that list the standard toolset and demonstrated techniques: joint rakers/grout saws, grout bags, pointing trowels, plate compactor with pad, rubber mallet, stiff brooms, pump sprayers, PPE. Use these to produce a clear tools/materials checklist and step‑by‑step workflow practical for DIYers.
What testing, performance and safety data should be checked?
Product cure/temperature limits, pot life/working time, recommended cleanup methods, and safety data sheets (SDS). These detail safe mixing, ventilation, skin/eye protection, and precautions about applying in freezing or wet weather. Example: Techniseal warns joints/surface must be dry; polymeric sands require no moisture during application; TDSs specify minimum temperatures and curing periods.
What surface‑specific information is needed?
Installation guides and case notes for each surface type (pavers, brick, concrete slabs, slate, natural stone) covering allowable joint widths, recommended joint materials, substrate prep differences, and compaction/activation steps. Manufacturer TDSs and ICPI tech notes usually specify which products suit which surfaces and any special cleaning or joint‑filling techniques for stone vs pavers.
Next Article
How to Regrout Slate Patio: Step-by-Step DIY Guide for Stone, Brick & Pavers
Step-by-step DIY guide to regrout slate patios: tools, grout types, mixing ratios, application, curing, fixes.