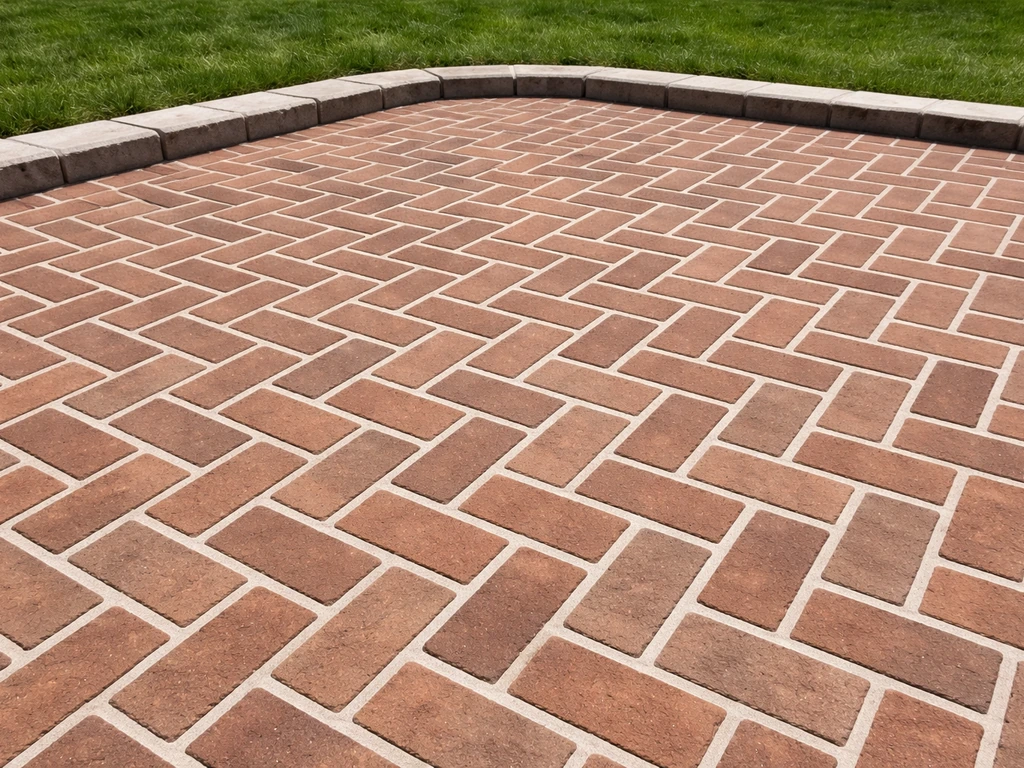
Regrouting patio slabs is a solid weekend DIY job as long as the slabs themselves aren't moving. Remove the old, failed material from the joints, clean the voids properly, pick the right jointing mix for your slab type and joint width, pack or sweep it in, then cure and seal it correctly. Done right, you can add years of life to a patio that looks tired and is letting in water and weeds. Done wrong, the new grout fails just as fast as the old stuff did, usually for the same reason: a movement or drainage problem that regrouting alone can never fix.
How to Regrout Patio Slabs: Step-by-Step DIY Guide

Talia Lang
10 Jun 2026
Is regrouting actually the right fix here?
Before you buy a bag of jointing compound, spend five minutes checking whether regrouting will actually solve the problem. The most common reasons people end up back on their knees six months after a regrout job is that they fixed the joints when the real issue was movement or drainage underneath.
Regrouting is the right fix when the slabs themselves are solid and level but the joints are visibly deteriorating. Look for these signs that point to a grout-only problem:
- Crumbling, cracking, or shrinking grout that's pulling away from the slab edges
- Empty or hollow joints where the material has simply washed or worn out
- Weeds establishing themselves in the gaps (roots accelerate grout breakdown)
- Visible gaps that are allowing water to channel down between slabs
- A gritty, sandy residue on the surface after rain (old jointing sand washing out)
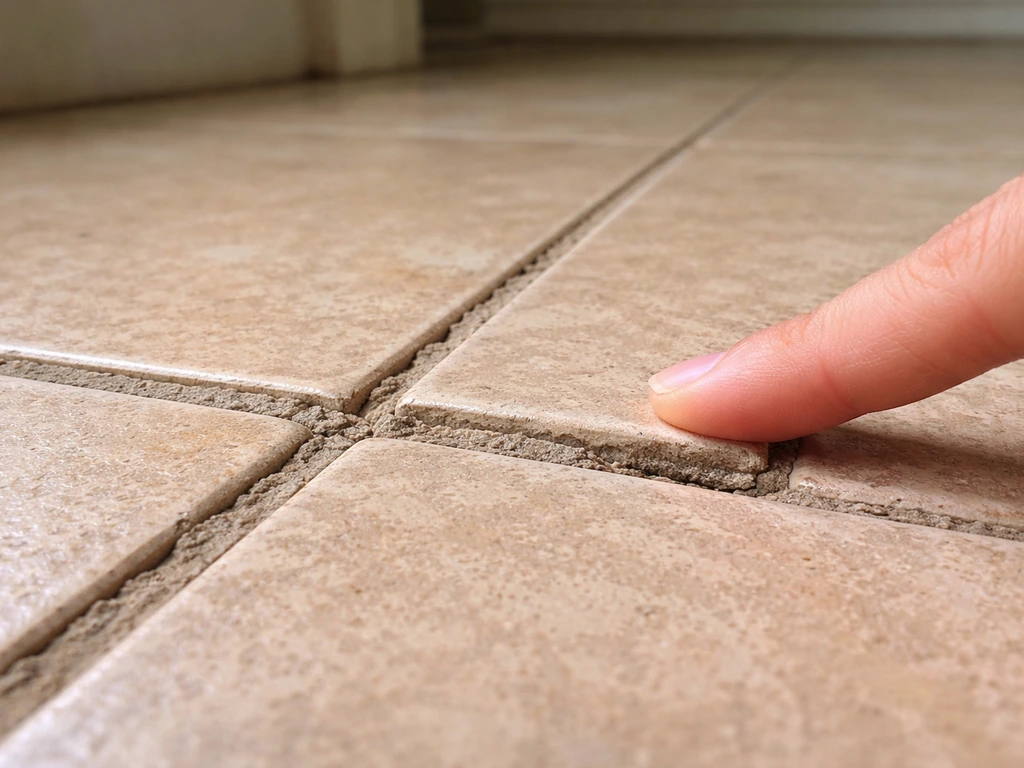
Now do a quick rocking test. Press down firmly on each slab with your foot near each corner. If any slab shifts, tilts, or clicks underfoot, that slab is not properly supported. Regrouting a moving slab achieves nothing. Pavingexpert notes that if slabs are loose, moving, or rocking, re-jointing is probably not going to fix the underlying issue and you should address the movement first Regrouting a moving slab achieves nothing. The new joint will crack again almost immediately because the slab is still pivoting against it. Likewise, if you see pooling water on or around the patio after rain, or if multiple slabs are sunken or significantly uneven, you're looking at a base or drainage problem, not a grout problem. In those cases, the sub-grade, sub-base, or bedding layer underneath has failed, and the only real remedy is lifting and re-laying those slabs on a properly compacted, well-drained base. Regrouting first and investigating later is exactly backwards.
If most slabs are stable and only the joints are the issue, you're good to proceed. If it's a mix, fix the rocking slabs first, then regrout everything once the base is solid.
Tools and materials you'll need
Nothing here requires specialist equipment. Most of this you may already own or can hire cheaply for a day.
Tools
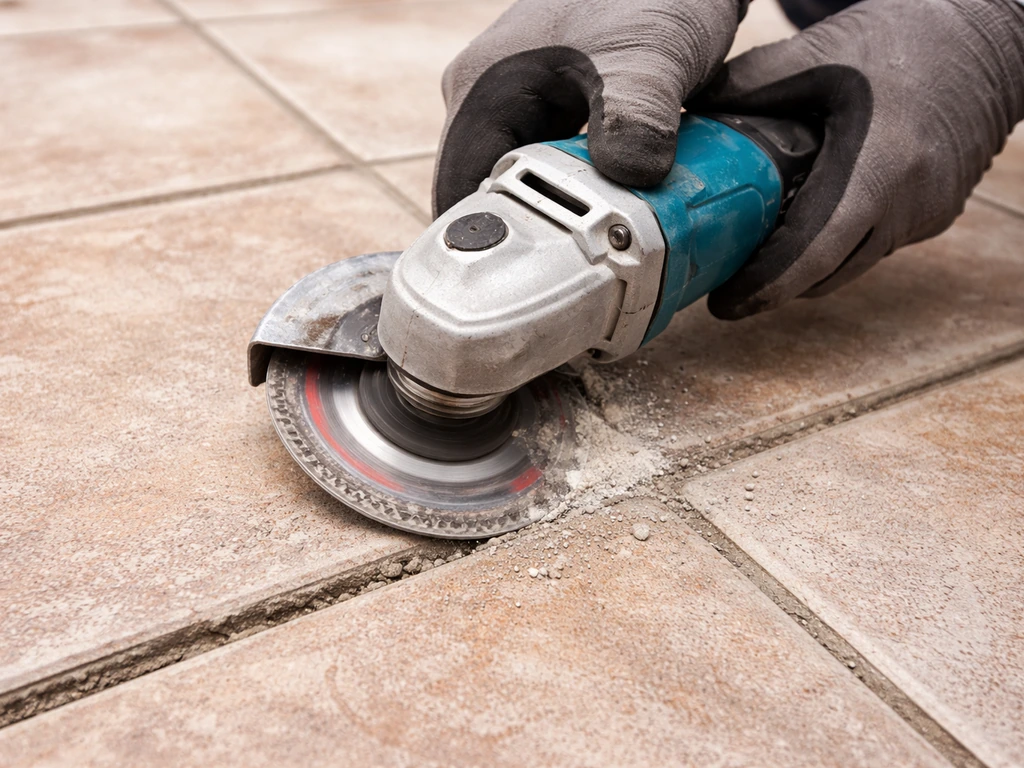
- Angle grinder with a mortar-raking disc (or a plugging chisel and club hammer for smaller areas)
- Stiff-bristled brush and a soft broom
- Wet/dry vacuum or leaf blower
- Pointing trowel and a margin trowel
- Rubber mallet (for tapping in dry-pour jointing material)
- Bucket and mixing paddle (or a drill with a mixing attachment) for mortar-based grout
- Grout float or wooden float for wide joints
- Garden hose with a fine mist nozzle (not a jet spray)
- Knee pads and safety glasses
- Dust mask rated for silica dust (mandatory when dry-cutting or raking joints)
Materials
- Jointing material suited to your slab type and joint width (see the next section)
- Joint primer or bonding agent if using cement-based mortar on dense, low-absorption slabs
- Backer rod (closed-cell polyethylene foam) if joints are unusually deep and you're using a flexible sealant
- Exterior patio sealer if your slab type benefits from sealing after cure
- Weed killer or diluted bleach for pre-treatment of weedy joints (applied a day or two before work)
- Masking tape or thin card to protect polished or textured slab faces from mortar stain
Remove old grout safely and completely
This is the step people rush, and it's also the step that determines whether the new grout lasts or fails. New jointing material needs a clean, open void to grip. You can also use this guide to understand how to use patio grout correctly for a durable, watertight finish. If you leave crumbling old mortar in the bottom of the joint, the new stuff bonds to loose debris instead of the slab faces.
- Kill any weeds growing in the joints first. Apply a weed killer or a diluted bleach solution a day or two before you start raking. Dead roots are much easier to pull out than live ones.
- For an angle grinder with a mortar-raking disc: keep the disc running along the center of the joint, not drifting toward the slab edge. Work at a steady pace. You want to clear material to a depth of at least 20 mm (roughly 3/4 inch) but you don't want to undercut the slabs themselves. Wear your dust mask. Raking old mortar creates fine silica dust.
- For smaller areas or softer mortar: a narrow plugging chisel and club hammer work well. Use short, controlled strikes directed down the center of the joint. Take your time, especially near the slab edges.
- Once the bulk is out, go back with a stiff brush to loosen anything still clinging to the joint walls. Then vacuum the voids with a wet/dry vac. A leaf blower is useful too, but blow away from slabs you've already cleaned.
- Inspect the void walls. They should look like firm, clean slab edges. If the bedding mortar or sand under a slab is visible and loose, that's a sign the slab has some movement, even if it felt stable underfoot. Make a note and investigate before filling.
- Wipe or brush the slab surface near the joints to remove dust and grit. Any loose debris left on the surface will contaminate the new grout or cause bonding failure at the joint mouth.
A minimum joint depth of 20 mm is a practical target for most cement-based and flexible jointing compounds. Products like Sika FastFix also specify a minimum joint width of 5 mm. If your joints are shallower or narrower than product minimums after raking, you may need to mechanically cut the joint slightly wider, or switch to a product designed for shallow joints.
Choosing the right jointing material for your patio
This is where a lot of DIYers go wrong, often by picking up whatever's on the shelf at the builders' merchant without checking whether it suits their slab type and joint dimensions. The wrong material either cracks, washes out, or leaves a residue that's almost impossible to clean. Here's a breakdown of the main options for external patio slabs.
| Material type | Best suited for | Joint width | Key notes |
|---|---|---|---|
| Polymeric jointing sand | Concrete pavers, block paving, regular interlocking slabs | 3 mm (1/8 in) to 12 mm (1/2 in) | Sweeps into joints dry; activated by fine misting; affordable and DIY-friendly; not ideal for very wide or deep mortar joints |
| Pre-mixed paving jointing compound (e.g. Sika FastFix) | Porcelain, natural stone, concrete flags | Min 5 mm wide, min 20 mm deep | Squeezed or packed in from a bag/tube; flexible when cured; weatherproof; great for most residential patios |
| Sharp sand and cement mortar (3:1 or 4:1 mix) | Brick, natural stone, wide joints | Any width over 10 mm | Traditional and durable; slower to apply; needs proper mixing; best in dry conditions; can stain porous slabs if not primed |
| Flexible exterior grout (epoxy or resin-modified) | Porcelain, polished or low-absorption slabs | As specified by manufacturer | Most durable option; more expensive; requires accurate mixing; excellent for stain and weed resistance |
| Flexible joint sealant with backer rod | Movement joints, wide gaps in mixed slab patios | Varies; backer rod depth controls sealant depth | Used where expansion/movement is expected; backer rod (closed-cell foam) controls sealant depth to a 2:1 width-to-depth ratio |
For most standard concrete flag or stone slab patios with joints between 6 mm and 20 mm wide, a good quality pre-mixed paving compound or a 3:1 sharp sand and cement mortar are the most practical choices. If you are mixing your own grout or joint mortar, aim for a consistent texture and use the correct ratio for your patio joint width how to make grout for patio. Polymeric jointing sand is better suited to pavers with tight, consistent joints, as used in block paving and interlocking patio systems. If you're working with porcelain slabs specifically, avoid standard cement mortars without a primer, as porcelain is very dense and doesn't give mortar anything to grip. A resin-modified or flexible compound is worth the extra cost there.
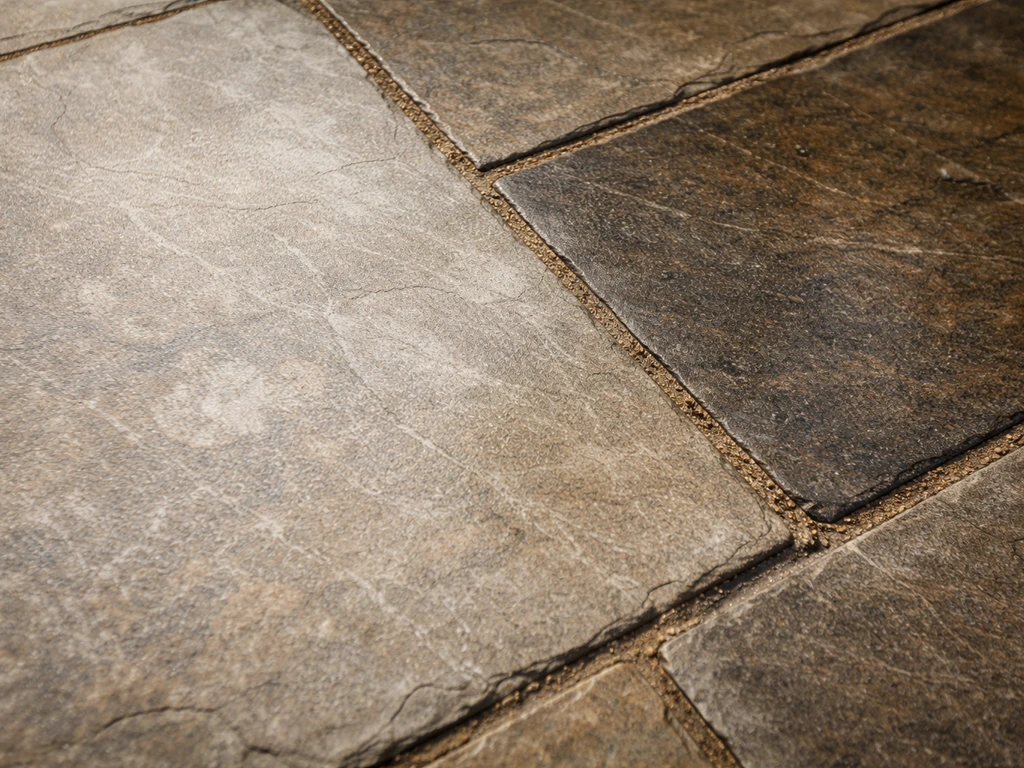
If you're dealing with natural stone patio slabs (slate, sandstone, limestone), the process shares a lot with regrouting other natural materials, and the same principle applies: match the product to the joint geometry and the slab's absorption characteristics. If you're wondering how to repair stone patio grout, the key is matching the jointing product to your stone and the joint geometry before you regrout. Dense stones like slate or polished granite need a flexible compound rather than a rigid cement mortar that will crack as the stone moves seasonally.
How to apply and finish the new grout joints
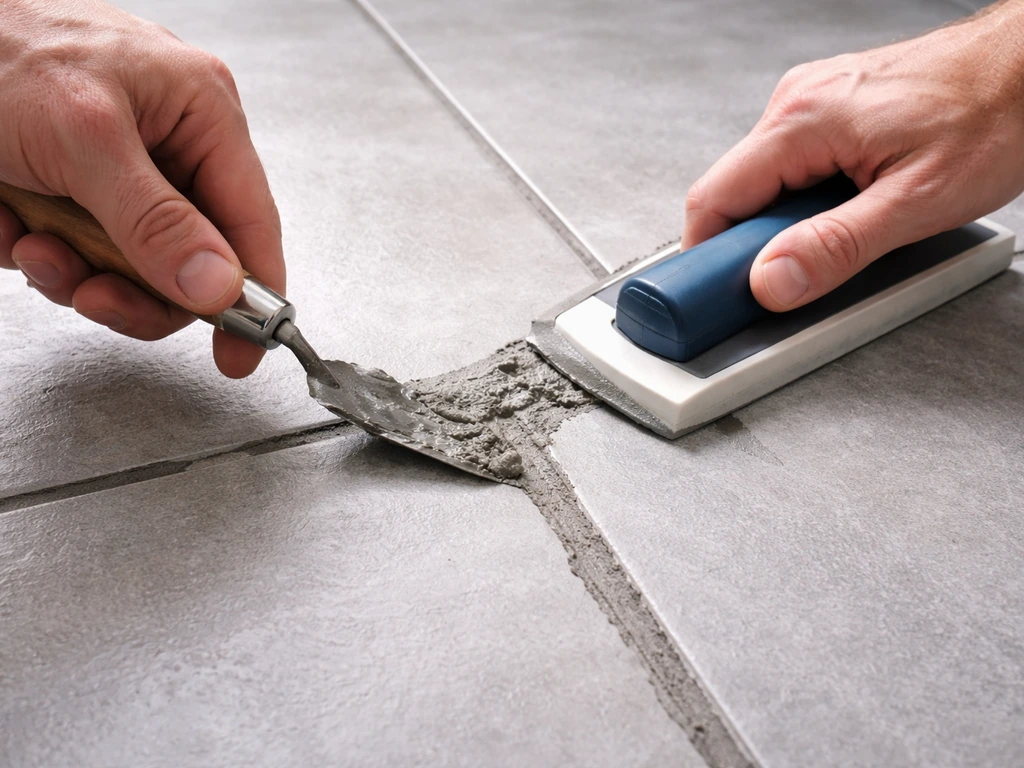
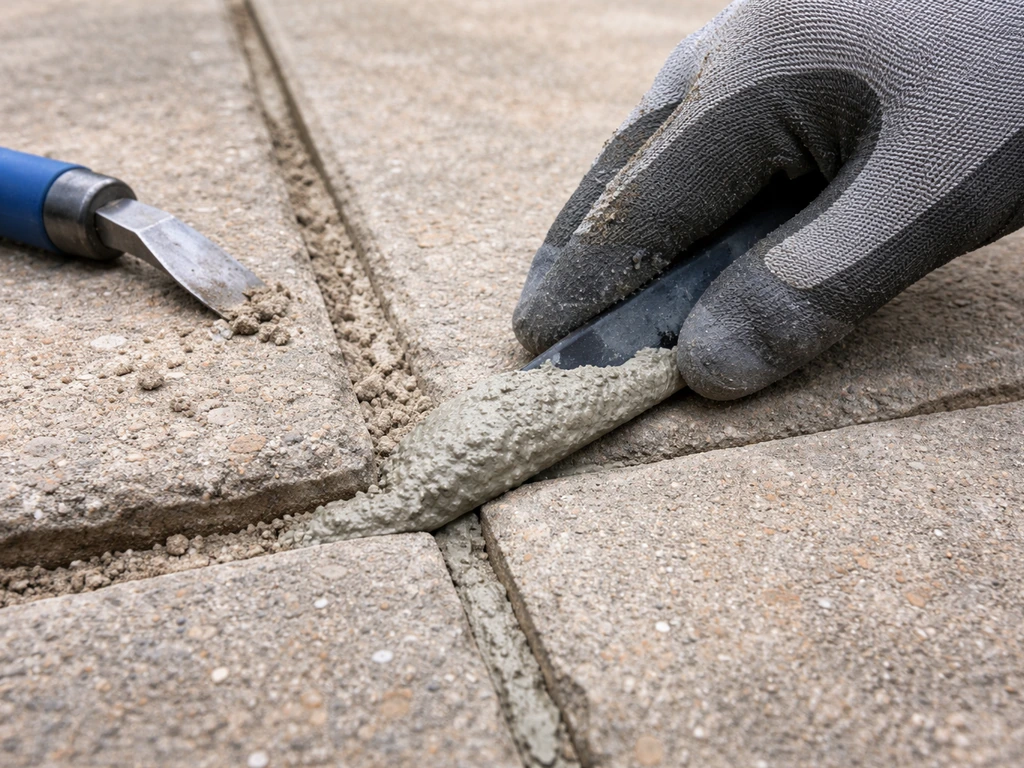
For cement mortar or pre-mixed jointing compound
- Dampen the joint walls lightly before applying cement-based mortar. Not wet, just damp. This prevents the dry slab faces from pulling moisture out of the mortar too quickly, which causes shrinkage cracks. Skip this step for pre-mixed compounds that are already moisture-controlled.
- Load the mortar onto a pointing trowel or margin trowel and press it firmly into the joint. Work from one end of the joint to the other, packing in small amounts and pressing down rather than smearing along the surface.
- Once the joint is filled slightly proud of the slab surface, use a smaller trowel or a jointing tool to compact and profile the joint. For a standard patio, a slightly recessed or flat finish works well. A raised joint sits proud of the slab and catches dirt. A deeply recessed joint holds water.
- Work in manageable sections of 1 to 2 square metres at a time. Don't spread mortar across too large an area before profiling, or it will stiffen before you can finish it properly.
- Remove excess material from the slab surface immediately using a damp sponge or cloth. Work across the slab face, not along the joint, to avoid dragging wet mortar back into the gap.
- Once initial set has begun (usually 30 to 60 minutes depending on temperature), go back and lightly brush the joints with a soft brush to tighten the surface texture and remove any last surface smear.
For polymeric jointing sand
- Make sure the slab surface and joints are completely dry before starting. Even morning dew is enough to cause problems.
- Pour the sand loosely over the surface and sweep it into the joints with a stiff broom, working diagonally across the joints so the sand doesn't just sit on top.
- Use a rubber mallet or plate compactor (on a low setting) to vibrate the sand down into the joints. Add more sand and repeat until the joints are filled to within 3 mm (1/8 inch) of the slab surface. Do not fill flush with the top.
- Sweep all remaining loose sand off the slab surface thoroughly. This is the most important step before activation. Any sand left on the surface will fuse there once you add water, leaving a whitish haze that is very difficult to remove.
- Activate with a fine mist. Use a garden hose on its lightest mist setting, not a spray or jet. Work in slow passes, letting each pass absorb before applying the next. The goal is to saturate the sand in the joints without pushing it out or pooling water on the surface.
- Allow to dry completely before walking on the surface. Depending on temperature and humidity, this typically takes a few hours to overnight. Do not use the patio until the sand has fully polymerized and hardened.
Curing, sealing, and getting the timing right
Curing time is one of the most common areas where people get impatient and end up with a failure. Cement-based grout and mortar need at least 72 hours to cure at around 70°F (21°C) before you apply any sealer. In cooler temperatures that minimum goes up, not down. Applying sealer too early traps moisture in the joint and causes the surface to cloud or the mortar to weaken.
For polymeric sand, the joint needs to be fully dry and polymerized before any sealer goes down. The sand is technically rain-resistant after around 60 minutes in most products, but that's not the same as fully cured. Wait at least 24 hours in good conditions before applying a patio sealer over polymeric sand joints.
Whether you seal depends on your slab type. Here's a quick guide:
- Porcelain slabs: sealing is usually not necessary and can actually trap moisture under a non-breathable sealer. Check the manufacturer's guidance for your specific product.
- Natural stone (sandstone, limestone, slate): sealing is strongly recommended after grouting. These stones are porous and will stain quickly through freshly opened joints. A breathable impregnating sealer applied after full cure is the right choice.
- Concrete flags: sealing is optional but worthwhile, especially for colored or textured finishes. It also helps protect the fresh grout joints themselves.
- Brick patios: a breathable sealer helps, but avoid film-forming sealers that can peel in frost.
Timing matters beyond just curing. Don't regrout in very cold conditions (below about 5°C / 40°F) because cement hydration slows to a crawl, and frost can destroy fresh mortar before it's cured. Equally, avoid working in direct sun on a hot day if you're using cement mortar. The surface dries too fast, the mix stiffens before you can finish it, and you end up with a patchy, cracked result. Early morning on a dry, mild day is the sweet spot. Check the forecast for at least 24 hours of dry weather before starting.
Troubleshooting common problems
White haze or residue on the slabs
This is almost always caused by one of two things: cement smear left on the slab surface that dried before you cleaned it, or polymeric sand that was activated before the surface was fully swept clean. TCC Materials notes that narrow sprays can knock loose paver locking sand from joints, and stresses correct surface prep and cleanliness to avoid residue or a whitish film on pavers For polymeric sand haze, the same approach works, but prevention is much easier than the cure: sweep obsessively before you mist.. For cement haze, a diluted acid wash (follow manufacturer instructions carefully) applied after full cure will usually remove it. For polymeric sand haze, the same approach works, but prevention is much easier than the cure: sweep obsessively before you mist.
Grout cracking shortly after application
If new grout cracks within a few weeks, the most likely culprit is movement in the slab beneath it. Go back to the rocking test. A less common cause is that the mortar dried too fast in hot sun, or was mixed too dry and didn't have enough water to cure properly. Cracks that run across the joint rather than along the edges of the slab tend to indicate shrinkage during cure; those running along the slab edges usually indicate movement.
Jointing sand washing out after rain
If polymeric sand washes out after the first heavy rain, it wasn't properly activated or didn't fully dry before the rain hit. You'll need to re-do the affected joints. Check the product's minimum drying time before rain, refill the joints, activate correctly, and if rain is coming, cover the area with a tarpaulin until it's had time to set.
Mortar won't compact or keeps crumbling
A too-dry mix won't compact into tight joints. It crumbles as you press it, leaves voids, and fails quickly. Add a small amount of water and re-mix. The mortar should hold its shape when squeezed but not slump. For pre-mixed bagged compounds, follow the water ratio exactly. These are calibrated for a reason.
Uneven joint finishes
This usually comes from inconsistent packing depth or finishing at different stages of set. Work in smaller sections, finish each section before the mortar stiffens, and use a consistent profiling tool throughout. A piece of 6 mm copper pipe or wooden dowel dragged along the joint makes a neat, uniform recessed finish and costs nothing.
When to stop and call a professional
Regrouting is genuinely DIY-friendly when the slabs are stable and the problem is only the joints. But there are situations where doing it yourself means paying twice: once for the materials and once to have the underlying problem properly fixed anyway.
Call a professional if you find any of the following during your assessment:
- Multiple slabs are rocking, tilting, or have sunken below the level of adjacent slabs. This points to sub-base or bedding failure that requires lifting and re-laying.
- Water is pooling on the patio surface after rain rather than draining away. This is a drainage or falls issue that regrouting will not fix and may make worse by sealing up the one path water was escaping through.
- The joints have failed repeatedly in the same spots despite previous repairs. Repetitive failure in one area almost always means there's movement or a drainage problem localized there.
- The entire perimeter of the patio has sunk or tilted, suggesting the edge restraints have failed or the sub-grade has settled across a wide area.
- You're working with a large area of porcelain or large-format natural stone slabs where joint geometry is critical and product choice errors are costly to fix.
A good paving contractor can diagnose whether you have a grout problem or a base problem in about 20 minutes, and that conversation can save you a weekend of wasted work. There's no shame in getting that assessment before you start, especially on a patio that's failed before.
FAQ
How do I tell if I need to regrout or if I should lift and re-lay the patio slabs?
Do the rocking test first, if a slab shifts or clicks, regrouting will not hold. Next, check for repeated low spots or water pooling after rain, if multiple slabs are sunken or uneven, the base or bedding layer is failing and you likely need relaying.
Can I regrout over old grout if it looks mostly intact?
Avoid it. New jointing needs a clean, open void that grips slab edges, leaving crumbling material behind usually causes rapid failure because the new mix bonds to debris instead of solid faces.
What joint width or depth is too shallow to regrout successfully?
As a practical target, aim for at least 20 mm depth for most cement-based and flexible patio jointing mixes. If the joint ends up narrower than the product minimum after raking, you may need to widen it mechanically or switch to a shallow-joint product.
What should I do if my joints are shallow and I already bought the wrong grout?
Don’t force it, a product outside its minimum geometry can crack or wash out. Either mechanically cut the joints to meet the mix requirements, or return and replace with a compound specifically rated for shallow joints.
Is polymeric jointing sand okay for any patio surface?
It’s mainly for pavers or systems with tight, consistent joints, not for every slab type. If your slabs have variable gaps or you are working with dense surfaces like porcelain, check that the product is compatible and consider a flexible compound instead of rigid mortar.
How long should I wait before rain after regrouting with polymeric sand?
Don’t rely on the “rain resistant after 60 minutes” line. Wait at least 24 hours in good conditions, and if heavy rain is forecast, cover the area with a tarpaulin until joints have set properly.
How soon can I apply sealer after using cement-based grout?
Wait until the mortar has cured, at least 72 hours at about 70°F (21°C). In cooler weather, extend the wait because cure slows, and sealer too early can cloud the surface and weaken the joint.
Why do I sometimes get a white haze on the slab after regrouting?
Most haze comes from cement smear left on the surface that dried before cleaning, or polymeric sand being activated while residue remains. Once fully cured, a diluted acid wash can remove cement haze, for polymeric sand prevention (sweep thoroughly before misting) is the key.
My new grout cracked quickly, what’s the most likely cause?
Early cracking usually points to movement underneath the slabs, repeat the rocking test on the same areas. Less common causes include curing issues from hot sun drying too fast, or mixing too dry so the grout cannot hydrate properly.
If polymeric sand washes out after rain, do I need to regrout the whole patio?
Usually you can redo only the affected joints. Remove failed material, ensure joints are fully dry and correctly activated, refill the joints, and if rain is coming again, cover with a tarpaulin until set time is reached.
What water ratio should I use for pre-mixed paving grout?
Use the exact water ratio on the bag. If you add too little water, the mix won’t compact and will crumble with voids, if you add too much, it can shrink, crack, or wash out.
Do I need to seal all patio joints after regrouting?
Not always, it depends on the slab type and the product system you used. If you use cement-based mixes, sealing is often part of the process after full cure, while polymeric sand generally should only be sealed after it is fully dry and polymerized (typically after at least 24 hours).
What’s the best temperature and timing to start a patio regrout job?
Avoid very cold conditions (below about 5°C / 40°F), frost can damage fresh mortar before it cures. Also avoid direct sun on a hot day for cement mortar, early morning on a mild dry day is usually the best window, and plan for at least 24 hours of dry weather.
How can I get a consistent joint finish without buying special tools?
Work in small sections and finish each before the mix stiffens. Use a consistent profiling tool, a simple method is dragging a 6 mm copper pipe or a wooden dowel along the joint to create a neat, uniform recessed profile.
When should I stop DIY and call a professional?
Call a paving contractor if you suspect slab movement, widespread unevenness, recurring drainage issues, or if you already had a previous regrout fail. A quick on-site assessment can distinguish a grout problem from a base problem and prevent wasted materials and time.
Next Article
How to Regrout a Brick Patio: Step-by-Step DIY Guide
Step-by-step guide to regrout a brick patio, remove old grout, choose outdoor mortar, finish joints, and prevent future