Repairing grout between patio stones is a job most homeowners can handle in a weekend. You remove the failed material, clean the joints out completely, choose the right filler for your specific stone and joint type, pack it in properly, and then give it time to cure before sealing. The catch is that skipping any of those steps is exactly why grout fails in the first place. Do it right once and it'll hold up through years of freeze-thaw cycles and heavy rain.
How to Repair Stone Patio Grout: Step-by-Step DIY Guide

Talia Lang
23 May 2026
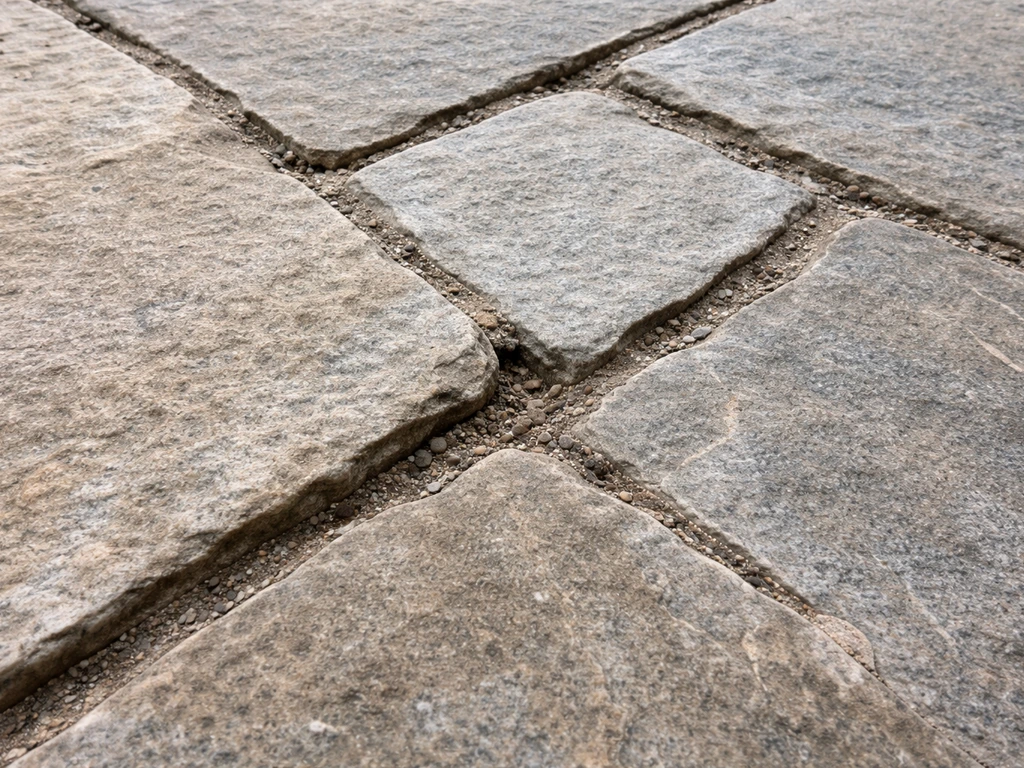
Figure out why the grout is failing before you touch anything
This is the step most people skip, and it's the one that matters most. If you just pack new grout into failing joints without understanding the cause, you'll be back out there doing it again next spring.
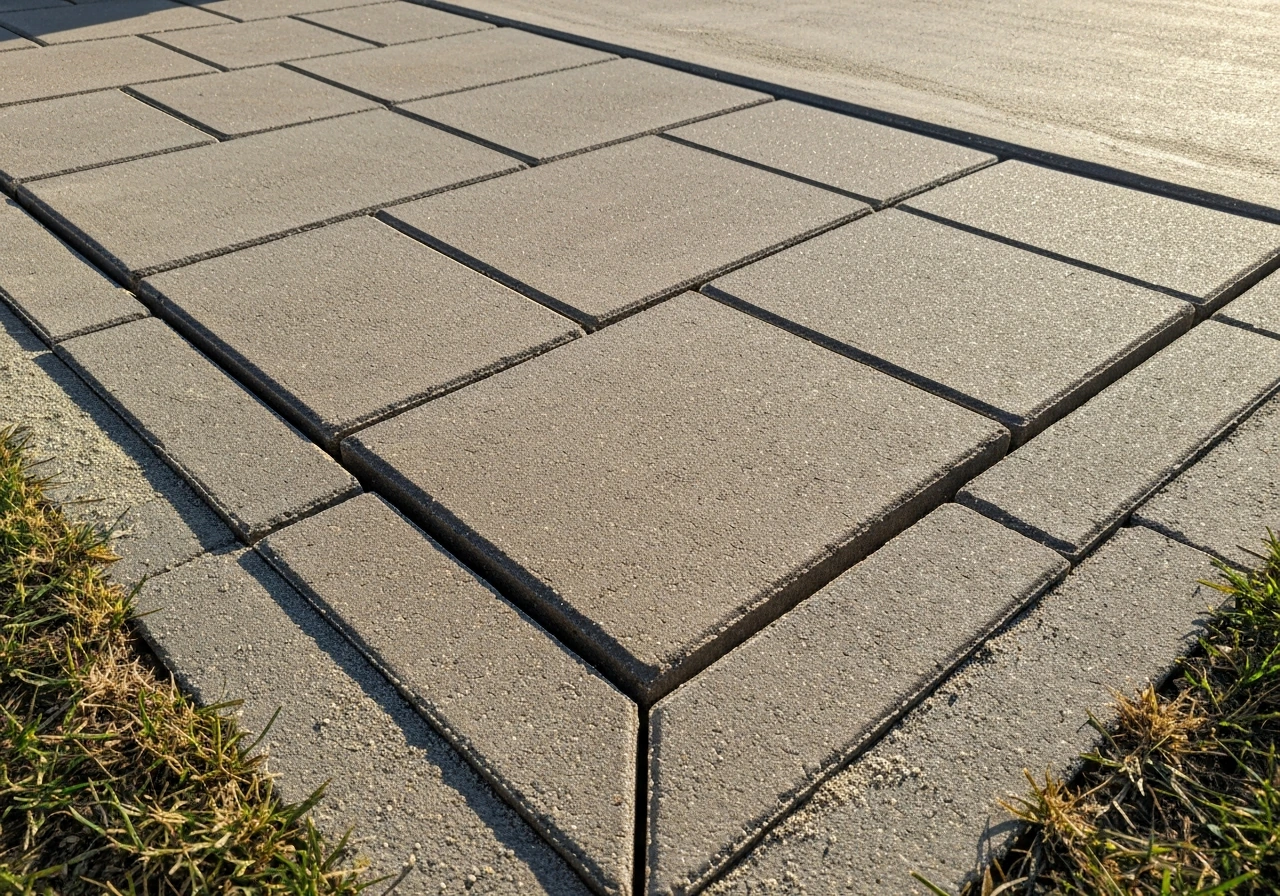
The most common signs of failed patio grout are crumbling, washing out, gaps, weeds taking root in the joints, and visible cracks running along or through the joint lines. These usually mean the grout itself has reached the end of its life, which is a completely normal repair job. Outdoor grout takes a beating from UV, rain, temperature swings, and freeze-thaw cycles, and even a well-installed patio will need attention every several years.
What you're watching for is anything that points to a bigger problem beneath the surface. Walk the whole patio and press down on each stone or slab with your foot. If any of them rock, shift, or sit noticeably higher or lower than their neighbors, you're looking at sub-base movement, not just grout failure. Water getting into failed joints sits under the paving, softens the bedding layer, and then freezes in winter, which lifts and shifts stones over time. Regrouting over that without fixing the base is a waste of time and money.
- Crumbling, soft, or sandy grout that brushes out easily: normal grout aging, safe to regrout
- Weeds growing in joints: grout has degraded enough to hold moisture and seed, regrout once cleared
- Hairline cracks running along joint lines: likely shrinkage or minor movement, repair is straightforward
- Gaps where joints have opened up noticeably: check for sub-base settling before regrouting
- Stones that rock or are at different heights: stop here and address the base first
- Large sections of joint missing across the whole patio: widespread failure, possibly drainage-related
If drainage is your problem, you'll often see staining or moss concentrated in one area where water pools, or you'll notice the joint damage is worst at the lowest point of the patio. Poor drainage causes water to accumulate under the paving, which accelerates every other form of failure. You need to fix where the water is going before any grout repair will last.
Tools and materials you'll need
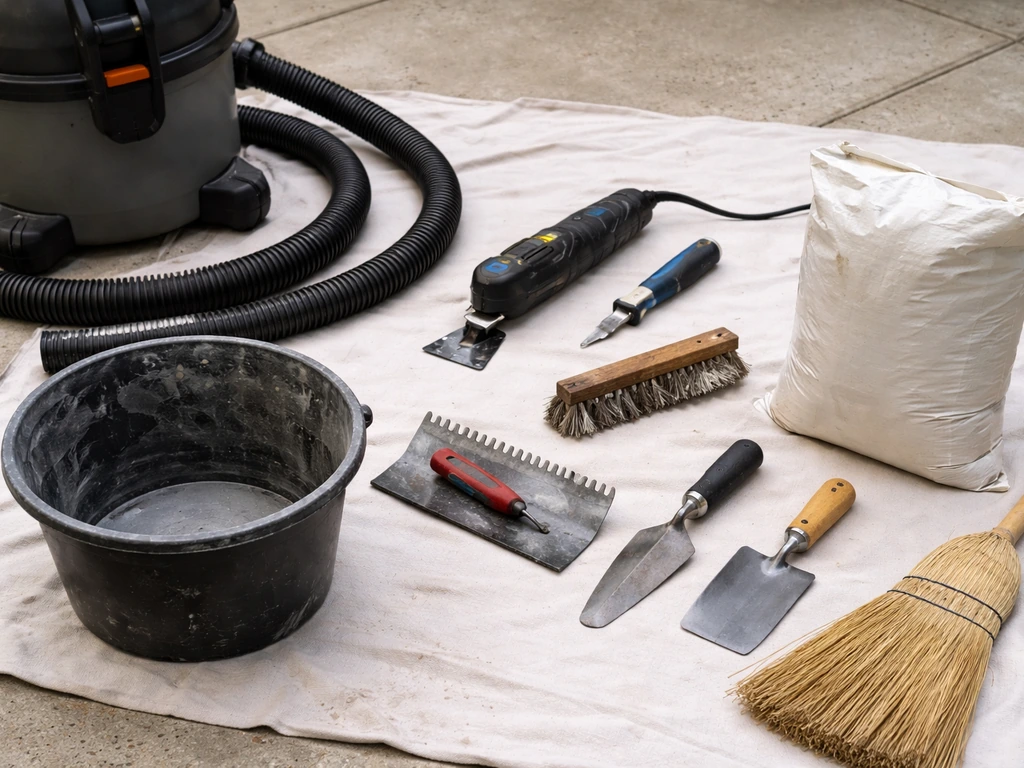
You don't need a lot of specialized gear, but having the right tools makes the removal phase much less painful and reduces the risk of chipping your stone.
| Item | What it's for | Notes |
|---|---|---|
| Oscillating multi-tool with grout blade | Cutting and removing old grout | Best all-around power option for control near stone edges |
| Carbide grout rake or grout scraper | Manual removal in tight spots | Slower but gives you maximum control |
| Angle grinder (optional) | Long straight runs of wide joints | Use with care; easy to damage stone faces |
| Stiff brush or wire brush | Cleaning joint debris after removal | |
| Shop vac | Sucking out dust and loose debris | Essential before filling |
| Bucket and mixing paddle (or drill attachment) | Mixing grout or jointing compound | |
| Grout float or pointing trowel | Packing grout into joints | Float for wider joints, trowel for narrow ones |
| Pointing iron or gloved finger | Striking (finishing) the joint surface | |
| Soft cloth or sponge | Cleaning haze from stone surface | |
| Grout or polymeric sand (see section below) | The actual joint filler | Type depends on your joint width and stone |
| Outdoor stone sealer | Protecting cured grout and stone |
Remove old grout and clean the joints properly
Do not skip full removal and try to just add new material on top of the old. If you want step-by-step details, follow our guide on how to use patio grout for mixing, packing, and curing. New grout will not bond reliably to failing old grout, and you'll get the same result in a fraction of the time. Complete removal is non-negotiable.
Removing the old material
blank" rel="noopener noreferrer">An oscillating multi-tool fitted with a grout-removal blade is the go-to power tool for this job. It vibrates rather than spins, which gives you a lot more control than a grinder and dramatically reduces the chance of catching the edge of a stone. Run the blade along the center of the joint, not the edges, and let the tool do the work. For removing sanded grout in tight spaces, DuraGrit support recommends using specific Dremel oscillating blades such as the Dremel MultiMax MM1500 and MM1501 for grout removal between tiles blank" rel="noopener noreferrer">Run the blade along the center of the joint. Pressing too hard slows you down and risks slipping.
For narrow joints or areas where you need maximum control, a carbide-tipped grout rake does the job manually. It takes more effort but there's almost no risk of damaging surrounding stone. On long straight runs of wide joints, an angle grinder with a diamond blade can speed things up, but this is only worth it if you're comfortable with the tool. One slip and you're grinding a groove into your stone face.
Work along the full length of every failing joint. If the joint is between different-height stones or in a tight corner, go back to manual tools. The goal is to remove all loose, crumbling, or powdery material down to solid substrate.
Cleaning out the joints

Once the bulk of the old grout is out, hit the joints with a stiff brush to knock out any remaining loose particles, then vacuum everything with a shop vac. This is more important than it sounds. Dust and fine debris left in the joint will prevent adhesion and contaminate your new mix. For cementitious grouts, lightly dampen the cleaned joint with water before filling (but don't leave it soaking wet). For polymeric sand, the joint needs to be completely dry.
While you're cleaning, check the depth of each joint. This matters when it comes to choosing and applying your filler. Polymeric jointing sands, for example, require a minimum joint depth of around 1.5 inches (4 cm) to work effectively. If your joints are shallower than that, polymeric sand isn't the right choice.
Choose the right grout or joint filler for outdoor stone
This is where a lot of people go wrong. They grab whatever grout is on the shelf at the hardware store without considering whether it's actually suited to outdoor use, their specific stone type, or their joint dimensions. There are three main categories to consider.
| Type | Best for | Joint width | Freeze-thaw performance | Sealing needed? |
|---|---|---|---|---|
| Polymeric jointing sand | Paver and flagstone joints, natural stone with wide joints | Up to 1 inch (25 mm) wide, min 1.5 in deep | Excellent, designed for freeze-thaw movement | Not typically required |
| Cementitious (sanded) grout | Tighter joints on natural stone, slate, flagstone | 1/8 inch to 1/2 inch wide | Good if properly sealed; vulnerable if unsealed | Yes, after 72-hour cure |
| Epoxy grout | Areas with heavy moisture, staining, or chemical exposure | Any, but harder to work with | Excellent, non-porous | No, epoxy is non-porous |
For most stone patios with gaps between 1/4 inch and 1 inch wide, polymeric jointing sand is the most practical and forgiving choice. It's specifically engineered for outdoor use, activates with water to bind into a semi-rigid joint, and handles freeze-thaw movement without cracking the way standard mortar or grout can. Products like Techniseal's SMARTSAND or EZSAND are widely available and come with clear installation instructions.
For tighter, more formal stone joints (think cut sandstone or slate with 1/8 to 1/4 inch joints), a sanded outdoor cementitious grout is more appropriate. Make sure the product is rated for exterior use and for the stone type you have. Some grouts can stain porous stones like limestone or sandstone, so test in a hidden corner first or use a grout release agent.
Epoxy grout is the most durable option and genuinely doesn't need sealing because it's non-porous. The trade-off is that it's harder to mix and apply than other options, it's unforgiving of mistakes, and its working time drops significantly in warm weather (roughly half the normal working time when temperatures climb above 85°F/30°C). Unless you have a specific reason for epoxy (heavy staining history, commercial-grade use, or joints near a water feature), stick with polymeric sand or a quality sanded grout for most stone patio repairs.
If you have patio pavers specifically, or you're working with brick or slate, the approach shares a lot of similarities with what's described here, though the joint products and finishing techniques vary slightly. If you’re working with slate specifically, follow the same removal, joint prep, and grout choice steps, then finish and cure according to the slate-friendly product you pick how to regrout slate patio. If you need step-by-step help, see our guide on how to regrout patio pavers, including mixing, packing, and curing times.
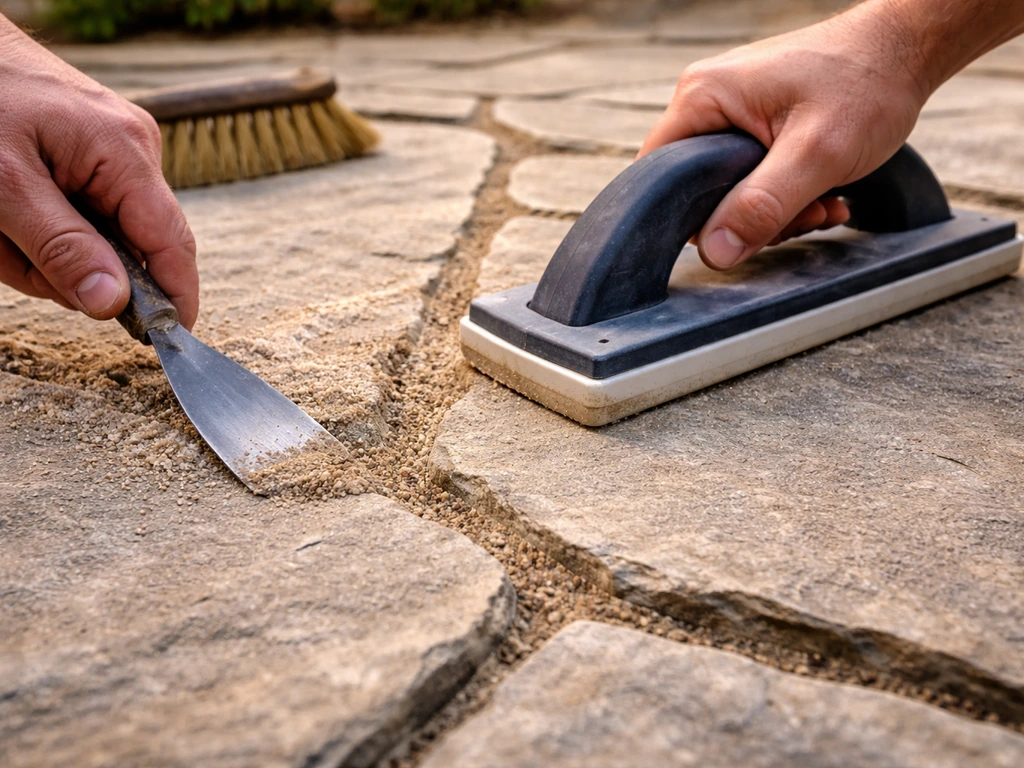
How to regrout: mixing, packing, and finishing
If you're using polymeric sand
The first rule with polymeric sand is to wait at least 24 hours after any significant rainfall before starting. The joints and surface need to be completely dry, and so does the sand. Working with damp polymeric sand leads to premature activation and a hazy residue that's a nightmare to clean off your stone.
- Pour polymeric sand over the patio surface and use a stiff broom to sweep it into the joints, working from multiple angles to fill evenly.
- Use a plate compactor or hand tamper to vibrate the sand down into the joints. This is critical for dense packing.
- Sweep more sand in and compact again. Repeat until joints are filled to within about 1/4 inch of the top of the stone.
- Blow or brush any excess sand completely off the paver surface. If sand sits on the surface when you wet it, you'll end up with a permanent haze.
- Lightly mist the surface with water using a garden hose on a gentle spray setting. Let the water soak in, then mist again. Repeat 2-3 times over about 15 minutes to fully activate the polymers.
- Keep traffic off the patio for at least 24 hours, and keep it dry. Rain before the sand has set will wash it right back out of the joints.
If you're using cementitious grout
Mix the grout according to the manufacturer's instructions. If you’re wondering how to make grout for a patio, follow the same idea: measure carefully, mix to the right stiffness, and let it cure properly before use mix the grout. The most common mistake here is adding too much water to make mixing easier. Excess water weakens the mix and causes shrinkage cracking as it dries. Mix to a stiff, peanut butter-like consistency. If it's runny or slumps off a trowel, it's too wet.
- Lightly dampen the cleaned joints with a spray bottle. The stone shouldn't be soaking wet, just slightly damp to prevent the dry stone from sucking moisture out of the grout too fast.
- Load the grout onto a grout float or pointing trowel and press it firmly into the joint, working in sections of 2-3 feet at a time.
- Pack the grout in with firm downward pressure, working at an angle across the joint to eliminate air pockets. Don't leave voids.
- Once the joint is full and slightly proud of the surface, use a pointing iron, the edge of a trowel, or a gloved finger to strike (compress and shape) the joint. Aim for a slightly concave or flush finish, depending on your aesthetic and stone style.
- Wipe excess grout off the stone surface with a barely damp sponge before it sets. Work gently to avoid pulling grout out of the joint.
- If grout haze appears on the stone surface after drying, clean it with a damp cloth while it's still relatively fresh. Dried cement haze requires a diluted acid wash to remove.
If you're using epoxy grout
Mix only small batches at a time, especially in warm weather. At temperatures around 85°F (30°C), you have roughly half the working time compared to a cooler 70°F (21°C) day. Apply with a grout float, pack firmly, and clean residue off the stone surface immediately because epoxy becomes very difficult to remove once it starts to cure. Work in the early morning if possible to avoid heat.
Curing, sealing, and making the repair last
Curing is the phase where the grout develops its strength, and rushing it is one of the most common reasons repairs fail early. Keep foot traffic off the repaired area and protect it from rain for the curing period.
For cementitious grouts, allow at least 72 hours of cure time at around 70°F (21°C) before sealing or returning the patio to normal use. In cooler temperatures the cure takes longer. Don't seal too early or you'll trap moisture in the grout, which causes it to crack or discolor.
Sealing cementitious grout is genuinely important for outdoor stone patios. An unsealed cement grout in a climate with freezing winters will absorb water, freeze, and start to crumble within a season or two. Use a penetrating stone and grout sealer rated for outdoor use. Apply it according to the manufacturer's instructions, typically two thin coats, and reapply every 2-3 years depending on your climate and traffic.
Epoxy grout does not need sealing at all. It's inherently non-porous, so a sealer won't penetrate or add any meaningful protection. You can seal the surrounding stone if you want to, but skip the grout lines.
Polymeric sand doesn't need a traditional sealer either, though you can apply a joint stabilizing sealer over the top if you want to add extra protection against erosion and weed growth. Wait until the sand has fully cured (usually 48-72 hours) before applying anything over it.
The single best thing you can do to prevent repeat grout failure is to address drainage. Make sure your patio still sheds water away from the house and doesn't pool in any area. Check the slope periodically, especially after a hard frost season. Clean the joints of debris annually so organic material doesn't break down and create a moisture reservoir. And plan to reseal every few years rather than waiting until the grout is visibly failing.
Troubleshooting common problems and when to call a pro
Common problems during and after repair
| Problem | Likely cause | Fix |
|---|---|---|
| Grout cracking shortly after drying | Mix was too wet, or dried too fast in hot sun | Re-remove and redo with drier mix; work in shade or early morning |
| Polymeric sand washed out after rain | Rain before sand fully cured | Re-sweep and re-activate; watch weather forecast next time |
| Haze on stone surface | Grout or sand residue left on surface before wetting | Clean with damp cloth while fresh; diluted acid wash for dried haze |
| New grout crumbles within one season | Wrong product for outdoor use, or joint not properly cleaned before filling | Remove and redo with outdoor-rated product after thorough cleaning |
| Joints look uneven or low spots appear | Insufficient packing or compaction during installation | Top up with same material and re-finish |
When to stop DIYing and get professional help
Most grout repairs on a stone patio are well within DIY range. But there are a few situations where you should get a professional assessment before spending a weekend on a repair that won't fix the underlying problem.
- Multiple stones are rocking, shifting, or sitting at different heights: this is sub-base movement, and regrouting alone won't fix it
- You see widespread joint failure across the entire patio rather than isolated areas: often signals a drainage or base failure affecting the whole structure
- The gap between stones keeps reopening even after multiple repairs: usually means ongoing movement in the base
- You notice water pooling near the house foundation or draining toward the structure: this is a drainage problem that needs professional assessment before any cosmetic repair
- The stone itself is cracking (not just the grout): suggests structural stress, possibly from settlement or frost heave
A landscape contractor or hardscape specialist can probe the base, assess drainage, and tell you whether you're looking at a simple re-pointing job or something that requires lifting sections of the patio and re-laying them on a corrected sub-base. That assessment is worth getting before you invest a full weekend into a repair that won't hold. Grout repair is the right starting point for most stone patios with isolated joint failure, but it's not a substitute for base correction when the structure itself has moved. For brick patios, follow the same fundamentals of full joint removal, proper cleaning, and choosing the right outdoor joint filler so your regrouting holds up regrouting job.
FAQ
How do I tell if I should regrout or fix a loose or uneven stone patio first?
If you can push down on a stone and it rocks, lifts, or sits higher than its neighbors, grout is likely failing because the bedding or sub-base has shifted. In that case, regrouting without correcting the base usually cracks or washes out again, especially after freeze-thaw. A pro can probe the base and drainage to confirm whether lifting and re-laying is needed.
Can I use polymeric sand on porous stones like limestone or sandstone?
Polymeric sand can leave residue and some jointing materials can stain porous stone. Before committing, test the product in a hidden corner and confirm the stone is compatible with that specific polymeric sand system. If staining is a concern, consider a sanded outdoor cementitious grout (with a grout release agent) or plan extra immediate residue cleanup.
What’s the easiest way to avoid a hazy residue when using polymeric sand?
Two main causes are moisture and timing. Start only after at least 24 hours have passed since significant rainfall, and make sure the joints and the sand are completely dry. Also avoid over-wetting during activation, because damp polymeric sand activates early and can produce a residue that’s difficult to remove from stone faces.
How deep do I need to remove the old grout before installing new filler?
You generally want to remove all loose, crumbling, or powdery material down to solid substrate, then verify joint depth while cleaning. Joint depth matters because some products have minimum requirements (polymeric sand is effective only when joints meet the minimum depth guidance). If you cannot reach enough depth, choose a filler rated for your joint dimensions.
Should I dampen the joint with water before filling, and does it depend on the grout type?
Yes. Cementitious grouts typically want a lightly dampened joint for better bonding, but it should not be soaking wet. Polymeric sand needs the joint completely dry to avoid premature activation. When in doubt, follow the product instructions for that exact jointing material rather than general patio rules.
How long should I keep foot traffic off the repaired area?
Avoid walking on the fresh repair during the curing window, and keep it protected from rain. Cementitious grouts typically need at least 72 hours of cure time around 70°F before normal use. For polymeric sand, plan for the full cure period (often 48 to 72 hours) before treating the patio as fully usable.
Do I need to seal cement grout on a stone patio, and what kind of sealer is best?
For outdoor stone patios in freeze climates, sealing cementitious grout is strongly recommended to slow water absorption and reduce freeze-thaw damage. Use a penetrating stone and grout sealer rated for outdoor use, apply two thin coats as directed, and plan reapplication every few years based on weather and traffic.
Can I just patch cracks in the grout without removing the whole joint?
Spot patching usually fails because new material cannot reliably bond to failing or contaminated grout left in the joint. The repair approach that lasts includes full removal of the failed material, thorough brushing and vacuuming, and refilling the entire joint line so adhesion and depth are consistent.
What happens if I mix grout too wet or add extra water to make it easier?
Extra water weakens cementitious mixes and increases shrinkage risk, which can lead to cracking as the grout dries. For consistent strength, mix to the recommended stiffness, if the mixture slumps off a trowel it’s usually too wet. Use small batches so you don’t lose control as the mix starts to set.
Is epoxy grout worth it for small patio joint repairs?
Epoxy grout is very durable and non-porous, so it generally won’t need sealing, but it is more difficult to mix and apply and it becomes harder to work with quickly, especially in warm temperatures. Unless you have a specific need for epoxy, polymeric sand or a quality sanded outdoor cementitious grout is often the more forgiving choice for typical patio joint widths and homeowner repairs.
What annual maintenance helps prevent grout from failing again?
Remove debris and organic buildup from the joints at least once per year so moisture and breakdown products do not create a persistent wet area. If you see recurring pooling or moss in one section, re-check drainage and patio slope, then address the water source before regrouting again.
Next Article
How to Regrout Patio Pavers: Step-by-Step DIY Guide
Step-by-step DIY to regrout patio pavers, choose joint material, replace eroded sand, and stop weeds and loose joints.