To repair patio slab pointing, you need to rake out the old, loose mortar or sand to at least 25mm deep, clean and dry the joints, then pack in fresh jointing material, either a semi-dry mortar mix (4 parts sharp sand to 1 part cement), a ready-mixed jointing compound, or polymeric sand depending on your patio type. A typical approach after slabs are down is to fill the joints using a jointing compound or a traditional semi-dry mix, such as blank" rel="noopener noreferrer">four parts building sand to one part cement. Compact it flush, finish the surface neatly, keep foot traffic off for at least 24 hours, and hold off sealing for 28-30 days. That's the core process. To keep patio slabs from moving, make sure your jointing and pointing method is suited to the slab type and joint width, which is the best way to point patio slabs correctly. The rest of this guide is about doing it right so you don't have to redo it in 18 months.
How to Repair Patio Slabs Pointing and Repoint Joints

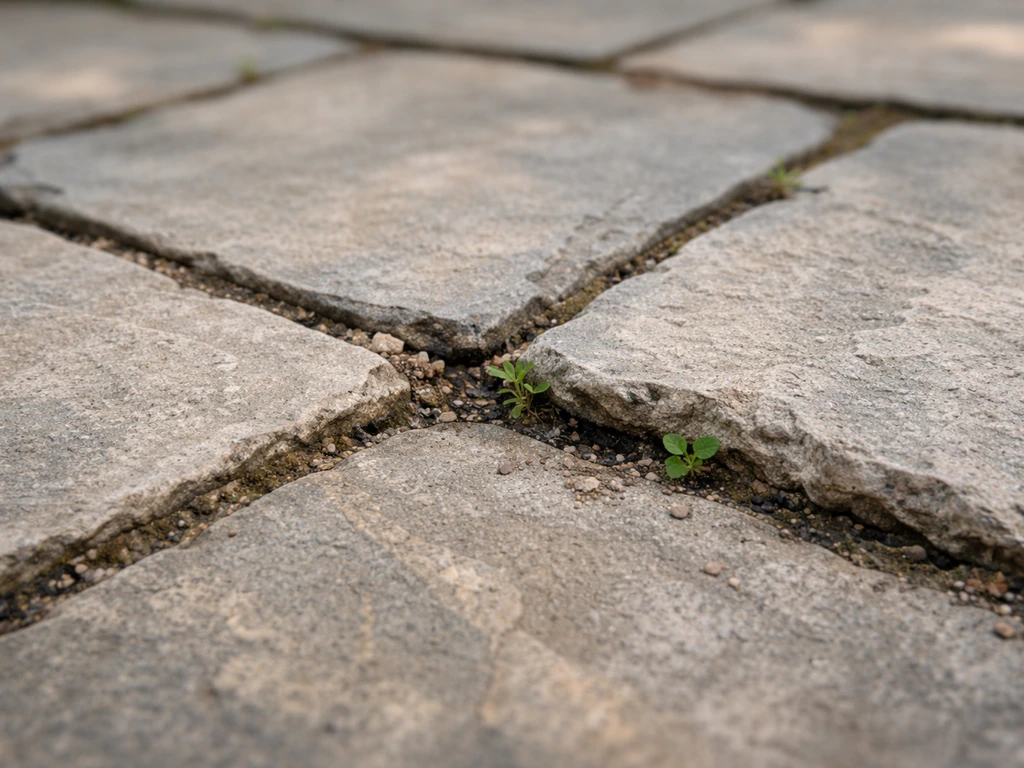
What patio pointing actually is and why it keeps failing
Pointing is the filler material packed into the joints between patio slabs. It isn't just cosmetic, it does real structural work. When the joints are solid, they transfer load between slabs, so foot traffic, furniture, and the occasional BBQ don't gradually rock individual flags loose. Good pointing also stops water from getting under the bedding layer, blocks weeds from rooting in the gaps, and keeps ants from undermining the whole surface.
The most common reasons it fails are surprisingly predictable. Rain washes out joint sand over time, especially in patios with any slope or poor drainage. Freeze-thaw cycles crack rigid mortar as water expands in the joint. UV and weathering break down polymeric sand binders. And if the original job used a weak or overly wet mortar mix, it crumbles within a few years no matter how good the weather. Once a joint opens up even slightly, the cycle accelerates: more water gets in, more material washes out, the slab edges lose support, and you start noticing rocking, weeds, and widening gaps.
Quick diagnosis: is it just the joints, or is something deeper going on?
Before you buy a bag of jointing compound, spend ten minutes walking the patio and being honest about what you're seeing. In practice, that means choosing the right jointing material and prepping the joints properly before you repoint the slabs choose the right jointing material. Repointing only fixes the joint, it can't fix a failed base, poor drainage, or a slab that's moved significantly. If the underlying problem isn't addressed, your new pointing will fail just as fast as the old stuff.
Press down on each slab with your foot. A slab that rocks, clicks, or flexes noticeably has lost support underneath, that's a bedding layer problem, not a pointing problem. Repointing it will lock the gap but won't stop movement, and the new mortar will crack in months. If your slabs are solid but the joints are failing, a careful repointing approach is the right way to improve drainage and stop rocking from returning. Similarly, if you notice slabs that have sunk or risen by more than a few millimetres compared to their neighbours, or if there's a persistent wet patch on one area of the patio after rain, the issue is likely drainage or base erosion rather than just joint failure.
If the slabs sit flat and stable when you step on them, and the problem is genuinely just crumbled, cracked, or missing pointing material in the joints, you're in good shape for a DIY repoint. If you confirm the slabs are stable and the gaps in the joints are the issue, you can focus on how to repair patio slabs by repointing correctly DIY repoint. That's the scenario the rest of this guide is built around.
| What you see | What it likely means | Right fix |
|---|---|---|
| Crumbly, cracked, or missing mortar in joints — slabs sit flat and stable | Joint material failure only | Repoint the joints (this guide) |
| Slab rocks or clicks when stepped on | Bedding layer has failed or been undermined | Lift, re-bed, then repoint |
| One or more slabs noticeably sunken or raised | Base settlement or frost heave | Lift, address base, re-lay, repoint |
| Persistent wet or damp patch after rain dries elsewhere | Drainage problem pooling under surface | Improve drainage before any pointing work |
| Widespread hollow sound when you tap slabs | Sand washed out under surface, possible widespread base failure | Professional assessment recommended |
Choosing the right materials
The material you use matters a lot. The wrong choice is one of the most common reasons repointing fails early. Here's how the main options compare.
Traditional semi-dry mortar
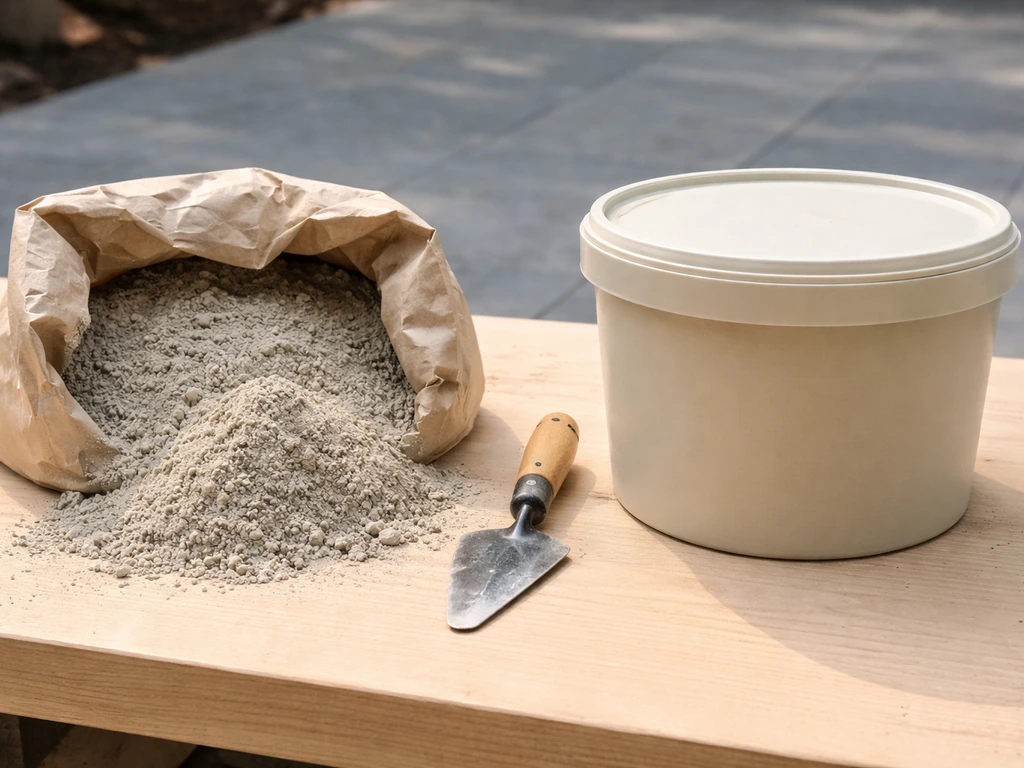
A 4:1 mix of sharp (washed) sand to Portland cement is the traditional approach for pointing natural stone flags, concrete slabs, and most standard patio surfaces. You mix it to a semi-dry consistency, it should just hold together when you squeeze a handful, not be wet or sloppy. This is a strong, durable choice that's been used for decades, but it needs reasonable weather to cure properly (no frost, no rain for at least 24 hours), and it requires careful application to avoid staining the slab faces. Some people go 5:1 for a slightly weaker, more flexible mix, which is worth considering if your patio is subject to temperature extremes.
Ready-mixed jointing compounds
Products like pre-mixed brushing mortar are essentially a bagged, consistent version of the semi-dry mix. They're convenient, reduce mixing errors, and some formulas include polymers for better flexibility and adhesion. Good for DIYers who want a predictable result without measuring ratios. Follow the manufacturer's water guidance carefully, adding too much water is still the most common mistake.
Polymeric sand
Polymeric sand is designed specifically for block paving and slabs with relatively narrow joints (the minimum joint width is typically 3-4mm, with a minimum depth of around 38mm or 1.5 inches). It goes in dry, you compact it, then mist it with water to activate the polymer binder. Quikrete’s polymeric jointing sand data sheet states that once it is placed and dampened, it hardens to lock pavers in place blank" rel="noopener noreferrer">hardens to lock pavers in place after dampening. It's a great choice for block paving patios where you want good weed resistance and some flexibility. It's not ideal for very wide joints or natural stone patios where joint depths vary. It must be protected from rain for at least 24 hours after activation, and you should wait at least 24 hours after any heavy rainfall before installing it.
| Material | Best for | Joint width/depth | Cure time before rain | DIY difficulty |
|---|---|---|---|---|
| Semi-dry mortar (4:1 or 5:1) | Natural stone, large concrete slabs, wide irregular joints | Any width, 25mm+ depth | 24 hours minimum | Medium |
| Ready-mixed jointing compound | Most slabs, consistent joints, less mixing skill needed | Any width, follow pack guidance | 24 hours minimum | Easy-Medium |
| Polymeric sand | Block paving, regular joints, narrow gaps | Min ~4mm wide, 38mm deep | 24 hours (protect from rain) | Easy |
| Plain kiln-dried sand | Temporary fix or very informal paving only | Any | N/A | Very easy — but not durable |
Tools you'll need
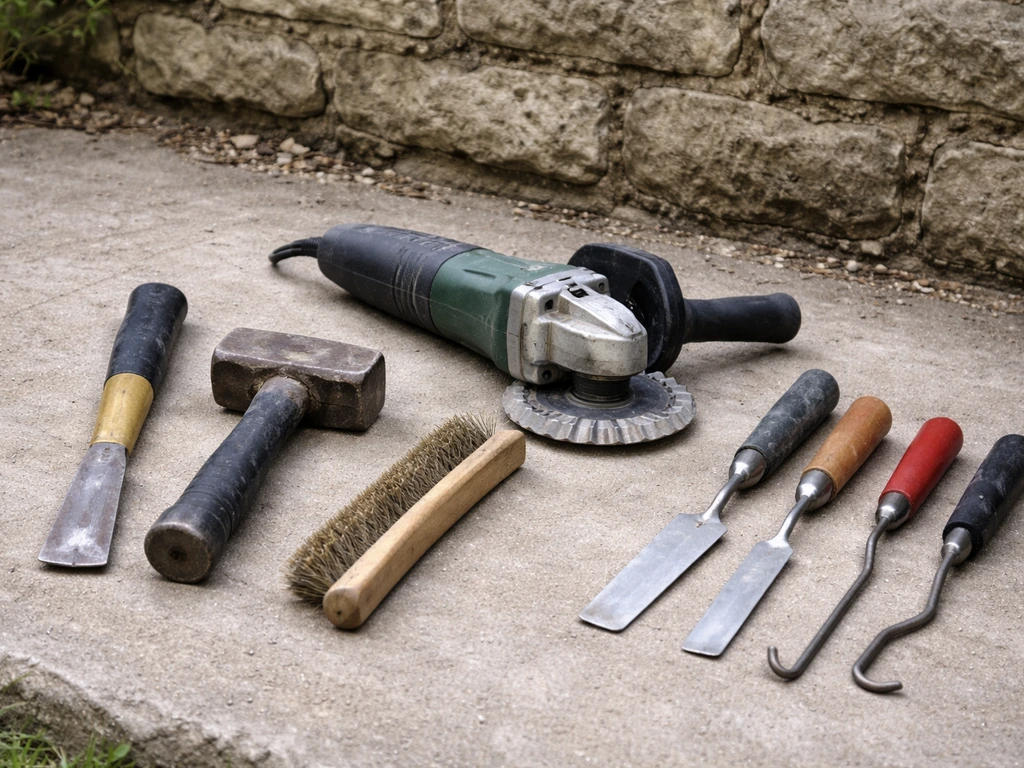
- Cold chisel and club hammer (for breaking out old mortar)
- Angle grinder with a pointing or mortar-raking disc (speeds up large areas significantly)
- Wire brush and stiff hand brush
- Bucket and trowel for mixing
- Pointing trowel or a small margin trowel
- Rubber mallet and grout float (for polymeric sand compaction)
- Leaf blower or soft brush (for polymeric sand residue)
- Garden sprayer or hose with a fine mist nozzle (for polymeric sand activation)
- Safety glasses, dust mask (P2 rated), and knee pads
Step-by-step: removing old pointing and prepping the joints
This is the part most people rush, and it's the part that most determines whether your repair lasts. Shallow, dirty joints are the single biggest cause of new pointing failing quickly. If you want a decorative finish, you can also learn how to stencil patio slabs once the base and joints are properly prepared.
- Start by checking the weather forecast. You want at least 48 hours of dry weather ahead with temperatures above 5°C. Never point in frost or when the slab surface is wet.
- Use a cold chisel and club hammer to break out all loose, crumbling, or hollow-sounding mortar. Tap lightly along the joint — you'll hear the hollow sections immediately. For larger areas, an angle grinder with a mortar-raking or pointing disc will save hours of work, but go carefully near slab edges to avoid chipping.
- Rake out the joints to a minimum depth of 25mm (about 1 inch). This is non-negotiable. Shallow pointing — anything less than 15mm — is too thin to grip properly and will pop out in the first winter. Some guides say 15mm is fine; in practice, 25mm is much more reliable.
- Once you've removed the bulk of old material, go back with a wire brush and scrub out dust, grit, and any remaining loose fragments. The joint walls need to be clean and firm for the new material to bond.
- Kill any weeds growing in the joints. Pull them out by the root rather than just snapping them off. For stubborn root systems, apply a path weedkiller and wait a week before proceeding — live roots under fresh pointing will crack it as they die and rot.
- Blow or brush out all dust and debris from the joints. If the joints are dusty, dampening them slightly before applying mortar improves adhesion — but don't leave standing water in them. For polymeric sand, the joints must be completely dry.
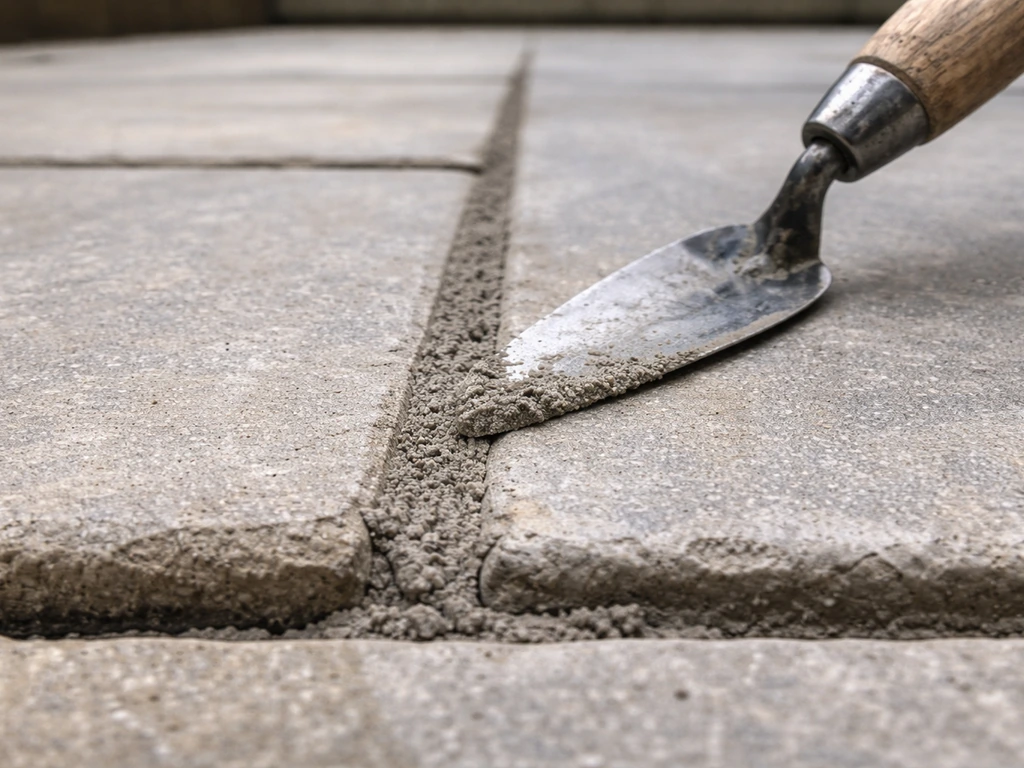
Step-by-step: applying the new pointing
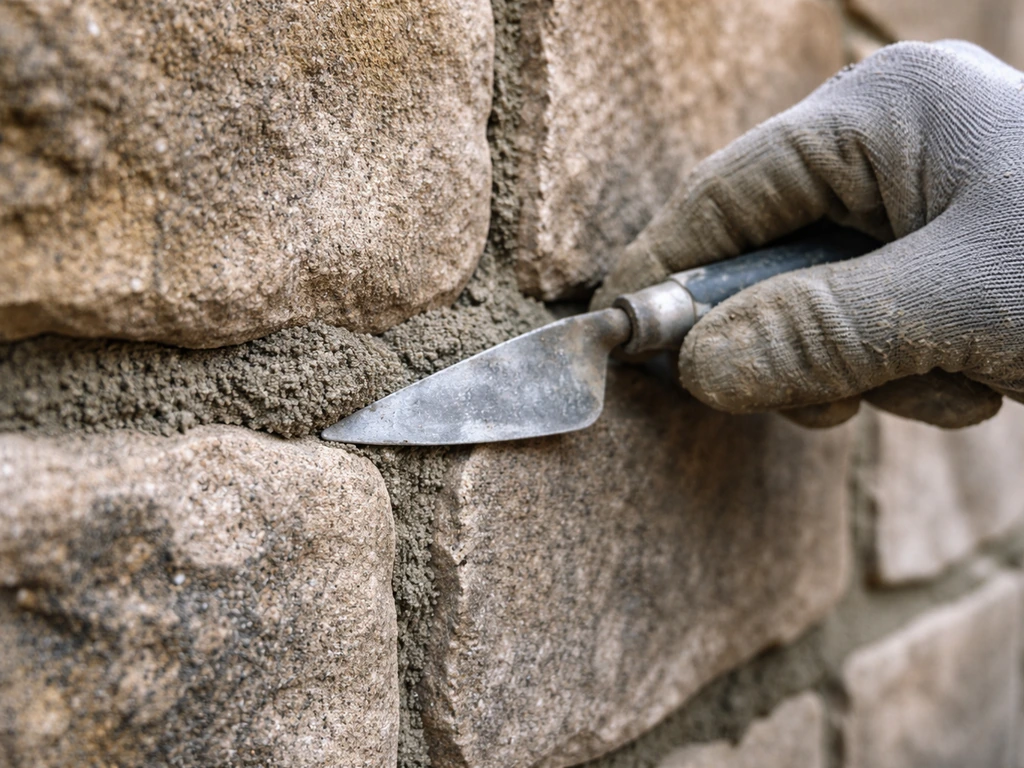
For mortar pointing (traditional or ready-mix)
- Mix your mortar to a semi-dry consistency. For a 4: 1 sand-to-cement mix, add water very sparingly — you want it to just hold together in a ball when squeezed in your fist, with no water weeping out. Too wet and it will slump, stain the slabs, and lose strength. This is probably the most important step to get right.
- If you're only repairing partial damage rather than doing a full repoint, work section by section across the areas that need attention rather than mixing a large batch at once. A semi-dry mix should be used within about 30-40 minutes of adding water.
- Load the joint using a pointing trowel or margin trowel, pressing the mortar firmly down into the gap. Don't just skim it across the surface — push it in and pack it down. Work in layers no more than 10mm deep if the joint is very deep, letting each layer firm up slightly before adding the next.
- Once the joint is filled to just below the slab face, tool the surface. A slightly recessed, slightly rounded finish (known as a raked or weathered joint) sheds water better than a flat flush finish. Avoid a proud joint that sits above the slab face — it catches water and cracks faster.
- Work carefully to keep mortar off the slab faces. If you do get mortar on the surface, wipe it off immediately with a damp cloth — once it sets, it's much harder to remove without risking staining. Keep a cloth to hand as you go.
- Once finished, keep foot traffic off the area for at least 24 hours. In cool or humid conditions, allow 48 hours. Cover the area lightly with a plastic sheet if rain threatens — but make sure the sheet doesn't sit directly on the fresh mortar and smear it.
For polymeric sand
- Pour dry polymeric sand across the dry patio surface and sweep it into the joints using a soft brush or broom. Work it into all joints thoroughly.
- Once joints are filled to within about 3-5mm of the top, use a rubber mallet to tap each slab lightly — this vibration settles the sand and removes air pockets. Sweep in more sand to top up if needed.
- Use a leaf blower on low power, or a soft brush, to remove all polymeric sand from the slab surfaces. This is important — sand residue left on the surface will haze and stain when activated with water.
- Using a garden sprayer or hose on a fine mist setting, dampen the joints thoroughly without flooding them. You want the water to penetrate through the full depth of sand without washing it back out. Apply two passes: a first misting, wait 10-15 minutes, then a second pass.
- Check the surface of the sand in the joints — it should darken evenly with no water pooling on top. Pooling suggests you've over-watered or the joints aren't draining properly.
- Keep the area completely dry for at least 24 hours. Polymeric sand is vulnerable to rain during this window — if it gets washed before it's set, the polymer binder is ruined and you'll need to remove it and start again.
Finishing, curing, and when to seal
With mortar pointing, the main curing window is the first 24-48 hours. Keep the area dry and away from foot traffic. Keeping patio slabs and joints dry with proper drainage and good pointing helps prevent the common causes of rocking and loosening Keep the area dry. In hot or very dry weather, a light misting of the joints (not the slab faces) after 4-6 hours can actually help the mortar cure more slowly and reduce surface cracking, cement needs moisture to cure properly, not just to dry out. After 24 hours you can walk on it carefully; after 48-72 hours it's broadly robust, though full mortar strength develops over 28 days.
For polymeric sand, manufacturer data suggests the polymer fully cures over roughly 30 days after activation, even though the surface feels firm within 24-48 hours. This curing period matters if you're thinking about sealing.
On sealing: you should wait a minimum of 28-30 days after pointing before applying any patio sealant, and honestly, if your patio is relatively new or the jointing was recently done, longer is better. If you want to add lights, plan ahead around curing and sealing so you don't trap moisture or disturb the patio slab edges while the mortar sets wait a minimum of 28-30 days after pointing. Sealing too early traps moisture, interferes with curing, and can cause whitish efflorescence (salt deposits) to appear on the slab surface and joints as salts are drawn up through the still-curing material. If your slabs are already showing white deposits, hold off on sealing entirely until the efflorescence has run its course naturally, usually a few weeks to months depending on conditions. Sealing over it locks it in. For guidance on protecting your patio surface long-term, that's a broader topic worth its own look, but the core rule is: cure first, seal second.
Common mistakes that make the job fail faster
- Not going deep enough when removing old material. If you don't rake joints to at least 25mm, the new pointing is too thin to survive frost and load.
- Mixing mortar too wet. A sloppy mix stains your slabs, shrinks as it dries, and is weaker. Semi-dry consistency is the goal every time.
- Pointing in cold weather. Below 5°C, cement hydration effectively stops. If there's any risk of overnight frost, don't start.
- Leaving polymeric sand residue on the slab surface before misting. It will bond to the surface and be very difficult to remove.
- Sealing too soon after pointing. Wait a full 28-30 days minimum, or you risk trapping moisture and triggering efflorescence.
- Skipping weed removal before repointing. Roots will crack the fresh pointing as they die, often within one growing season.
- Repointing over a moving slab. If a slab rocks, the new mortar will crack and pop out in weeks. Lift and re-bed the slab first.
- Using fine builder's sand instead of sharp (washed) sand for mortar. Fine sand makes a weaker, softer mix that erodes faster.
When to call in a professional
Repointing is a genuinely DIY-friendly job when the problem is just the joints. But there are a few situations where it's worth being honest with yourself about the scope of the problem.
- Multiple slabs are rocking, sunken, or raised — this points to base or bedding failure across a significant area, which means lifting and re-laying, not just repointing.
- There's persistent standing water or damp patches on the patio surface — drainage needs sorting before any pointing work makes sense.
- You tap the slabs and a large proportion sound hollow underneath — widespread sand washout beneath the surface is a structural issue that pointing won't address.
- The patio is large (over 20-25 square metres) and in poor condition throughout — the cost of materials and the labour involved can get significant, and a professional can often complete the work more efficiently.
- The patio is made of expensive natural stone (limestone, sandstone, slate) and the joints are wide or irregular — the risk of mortar staining during DIY repointing is higher, and a mistake is costly to reverse.
- You notice widespread cracking or movement in a patio that was laid within the last 2-3 years — this suggests a base or drainage problem from the original installation that needs proper assessment.
If you're in any of those situations, getting a quote from a paving contractor for a proper assessment is the practical move. Repointing over a structural problem just delays and adds cost to the bigger repair. But if your slabs are solid and it's genuinely just the joints that have failed, this is a satisfying repair you can absolutely do yourself in a weekend with the right prep and materials. Once you’ve matched your patio slab to the right pointing and bedding approach, you can extend the slab’s life by repointing the joints properly extend patio slab.
FAQ
How can I tell whether I need to repoint or fix the bedding/base instead of just repairing patio slabs pointing?
Press each slab firmly and watch for rocking, clicking, or noticeable flex. If the slab moves, the base or bedding is failing, repointing only fills the gap and won’t stop the slab from loosening again. Also check for persistent wet patches after rain, that pattern usually points to drainage or base erosion rather than joint-only failure.
Can I reuse old mortar or scraped-out joint material when repairing pointing?
No. Remove everything that is loose, crumbling, or contaminated, and rake out to the target depth so the new pointing has solid contact. Leaving debris behind reduces adhesion and creates weak spots that wash out sooner, especially on any slope where water runs across the joints.
What’s the minimum joint width and depth for polymeric sand, and what if my joints are wider than expected?
Polymeric sand is typically intended for narrower joints (minimum joint width is commonly around 3 to 4 mm, and minimum depth about 38 mm). If your joints are wider or depth varies a lot, polymeric sand may not compact evenly and can fail, a semi-dry mortar or a suitable brushing mortar is usually the safer choice.
Do I have to seal after repairing patio slabs pointing?
Not automatically, and you must not rush it. Wait at least 28 to 30 days after pointing before applying any sealant, because sealing early can trap moisture, interfere with curing, and increase the chance of efflorescence (white salt deposits). If efflorescence is already present, skip sealing until it clears naturally.
How soon can I walk on the patio after repointing patio slabs?
Allow at least 24 hours before normal foot traffic. Mortar pointing is generally more robust after 48 to 72 hours, but full strength develops over the following 28 days. For safety and to avoid disturbing fresh joints, keep loads and dragging furniture off the area during the first couple of days.
Why does my new pointing wash out or crumble within a season, even when I followed the steps?
Most early failures come from two issues: shallow or dirty joints (no proper depth or contamination left in place) and too much water when mixing semi-dry mortar products. Also consider drainage, if water repeatedly pools or runs directly through the joints, the pointing can lose strength faster even if application was otherwise correct.
Is it okay to repoint in wet weather or right before rain?
It’s better to avoid. Fresh pointing needs a dry window (for mortar, keep it dry during the first 24 hours at minimum, longer is safer). For polymeric sand, the key rule is keeping the joints protected from rain for at least 24 hours after misting/activation, and you should wait at least 24 hours after heavy rainfall before installing it.
What’s the best way to get a neat finish without staining the slab faces during mortar pointing?
Pack the joint flush and work in small sections so mortar doesn’t smear onto the slab surface. Use careful application, and if you need a decorative look, do it after the base and joints are properly prepared rather than trying to mask mess after the fact.
Can I repair only one area where the joints are pointing badly?
You can, but check for underlying causes. If slabs in the surrounding zone are stable and only that section’s joints are failing, patch repointing is usually fine. If the wider patio has drainage issues, slope-related washout, or widespread movement, targeted repairs may not last because the same problem will continue undermining nearby joints.
How to Put Lights in Patio Slabs: DIY Step by Step
Step-by-step guide to install low-voltage lights in patio slabs, from planning and drilling safely to weatherproof wirin