Installing patio slabs correctly comes down to three things: a solid base, the right slope, and proper joints. Get those right and your patio will last decades. Skip corners on any of them and you'll be dealing with rocking slabs, standing water, or sunken sections within a couple of years. This guide walks you through the whole process end-to-end, from picking your slabs to sealing the finished surface, with the failure-prevention details built in at every step. If you're wondering how to stencil patio slabs, start by planning your pattern and prepping a clean, level surface before any sealing or joint sand work.
How to Patio Slabs: DIY Layout, Base, Setting, Fixing

Talia Lang
6 Jun 2026
Choosing slab materials and planning the layout
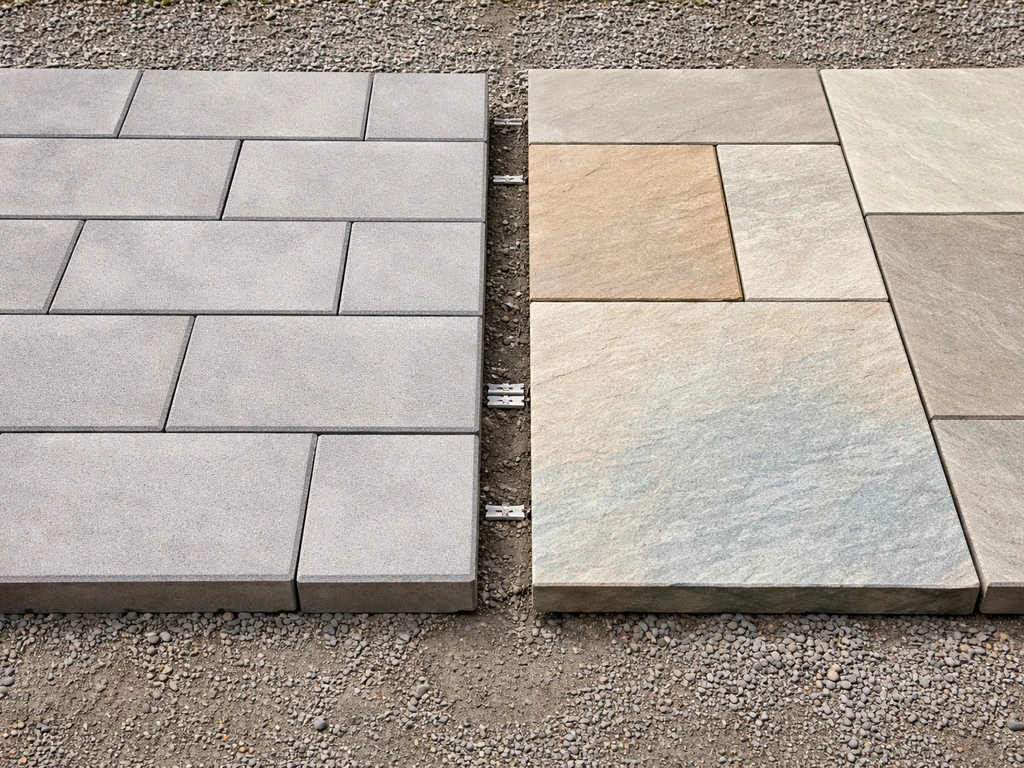
Before you dig a single spade of soil, decide what slabs you're using. The most common choices for DIY patios are concrete pavers, natural stone (like sandstone, slate, or limestone), and porcelain slabs. Each has real trade-offs.
| Material | Typical thickness | Durability | DIY difficulty | Cost |
|---|---|---|---|---|
| Concrete pavers | 2 3/8 in (60 mm) | Very good, especially if air-entrained for freeze-thaw | Easy | Low to mid |
| Natural sandstone | 1.5–2 in (38–50 mm) | Good, but porous; needs sealing | Moderate | Mid |
| Porcelain slabs | 0.75–1.25 in (20–32 mm) | Excellent, non-porous | Moderate (cutting is harder) | Mid to high |
| Natural limestone/slate | 1.5–2 in (38–50 mm) | Variable by stone type | Moderate | Mid to high |
For most DIYers, concrete pavers are the safest starting point. They're uniform in thickness (typically around 2 3/8 in for residential use), predictable to lay, and easy to replace individually if something goes wrong later. Porcelain looks great but requires a diamond blade and a steady hand for cutting. Natural stone is beautiful but thickness varies within the same batch, which makes leveling harder.
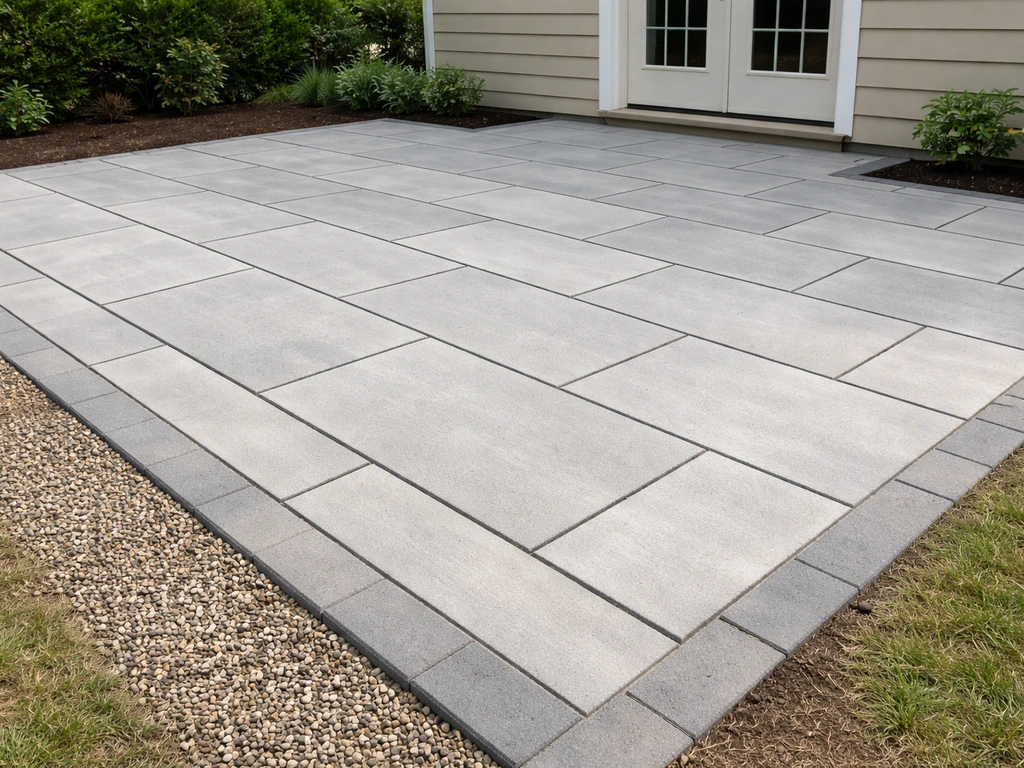
For the layout, sketch the patio on paper first and work out your pattern before you start. Running bond (brickwork offset), herringbone, and basketweave are the common options. Herringbone locks together best and resists lateral creep, which is worth considering if you're in a freeze-thaw climate. Once you've picked a pattern, calculate your slab quantities: measure the area in square feet, add 10% for cuts and breakage, and order accordingly. Mark the patio outline on the ground using stakes and mason's line. Keep the lines taut and check for square by measuring the diagonals: both diagonals should be equal.
Site prep: removing topsoil, grading, and measuring fall
This is the step most DIYers underestimate, and it's where most patio failures start. You need to remove all organic material, including topsoil, grass, and roots. Organic material decomposes over time, creating voids under your base that cause slabs to sink and rock. Don't just scrape the surface; dig down far enough to get below the root zone and any dark, loamy soil.
Your total excavation depth needs to account for every layer you're putting back. A standard residential patio requires: the slab thickness (say 2 3/8 in for concrete pavers) plus 1 in of bedding sand plus 4 to 8 in of compacted base material. So for concrete pavers with a 6 in base, you're excavating roughly 9 to 10 in below your finished surface level. Mark that depth on your stakes so you have a consistent target across the whole area.
Drainage slope is non-negotiable. Every patio needs to fall away from the house at blank" rel="noopener noreferrer">a rate of 1/8 in to 1/4 in per foot. To keep the fall accurate, it helps to point patio slabs correctly with your string lines before you compact the base best way to point patio slabs. That works out to roughly 1% to 2% gradient. If your patio is 12 ft deep, the far edge should sit 1.5 to 3 in lower than the edge nearest the house. Set your string lines to reflect this fall before you compact anything, because your base needs to follow this grade, not just your finished surface. Use a line level or a spirit level on a long straight-edge to check your string lines accurately.
Building the base: sub-base, compaction, drainage, and reinforcement
A well-built base is what separates a patio that lasts 20 years from one that starts failing after the second winter. Once you've excavated to the right depth and established your grade, you're building up in layers.
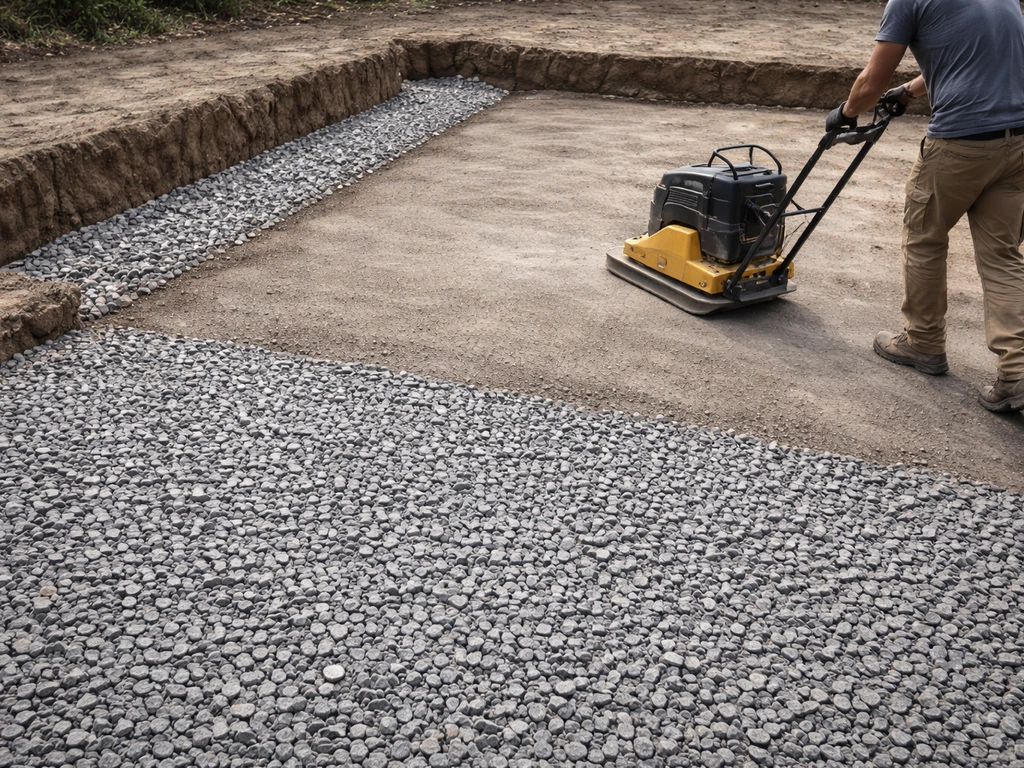
The sub-base layer
Fill the excavated area with compactable aggregate base material, typically crushed stone or road base gravel (often called Type 1, MOT Type 1, or crusher run depending on your region). Lay it in lifts of no more than 4 in at a time and compact each lift with a vibratory plate compactor before adding more. Running 4 to 6 passes per lift is a solid standard. Don't try to compact 8 in in one go: the top surface will compact but the bottom won't, and you'll get soft spots later. Your total compacted base depth should be 4 in for light residential use in stable soil and up to 8 in in freeze-thaw climates or soft/clay soils.
Drainage considerations
If your site has naturally poor drainage or clay soil, consider laying a perforated drain pipe (French drain) at the base of the excavation before you add aggregate. Route it to a suitable outlet, either a soakaway or an existing drain. This is especially important if the patio abuts the house: water sitting under the base will cause frost heave in winter and gradual settlement year-round. Don't skip this step hoping it won't be a problem. If water has nowhere to go, it will find its own way, usually by lifting or undermining your slabs.
Geotextile fabric and edge restraints
Lay a geotextile membrane over the subgrade (not over the aggregate) before you start building up. It separates the native soil from your aggregate base, prevents clay migration upward, and extends the life of the base. Install your edge restraints (plastic paver edging, metal banding, or concrete haunching) at this stage too, before you add bedding sand. Edge restraints are what stop the outer slabs from creeping outward over time. Secure them properly: plastic edging should be pinned into the base with long spikes at 12 in intervals.
Setting and installing patio slabs: leveling, spacing, cutting, and alignment
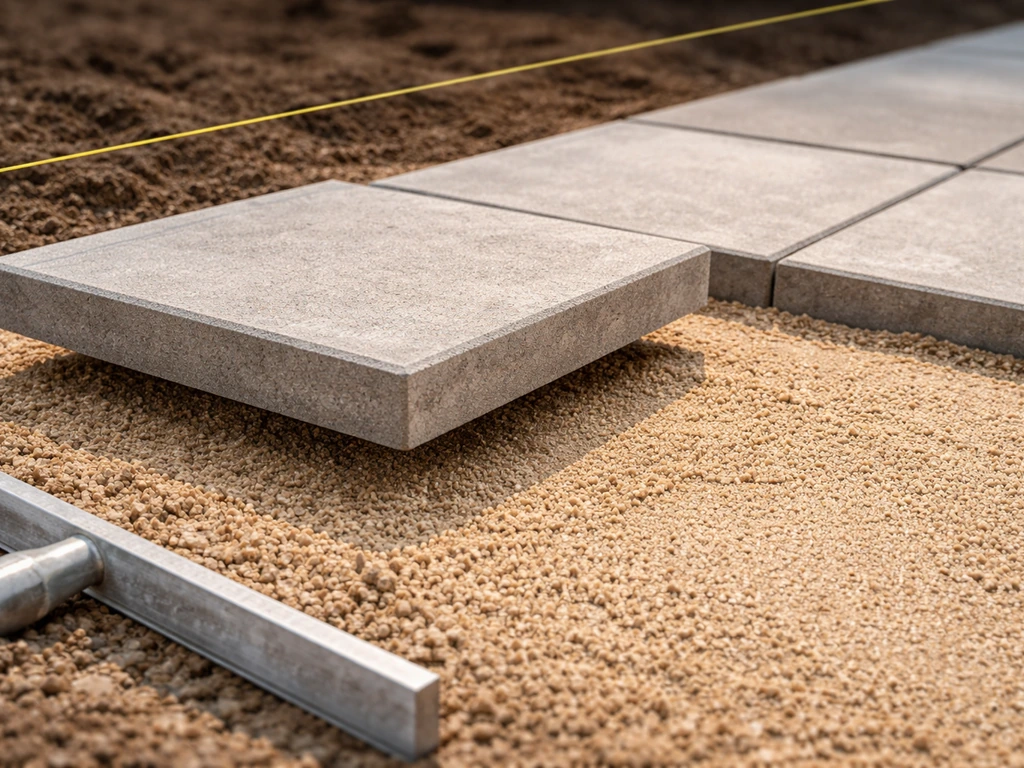
Once the compacted base is at the right grade and elevation, you add the bedding layer: a nominal 1 in of coarse, sharp sand (not building sand or fine sand, which compact unevenly). Screed it flat using two straight rails and a screed board, working in small sections. Do not walk on screeded sand before placing slabs. If you want lights in patio slabs, plan the wiring route and use weather-rated components so the installation stays safe and durable screeded sand. Keep the screeded surface consistent with your string lines, because the sand bed follows the grade you set earlier.
Placing slabs and controlling alignment
Start laying from a fixed corner or a straight edge, working outward. Snap chalk lines or pull string lines across the sand bed to keep your joint lines straight as you go. Belgard's guidance is useful here: lay slabs on both sides of your alignment line, using the lines to control joint layout so you don't get drift that forces awkward cuts at the edges. Lower each slab straight down onto the sand bed rather than sliding it, which disturbs the screeded surface. Use a rubber mallet to tap slabs level and use a spirit level constantly. Check level across adjacent slabs as well as along each individual slab.
Joint spacing
Maintain consistent joint widths as you go. For most concrete pavers and slabs, a joint width of 1/8 in to 1/4 in is the right target. Narrow joints look clean and are manageable for polymeric sand filling. Use spacers or a consistent tile spacer to maintain this gap: eyeballing it leads to drift by the time you're halfway across the patio. Gaps that are too wide or too inconsistent will look bad, fill with weeds faster, and make the finished surface feel less solid underfoot.
Cutting slabs
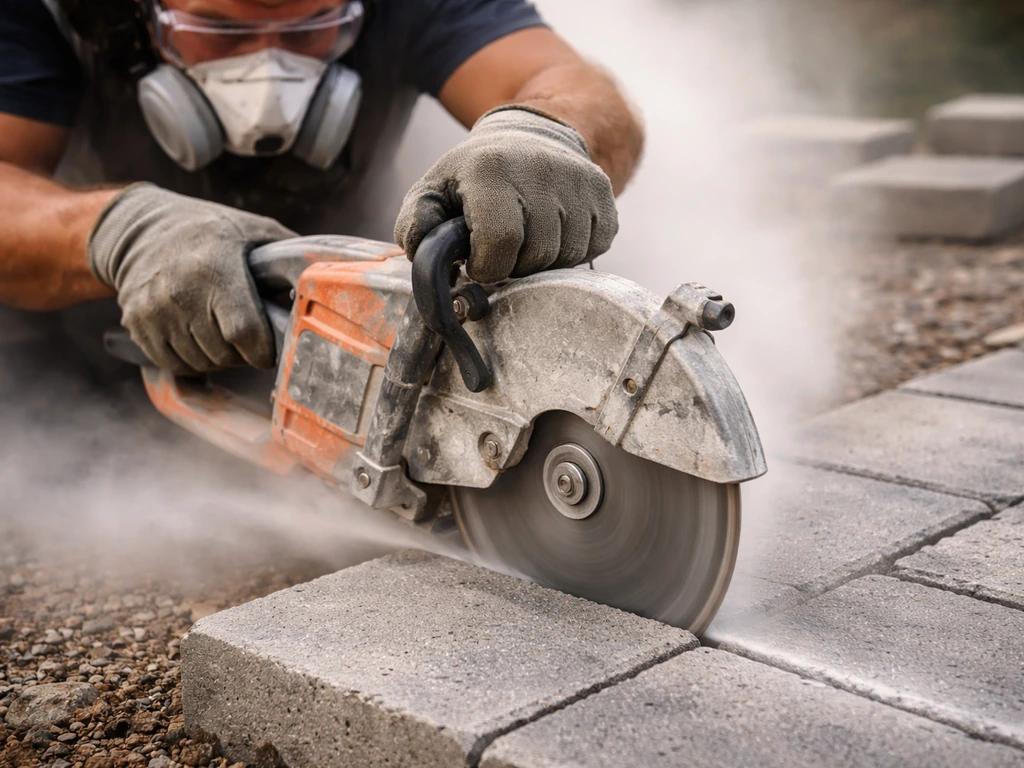
For straight cuts on concrete pavers, a circular saw with a diamond blade or a dedicated paver splitter will work. For natural stone, a wet-cut angle grinder or table saw with a diamond blade gives cleaner results. For porcelain, you need a good quality wet diamond blade and patience: porcelain chips easily if you rush the cut. Mark all your cuts accurately before you touch the saw. For curved cuts, a grinder with a segmented diamond blade lets you nibble away at the curve in stages. Cutting tips: always cut outside your layout line, wet the blade if you're using a saw, and wear eye and ear protection.
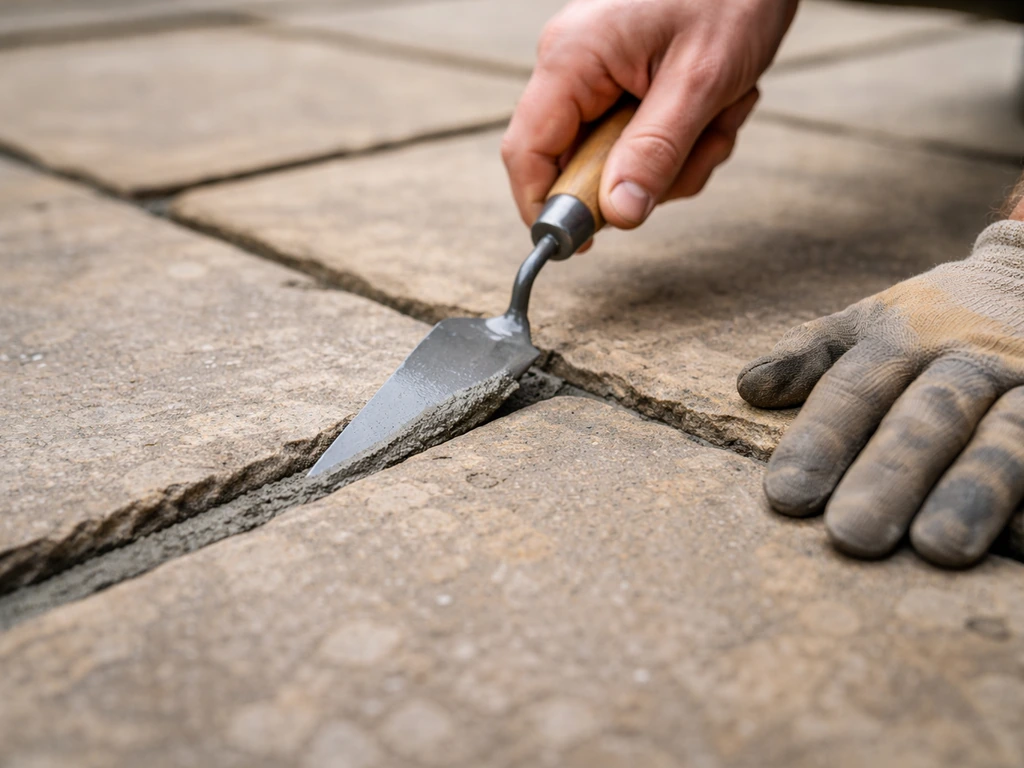
Grouting, jointing, and sealing: what to use and when
Once all slabs are set and you're happy with the level and alignment, compact the whole surface with the plate compactor (use a rubber pad or carpet offcut under the plate to avoid scratching the slabs). This beds the slabs firmly into the sand. Now you're ready for joint filling.
Joint sand vs. polymeric sand
Regular kiln-dried joint sand is cheaper and easy to apply, but it washes out over time, lets weeds in, and does little to lock the slabs together. Polymeric sand is the better choice for most patios. It contains binding agents that activate with water, setting firm enough to resist erosion, weeds, and insects while still allowing minor movement. Sweep it into the joints, compact again lightly, then blow or brush off all surface residue before wetting. Use a hose on a shower or mist setting, not a jet, and wet a section of about 200 sq ft for roughly 30 seconds at a time. The polymeric sand will set in around 90 minutes. The key caution: remove every trace of polymeric sand from the slab surface before wetting, because once it sets on the surface it leaves a haze that's very difficult to remove.
Sealing the finished patio

Don't seal immediately after laying. Wait 60 to 90 days to allow any efflorescence to appear and wash off and to ensure the slabs are fully dry and the polymeric sand has cured. Sealing over trapped moisture causes clouding and bonding problems. A penetrating sealer suits most natural stone and concrete pavers: it doesn't change the surface appearance much but protects against staining and water ingress. A topical/wet-look sealer gives a glossier finish and works well on concrete pavers if that's the look you want. Plan to reseal every 3 to 5 years: that's the realistic maintenance cycle for most residential patios. To protect patio slabs long-term, keep water from sitting on the surface and maintain the joints and sealer as the patio ages.
How to avoid and troubleshoot common slab patio failures
Most patio problems trace back to one of four root causes: insufficient base depth, wrong drainage slope, inadequate compaction, or failed/missing edge restraints. Here's how to identify what went wrong and what to do about it.
Rocking or uneven slabs
A rocking slab means either the bedding sand beneath it has washed out or compacted unevenly, or the slab was never fully bedded to begin with. If the slabs are fine but the pointing has failed, focus on removing loose mortar and refilling the joints correctly so water cannot get underneath repairing pointing. The fix: use a flat pry bar or two chisels to lift the affected slab without disturbing its neighbors. Remove the sand from that area, check whether the sub-base is solid, top up if needed, re-screed fresh bedding sand to 1 in, and reset the slab. Learning how to repair patio slabs also means fixing the cause, not just re-setting the slab. Check level against adjacent slabs before compacting back down. This is a targeted repair and doesn't require disturbing the whole patio, which is one genuine advantage of individual-slab construction over a poured concrete surface. This Old House notes that because many patio pavements are installed as independent units rather than a single monolithic slab, damaged sections can usually be removed and replaced for targeted repairs blank" rel="noopener noreferrer">individual-slab construction makes targeted repairs easier than a poured concrete surface.
Sunken sections
Sinking is usually a base problem, not a surface problem. Causes include insufficient compaction during installation, organic material left in the subgrade that has since decomposed, or water eroding the base from below. Lift the slabs in the sunken zone, inspect the base, and address the actual cause before resetting. If the sub-base has washed away, you need to rebuild it properly: add and compact fresh aggregate base before replacing the bedding sand and slabs. Resetting slabs on top of a compromised base without fixing it first just means the same problem recurs.
Standing water and drainage issues
If water pools on the patio, either the slope is wrong or there's a low spot caused by settlement. Check the grade with a long level or a water level: you should have a consistent fall of 1/8 in to 1/4 in per foot toward the garden. If the whole patio is flat or sloping toward the house, this requires lifting and releveling a significant portion of the installation. That's a bigger job, but ignoring standing water near a foundation is not an option. A channel drain installed at the low edge is sometimes a practical fix if re-grading the whole patio isn't realistic.
Cracking slabs
Individual slabs crack when there's a void beneath them (point loading with no support) or, in freeze-thaw climates, when water gets into the slab material and expands. For concrete pavers in freeze-thaw areas, air-entrained concrete is significantly more durable: the tiny air bubbles give water somewhere to expand without cracking the matrix. If you're buying concrete pavers in a cold climate, check that they meet freeze-thaw durability specifications. Cracked slabs from voids need the same treatment as sunken slabs: fix the base first, then replace the damaged unit.
Weed growth and joint erosion
Weeds in joints mean the joint sand has either washed out or was never filled with polymeric sand. Weed roots and organic debris eventually work their way under slabs and lift them. Clear the joints, remove weeds fully including roots, and refill with polymeric sand. Lay a geotextile membrane at sub-base level during new installations to prevent weed germination from below.
Quick troubleshooting checklist
- Rocking slab: lift, check bedding sand depth and sub-base firmness, re-screed and reset
- Sunken area: lift slabs, investigate base and drainage, rebuild base layers before resetting
- Standing water on surface: check slope with level, consider channel drain or re-grading
- Cracked slabs: check for void beneath, replace unit, fix base first
- Lippage (slabs at different heights): lift the high or low slab, adjust bedding sand, reset and check level
- Gaps or wide joints: sweep in polymeric sand, compact lightly, wet and allow to cure
- Weed-filled joints: remove weeds, clear old sand, refill with polymeric sand
- Edge slabs creeping outward: reinstall or repair edge restraints, reset affected slabs
When to stop DIY and call a professional
Most individual slab repairs, including lifting and resetting a few slabs, correcting a low spot, or refilling joints, are solid DIY territory. Where it gets more complicated is when the base or drainage is fundamentally wrong across a large area, or when the issue is structural.
Call a professional if you find significant erosion channels or voids under the base when you lift slabs, if the subgrade soil is soft and yielding (suggesting a drainage or soil stability problem that goes deeper than the base), if the patio is very close to the house foundation and there are signs of water pooling against it, or if tree roots have extensively undermined the base over a wide area. These situations involve ground engineering decisions and sometimes drainage engineering that go beyond what a standard DIY repair can reliably fix.
It's also worth getting a professional opinion if your whole patio has settled unevenly by more than an inch across its area, because that usually means the subgrade itself is moving. Lifting and resetting the slabs will give you a temporarily flat patio, but if the ground underneath is still moving due to poor drainage or unstable soil, you'll be repeating the job in a few years. A professional with experience in patio drainage can assess whether the ground conditions need to be addressed first, which saves you a lot of time and money in the long run.
Once your patio is down and in good shape, the ongoing maintenance is genuinely manageable: repoint joints as needed, reseal every few years, and deal with any isolated rocking or sunken slabs promptly before they become bigger problems. If you need to extend an existing patio slab, follow the same base, drainage slope, and jointing principles to prevent rocking and standing water extend patio slab. A well-built slab patio with proper drainage and solid jointing is one of the most durable outdoor surfaces you can install yourself, and most of the repair work covered elsewhere on this site, from re-pointing and repairing cracked slabs to protecting the surface with the right sealant, becomes much more straightforward when the base was done right to begin with.
FAQ
How do I know if my patio slabs are set on enough bedding sand (and not too much or too little)?
Bedding sand should end up about 1 in thick under the slabs, and it should be screeded flat and firm before you place stones. If you routinely find slabs sitting too low (needing lots of sand underneath) or too high (needing to be forced down), it usually means the sand depth or screeding rails are inconsistent. Use short leveling checks across a 2 to 3 ft straightedge as you lay, and avoid adding sand after a slab is already bedded, since that creates soft spots.
Can I reuse the aggregate base or bedding sand from an old patio when replacing slabs?
You can reuse materials only if they are clean, well-graded, and not contaminated with organics or soil. In most DIY repairs, aggregate base gets contaminated with debris and fines that hold water, which can lead to washout and settlement. For best results, remove and replace bedding sand (it mixes with disturbed sand), and treat any reused base as questionable unless you can confirm it is still free-draining and properly compactable.
What’s the easiest way to measure the slope, especially if my patio is not rectangular?
Instead of trying to calculate from a single corner, establish your fall using a fixed reference point near the house and then measure down at multiple points along the patio length. A line level plus a long straightedge works well for checking the string line grade at several stakes. For irregular shapes, keep the fall direction consistent (away from the house) and verify that the low edge actually drains to a planned outlet, not into a corner or around an obstruction.
Do I need a membrane under the base for all patios, or only in clay soil and weed-prone areas?
In weed-prone yards and where clay migration is likely, a geotextile membrane is especially valuable. For stable, sandy subgrades it may not be strictly required, but it still helps limit the mixing of subsoil with aggregate over time. The key detail is placement on the subgrade (before aggregate), not on top of the aggregate, because putting it higher reduces its ability to separate and prevents it from doing its intended job.
How tight should my joint gaps be, and what if I’m using different slab sizes or irregular units?
For consistent joints, aim for the typical 1/8 in to 1/4 in gap, and use spacers so you do not “average” the error while you work. If the units vary in size, keep one dimension as your control (usually the line you snap for alignment) and adjust the other dimension with your cut strategy rather than letting joints drift. When the joints become uneven by more than a small fraction across a few rows, polymeric sand can fail to lock properly and weeds can find the wider gaps.
What’s the correct way to compact the slab surface before and after joint filling?
After slabs are set, compacting helps bed them into the sand without moving them out of alignment. Use a plate compactor with a rubber pad or a protective material to prevent surface damage, and keep passes controlled, especially near edges. After polymeric sand is swept in and compacted lightly, avoid aggressive compaction again, since forcing sand deep and then re-compacting can change joint depth and cause incomplete setting.
Can I rain-proof the polymeric sand, and what if it starts raining before it sets?
Yes, timing matters. Polymeric sand needs moisture to activate, so a light rain can sometimes trigger it unpredictably. If rain starts before you’ve completed wetting, stop and cover the patio to prevent uneven activation, then re-evaluate before continuing. After setting begins, avoid rinsing or pressure washing, and treat any haze cleanup delays as a surface-specific issue because polymeric sand that cures on top can stain and be difficult to remove.
How long should I wait before sealing, and how do I check if sealing will be safe?
The common wait is 60 to 90 days so moisture and any efflorescence can dissipate. Before sealing, confirm the patio is fully dry and do a practical moisture check, such as taping down a small plastic sheet overnight to see if condensation forms. If moisture is still trapped, sealing can cause cloudiness, poor bonding, and uneven stain resistance.
Is it normal for slabs to settle slightly after installation, and when should I worry?
Minor micro-movements can happen as bedding sand settles and polymeric sand locks the joints, but noticeable settlement patterns indicate a base or drainage issue. A useful threshold from the repair perspective is when you see uneven movement across a wide area (for example, more than about an inch overall difference). If it is localized (one or a few slabs), it is more often bedding washout, a void, or an edge restraint problem than broad settlement.
What’s the best way to extend an existing patio without creating a weak joint or trip point?
Match the extension to the existing base strategy, including the same drainage direction and compatible jointing approach, rather than just laying slabs on whatever base material is present. Plan transitions so the new section meets the old section at the same finished elevation, and keep joint lines aligned to avoid a concentrated stress line. If the old patio has known drainage or sinking issues, fix the root cause first, otherwise the extension will inherit the failure mode near the boundary.
When should I avoid DIY and call a pro for patio slab problems?
Call a professional if you lift slabs and discover voids, significant erosion channels, or soft, yielding subgrade that suggests deeper ground instability. Also call when the patio is close to a foundation and shows water pooling against it, because drainage and soil behavior near foundations can require design-level decisions. If tree roots have undermined a large area, expect ground engineering implications, not just slab replacement.
Next Article
Best Way to Point Patio Slabs: Step-by-Step DIY Guide
Step-by-step DIY guide to repoint patio slabs: diagnose joint failure, prep depth, choose materials, fill cleanly, cure,