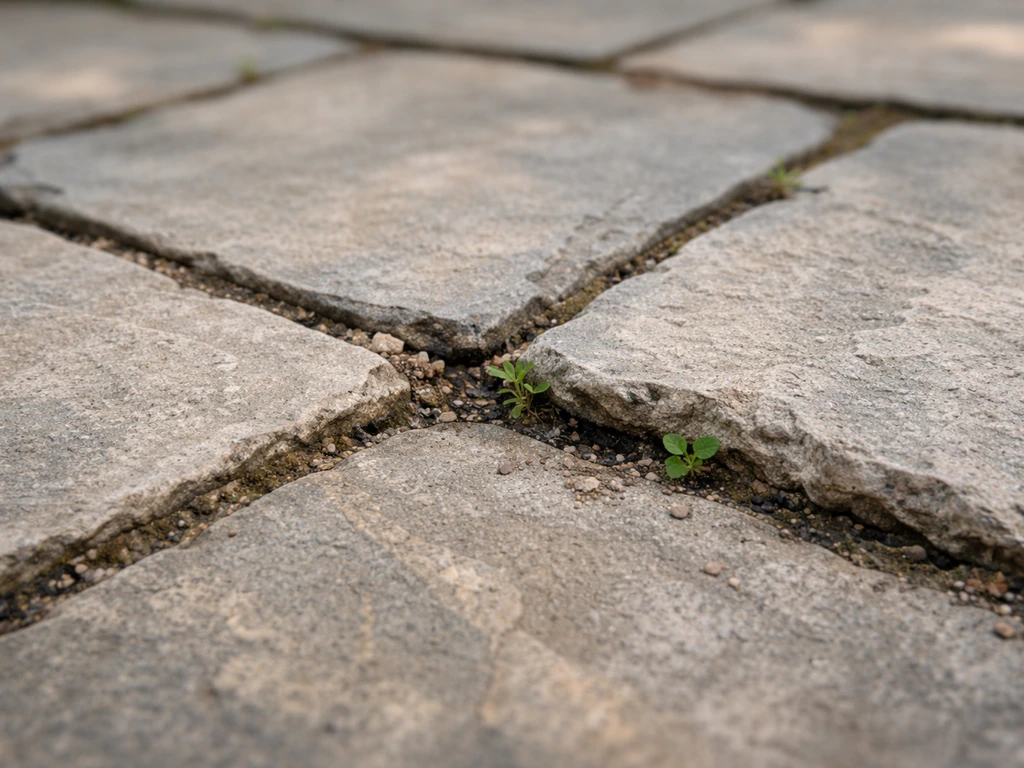
You can cut curves in patio slabs at home using an angle grinder for tight radii or a circular saw or cut-off saw for larger arcs, but the job requires planning, the right diamond blade, serious dust control, and a clear understanding of what's underneath the slab before you start cutting. Done carefully, curved cuts let you fit slabs around trees, planters, steps, and irregular borders without hiring a specialist. Rush it, skip the PPE, or use the wrong blade and you'll crack the slab, ruin a blade, or inhale concrete dust that causes permanent lung damage.
How to Cut Curves in Patio Slabs, Step-by-Step DIY Guide

Talia Lang
20 Jul 2026
Why cut curves and when is it a DIY job?
Most patio projects hit a point where a straight cut just won't work. You're fitting slabs around a circular raised bed, creating a rounded edge along a lawn border, wrapping around a tree base, or replacing a single damaged slab that butts up against a curved feature. These are all legitimate reasons to cut a curve rather than leaving an awkward gap or filling it with rubble.
That said, curved cutting is a step up from straight cuts in terms of technique, and it's worth being honest about the scope before you commit. A small arc on a single paving slab is a realistic afternoon project for most careful DIYers. Cutting a smooth, flowing curve through multiple poured concrete slabs with rebar inside is a different animal and may genuinely warrant hiring a concrete cutting contractor.
Is this job right for you? A quick checklist
Before you buy blades and borrow a saw, run through these questions honestly. They'll tell you whether this is something you can tackle this weekend or whether you need to call someone.
- Have you used an angle grinder or circular saw before? Curved cuts require confident tool control. If you've never used either, start on a scrap piece first.
- Do you know whether the slab is reinforced? Rebar and wire mesh change blade selection and significantly increase difficulty and cost.
- Is the slab post-tensioned? If you're in any doubt, stop. Cutting a post-tension tendon is a structural and safety emergency. This requires an engineer and specialist contractor, full stop.
- What is the radius? Curves tighter than about 12 inches (30 cm) are best handled with an angle grinder. Larger, smoother arcs can use a circular or cut-off saw.
- How thick is the slab? Standard paving slabs run 35–50 mm thick. Poured concrete residential patios are typically 100 mm (4 inches). Anything deeper than your blade's cutting depth needs staged passes or a walk-behind saw.
- Do you have or can you hire the right PPE and dust suppression? Skipping dust control isn't just lazy — it exposes you to respirable crystalline silica, which causes silicosis. This is non-negotiable.
- Is there a helper available? Holding a template, managing a water feed, and keeping a cut-off saw on line is genuinely hard to do alone on anything longer than one slab.
- Are you physically comfortable working at ground level for an extended period? Curved cuts in paving take longer than straight cuts and involve a lot of crouching.
If you ticked most of those boxes confidently, you're probably good to proceed. If rebar, post-tension tendons, or a very large project came up, read the relevant sections below before deciding, but lean toward professional help.
Planning the curve before you pick up a tool
The most common mistake I see is people skipping the planning stage and going straight to marking the slab by eye. A curve that looks fine when you're standing over it can look terrible once the slabs are laid and pointed. Take the time to do this properly.
Choosing your radius
The radius is the distance from the centre of your curve to the slab edge. A gentle 1.5-metre arc along a lawn border looks natural and is easy to execute. A 200 mm arc around a post or corner is tight, harder to cut cleanly, and creates narrow, fragile slab pieces that are prone to cracking. As a general rule, avoid any radius under 150 mm in a paving slab, the resulting piece will be structurally weak and likely to break during cutting or shortly after installation.
Creating a template
For large, consistent arcs, make a trammel. Screw a batten to the ground or a piece of ply at your centre point, measure your radius along the batten, and drive a scribe nail or pencil at the end. Swing it to draw the arc. For irregular curves, fitting around a planter or obstacle, cut your template from hardboard or thin ply first, test the fit, adjust it, and only then trace it onto the slab. Cutting the template costs nothing and saves expensive slab material.
Allowing for joints
If you're cutting a curved edge that will butt against another slab or a border, remember to account for your joint width, typically 8–15 mm for standard paving. Mark the finished edge of the slab, not the finished edge of the joint. If you're fitting into an existing curved bed edge, measure from the nearest fixed point and allow for the joint gap before transferring to the slab.
Before you cut: permits, underground services and site access
This section sounds bureaucratic, but skipping it causes real problems. Run through these four checks before any cutting starts.
- Check local permit requirements. In most residential areas, modifying an existing patio doesn't need a permit, but if you're cutting to extend drainage or alter a load-bearing element, check with your local authority. Rules vary.
- Locate underground services. Call 811 (in the USA) or your national dig-safe service before any cutting that goes near the slab perimeter or that requires breaking out sections. Gas, water, and electrical runs under patios are more common than people expect, especially near the house wall.
- Scan for rebar and mesh. If you don't know whether the slab is reinforced, hire or borrow a rebar locator (examples include the Hilti PS series or Proceq Profoscope) before cutting. These detect rebar and estimate depth. For unknown or older slabs, don't assume it's unreinforced.
- Check site access for equipment. If you're renting a walk-behind concrete saw for a large job, make sure it can actually get to the work area through a gate or side passage. These machines are heavy and not easy to manoeuvre through narrow openings.
Tools and consumables you'll need
The tool you need depends primarily on the radius of the cut. For broader step-by-step guidance on selecting and preparing slabs, see our guide on how to patio slabs. Here's a practical breakdown.
| Tool | Best for | Typical cutting depth | Notes |
|---|---|---|---|
| 4–5" angle grinder | Tight curves, radius under 300 mm, flagstone shaping | Up to 35–40 mm per pass | Most versatile for curves; needs multiple passes on thick slabs |
| 7" angle grinder | Medium curves, thicker paving slabs | Up to 50–55 mm per pass | Heavier, more fatigue; good for 50 mm slabs in one pass |
| Circular saw with masonry blade | Larger arcs, 300 mm+ radius, staged passes | 50–65 mm depending on saw | Hard to steer a tight curve; better for gentle arcs |
| Cut-off saw (eg. STIHL TS 420, Husqvarna K760) | Large arcs in thick or poured concrete | Up to 120–125 mm | Water kit highly recommended; loud and dusty — full PPE essential |
| Walk-behind concrete saw | Long smooth arcs in poured slabs | Up to 125 mm+ | Rental only; operator experience needed; not suited to very tight curves |
Diamond blade selection
Diamond blade choice is where most DIYers get it wrong. The key principle is counter-intuitive: hard, dense materials like cured concrete need a softer bond blade so the segment matrix wears away and exposes fresh diamonds. Softer, more abrasive materials like sandstone or some flagstones need a harder bond to prevent premature diamond loss. Using the wrong bond doesn't just slow you down, it can glaze the blade (no cutting action) or cause the blade to fail.
- Cured poured concrete (standard residential patio): soft-bond continuous rim or segmented diamond blade rated for concrete
- Paving slabs (most are hard-pressed concrete or reconstituted stone): medium-bond segmented blade rated for concrete/masonry
- Natural stone / flagstone (sandstone, slate, limestone): hard-bond blade or a blade specifically rated for natural stone
- Reinforced concrete with rebar: laser-welded or metal-bond segment blade explicitly rated for reinforced concrete — standard concrete blades will degrade rapidly on rebar
- Never use a blade on a machine it is not rated for. Check the RPM rating on the blade and match it to your tool's maximum RPM.
For angle grinder curved cuts, a 4.5" continuous rim diamond blade (turbo rim for faster cutting) works well on most paving slabs and flagstone. For cut-off saws, follow the manufacturer's recommendations exactly, Husqvarna and STIHL both publish blade compatibility guides for their machines and cutting incorrect materials with an incorrect blade can cause blade failure or saw damage.
Consumables and ancillary items
- Chalk line or pencil and straight edge for layout
- Hardboard or thin ply for curve templates
- Batten and screws for trammel/compass setup
- Masking tape to protect finished surfaces adjacent to the cut
- Garden hose or water pump for wet cutting
- HEPA-filtered wet-dry vacuum (if using water is not practical)
- Stiff brush and bucket (never dry-sweep silica-laden dust — use damp methods)
PPE and dust control: the part you can't skip
Cutting concrete, masonry, and stone releases respirable crystalline silica, particles small enough to reach deep into your lungs and cause silicosis, an incurable progressive disease. OSHA's construction silica standard (29 CFR 1926.1153) exists precisely because this risk is serious and well-documented. NIOSH data shows that unprotected concrete grinding and cutting can produce exposures many times above safe thresholds. This isn't scare-mongering, it's the reason proper dust control is the first thing to sort out, not an afterthought.
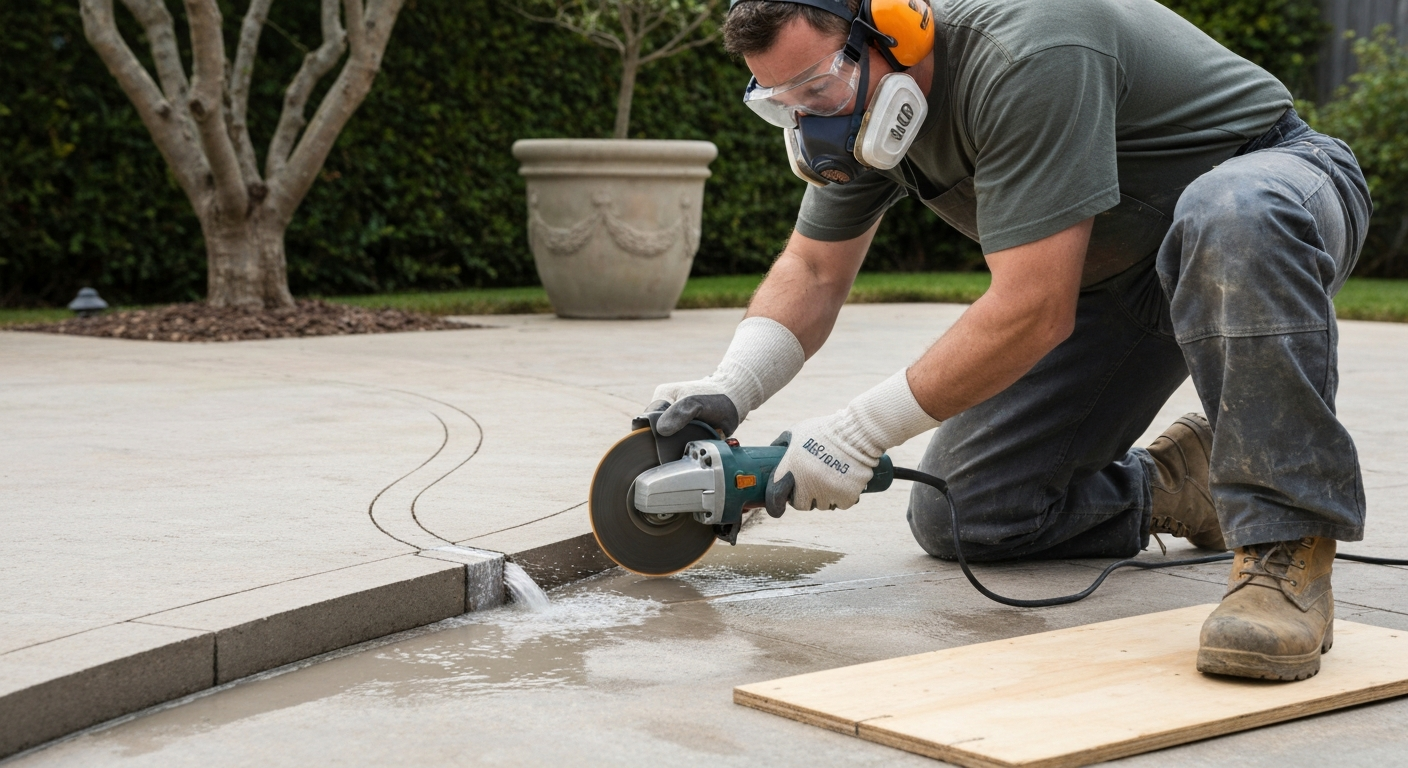
Minimum personal protective equipment
- Respirator: P100 half-face respirator (or better) — a dust mask or paper mask is not adequate for silica. N95 is a minimum; P100 is better for repeated or prolonged cutting
- Eye protection: safety glasses or goggles (not sunglasses)
- Hearing protection: cut-off saws and angle grinders run at 90–110 dB
- Cut-resistant gloves: diamond blades are unforgiving
- Sturdy work boots with toe protection
- Long sleeves and trousers: stone fragments travel
Dust suppression: wet cutting
Wet cutting is the most effective and practical dust control for patio work. NIOSH recommends wet methods (water sprays) for cutting and grinding concrete and provides guidance and validated sampling approaches (e.g., NIOSH Method 7500) for assessing respirable crystalline silica exposures (Safe Work Practices | Silica | NIOSH/CDC). Run a steady trickle of water at the blade contact point while cutting, a garden hose with a gentle flow works, though a dedicated water attachment is cleaner. Most cut-off saws including the STIHL TS 420 and Husqvarna K760 have water kit accessories; use them when possible. The water suppresses the dust at the source, cools the blade (extending its life significantly), and reduces glazing. Don't let the water flow stop mid-cut, a dry, hot blade is a wasted blade.
When wet cutting isn't practical
If you genuinely can't use water (working near an electrical hazard, freezing temperatures, or equipment not rated for wet use, check the manual), use a HEPA-filtered vacuum connected to a dust shroud on the grinder or saw. This is the second-best control according to OSHA and NIOSH guidance. A standard shop vac without a HEPA filter is not adequate, it will recirculate fine particles. After cutting, clean up with damp methods only. Never dry-sweep or blow silica-laden debris with compressed air.
What to expect from each material
Not all patio slabs cut the same way. The material affects blade choice, cutting speed, breakout risk, and finishing requirements.
Poured concrete slabs
Poured-in-place concrete is the most demanding material for curved cuts. It's typically 100 mm thick or more, often contains aggregate that can be hard on blades, and may have rebar or wire mesh inside. Cured concrete (over 28 days old) is hard and dense, requiring a soft-bond blade. Green or recently poured concrete is more abrasive and cuts faster but produces more slurry. Staged shallow passes, never trying to plunge to full depth in one go, are essential for safe, accurate curved cuts in poured concrete.
Paving slabs (concrete or reconstituted stone)
Most residential paving slabs in the UK and North America are pressed concrete or reconstituted stone, 35–50 mm thick. They're easier to cut than poured concrete and more forgiving of technique, but they still produce significant silica dust. The main risk is breakout, the slab cracking from the cut line rather than following it. This is caused by applying too much pressure, using a dull or wrong blade, or not supporting the cut-off section properly. Support the waste piece so it doesn't drop and lever against the cut as you finish.
Natural stone and flagstone
Flagstone (sandstone, slate, limestone, bluestone) varies enormously. Sandstone is relatively soft and abrasive, needs a harder-bond blade, and cuts without too much resistance but produces a lot of fine dust. Slate is layered and tends to split along natural planes, this is actually useful for gentle curves where you can coax a split along a scored line. Limestone and bluestone are denser and harder. For tight curves in flagstone, an angle grinder with a continuous-rim diamond blade is typically the better choice over a larger saw because the smaller disc radius can follow the curve. Score the line first, then deepen in stages.
Marking and layout for tight curves
Getting an accurate curved cut starts with an accurate layout. Rushing the marking is the number one reason curved cuts end up looking rough or asymmetrical.
Using a trammel for consistent arcs
A trammel is just a rigid batten with a pivot at one end and a scribe or pencil at the measured radius. Anchor the pivot at your centre point (a screw through ply works on a workbench; a masonry nail into a mortar joint or a brick works in situ), measure your radius along the batten, fix the pencil, and swing the arc. For radii over about 600 mm this gives you a much more consistent line than any freehand approach.
Using a cardboard or hardboard template
For irregular curves, fitting around a curved planter, a tree base, or an existing feature, make a template from cheap hardboard or thick cardboard. Cut the template to the final shape you want, test it in position, trim and adjust until it fits perfectly, then trace it onto the slab with a chalk pencil or pencil and straight edge. This takes an extra 20 minutes but eliminates expensive mistakes. Mark clearly which side of the line is waste, it sounds obvious but is easy to lose track of once you're cutting.
Working solo on tight curves
Working alone on a curved cut is manageable on individual paving slabs, you can mark, move the slab to a stable cutting surface, and cut without needing assistance. Where a helper genuinely matters is when cutting in situ in a large poured slab: one person to run the saw, one person to manage the water feed and keep the hose out of the blade path. If you're solo on a larger cut, set up the water feed on a slow trickle and secure the hose so it feeds water to the blade without you having to hold it.
Step-by-step curved cutting procedure
These steps apply broadly across materials, with material-specific notes where the approach differs.
- Set up your work area. If cutting individual slabs, place the slab on a stable surface — two timber offcuts across a workbench or on the ground, positioned so the waste end is unsupported and can drop clear without binding the blade. If cutting in situ, clear the area and set up water supply.
- Don your full PPE before picking up any tool. Respirator, eye protection, hearing protection, gloves, boots. Don't compromise on this.
- Mark the cut line clearly. Use chalk or pencil. Mark which side is waste.
- Score the line first. With your angle grinder (or saw), make a first shallow pass of 5–10 mm following the curved line carefully. Don't try to cut to depth straight away. This scoring pass guides the blade for subsequent passes and reduces breakout at the surface.
- Deepen in staged passes. On paving slabs (35–50 mm), you'll typically need 2–3 passes. On poured concrete (100 mm), expect 4–6 passes with a cut-off saw. Drop the depth by 10–15 mm per pass. Keep the blade moving along the curve — don't dwell in one spot or you'll overheat the blade.
- Manage the water feed. Keep a steady trickle at the blade point throughout. If you stop cutting, you can pause the water, but restart it before the next pass.
- Support the waste piece. As you approach the final pass, have a second person or a timber wedge ready to support the waste section so it doesn't drop and crack the slab or trap the blade.
- Complete the final pass. Follow the scored line at full depth. Keep steady, controlled pressure — let the blade do the work.
- Remove the waste piece carefully. Don't lever it with the blade. Use a bolster chisel if it needs persuasion.
- Inspect the cut edge. Some chipping on the underside is normal. The top face should be clean if you scored first.
Cutting very tight curves (radius under 150 mm)
For a radius that a saw blade simply can't follow, use a relief-cut technique with an angle grinder. Make a series of straight cuts from the waste edge into the curve line, spaced 10–15 mm apart, these are relief cuts. Then run the grinder along the curve line. The small sections between relief cuts snap or grind away cleanly, and the grinder can follow the arc because each segment is short. Finish the edge with the grinder at a low angle to smooth any steps between relief cuts.
Handling rebar and mesh
If your slab scan shows rebar, you have a few decisions to make. Cutting through rebar with a standard masonry blade will destroy the blade quickly and can cause it to bind or kick back. You need a blade explicitly rated for reinforced concrete, laser-welded segments or metal-bond blades designed for this purpose are available from Husqvarna and other manufacturers. Expect slower cutting, more heat, and more wear than on plain concrete. Cut at a steady pace and let the blade cool between passes.
Wire mesh (welded wire fabric) is easier than rebar but still accelerates blade wear. If the mesh is close to the surface, it may be possible to cut just the top layer of concrete and then use bolt cutters to snip the mesh before completing the cut. This depends on the mesh depth and slab design, so use your judgment based on what the scan shows.
As noted earlier, if there is any indication that the slab could be post-tensioned (typically in commercial settings, structured decks, or some later-built residential slabs), do not cut it without engineer approval and specialist contractor involvement. Penhall: scanning and special procedures for post‑tension and reinforced concrete (Penhall) recommends verifying tendon locations with GPR or ferroscan and never cutting post‑tension tendons without engineer approval or specialist procedures. A severed post-tension tendon can cause sudden and violent structural failure.
Finishing and smoothing the cut edge
A freshly cut edge is sharp and often slightly uneven. For a patio, the edge quality matters visually and practically, a ragged edge catches on feet and looks poor once the slabs are laid.
Run your angle grinder along the cut edge at a low angle (about 45 degrees) to chamfer off the sharpest corners, this is called arrissing and it makes a real difference to the finished look. For paving slabs, a rubbing block (a coarse abrasive block used wet) will smooth any remaining irregularities and tidy up small chips. On natural stone, you can blend the cut edge into the natural face texture by working across the edge with the grinder and a coarse flap disc. On poured concrete edges that will remain visible, a stiff brush and a light wash while the cut dust is still damp will clean the face without smearing.
Repairing or replacing the cut section
Once the curved slab piece is cut, bedding it in properly is just as important as the cut itself. A curve-cut slab needs the same full-coverage mortar bed as any other slab, spot bedding under a curved edge creates a stress concentration and the slab will crack under load. If you're replacing a damaged slab that required a curved cut to fit, remove all old mortar from the base before re-laying. Use a semi-dry mix (a 4:1 sand:cement screed that holds its shape when squeezed) and bed to a consistent depth, checking with a spirit level and rubber mallet. For step-by-step instructions on fixing damaged slabs, preparing the base, and practical repair tips, see our guide on how to repair patio slabs.
For in-situ curved cuts through a poured concrete patio, where you've cut to create a curved edge or remove a section, the cut faces are now exposed and should be sealed. A penetrating concrete sealer applied to the cut edge will slow water ingress and reduce freeze-thaw damage at the joint. For more on long-term care and treatments, see our guide on how to protect patio slabs. Pointing the joint between the cut slab and adjacent slabs (or between the concrete and a border) should be done once the slab has settled, don't rush this. For step-by-step guidance on repairing and re-pointing patio slab joints, see how to repair patio slabs pointing (resource id 5d0eed97-2a15-44b8-9d33-cd7f4c437009). Related next steps like pointing and protecting the finished surface are worth doing properly once the cutting work is done.
Realistic time and cost estimates
| Job scope | Estimated time (DIY) | Approximate tool/material cost |
|---|---|---|
| Single paving slab, simple arc, angle grinder | 1–2 hours including setup and cleanup | $20–$50 (blade + consumables, tools likely owned) |
| 3–5 paving slabs, curved edge, angle grinder or circular saw | Half day (3–5 hours) | $50–$120 (blades, possible tool hire) |
| Single large poured concrete slab, curved cut, cut-off saw | Half to full day | $80–$200 (saw hire, blades, water kit, PPE if needed) |
| Multiple poured concrete slabs, long arc, walk-behind saw | Full day or more | $150–$400+ (saw hire per day, specialist blades, PPE) |
| Reinforced slab with rebar, any size | Add 50–100% to above estimates | Add $30–$80 for reinforced-concrete blades; scan cost $50–$150 if hiring a locator |
These are genuine DIY estimates including time to set up, work safely, and clean up properly. If your job is coming out at the more complex end, reinforced concrete, large arcs through thick slabs, or multiple sections, get a quote from a concrete cutting contractor before committing. A pro with a track-mounted saw and vacuum shroud can often complete a large curved cut in an hour or two. Their time is expensive, but so is renting equipment, buying specialist blades, and then doing a poor job.
Common problems and how to fix them
| Problem | Likely cause | Fix |
|---|---|---|
| Blade glazes over and stops cutting | Wrong bond hardness for the material; too soft a material for a soft-bond blade | Dress the blade by making a few passes through abrasive material (brick, or a dedicated dressing stick) |
| Slab cracks during final pass | Waste piece not supported; blade binding; too deep a single pass | Support waste sections as you cut; use staged passes; replace cracked slab |
| Cut wanders off the line | Too fast, too much pressure, blade deflection on curve | Score the line first; reduce speed; use a smaller disc for tighter curves |
| Excessive breakout on the top face | Blade dull or wrong type; no scoring pass first | Score before deepening; replace a worn blade; use a continuous-rim blade for cleaner entry |
| Blade overheats, smells burning | Insufficient water; cutting too deep per pass; wrong blade | Check water flow; reduce depth per pass; verify blade rating |
| Rebar hit, blade slows dramatically | Rebar encountered without reinforced-concrete-rated blade | Stop, change to reinforced-concrete blade, proceed slowly |
| Edge chips badly after cut | No arrissing; natural stone split plane; dried concrete crumbling | Chamfer edge with angle grinder; for stone, accept some natural variation; seal exposed aggregate edges |
When to hire a professional
I'll always tell you if a job is outside reasonable DIY territory, and curved concrete cutting has some clear lines. Call a concrete cutting contractor if: the slab is post-tensioned; the slab is over 150 mm thick and you're working a long arc; you've found rebar and don't have a reinforced-concrete-rated blade and experience cutting reinforced slabs; the job involves structural elements (a patio that also serves as a retaining base or is connected to a foundation); or the area is indoors or poorly ventilated, where silica dust control becomes significantly more difficult without specialist extraction equipment.
A concrete cutting specialist will use track-guided saws, diamond-impregnated blades designed for the specific material, and integrated dust suppression. They'll get a better result faster and more safely on complex jobs. Getting a quote costs nothing and might surprise you, it's often less than the hire cost and materials for doing it yourself badly.
What to do next
Once the curved cuts are done and the slabs are bedded in, the work isn't quite finished. The joint between newly cut slabs and adjacent pieces needs pointing, the mortar or jointing compound that fills the gap, locks the slabs in place, and keeps water from tracking underneath. For detailed step‑by‑step guidance on the best way to point patio slabs, consult our dedicated pointing guide. The cut edges, particularly on porous natural stone, benefit from sealing to slow weathering. If you've added a new curved section to extend your patio, the sub-base preparation and laying process matters as much as the cut quality for long-term performance. For step-by-step advice on tying a new curved section into existing paving, sub-base preparation, and joint details, see our guide on how to extend patio slab. And if your project involved installing anything into the slab, lights, drainage, edging, those follow-up tasks have their own requirements. If your project involved installing anything into the slab, lights, drainage, edging, those follow-up tasks have their own requirements, see how to put lights in patio slabs for guidance on recessed lighting installation and waterproofing. The cut is the beginning, not the end. If you're planning decorative finishes after cutting and relaying, see our guide on how to stencil patio slabs for stencil selection, surface prep, and durable application techniques.
FAQ
What are the main reasons to cut curves in patio slabs and when should I consider it as a DIY project?
Common reasons: fit patio to landscaping or plant beds, create rounded edging for appearance and safety, route around obstacles (trees, posts), or remove damaged sections. DIY is reasonable for small radii in pavers, flagstone, or thin slabs, and for modest arcs in non‑reinforced concrete using handheld tools. Hire a pro if slabs are heavily reinforced, post‑tensioned, part of a structural slab, if you need very smooth long radii, or if scanning detects utilities/rebar you can't safely avoid. If in doubt about reinforcement or structural role, consult an engineer or contractor.
What tools and consumables will I need for cutting curves in different patio materials?
Basic list: angle grinder (4–7") with diamond blade for tight curves and flagstone; circular masonry saw or compact dry/wet saw for thicker paving slabs; walk‑behind concrete saw or track saw for long smooth arcs in concrete; handheld cut‑off saws for heavy slabs; masonry chisels and cold chisels; hammer or rubber mallet; masonry drill with carbide bit (for relief holes on tight curves); rebar/utility locator (cover‑meter or GPR) to scan for reinforcement; HEPA vacuum or dust shroud; water supply for wet cutting (hose and splitter or water kit). Consumables: diamond blades rated for the material (soft bond for abrasive aggregate, hard bond for dense stone), diamond cup/grinding wheels for finishing, replacement blades, personal protective equipment (N95 or P100/half‑mask respirator for silica, ideally powered‑air if exposures high), safety goggles, face shield, ear protection, gloves, knee pads, water management supplies, and trash bags for waste.
How do I choose the right diamond blade for concrete, paving slabs, or flagstone?
Match blade to material hardness and presence of reinforcement. For dense, hard stone use a harder bond; for abrasive or soft aggregate use a softer bond (blade suppliers note this). Use blades labeled for masonry/concrete for general work; choose reinforced‑concrete or metal‑cutting blades if you expect to hit rebar or steel. Confirm blade diameter and RPM compatibility with your saw and follow manufacturer recommendations. When cutting reinforced concrete expect slower cutting and accelerated wear — use blades designed for that purpose.
What respiratory and dust‑control measures should I use?
Dust from cutting concrete, pavers, and flagstone commonly contains respirable crystalline silica. Preferred controls: wet cutting (water suppression) and local exhaust (dust shroud hooked to HEPA vacuum). OSHA/NIOSH guidance recommends wet methods and HEPA vacuums; dry sweeping is not acceptable. At minimum use an appropriate respirator: NIOSH‑approved N95 for short low‑exposure tasks; for prolonged or uncontrolled dust use an elastomeric half‑mask with P100 filters or a powered air‑purifying respirator (PAPR). Always wear eye/face protection and hearing protection. For homeowners, use water suppression when possible and a shop vacuum with HEPA filter when not.
How do I mark and lay out a curve, for both small and large radii?
Small radii (tight curves around beds or circles): use a compass method — a stake at the center and a string with a pencil/chalk to scribe the radius. For irregular arcs, snap a chalk line or trace a template (cardboard or plywood) fitted to the edge. Large radii or long arcs: use a long string or garden hose as a guide, stake ends and adjust until the curve looks right, then mark the cut line with chalk or a mason’s crayon. Mark relief cut locations if you plan staged cutting, and note any intended straight lead‑in/out cuts to connect to the curve.
Step‑by‑step: How do I cut a tight curve in paving slabs or flagstone?
1) Clean and wet the area to suppress dust. 2) Mark the curve with a string or template. 3) Make multiple short relief cuts with an angle grinder (4–7") along the marked line, spaced closely until you can break out small pieces. 4) Remove broken pieces with a chisel and hammer, working slowly. 5) Refine the curve with the grinder or an abrasive cup wheel, keeping the blade cooled with periodic water. 6) Finish edges with hand chisel for a natural look or grinding for smoothness. Always wear PPE and control dust with water/HEPA vacuum.
Next Article
How to Repair Patio Slabs Pointing and Repoint Joints
Step-by-step guide to repair patio pointing: remove loose mortar, repoint joints, stop rocking, weeds, and water intrusi