The best way to protect patio slabs is to seal them with a penetrating silane/siloxane sealer, keep the joints fully filled with the right mortar or polymeric sand, maintain a proper drainage fall away from the house, and fix small problems before they become big ones. None of that is complicated, but most patio damage I've seen comes down to one or more of those things being skipped or left too long.
How to Protect Patio Slabs: Sealing, Pointing & Repairs

Talia Lang
30 Jul 2026
What this guide covers and who it's for
This guide is for DIY homeowners who want to either protect a patio they already have or get more life out of one that's starting to show its age. It walks you through diagnosing what's actually wrong (or likely to go wrong), deciding which jobs you can handle yourself and which ones aren't worth the gamble, and then working through the practical steps for the most important protection tasks: sealing, repointing, drainage, edge restraints, and sub-base basics. There's also guidance on decorative work like stenciled surfaces, cutting curves, extending a patio, and fitting in-slab lights, since all of those affect how well slabs hold up over time if they're done badly. The seasonal maintenance schedule near the end will help you keep on top of things without a major project every year.
Quick diagnosis: what to look for before you do anything
Before you buy a sealer or mix any mortar, spend 20 minutes actually looking at your patio. Most people skip this and end up treating the symptom rather than the cause. Here's what to check.
Surface and slab condition
- Hairline cracks: fine surface cracks that don't go all the way through are usually cosmetic or caused by shrinkage. They let in moisture and will widen over freeze-thaw cycles if ignored.
- Structural cracks: wider cracks that go through the full depth of the slab, or cracks that are still moving, are a more serious sign of sub-base failure or ground movement. Epoxy injection can restore structural integrity for cracks down to around 0.002 in (0.05 mm), but only when further movement is not anticipated — if the ground beneath is still shifting, filling the crack buys you nothing.
- Spalling and scaling: surface flaking or pitting, usually caused by freeze-thaw action on a poorly sealed or low-quality slab. Common on concrete slabs that were sealed too late or not at all.
- Efflorescence: white powdery bloom on the surface. This is soluble salts migrating out through the slab with moisture. It's harmless structurally but signals moisture movement through the slab, which will eventually cause more damage.
- Settlement and trip edges: lay a 1-2 m spirit level or a 10-ft straightedge across slabs. Industry tolerances for finished paving are roughly 1/8 inch in 24 inches and 1/4 inch in 10 feet. Anything greater than that is worth addressing, especially if it's creating a trip hazard or causing water to pond toward the house.
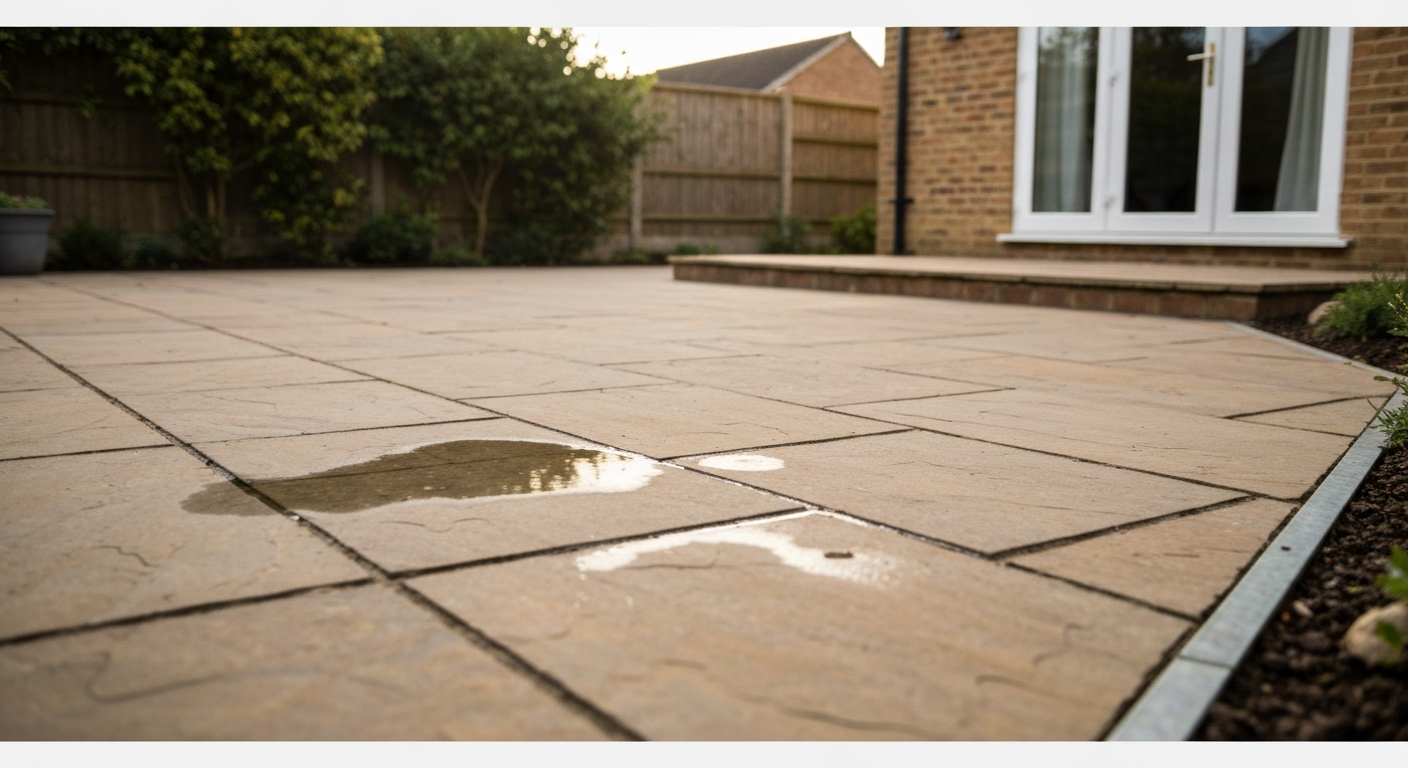
- Ponding water: water sitting on the surface after rain means either the fall (slope) is wrong, drainage is blocked, or slabs have subsided. Don't seal over a ponding problem — it won't fix it.
- Frost-related surface flaking: similar to spalling but usually in a regular pattern across the slab surface. Often gets worse each winter if nothing is done.
Joints and edges
- Missing or crumbling mortar: joints that have dropped out, cracked through, or turned powdery. This is the single most common cause of patio deterioration — water gets under the slabs and the freeze-thaw cycle does the rest.
- Vegetation in joints: moss, weeds, and grass growing between slabs indicate joint material has failed and organic debris has accumulated. The roots can shift slabs over time.
- Loose or rocking slabs: press down on each corner. Any movement means the bedding underneath has washed out or failed. A loose slab will crack under repeated loading.
- Edge restraint failure: slabs spreading outward at the perimeter, usually because there was never a proper edge restraint or it has corroded or shifted.
A simple water bead test for existing sealant
Flick a small amount of water onto a dry slab. If it beads up and sits on the surface, the sealer is still active. If it soaks straight in within a few seconds, the sealer has gone and the slab is unprotected. This is worth doing before you decide whether resealing is urgent or can wait another season.
DIY or call a professional? How to decide
I want to be honest here: most routine patio maintenance is well within DIY capability. But there are situations where calling someone in is the smarter and cheaper option in the long run.
| Situation | DIY or Pro? | Why |
|---|---|---|
| Cleaning and resealing | DIY | Straightforward with rented or owned pressure washer and off-the-shelf sealer |
| Repointing failed joints (cosmetic/maintenance) | DIY | Manageable with basic tools and the right mortar mix |
| Replacing a few cracked or loose slabs | DIY | Lifting and relaying individual slabs is achievable with basic groundwork knowledge |
| Widespread settlement across multiple slabs | Pro (assess first) | May indicate sub-base failure requiring excavation and full reinstatement |
| Structural cracks with active movement | Pro | Need to identify and address root cause before any surface repair |
| Major drainage problems affecting the house | Pro | Drainage that connects to foundations, soak-aways, or mains drainage needs a qualified assessment |
| Cutting complex curves in hard stone (granite, porcelain) | DIY (with right tools) or Pro | Possible DIY with a good angle grinder and wet blade, but hard materials carry real injury risk |
| In-slab lighting with mains electrical connections | DIY prep + licensed electrician | Cable routing and slab prep is DIY; mains connections must be done by a qualified electrician |
| Extending a patio that involves building regulations or drainage changes | Pro assessment | Planning considerations and drainage impact may require professional input depending on size and location |
The general rule I follow: if the problem is at the surface (joints, sealer, a couple of slabs), it's usually DIY territory. If the problem is structural or underground (sub-base, drainage, foundations), get a professional opinion before you start digging.
Prioritized prevention: tackle these in this order
If you're working on a patio that's still in reasonable condition and you want to keep it that way, here's how I'd prioritize the work. Do them in this order because each one builds on the last.
- Fix drainage first. A patio with the wrong fall, blocked drainage channels, or ponding water will deteriorate regardless of what else you do. Minimum fall is 1.5 to 2 percent (15 to 20 mm per metre) away from the house. Check this with a spirit level before anything else.
- Repoint or regrout all joints. Failed joints let water under the slabs, which destroys the bedding and causes frost damage from below. No point sealing a patio with failed joints — sort the joints first.
- Repair or relay any loose or sunken slabs. A loose slab will crack, and a sunken slab will pond water. Both will undermine everything around them.
- Install or reinstate edge restraints. Without a solid edge, slabs gradually spread outward and joints open up. Plastic or aluminium edging spiked into the sub-base keeps everything locked in place.
- Seal the surface. Once the joints are solid, the slabs are level, and drainage is right, apply a quality sealer. This is the last layer of protection, not the first fix.
- Address sub-base concerns. If you've had repeated settlement or frost heave, the sub-base may need topping up or replacing in problem areas. This is the most disruptive job but solves recurring problems permanently.
Patio slab installation basics that affect long-term protection
Even if your patio is already laid, understanding the installation principles helps you diagnose what went wrong and do it right if you're relaying slabs or extending the patio. For a step-by-step tutorial on how to patio slabs, consult the dedicated how to patio slabs guide.
Fall and slope
Every patio needs a consistent fall of at least 1.5 to 2 percent away from the house or toward a drain. That's 15 to 20 mm drop per metre of patio width. Less than this and water will pond. It sounds like a small detail but it's probably the most common reason patios fail prematurely.
Sub-base depth and compaction
For a pedestrian patio, a minimum of 4 inches (100 mm) of compacted hardcore or crushed aggregate sub-base is generally acceptable in well-drained soils, but 6 to 8 inches (150 to 200 mm) is the better standard, especially in areas that get hard frosts or where the ground is clay-heavy. The sub-base must be compacted in layers using a plate compactor, tipping in a thick layer and compacting it once isn't the same thing. Skimping on this is the single biggest cause of long-term settlement.
Bedding layer
Slabs are typically laid on a semi-dry mortar bed (roughly 50 mm deep) or, for flexible systems, a compacted sharp sand bedding layer. The bedding must be consistent in depth and fully support the slab across its full area, not just at the corners. A slab bedded only at the corners will rock and crack under foot traffic.
Joint spacing
Standard joint widths for concrete pavers are typically 3/16 to 1/4 inch (4 to 6 mm). Larger format slabs and natural stone may require wider joints to accommodate minor size variation. Joints narrower than about 3 mm are difficult to mortar-point effectively and generally need a resin or adhesive-based jointing product. Joint depth should ideally be at least two-thirds of the slab thickness to give the mortar enough depth to bond and resist being pushed out.
Tools and materials you'll need
The list below covers the main tasks in this guide. You won't need everything for every job, use it as a reference when planning what to buy or hire.
| Task | Tools | Materials |
|---|---|---|
| Cleaning | Pressure washer (1,200–2,000 PSI for pavers; up to 3,000 PSI for dense concrete), surface cleaner attachment, stiff brush, garden hose | Patio cleaner/degreaser, specialist stain removers as needed |
| Sealing | Low-pressure garden sprayer or short-pile roller, paintbrush for edges, gloves and eye protection | Penetrating silane/siloxane sealer or film-forming acrylic/polyurethane sealer depending on finish required |
| Repointing | Mortar rake or small angle grinder with raking disc (dust shroud recommended), pointing trowel, bucket and mixing paddle, stiff brush, sponge | Pointing mortar (4:1 building sand:Portland cement with plasticiser, or pre-mixed repointing products), water |
| Polymeric sand jointing | Stiff brush, leaf blower or broom, garden hose with misting setting | Polymeric jointing sand or polymeric jointing mortar |
| Lifting and relaying slabs | Bolster chisel, lump hammer, pry bar, plate compactor (hire), spirit level, rubber mallet | Sharp sand or semi-dry mortar bedding mix, jointing material |
| Cutting curves | Angle grinder with diamond wet/dry blade, or circular saw with masonry blade, safety goggles, hearing protection, dust mask (P3) | Marked-up slab, chalk line or template |
| Edge restraints | Mallet, spike driver or SDS drill, string line | Plastic or aluminium paver edging, galvanized spikes |
| In-slab lighting | Core drill or angle grinder, conduit, cable ties | IP68-rated LED paving lights, armoured cable (SWA), conduit — mains connection by qualified electrician only |
Cleaning and sealing: step by step
Sealing is the most impactful single thing you can do to protect patio slabs from moisture, staining, frost damage, and algae growth. But it only works if you clean properly first and pick the right sealer for your slab type. When cleaning before sealing, professional sources recommend moderate pressure washer settings, typically 1,200–2,000 PSI for pavers (up to 3,000 PSI on dense concrete) and using a surface‑cleaner attachment to avoid washing out joints.
Choosing the right sealer
There are two main categories to understand. Penetrating sealers (silane/siloxane impregnators) soak into the slab and repel water without changing how the surface looks. They're breathable, so moisture can still escape from below, which is important for freeze-thaw performance. These are my default recommendation for most patios. Film-forming sealers (acrylics, polyurethanes, epoxies) sit on top of the surface and form a physical coating. They offer better stain resistance and can enhance colour, but they can make surfaces slippery when wet, trap moisture if applied over a damp slab, and tend to need reapplication every 1 to 3 years in exposed conditions. Penetrating silane/siloxane sealers typically last 3 to 10 or more years depending on traffic and abrasion, which makes them more cost-effective over time for most outdoor situations.
Step-by-step cleaning and sealing process
- Clear the patio completely and remove any loose joint material, weeds, and debris from joints.
- Pressure wash the surface using 1,200 to 2,000 PSI for pavers and block paving (to avoid washing out joint sand) or up to 3,000 PSI for dense concrete with a surface cleaner attachment. Keep the nozzle moving — holding it in one spot will damage the surface. Work in consistent overlapping passes.
- Treat stains: use a degreaser for oil or grease stains with a hot water flush; use a specialist poultice or manufacturer-recommended cleaner for rust or deep mineral staining. Always test in a small inconspicuous area first — some cleaners will etch certain stone types or change colour.
- Allow the surface to dry completely — typically 24 to 48 hours in dry weather. This step is non-negotiable. Sealing over a damp slab traps moisture and causes the sealer to fail, often going white or milky.
- For new concrete, wait a full 28 days after pour before applying most sealers unless the product datasheet specifically allows earlier application.
- Do a small test patch in a corner — apply sealer to a 30 cm square area and check adhesion, appearance, and that the product behaves as expected on your specific surface before committing to the whole patio.
- Apply penetrating sealer using a low-pressure garden sprayer or a short-pile roller. Typical coverage for silane/siloxane products is roughly 100 to 400 sq ft per gallon (2.4 to 10 m² per litre) depending on how porous your slabs are — denser slabs need less. Follow the product datasheet for your specific sealer.
- Allow the first coat to penetrate for the manufacturer's stated dwell time, then apply a second coat if the first has fully absorbed (wet-on-wet or wet-on-dry, per the datasheet). Avoid puddling — wipe off or brush out any excess that has not absorbed.
- Keep foot traffic off for several hours and heavy use off for at least 24 hours, or as directed by the sealer manufacturer.
- Recheck with the water bead test every year or two. When water stops beading, it's time to reseal.
Protecting stenciled patio surfaces
If you've applied a decorative stencil finish to your slabs (or you're considering it), sealing is even more important because the paint or stain layer is the first thing that wears away under UV exposure and foot traffic. For step-by-step instructions on achieving a durable, attractive stencil finish, see how to stencil patio slabs. Use a film-forming polyurethane or acrylic sealer over stenciled surfaces rather than a penetrating sealer, the film-forming type sits on top and physically protects the decorative layer. Apply it once the stencil paint has fully cured (follow the paint manufacturer's guidance, usually at least 24 hours). Reapply every 1 to 2 years on a well-used patio, or sooner if you see the colour dulling or the surface feeling rough. When cleaning stenciled surfaces, avoid high-pressure washing directly over the pattern and don't use acidic cleaners, both will lift the finish faster than normal weathering would.
Common sealing mistakes to avoid
- Sealing over damp slabs: causes the sealer to go milky or peel within weeks.
- Sealing over failed or missing joints: water will still get under the slabs through the joints — sort the pointing first.
- Using the wrong sealer on the wrong material: some natural stones (sandstone especially) are sensitive to certain sealers; always check with the manufacturer for your specific slab type.
- Applying too thickly: film-forming sealers applied too heavily can streak, peel, or create a slippery surface. Two thin coats are always better than one thick one.
- Skipping the test patch: this one has saved me more than once from having to strip a sealer off an entire patio.
Repointing patio slabs: the right way to do it
Repointing is probably the most neglected patio maintenance job and one of the highest-impact ones. Failed joints are the entry point for water, weeds, and frost damage. Getting the joints right and keeping them right is more important than any sealer. If you need a step-by-step walkthrough, see our guide on how to repair patio slabs pointing. For step-by-step instructions on how to repoint joints correctly, see the guide on the best way to point patio slabs.
Mortar pointing vs. polymeric jointing: which to use
| Method | Best for | Pros | Cons |
|---|---|---|---|
| Traditional mortar pointing (4:1 sand:cement) | Natural stone flags, wide joints, large format slabs | Strong, durable, weather resistant, cheap materials | Slower to apply, needs curing time, can crack if ground moves, requires mixing |
| Lime/NHL mortar | Softer historic stone, period patios, flexible situations | Flexible enough to move slightly, less likely to damage soft stone | Slower to cure, more expensive, needs more care in cold/wet weather |
| Polymeric jointing sand | Sand-set block paving, standard paver joints (4–6 mm) | Fast to install, good weed resistance, locks in place with water activation | Not suitable over mortar-pointed joints, not ideal for very narrow (<3 mm) or deep joints, can look uneven if installation conditions aren't right |
| Polymeric jointing mortar (wet-applied) | Wider joints, porcelain and large format pavers, awkward joint profiles | Strong bond, flexible, good for awkward situations | More expensive than sand, installation technique needs care, limited re-work window |
For most standard patio slabs with joints of 6 mm or wider, a traditional mortar mix of 4 parts building sand to 1 part Portland cement with a small amount of plasticiser is reliable, inexpensive, and long-lasting. Pavingexpert recommends a mortar mix of roughly 4 parts building sand to 1 part Portland cement for pointing and also highlights polymeric jointing sands or modern polymeric jointing mortars as often preferable for many block/paver joints, especially narrow ones, because they stabilise faster and reduce wash‑out risk Pavingexpert recommends a mortar mix of roughly 4 parts building sand to 1 part Portland cement and notes polymeric jointing sands or modern polymeric jointing mortars for many paver joints.. For block paving with standard 4 to 6 mm joints, polymeric jointing sand is a genuinely good option and much faster to apply. For joints narrower than about 3 mm (common with porcelain tiles), you'll need a resin-based or adhesive jointing product, standard mortar won't key into a joint that narrow.
How to repoint patio slabs: step by step
- Rake out the old joint material to a consistent depth using a mortar rake, a small angle grinder fitted with a raking disc (use a dust shroud and P3 dust mask — fine silica dust is a serious health hazard), or a plugging chisel and lump hammer for smaller areas. Aim to remove material to at least two-thirds of the slab depth where possible.
- Brush the joints clean with a stiff brush to remove all dust and loose particles. A leaf blower is useful for wider areas.
- Check the weather forecast. Do not point in temperatures below 5°C (41°F) or when rain is expected within 24 hours. Mortar that gets rained on before it sets will wash out and fail.
- Lightly dampen the joints with a fine mist of water before pointing — this prevents the joint edges from sucking moisture out of the mortar too quickly, which causes weak, crumbly joints. Don't soak them.
- Mix your mortar: 4 parts building (soft) sand to 1 part Portland cement, with a small squirt of plasticiser mixed into the water first. The consistency should be firm enough to hold its shape but not crumble — similar to stiff mashed potato. Mix in small batches to avoid waste.
- Press the mortar into the joints using a pointing trowel or a flexible grout squeegee for wide areas. Work it in firmly and in layers if the joint is deep. Compact as you go to avoid voids.
- Finish the joint to match the surrounding profile — flush, slightly recessed, or weathered edge depending on your preference and the original style. Avoid a proud (raised) finish as this catches water.
- Clean the slab surfaces as you work — wipe off mortar smears with a damp sponge before they set. Dried mortar on natural stone can stain and is difficult to remove without risking damage.
- Keep the newly pointed joints damp for the first 24 hours (a light misting morning and evening in dry weather) to allow a slow, strong cure. Keep foot traffic off for at least 24 hours and avoid pressure washing or heavy rain for several days.
- For polymeric jointing sand: brush the dry sand into clean, dry joints, compact with a plate compactor (for block paving) or hand tamp, sweep off the excess completely from the slab surface, then mist with water using a fine spray to activate the binding polymer. Follow the manufacturer's instructions precisely for timing and water application — getting this wrong is the most common reason polymeric sand fails.
Tips for durable joints
- Never point over loose or unstable slabs — fix the bedding first, or the new pointing will crack as the slab moves.
- Work in sections you can finish and clean up in one session — mortar that starts to set before you finish pointing is harder to work with and will produce a weaker joint.
- In cold weather, cover newly pointed joints with hessian or a polythene sheet weighted at the edges to protect from frost while curing.
- If you get mortar haze on the slab surface after cleaning, a very dilute acid wash (carefully applied per manufacturer's instructions and neutralised afterward) can remove it from concrete or dense stone — but never use acid on limestone, sandstone, or other acid-sensitive materials.
- Recheck joints every spring. Small failures caught early take 10 minutes to fix; ignored for two winters they become a full repointing job.
Lifting, relaying, and replacing damaged slabs
If individual slabs are sunken, cracked through, or rocking, they need to come up and be relaid rather than patched over. Patching a cracked slab that's sitting on failed bedding is cosmetic at best, it'll crack again within a season. Lifting and relaying a handful of slabs is a straightforward afternoon job if you've done any basic groundwork. For a step-by-step guide on lifting, relaying, and other slab repairs, see how to repair patio slabs.
Use a bolster chisel and lump hammer to carefully break the old pointing around the target slab, then lever it up with a pry bar. Remove the old bedding mortar and inspect the sub-base underneath, if it's washed out, soft, or contaminated with fine material, top it up with compacted crushed aggregate before relaying. Mix a fresh semi-dry mortar bed, reposition the slab to the correct level and fall using a spirit level and rubber mallet, and allow the bed to set before repointing the joints. For structural cracks in concrete slabs that aren't due to ground movement, epoxy injection is a legitimate repair option for cracks of 0.05 mm or wider, but it's worth addressing whatever caused the crack first.
Cutting curves, extending patios, and fitting in-slab lights
Cutting curves in patio slabs
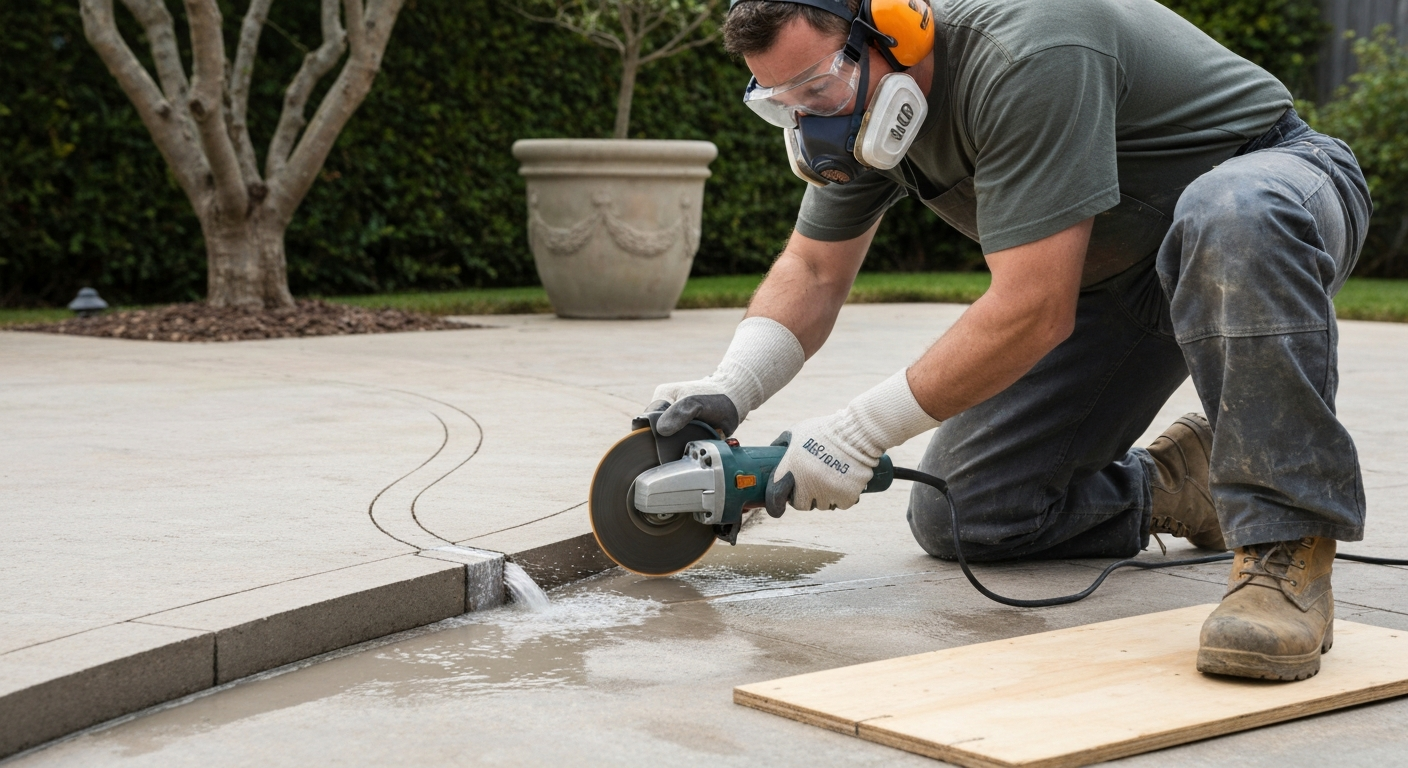
Curved cuts are achievable with an angle grinder fitted with a diamond blade, but they require patience and proper safety gear (eye protection, hearing protection, P3 dust mask, and gloves as an absolute minimum). Mark your cutting line clearly with chalk or a marker, make a series of shallow cuts following the curve rather than trying to cut the full depth in one pass, and score progressively deeper. For a step-by-step walkthrough, see how to cut curves in patio slabs. For very tight curves on hard materials like porcelain or granite, a wet-cutting diamond blade on an angle grinder will give cleaner results and reduce the risk of shattering the slab. Never cut indoors or in confined spaces without proper dust extraction, crystalline silica dust causes serious lung damage with repeated exposure.
Extending a patio
Extending a patio follows the same installation principles as laying from scratch: correct sub-base depth (4 to 8 inches compacted), proper bedding, falls toward drainage, and edge restraints on all new free edges. The key extra consideration is matching the new section's level and fall to the existing patio, this sounds obvious but is easier to get wrong than you'd think. String lines and a long spirit level between the existing edge and the new work are essential. If you're extending a patio significantly (adding several square metres), also consider whether the drainage capacity of your current outlet is adequate for the increased impermeable area.
Fitting lights into patio slabs
In-slab lights require cutting or core-drilling a recess into the slab for the light fitting, laying conduit for the cable before the bedding is reinstated, and routing the cable to a power source. For step-by-step instructions on how to put lights in patio slabs, see the dedicated guide on that topic. The slab prep and conduit installation are DIY work. The mains electrical connection is not, this must be done by a qualified, registered electrician. Use only IP68-rated LED paving lights specified for in-ground use and armoured (SWA) cable rated for buried external use. Cheap, unrated fittings fail quickly and present a real safety risk. Plan all cable routes before laying any slabs, retrofitting conduit under an existing patio is significantly more disruptive and expensive.
Seasonal maintenance schedule
The best patio protection isn't a single big job, it's small, regular maintenance that catches problems before they compound. This is the schedule I'd follow on my own patio.
| Season | Tasks |
|---|---|
| Spring (March–April) | Full inspection for winter damage; clear moss and algae growth; check joints for frost damage and repoint any that have failed; check drainage channels are clear; do the water bead test to assess whether resealing is needed |
| Summer (June–August) | Clean as needed; treat any oil or stain marks promptly before they set; check edge restraints and reseat any that have shifted; ideal time for sealing (warm, dry conditions) |
| Autumn (September–October) | Clear leaf debris from surface and drainage channels before wet season; treat any efflorescence; apply sealer if not done in summer and the surface needs it; repair any loose slabs before frost arrives |
| Winter (November–February) | Avoid using rock salt (sodium chloride) as a de-icer — it damages concrete and stone surfaces; use grit or sand instead; check for frost heave and note any new movement for spring repair; avoid pressure washing in near-freezing temperatures |
Realistic longevity and cost expectations
A well-installed patio with good drainage, properly filled joints, and regular sealing can realistically last 20 to 30 years before major work is needed. A poorly installed one can start failing within 3 to 5 years. The difference is almost always the sub-base, the falls, and the joints, not the slabs themselves.
On the cost side: a penetrating sealer for an average patio (say 30 to 40 m²) will cost roughly £30 to £80 for the product depending on brand and coverage, plus a couple of hours of your time. Repointing materials are cheap, a bag of building sand and a bag of cement will cover most average patios for under £20. The labour savings over hiring a contractor are significant, but the more important point is that doing these jobs regularly means you're never facing a full patio replacement, which is where the real cost sits.
Safety notes worth reading before you start
- Silica dust: cutting, grinding, and raking mortar from joints all release fine crystalline silica dust, which causes irreversible lung disease (silicosis) with repeated exposure. Always wear a P3-rated dust mask for any cutting or grinding work. Use a wet-cutting method or vacuum dust extraction where possible.
- Pressure washer safety: never point a pressure washer at people, pets, or electrical fittings. Be especially careful around in-slab lights, edge lighting, and external sockets.
- Chemical cleaners: read datasheets before using acid-based cleaners — they will etch limestone, marble, and other acid-sensitive materials. Neutralise and rinse thoroughly. Wear gloves and eye protection.
- Electrical work: all mains electrical connections for in-slab or garden lighting must be carried out by a qualified electrician. In the UK this is a Part P notifiable work requirement in many cases.
- Lifting heavy slabs: full-size patio slabs can weigh 30 to 50 kg each. Use proper lifting technique, ask for help, and use a slab lifter or suction lifter tool for large format slabs — back injuries from manual slab handling are extremely common.
FAQ
How do I inspect and diagnose problems with patio slabs?
Walk the patio and use a 1–2 m spirit level or 10 ft straightedge to spot unevenness. Look for: hairline vs structural cracks, spalling/scaling, efflorescence (white bloom), settlement (trip edges or ponding), missing/deteriorated joint material, vegetation in joints, frost flaking. Measure deviations — industry tolerances ~1/8" in 24" or ~1/4" in 10 ft for finished paving. Note where water stands or runs toward buildings: identify likely causes (poor fall, blocked drains, inadequate sub‑base). Take photos and map problem types before planning repairs.
What preventative measures should I prioritize to protect patio slabs?
Priority checklist: 1) Ensure adequate fall/drainage away from structures (min ~1.5–2% recommended). 2) Secure a rigid edge restraint (plastic/metal/haunching) to hold paving laterally. 3) Confirm a competent sub‑base (4" minimum, 6–8" preferred in poor soils) well compacted in lifts. 4) Use correct jointing: mortar for wide/natural stone joints; polymeric or compacted sand for narrow pavers. 5) Seal where appropriate (penetrating silane/siloxane for breathability and freeze protection; film‑forming for color/enhancement). 6) Prevent vegetation and clear debris; keep gutters and drains functioning. 7) Monitor and maintain seasonal (clean, re‑seal periodically).
Which sealer type should I use — penetrating or film‑forming?
Penetrating (silane/siloxane): water‑repellent, breathable, invisible — best for freeze‑thaw protection and where natural look must be retained. Film‑forming (acrylics, polyurethane, epoxy): creates a surface layer, enhances color and stain resistance, changes sheen, and may reduce breathability — use if appearance and stain protection are priorities. Choose per substrate, traffic, and manufacturer datasheet; test a small area first.
How do I clean and seal patio slabs (step‑by‑step) and what tools/materials do I need?
Tools/materials: pressure washer (1,200–2,000 PSI typical), surface cleaner, stiff brush, joint rake, degreaser/stain cleaners, silane/siloxane or chosen sealer, low‑pressure pump sprayer or roller, PPE. Steps: 1) Remove furniture, sweep loose debris. 2) Clean stains with suitable cleaners; degrease oil, use poultice for rust if needed. 3) Pressure‑wash at moderate pressure, avoid washing out joints; allow full drying (24–48 h). 4) Test sealer on a small area. 5) Apply sealer per product: low‑pressure spray or roller, working in sections. 6) Allow manufacturer curing before foot/vehicle traffic (follow datasheet). 7) Use bead test later to check effectiveness (water should bead if active).
How often should I reapply sealers?
Penetrating silane/siloxane: typically 3–10+ years depending on traffic and weather. Film‑forming acrylics: often every 1–3 years in exposed or high‑traffic areas. Use bead/wetting tests and inspect wear; reapply sooner where abrasion, UV or chemical exposure is high. Always follow the manufacturer’s guidance and test first.
How do I repoint patio joints — tools, mix and technique?
Tools: mortar rake or small angle grinder (with dust control), stiff brush, pointing trowel/finishing tool, bucket, mixing hoe. Mix: for external flagstone a common trade mix ~4 parts building sand : 1 part Portland cement; for historic/soft stone consider lime or NHL mortars. Technique: 1) Remove old mortar to a consistent depth (usually two‑thirds of slab thickness where possible). 2) Brush clean and dampen joints. 3) Press mortar in layers, compacting to avoid voids. 4) Tool to desired finish and cure per conditions (avoid pointing in freezing/rainy weather). For narrow joints or sand‑set pavers, consider polymeric jointing products (follow product instructions and weather windows).
Next Article
How to Cut Curves in Patio Slabs, Step-by-Step DIY Guide
Step-by-step DIY guide: how to cut curves in patio slabs, tools, safety, wet vs dry methods, finishing tips