Most loose, moving, or wobbly patio slabs come down to one of three things: the bedding underneath has washed out or was never properly installed, the base beneath that wasn't compacted enough, or the joints between slabs have broken down and let water in to do damage over time. In almost every case, you can fix it yourself by lifting the problem slab, rebuilding the support underneath, re-setting it level, and finishing the joints properly. The only time you really need to stop and call someone is when you're dealing with a large concrete slab that has sunk significantly, or when you suspect a structural problem underneath.
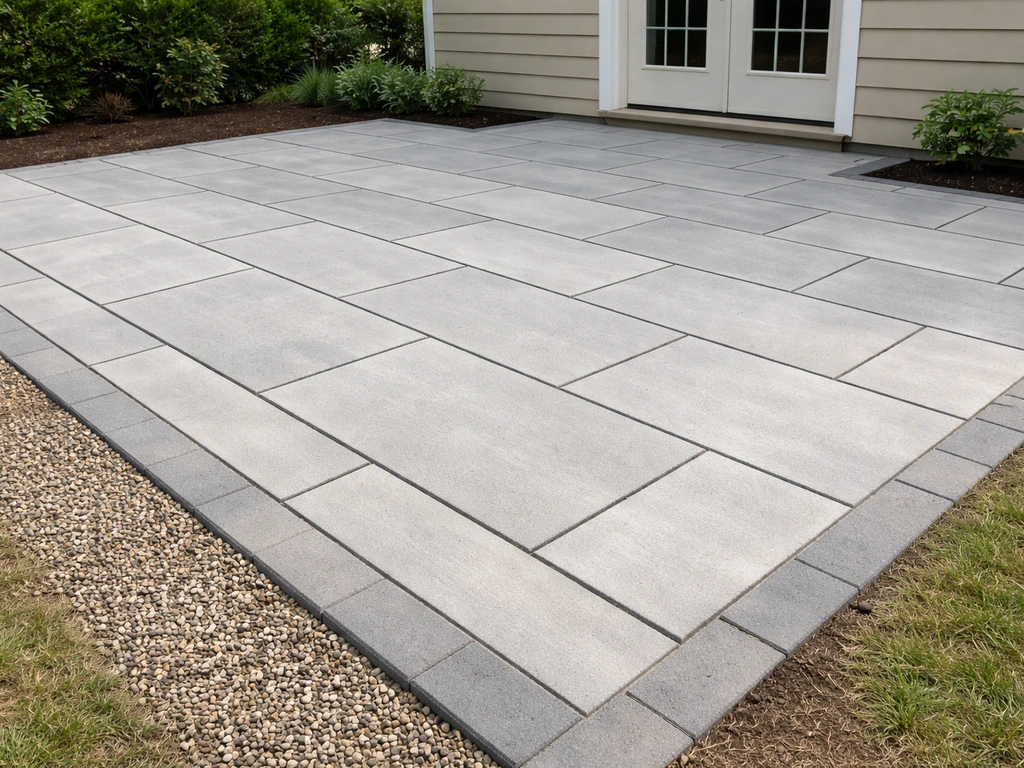
How to Repair Patio Slabs: Fix Loose, Moving, Wobbly Ones

Talia Lang
16 Jun 2026
Why your patio slabs are loose or moving
Before you fix anything, it's worth spending five minutes understanding what went wrong, because if you just re-set the slab without fixing the root cause, it'll be rocking again within a season or two.
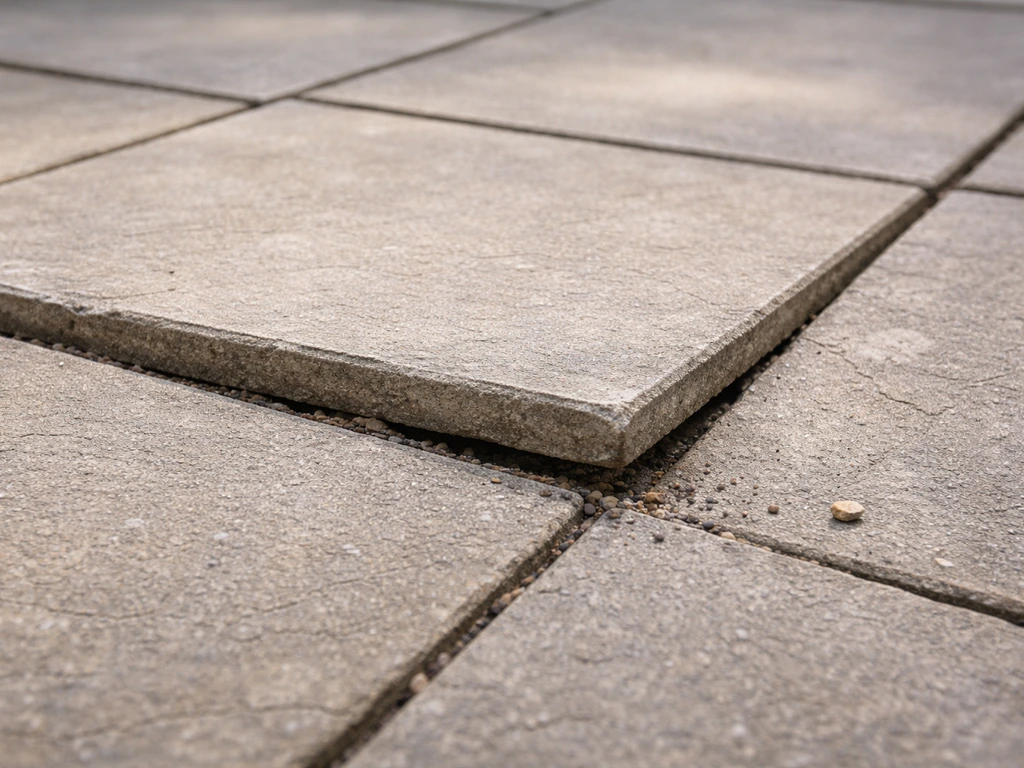
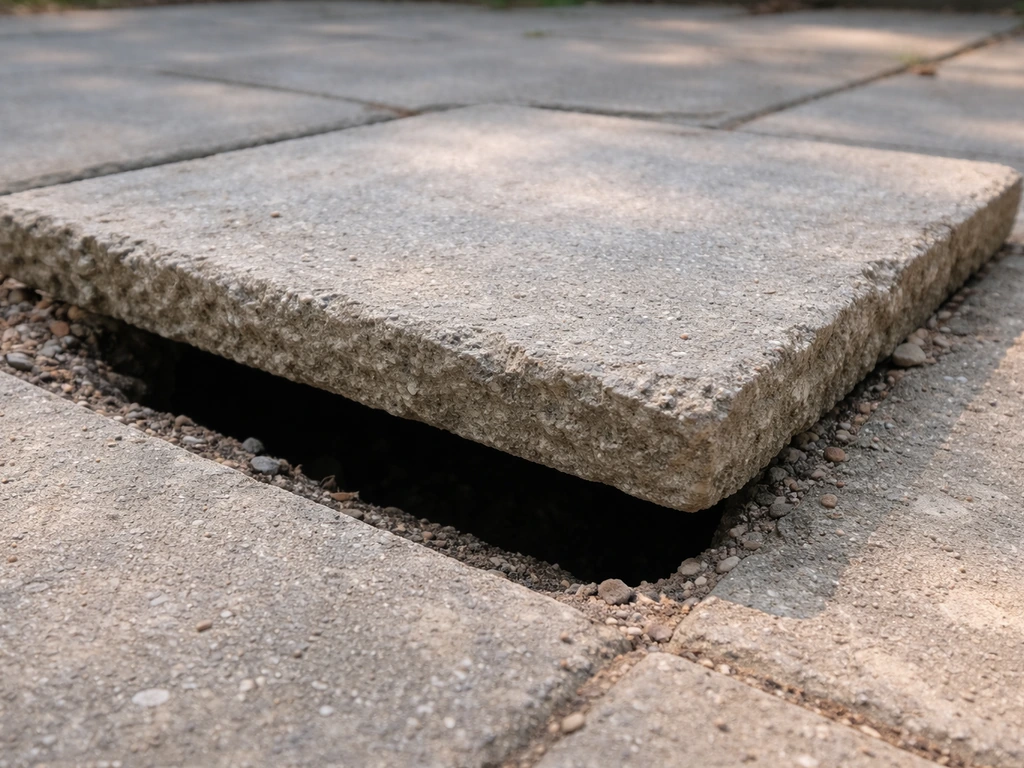
The most common culprit is a void underneath the slab. When slabs are laid using a spot-bedding method (small blobs of mortar at the corners and center rather than a full mortar bed), gaps are left under the slab from day one. Over time, those gaps grow as the mortar crumbles, sand erodes, or the ground settles. The slab rocks because there's literally nothing supporting part of it. You can usually confirm this by tapping the slab with your knuckle or a rubber mallet. A hollow sound means a void.
The second cause is base failure. The compacted gravel or hardcore layer that sits under your bedding is what everything else rests on. If it wasn't compacted properly during installation, or if water has been getting underneath and eroding it, you'll see slabs sink unevenly or shift sideways. This is especially common along the edges of a patio where edge restraints are missing or have failed, because water has an easy entry point there.
The third cause is joint breakdown. The material between slabs, whether that's pointing mortar, standard kiln-dried sand, or polymeric sand, keeps each slab locked in position and stops water from getting underneath. When joints crack, crumble, or wash away, water gets in, erodes the bedding, and the slabs start to rock. Cracked joints also let plant roots in, which can lever slabs upward over time.
Other contributing factors include drainage problems (water pooling on or around the patio and repeatedly saturating the base), frost heave in colder climates (frozen water under the slab expands and pushes it up), and tree roots from nearby trees growing under the patio. It's worth identifying which of these applies to your situation before you start any repair work.
Safety checks first, and knowing when to call a pro
A wobbly slab is a trip hazard, so if you have elderly visitors or kids running around, tape it off or put something visible on it while you gather your materials. Beyond that, there are a few safety checks worth doing before you lift anything.
If you're planning to dig out and replace the base material under your patio, call 811 before you break ground. This is a free service in the US that contacts your local utility companies to come out and mark buried electric, gas, water, and communications lines. In the U. S.
, always call 811 before excavation so utilities can mark the locations of buried electric, gas, water, and communications lines call 811 before you break ground. You might think you know where everything runs, but underground lines don't always go where you'd expect.
It takes a couple of days for marking to happen, so factor that into your timeline. In the UK, use the "Dial Before You Dig" service. This step isn't optional.
Now for the honest part: some patio repairs really do need a professional, and it's better to know that upfront. Stop the DIY approach and call a contractor if:
- A large concrete slab (not individual pavers) has sunk more than an inch or two and you're looking at mudjacking or polyurethane foam injection to lift it. These processes involve drilling through the slab and injecting material under pressure, which is manageable for experienced DIYers but easy to get wrong if you overfill and crack the slab.
- You find soft, boggy, or consistently wet soil under the patio when you lift a slab. This suggests a drainage or groundwater problem that needs to be addressed before any repair will hold.
- Slabs are cracked through, not just surface-level cracking. A slab that's broken in two won't re-level properly and needs replacing, not resetting.
- The patio is connected to or abutting your house foundation, and there are signs of foundation movement or settlement. This is a structural issue and not a patio repair job.
- You lift a slab and find the ground underneath has eroded significantly over a wide area. Spot repairs won't hold, and you need a contractor to assess whether the whole base needs rebuilding.
Tools and materials you'll need
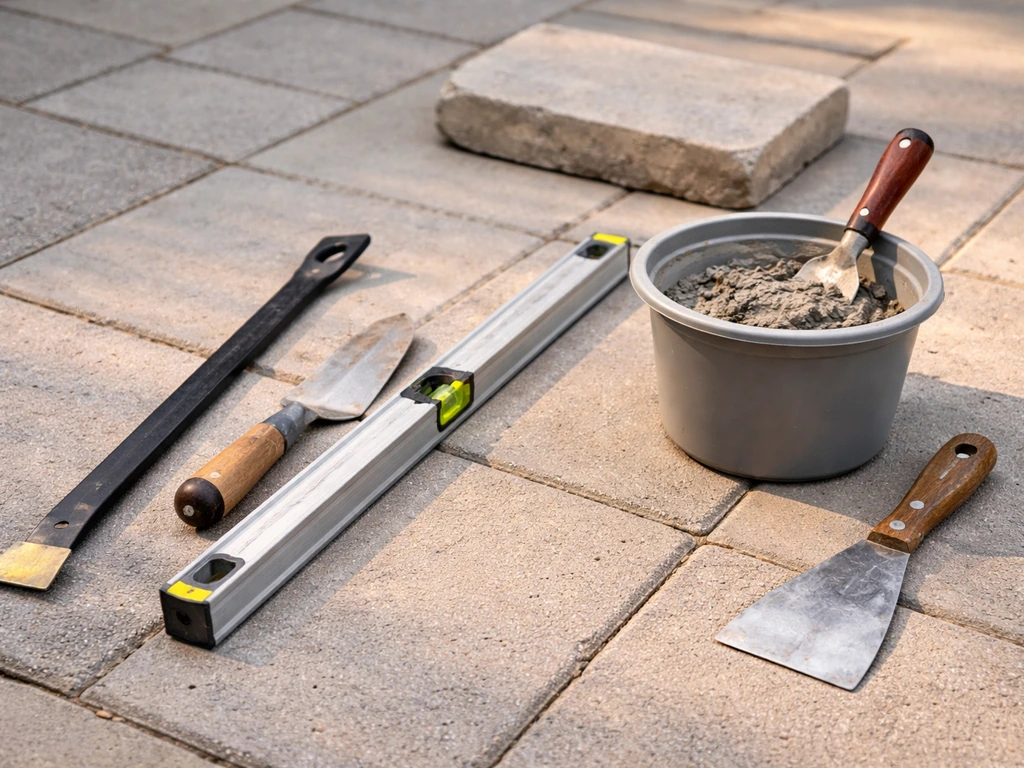
The exact list depends on what you find when you lift the slab, but here's what to have on hand before you start. Running to the hardware store mid-job when you've got a slab sitting on your lawn is frustrating.
| Item | What it's for |
|---|---|
| Pry bar or flat bar (24–36 inch) | Lifting and levering slabs without cracking them |
| Rubber mallet | Tapping slabs down into position without chipping edges |
| Spirit level (4 foot if possible) | Checking that the reset slab is level and matches surrounding slabs |
| Sharp spade / margin trowel | Removing old bedding, shaping the sand bed, and pointing joints |
| Stiff brush and soft brush | Clearing debris and sweeping joint material into gaps |
| Sharp sand (coarse sand) | Re-bedding slabs when using a sand bed method |
| Dry-mix mortar or ready-mix pointing mortar | Full mortar bed re-laying or joint re-pointing |
| Polymeric jointing sand | Re-filling joints on slabs that are being re-set in a sand bed |
| Compactable hardcore / MOT Type 1 gravel | Replacing or topping up failed base material |
| Plate compactor (hire if needed) | Compacting replaced base material properly |
| Protective gloves, knee pads, safety glasses | Personal protection throughout the job |
| Timber off-cuts or wooden wedges | Propping lifted slabs safely while you work underneath |
One note on mortar: if your slabs were originally laid on a full mortar bed, you'll want to match that when re-setting them. If they were laid on sharp sand, stick with sand. Mixing methods between old and new sections can create inconsistent settlement.
Step-by-step: re-leveling moving patio slabs
This is the approach to use when a slab (or a few slabs) has shifted or sunk below the level of the surrounding patio, creating a dip or uneven surface that causes pooling water or a tripping hazard. Methods like concrete lifting or leveling typically work by filling voids beneath settled slabs and raising them by pressure-injection through holes drilled in the slab.
Stenciling patio slabs is a great way to add pattern and texture, and it works best after the surface is clean, level, and fully cured stencil patio slabs. You can also use similar re-leveling and support steps when installing or upgrading lights in patio slabs so the surface stays stable.
If you’re looking at a larger slab or planning expansions, follow a dedicated approach for extending patio slabs so the base and joints are set up correctly extend patio slab.
- Clear the area around the problem slab. Remove any furniture, pots, or debris, and brush the joints clean so you can see what you're working with.
- Score the joints with a cold chisel or old screwdriver to break the seal between the slab and its neighbors. This prevents you from cracking an adjacent slab when you lever the target slab up.
- Insert your pry bar into the joint at one corner and apply steady upward pressure. Work around two or three sides to gradually break the slab free of its bed. Never try to pop it up from one side only, as this can crack the slab.
- Once it's free, slide it to the side or lift it onto wooden off-cuts on the ground nearby. Slabs are heavier than they look. A typical 600x600mm paving slab weighs around 32kg (70lbs), so have a second person help if you can.
- Examine what's underneath. Scrape away all the old bedding material. If you see a void (empty space), soft compressible soil, or the original mortar blobs have just crumbled away, you need to address this before re-laying.
- If the base material (the compacted gravel/hardcore layer below the bedding) looks solid and intact, just top up the bedding layer. If it's been eroded or compacted unevenly, add more Type 1 gravel and compact it with a plate compactor or hand tamper before adding bedding.
- For a sand bed: add enough sharp sand to bring the slab up to target height (allowing for the slab thickness), then use a screed board to level and firm the sand surface. The bed should be slightly higher than you want the finished surface, because the slab will settle it down when you tap it into place.
- For a mortar bed: mix a relatively dry mortar (around 4 parts sharp sand to 1 part cement), spread it across the full underside area of the slab position to an even depth of about 30–40mm, and trowel it smooth.
- Lower the slab back into position, aligning it carefully with the surrounding slabs. Use your rubber mallet to tap it down evenly across the surface.
- Check with your spirit level in multiple directions. The slab should match the gradient of the rest of your patio (typically a slight fall of around 1:60 away from the house for drainage). Adjust by adding or removing bedding material and re-setting as needed.
- Leave the slab for at least 24 hours before walking on it if you've used mortar bedding. Sand-bedded slabs can usually be walked on the same day once the joints are filled.
Step-by-step: re-setting and realigning loose patio slabs
This is specifically for slabs that have shifted sideways, rotated out of alignment, or feel loose underfoot but haven't necessarily dropped significantly in height. The process is similar to re-leveling, but the focus is on alignment and proper support rather than height correction.
- Tap the slab with your knuckle across its entire surface. Listen for hollow sounds that indicate voids. A slab can sit at roughly the right height but still rock because its support is only under one corner.
- Check the joints on all four sides. If joint material is missing, crumbled, or cracked through, water has likely been getting in and eroding the bed underneath. Note which joints have failed, because you'll be re-doing them all.
- Lift the slab using the same pry bar technique described in the re-leveling section above. Even if it's only slightly loose, you need to come out completely to fix the bedding properly.
- Remove all old bedding material from the slab's underside and from the ground. Chisel off old mortar if needed. Getting back to clean surfaces matters, because new mortar won't bond properly to old crumbled material.
- Check alignment spacers or edge restraints. If the slab shifted because the restraint holding it in place failed, fix that before re-laying. A missing edge restraint is one of the most common reasons a border slab keeps moving.
- Prepare a fresh, consistent bedding layer across the full footprint. For mortar beds, use a dry-ish mix and work to a uniform depth. Don't spot-bed, which is placing mortar only at corners and the center. Full bed coverage is what eliminates rocking.
- Lower the slab back into position, taking care to match the joint gap on all four sides. Use timber spacers (or off-cuts of the same thickness as your intended gap) to keep alignment consistent with adjacent slabs.
- Tap level with your rubber mallet, checking with the spirit level against both the slab itself and its neighbors.
- Once it's correctly positioned, press down firmly and check that it doesn't rock at all. If it still rocks, lift it again, adjust the bed, and re-set. Don't accept any movement at this stage.
Step-by-step: fixing wobbly patio slabs with bedding and joint repair
A wobbly slab that you can feel flex underfoot without it being noticeably out of level is usually a void and joint problem combined. Here's how to tackle it properly, including sorting the joint work that often gets skipped. For slabs that are pointing or leaning, focus on re-setting them square, rebuilding the support underneath, and then re-doing the pointing so water can't get back in joint work. If you want the full method, follow this step-by-step guide on how to patio slabs after re-setting and joint repair.
- Identify all the affected slabs. Wobble often spreads, because once one slab starts rocking, the movement gradually loosens the ones around it. Press each slab in its corners to see how many are affected before you start.
- Lift all affected slabs together rather than doing one at a time. This is more efficient and lets you see the full extent of any base or drainage problem underneath.
- With slabs removed, probe the ground with a screwdriver or spike. If it sinks in easily, the base material has been softened by water. If there's a visible hollow or void, you'll see it clearly now.
- For small, shallow voids (up to about an inch deep): fill with a dry-pack mortar mix (a very dry sand and cement blend, around 3:1 sand to cement). Tamp it down firmly with a piece of timber or a hand tamper. This is a solid approach for isolated voids under individual slabs.
- For larger or widespread voids under a solid concrete slab (not individual pavers): this is where mudjacking or polyurethane foam injection becomes relevant. Both methods involve drilling small holes (typically 1–2 inches in diameter) through the slab and injecting material under pressure to fill the void and raise the slab back to level. This is doable as a DIY job for confident and experienced DIYers, but the margin for error is small. Overfilling cracks the slab. If you're not comfortable, this is a reasonable job to hire out.
- For sand-bedded slabs with eroded bedding: rake out and remove all the existing sand, compact the base layer below it, then re-lay fresh sharp sand to the correct depth before re-setting the slabs.
- Once the slabs are back in position and confirmed fully stable (no movement at all when pressed in any corner), move on to the joints. Rake out all old joint material from every joint between and around the affected slabs. Don't just top up, because new material won't bond well to old crumbled material and the joint will fail again quickly.
- For mortar joints: mix a pointing mortar (typically 3 parts sharp sand to 1 part cement, or use a proprietary ready-mix pointing compound), press it firmly into the joint with a pointing trowel or a gloved finger, and profile it to a slight downward slope so water runs off. Keep the joint material slightly below the slab surface. Cover and keep damp for at least 24–48 hours while it cures. For more detail on this part of the job, the guide on how to repair patio slabs pointing covers the technique thoroughly.
- For polymeric sand joints: make absolutely sure all slabs are completely dry before you start. This is not optional. If the pavers are damp, polymeric sand will bond to the surface and leave a white haze that's very difficult to remove. Sweep the sand into the joints, compact it by running a plate compactor over the area (with a rubber mat underneath to protect the slabs), then sweep in a second pass to top up. Blow off all excess sand from the slab surfaces with a leaf blower before wetting. Then apply water in a gentle shower pattern, allow it to absorb, and apply a second time. Don't let the joints dry out completely between applications. Follow the specific product instructions, as curing windows vary by brand.
- Once joint material has cured, do a final press test on every slab. There should be zero movement. If any slab still rocks, lift it again and find out why.
Finishing: sealing, preventing the same problem, and your final check
With the slabs re-set and joints filled, you're nearly done. But a few finishing steps make the difference between a repair that lasts five years and one that needs redoing next spring.
Should you seal the slabs?
Sealing is optional, but it's genuinely useful in high-rainfall areas or on patios that pool water. A good patio sealer does two things: it reduces water ingress into the slab material itself (which reduces frost damage and algae growth), and it helps protect the joint material from erosion. Apply sealer only after mortar or polymeric sand joints have fully cured, which is typically a minimum of 7 days for mortar and 24–48 hours for polymeric sand, though always check the product you used. Apply sealer on a dry day when no rain is forecast for at least 24 hours. For more on this, the guide on how to protect patio slabs goes into the options in more detail.
Preventing it from happening again
The reason most patios develop wobbly or loose slabs is water getting underneath combined with insufficient base preparation from the start. You can't always fix the original installation, but you can manage water. Make sure your patio has a consistent fall of at least 1:60 (roughly 1cm drop for every 60cm of run) away from the house. Check that the surrounding ground isn't directing water toward the patio. Keep joints topped up and in good condition. Once the slabs are solid, a good pointing job can also help you achieve the best way to point patio slabs for a neat, water-shedding finish. Once joint material starts cracking or washing out, water gets in fast and the cycle repeats.
If your patio has consistently had drainage problems, consider adding a channel drain at the lower edge to intercept water before it pools on the surface or runs under the slabs. This is a bigger project, but it solves the root problem rather than treating symptoms.
Your final walkthrough
Before you pack up your tools, walk the entire patio and press firmly on every slab, especially in the corners. Listen for hollow sounds. Look at the joint lines: they should be consistent in width and filled flush or just slightly below the slab surface. Check that the patio still has its intended fall by placing your spirit level on a few slabs and seeing which direction the bubble moves.
Then do the same check after the first heavy rain. If a slab has shifted even slightly after a downpour, you've still got a drainage or base issue that needs addressing. Catching it early, before the void grows again, is what keeps a patio repair from becoming a full patio replacement.
FAQ
How can I tell whether the slab is loose because of a void, base failure, or joint washout before I lift it?
Do quick checks first: tap the slab for a hollow sound (void). Look for uneven height changes or side-to-side movement (often base failure), then inspect the joint lines for gaps, missing pointing, or joint sand that looks washed out or crusty (joint breakdown). If water stains or dark, damp areas appear along joints or edges, it often points to joint and bedding being compromised together.
What should I do if the slab rocks even after I re-bed it and re-set it level?
If it still rocks, you likely did not fully rebuild the support layer under the slab (for example, the void area was not removed, or the new base wasn’t compacted in lifts). Also check that the slab seats on the same bedding method as the rest of the patio (full mortar bed vs sharp sand or spot bedding). Any mismatch can cause uneven settlement within months.
How do I compact the base so slabs do not settle again?
Compact in thin lifts rather than dumping and leveling one thick layer. Use the right compaction method for the material (hand tamper for small areas, plate compactor for larger sections). After compaction, remove any loose or dusty top layer before placing bedding, because that thin “uncured” layer can act like a cushion and let slabs shift later.
Can I just scrape out the old joints and refill them instead of lifting slabs?
Sometimes, but only if the movement is limited and tapping confirms the underside is still supported. If the slab feels flex underfoot or you get a hollow sound, joint work alone will not stop rocking because the bedding or base underneath is already failing. In that case, lifting and rebuilding support is the durable fix.
How do I avoid damaging the surrounding slabs when lifting the problem one?
Work gradually and from the edges. Use thin shims or a pry bar to lift slowly, and stop if you see nearby slabs shift or crack. Keep debris out of the joint lines so you can reset adjacent pieces cleanly. If several slabs around the area have cracked joints, plan to lift a small cluster rather than fighting to isolate just one.
What materials should I use for the new bedding and joints if my patio was installed with different methods?
Match the existing method as closely as you can: if the slabs sit on a full mortar bed, replicate that rather than switching to sand. If the original looks like sharp sand or spot bedding, use the same style. For jointing, use the joint material type already present (pointing mortar vs kiln-dried sand vs polymeric sand) because compatibility affects curing, bonding, and long-term water resistance.
How long should I wait before walking on the repaired patio?
For safety and durability, do not rush. Mortar joints typically need at least a week to fully cure before heavy exposure. Polymer sand usually needs about 24 to 48 hours to set and lock in, but you should still avoid stressing the area early. If in doubt, extend the wait and keep foot traffic off until everything is firm and dry.
Should I seal repaired patio slabs, and when is it actually worth doing?
Sealing is most beneficial where rainfall is frequent or where water tends to pool at the surface. It helps reduce water uptake that can drive algae and frost damage, and it can protect joint material from erosion. Wait until the joints are fully cured and apply on a dry day with no rain forecast for at least 24 hours.
Why do my joint sand repairs wash out again after a while?
The usual causes are water getting underneath (drainage or base issue), joints that were not cleaned and re-filled to the correct depth, or the wrong joint material for the area. Also check whether the patio still has the intended fall away from the house. If a slab shifted after a heavy rain, joint washout is often a symptom of ongoing support failure beneath.
What drainage or slope checks matter most after repair?
Confirm the patio has a consistent fall (roughly 1 cm drop per 60 cm run) away from the house, and ensure the surrounding ground is not directing water toward the patio. After your first heavy rain, re-check for any movement, especially near corners and along edges where water enters under slabs.
When should I call a professional instead of continuing DIY repairs?
Call in a pro if you see significant sinking of a large slab, signs of structural problems beneath, or repeated re-shifting even after you’ve rebuilt the base and joints properly. Also consider professional help if access is difficult, utilities complicate excavation, or the patio has extensive movement across multiple sections.
Is it safe to start excavation before checking for underground utilities?
No. Always call the appropriate utility locate service (for the US, dial 811) before digging. Marking typically takes a couple of days, so build that into your timeline. In the UK, use the equivalent “Dial Before You Dig” service. This step prevents dangerous strikes and costly repairs.
How can I tell after heavy rain whether the repair is likely to hold?
Do two checks. First, walk the area and press firmly on slabs, especially corners, to see if any feel hollow or flex again. Second, visually inspect joint width and whether joint material has been washed out. If any slab changes position after rain, the root cause is not fixed yet, usually drainage or base preparation.
Next Article
How to Patio Slabs: DIY Layout, Base, Setting, Fixing
Learn how to install and fix patio slabs end to end with proper base, leveling, spacing, drainage, and joint sealing.