Most patios don't need to be torn out and rebuilt, they need to be diagnosed correctly and fixed in the right order. Whether you're dealing with cracked concrete, sunken pavers, pooling water, or a sealant that's peeling like old sunburn, the restoration process follows the same basic logic: find out what went wrong, fix the underlying cause, repair the surface damage, then protect it. If you follow the same step-by-step approach for identifying the cause, repairing the surface, and sealing properly, you have the core of how to refurbish a patio. Do those steps in the wrong order and you'll be back here next spring doing it all again.
How to Restore a Patio: Step-by-Step DIY Repairs

Talia Lang
8 Jun 2026
Quick diagnosis: what's actually wrong with your patio
Before you buy anything or pick up a tool, spend 20 minutes walking your patio and taking stock. The symptom on the surface usually tells you what failed underneath, and that's what determines your repair path.
| What you see | Likely cause | Repair path |
|---|---|---|
| Hairline cracks (under 1/8 in wide) | Normal shrinkage or thermal movement | Clean and seal with flexible crack filler |
| Wide or stepped cracks (1/4 in+) | Base settlement, freeze-thaw, or erosion | Patch or inject, but investigate base first |
| Spalling or flaking surface | Freeze-thaw damage, poor mix, deicing salt abuse | Surface patch if shallow; assess for replacement if deep |
| Sunken or rocking pavers | Sand washout, base failure, drainage issue | Re-bed pavers, repair base, add drainage |
| Standing water after rain | Inadequate slope, blocked drainage, settled surface | Re-grade or re-level; fix before resurfacing |
| White chalky film on pavers | Efflorescence (mineral migration) | Clean with efflorescence remover before sealing |
| Peeling or hazy sealant | Failed film-forming sealer, moisture trapped below | Strip old sealer completely, then re-seal |
For concrete specifically, do a quick "sounding" test on areas that look questionable: rap the surface firmly with a hammer or metal rod. A solid section rings with a sharp crack. A delaminated or hollow section sounds dull and thuddy. That dull sound means the concrete has separated internally and a surface patch won't hold there, you'll need to go deeper or remove that section entirely.
Safety and prep: clear the area before you do anything else
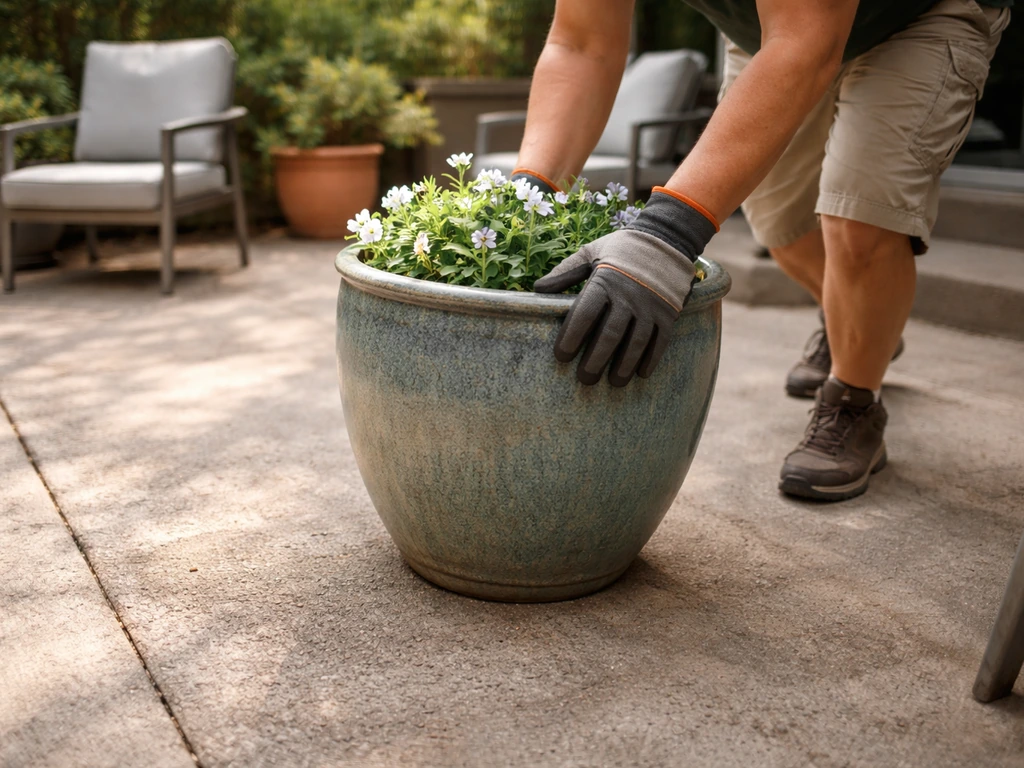
Clear all furniture, planters, and rugs off the patio. You need to see the full surface and you don't want to damage anything during cleaning or grinding. If you're working near the house foundation or garden beds, drape plastic sheeting over plantings and use painter's tape to protect the siding at the base, especially if you're pressure washing or applying chemical cleaners or strippers.
Silica dust is a real hazard when you're cutting, grinding, or chipping concrete. If you're using an angle grinder, rotary tool, or cold chisel on any concrete surface, wear an N95 or P100 respirator, not just a dust mask. Even better, use a grinder with a HEPA-filtered vacuum attachment, that combination keeps airborne silica dust down significantly and is the safest way to work. Safety glasses and knee pads round out the basics. Once the area is prepped, walk the whole perimeter and check that edge restraints on paver patios are still intact (buried plastic edging or concrete borders), damaged edges let pavers spread and sand escape, which is often the root cause of the whole problem.
Cleaning and removing failed sealant before any repairs
This section comes before patching and leveling for a good reason: you cannot bond a patch, a new sealer, or polymeric sand to a surface that still has failed sealant, efflorescence, or algae on it. Doing the cleaning step first is not optional.
Stripping old sealant
If the existing sealer is peeling, bubbling, or flaking, it has to come off completely. Use a dedicated chemical sealer stripper, products formulated specifically for this job are available at most masonry supply stores. Apply per the manufacturer's directions, let it dwell, and scrub or pressure wash it off.
For concrete sealer removal, match the stripper chemistry to your sealer type, and follow the manufacturer's directions for compatibility and cleanup rather than using random solvents follow the manufacturer's directions for stripper compatibility and cleanup.
Do not use muriatic acid, phosphoric acid, or other concrete etching acids as a substitute for a stripping product. Acid etches the surface and damages it, it is not a sealer remover and will create more problems than it solves. Always check the stripper's label for compatibility with your sealer type (solvent-based vs. water-based sealers often require different strippers).
Cleaning pavers and concrete
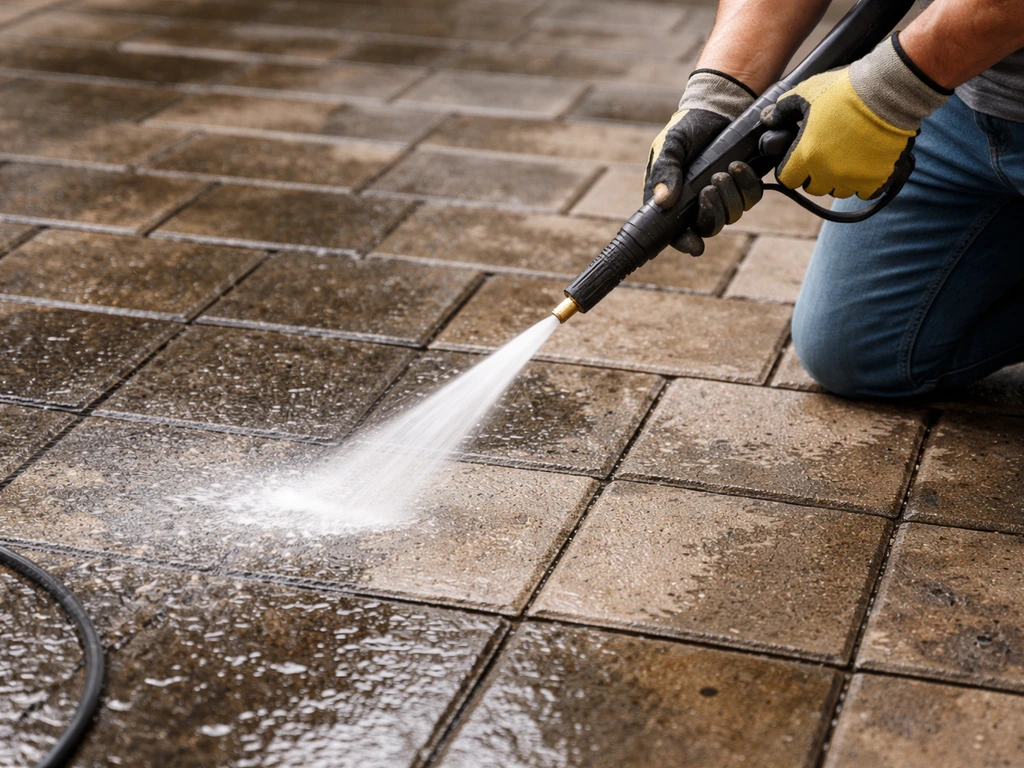
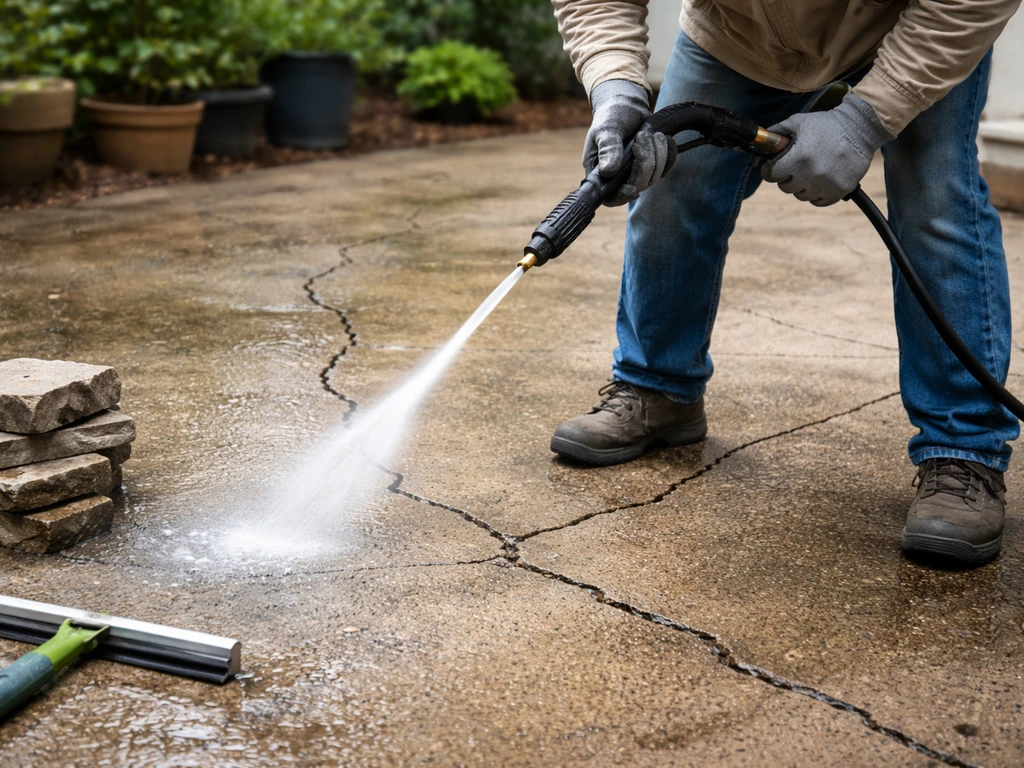
For pavers, a pressure washer around 1,500 psi works well for general cleaning. Hold the wand at a consistent 45-degree angle and keep a steady distance, going straight down or too close will blast jointing sand out of the joints, which defeats the purpose. For efflorescence (that white chalky film), use a dedicated efflorescence cleaner, not just a pressure washer alone. The mineral deposits need a mild acid-based cleaner to dissolve them properly. Rinse thoroughly afterward. For plain concrete, a concrete degreaser or TSP (trisodium phosphate) solution handles oil stains and organic buildup before patching.
Fixing cracked or spalling concrete
Not all concrete cracks are equal. A hairline crack in a flat slab that hasn't moved in years is cosmetic. A crack that's wider at one end, stepped (one side higher than the other), or actively growing is structural and warrants more investigation before patching.
Surface patching for spalling and shallow cracks
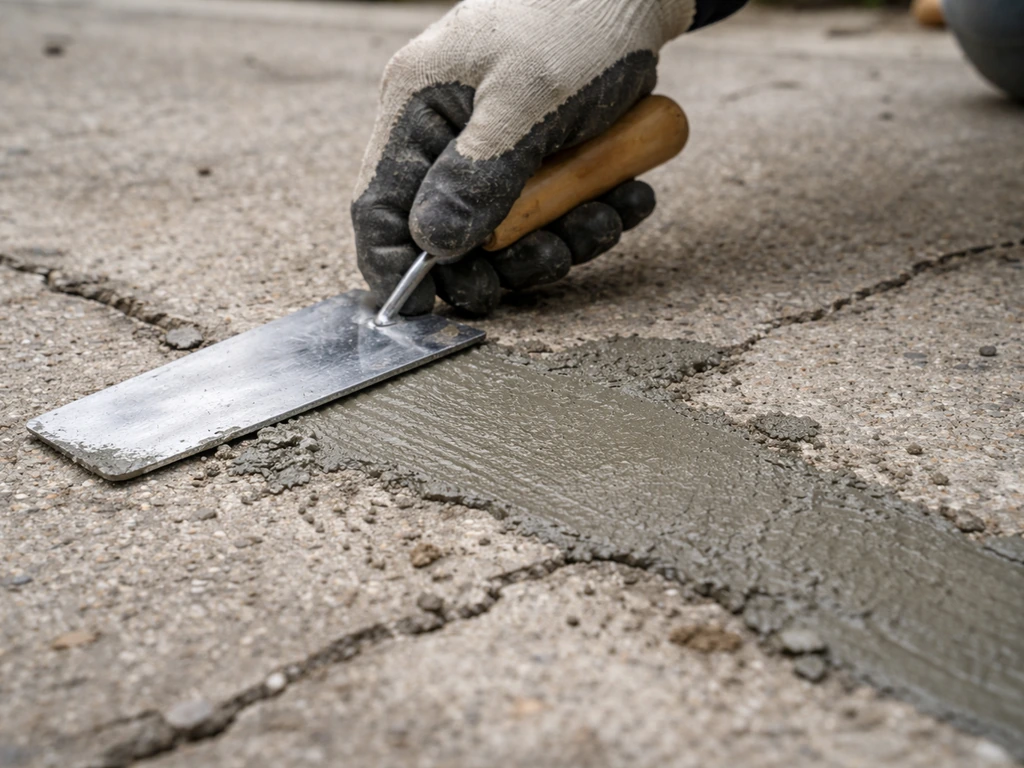
For surface spalling (flaking or pitting) and cracks up to about 1/4 inch wide, a polymer-modified concrete patch product is your best tool. Products like QUIKRETE Polymer Modified Thin Patch can be applied from feather-edge thickness up to about 1/2 inch in one pass and allow foot traffic in roughly 3 hours at normal temperatures (drive-on time is around 24 hours).
Before applying, chisel or grind away any loose, flaking, or hollow-sounding material, a patch won't bond to unsound concrete, period. Use that hammer-sounding technique from the diagnosis step to find the true edges of bad material, then expand your repair boundary 3 to 4 inches into solid-sounding concrete before patching. Brush out all dust and debris, dampen the area (not soaking wet, just damp), and apply the patch mix per the product instructions.
Injecting deeper or structural cracks
For cracks that go through the slab but where the two sides are still level with each other and the base is solid, epoxy injection is a strong repair method. You drill ports along the crack, inject low-viscosity epoxy starting at the lowest port, and continue until epoxy starts appearing at the next port up, that tells you the crack cavity is filled.
Epoxy reaches about 75% of its final cure strength after roughly 3 days at 75°F, so don't stress the area during that window. Epoxy injection is not a beginner job, but it's doable for a patient DIYer. If the crack is wide, stepped, or has active movement, skip injection, the repair will just re-crack along the same line.
Spalling from freeze-thaw damage
If your concrete is pitting or flaking and you're in a cold climate, freeze-thaw damage is almost certainly involved. Water gets into the pore structure of the concrete, freezes, expands, and blows off the surface layer. Concrete mixed without air entrainment is especially vulnerable to this. Once spalling starts from freeze-thaw, it tends to keep progressing. A polymer-modified patch can buy you time, but if the surface is pitting across large areas, you're looking at resurfacing the whole slab or eventually replacing it. Going forward, the best protection is a good penetrating sealer applied to sound concrete, it reduces water absorption without sealing moisture in.
Lifting and leveling sunken or uneven pavers
Sunken or rocking pavers almost always trace back to one of three causes: sand washout from poor drainage, base failure from inadequate compaction during the original install, or edge restraint failure letting the whole field shift. The fix is not just pulling up a few pavers and throwing sand under them, you need to address the reason they sank or you'll be doing this repair again within a season or two. For a pea gravel patio, the same principles apply: control drainage, stabilize the base, and keep fines from washing out so the surface stays firm sand under them.
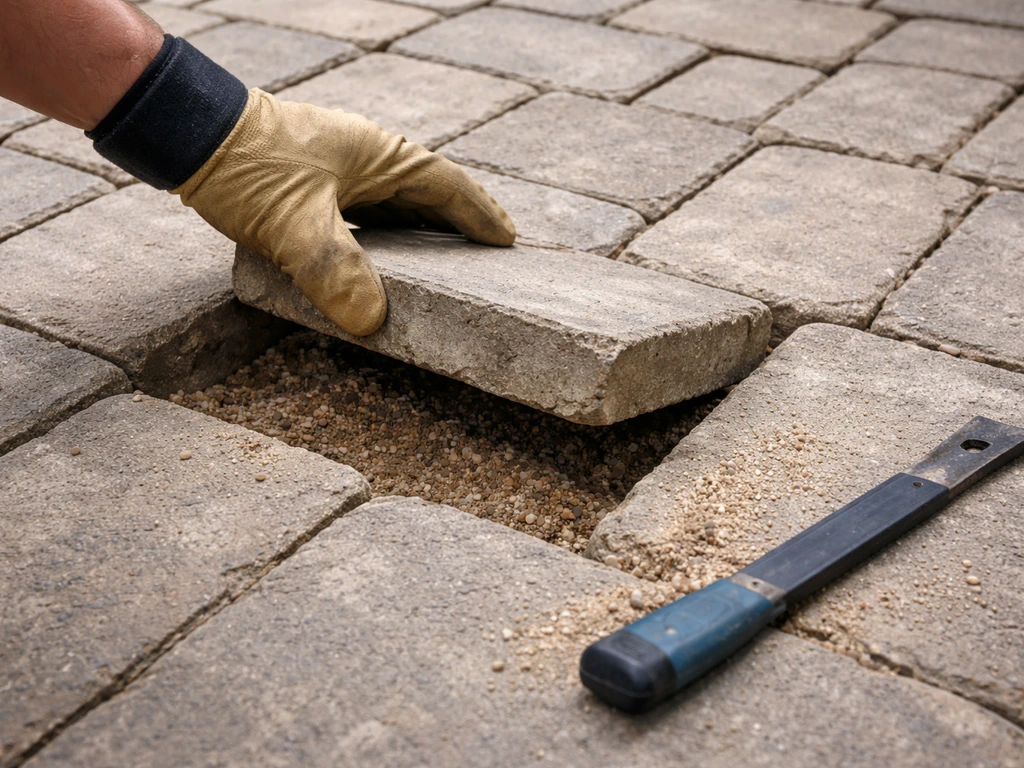
How to re-bed sunken pavers
- Pull up the affected pavers and set them aside. Mark or photograph the layout if the pattern is complex.
- Excavate the bedding layer down to the compacted aggregate base. Assess the base: it should be firm, not soft or muddy. Press a screwdriver into it — if it sinks easily, the base needs attention before anything else.
- If the base is soft or has voids, add and compact fresh crushed stone (typically 3/4 inch clean stone or a dense-grade aggregate depending on your region). Compact in layers — don't dump 4 inches and compact once.
- Screed fresh coarse bedding sand to approximately 1 inch (25 mm) thick in an uncompacted state. Use screed pipes/rails to get a consistent, flat layer — do not walk on the screeded sand before setting pavers.
- Set pavers back on the bedding sand, working from one edge to avoid disturbing the screeded surface. Use a rubber mallet to seat them.
- Check for level and slope as you go — you need a minimum 1/4 inch per foot of slope away from the house for drainage.
- Sweep polymeric sand into the joints, compact the surface with a plate compactor (use a rubber pad over the pavers to avoid surface damage), and sweep in a second round of polymeric sand to fill joints completely.
- Mist with water per the polymeric sand manufacturer's instructions to activate the binding agents.
A note on re-sanding: if your pavers are mostly level but the jointing sand has simply washed out or degraded, you may only need to re-sand the joints without re-bedding. If your joints are just empty, learning how to re-sand patio paver joints correctly can keep everything level and prevent sand from washing out again. That's a simpler job covered separately in re-sanding guides on this site.
Drainage and grading fixes to stop repeat damage

Standing water after rain is not just an annoyance, it's the number-one cause of patio deterioration over time. Water sitting on concrete accelerates freeze-thaw spalling. Water pooling on a paver patio washes sand out of the base and promotes settlement. If your patio holds water anywhere, fix the drainage issue before finishing any other repairs or the same damage will come back.
The standard for any patio within 10 feet of the house is a slope of at least 1/4 inch per foot away from the foundation. That's not a large slope, over a 10-foot patio, that's only 2.5 inches of drop total, but it has to be consistent. Low spots that collect water are almost always caused by settlement, poor original grading, or a combination of both. Use a long level or a string line to map where your patio surface sits relative to where it should drain.
Options for correcting drainage
- Re-leveling sunken sections to restore slope (covered in the paver section above, or via concrete grinding for small high spots)
- Adding a channel drain or linear drain across the low end of a concrete patio to capture runoff before it pools
- Installing a French drain along the perimeter if water is migrating from adjacent soil onto the patio
- Re-grading the surrounding landscaping so water flows away from the patio rather than toward it
- Checking and clearing any existing drain outlets — a blocked outlet is often the whole problem
For paver patios specifically: if standing water is a recurring problem, check the base and subbase slope, not just the surface. Water problems in paver systems almost always originate below the surface, not just on top of it. A patio that looks flat on top usually has a base that was never graded correctly from the start.
Sealing and finishing for a restoration that lasts
Sealing is the last step, not the first, and it only works when everything underneath is solid, clean, and dry. Applying sealer over damp concrete, dirty pavers, or unresolved efflorescence is a fast way to create a milky, trapped-moisture disaster that you'll have to strip and redo.
Choosing the right sealer
For most outdoor patios, penetrating sealers (silane or siloxane chemistry) are the safer, more forgiving choice. They soak into the concrete or paver surface, repel water without forming a film, and don't peel or trap moisture. They also don't make the surface slippery when wet, which matters a lot on an outdoor patio. The tradeoff is that they don't change the appearance much, no gloss or color enhancement.
Film-forming sealers (acrylics, epoxies, urethanes) sit on top of the surface and can add gloss and color depth, which looks great on decorative concrete. But they're more demanding: the surface has to be completely dry (most manufacturers recommend waiting at least 24 hours after any moisture contact), the existing surface has to be totally free of old sealer or contamination, and in freeze-thaw climates, you need to choose a product specifically rated for outdoor freeze-thaw exposure. A film-forming sealer that traps moisture will blister and peel, which is likely what happened to whatever sealer you stripped off in the cleaning step.
Sealing pavers: deal with efflorescence first
Before sealing pavers, make sure any efflorescence is fully removed and the surface is bone dry. Sealing over even mild efflorescence traps the minerals under the sealer, which creates whitish blotching that's difficult to fix without stripping the sealer again. If efflorescence keeps coming back after cleaning, it means moisture is migrating from below, through the sand, base, or soil, and sealing over it is just cosmetic cover-up that will fail. Address the moisture source first.
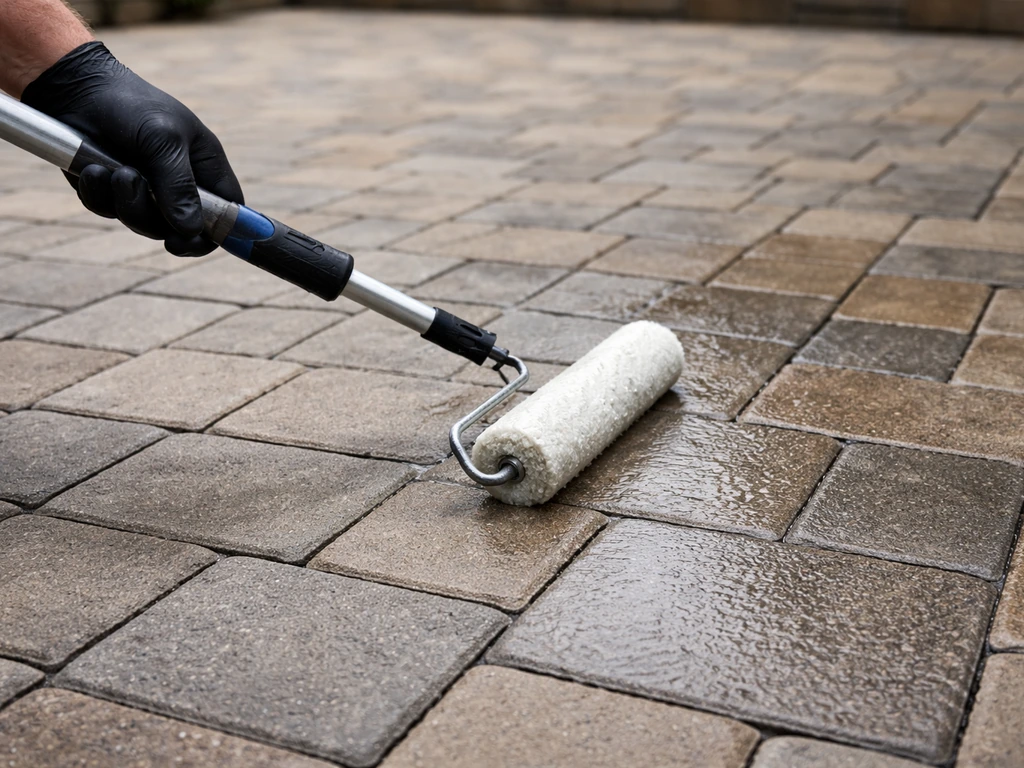
Application basics
- Apply sealer on a dry day with no rain forecast for 24 to 48 hours — check the product spec for the exact window
- Work in the shade or in moderate temperatures; sealer applied in direct summer sun or below 50°F often cures unevenly
- Use a low-pressure sprayer or roller for even coverage — avoid puddling or thick application, especially with film-forming sealers
- Two thin coats beat one heavy coat in nearly every product category
- For pavers with fresh polymeric sand, wait the full cure time specified by the sand manufacturer before sealing — typically 24 to 72 hours
Patch it, re-do it, or call someone: how to decide
This is the part most guides skip over or oversimplify. If you're dealing with a slate patio specifically, the same diagnostic order applies, then you choose the right cleaning, patching, and sealing steps for slate how to restore slate patio. The honest answer is: not every patio is a good candidate for DIY restoration, and not every damaged patio can be fixed with a tube of patch compound.
| Situation | Best approach |
|---|---|
| Hairline or minor cracks, surface in otherwise good shape | Clean, fill cracks with flexible filler, re-seal — solid DIY job |
| Spalling on less than 25% of surface, base is sound | Patch with polymer-modified mix, re-seal — DIY with some effort |
| Spalling across most of the surface, base still solid | Concrete resurfacer applied over the whole slab — DIY but labor-intensive |
| Cracked slab with visible settlement or stepped cracks | Investigate base; may need mudjacking/slab lifting or partial replacement — consider a pro |
| 1–3 sunken pavers, base otherwise firm | Re-bed pavers — solid DIY job |
| Large sections of sunken pavers or widespread settlement | Full base repair required; DIY possible but significant work — pro may be faster/more cost-effective |
| Persistent drainage problems despite surface fixes | Structural grading or drainage system install — often worth hiring out |
| Concrete slab with active heaving or wide structural cracks | Underlying soil or drainage problem — professional assessment needed before any repair |
A patch is only as good as what's under it. If the base is moving, settling, or saturated, a surface repair is a temporary cosmetic fix at best. The sounding test (hammer method) and the drainage test (does water pool after rain?) are your two most reliable quick indicators of whether a patio can be restored at the surface level or whether the problem goes deeper. When in doubt, a one-hour consultation with a concrete or hardscape contractor is money well spent before you invest in materials and labor on a repair that won't hold.
Some related jobs that often come up during a patio restoration, re-sanding paver joints, restoring slate surfaces, and stabilizing or sealing pea gravel patios, each have their own material requirements and techniques worth reading up on separately before you tackle them as part of a larger restoration project. If you need to do this step, follow the right approach to how to re-sand patio pavers so the joints fill evenly and the sand does not wash out again re-sanding paver joints.
FAQ
How can I tell if my patio should be repaired from the surface or from the base?
Do two quick checks, the hammer sounding test for hollow or delaminated sections, and a drainage test after a rain. If areas sound dull and thuddy or if water pools anywhere for hours, the problem is likely below the surface, so surface-only patching or resealing will usually fail or re-crack quickly.
Can I restore a patio if I see algae or organic staining but no standing water?
Yes, but treat it as a cleaning and surface prep issue first. Clean thoroughly, then verify the area is not trapping moisture. If the staining keeps returning soon after cleaning, you likely have hidden moisture movement, and sealing before fixing that source can lock in the problem.
What’s the biggest mistake when removing old sealer?
Using etching acids instead of a stripper. Acid can damage the concrete surface and prevent proper bonding, so the patch or new sealer may fail early. Also, make sure the stripper is compatible with whether the old sealer was solvent-based or water-based.
Is it safe to patch concrete the same day I strip old sealer and clean?
Not usually. Even after cleaning, you need the surface fully ready to bond, meaning no residue, no efflorescence, and appropriate dryness. Plan for drying time and confirm the concrete is clean and sound before mixing patch material, especially if humidity is high or temperatures are cool.
How do I avoid patch failures at the edges?
Expand the repair into solid-sounding concrete, don’t just skim over the crack or spall boundary. After removing loose material, brush out dust, dampen the area lightly (not soaking), then apply patch per the product instructions. Patches fail when applied over hollow edges or contaminated surfaces.
My concrete has multiple cracks, can I epoxy inject them all myself?
Only if the cracks meet the right conditions. Epoxy injection works best when the slab sides are level and the base is solid. If cracks are stepped, wide, or actively moving, injection often re-cracks along the same path, so you may need a different approach or contractor evaluation.
How can I tell if a paver patio issue is sand washout versus base failure?
Look for repeating settlement or rocking after you re-sand. If the surface keeps dropping or joints quickly empty again even after re-filling, the base or subbase slope and compaction are likely failing. If only joints are empty while pavers stay mostly level, joint re-sanding may be enough.
What pressure washer setup is safest for paver joints?
Use a lower pressure approach and a consistent angle. Around 1,500 psi is a common target for general cleaning, keep the wand at about a 45-degree angle, and maintain steady distance. Getting too close or blasting straight down can remove the joint sand and undo your repair plan.
Do I need to re-bed pavers if they’re sunken in one small area?
Not automatically. If pavers are mostly level and only joints have degraded, you can often re-sand without lifting. If the pavers rock, the surrounding area sinks again, or the base underneath is unstable, you need to address drainage, base grading, and base compaction, not just top-level sand.
Can I seal a patio if rain is forecast within a day?
Avoid sealing if surfaces will get wet. Film-forming sealers typically require longer dry windows and can blister if moisture is trapped under the coating. For any sealer, plan so the treated surface stays clean and dry for the manufacturer’s stated time, otherwise you may end up stripping and redoing the work.
What’s the difference between penetrating sealer and film-forming sealer for slip resistance?
Penetrating sealers generally reduce water absorption without building a surface film, so they are less likely to make the patio slick when wet. Film-forming sealers can look great but are more demanding and can become slippery in outdoor conditions if the wrong product or improper prep traps moisture.
Can sealing fix efflorescence if it keeps coming back?
No, it usually just hides it temporarily. Recurring efflorescence indicates moisture migrating from below through sand, base, or soil. The moisture source has to be addressed first, otherwise sealing over it tends to create whitish blotching and makes the issue harder to correct later.
What patio slope should I aim for near the house, and how do I verify it?
Aim for at least 1/4 inch per foot sloping away from the foundation within 10 feet. Verify with a long level or string line, mapping low spots relative to where water should drain. Consistent grading matters, because small local dips can still create standing water.
When is DIY restoration not worth attempting?
If sounding shows widespread hollow areas, if drainage issues are severe or ongoing, or if you observe active movement like stepped cracks or shifting paver fields, DIY repairs may become temporary fixes. When uncertain, a brief contractor consultation can prevent buying patch, sealer, and sand for a solution that won’t last.
Next Article
How to Refurbish a Patio: Step-by-Step DIY Repairs
Step-by-step guide to refurbish your patio, fix cracks, reset pavers, repair drainage, and reseal for lasting results.