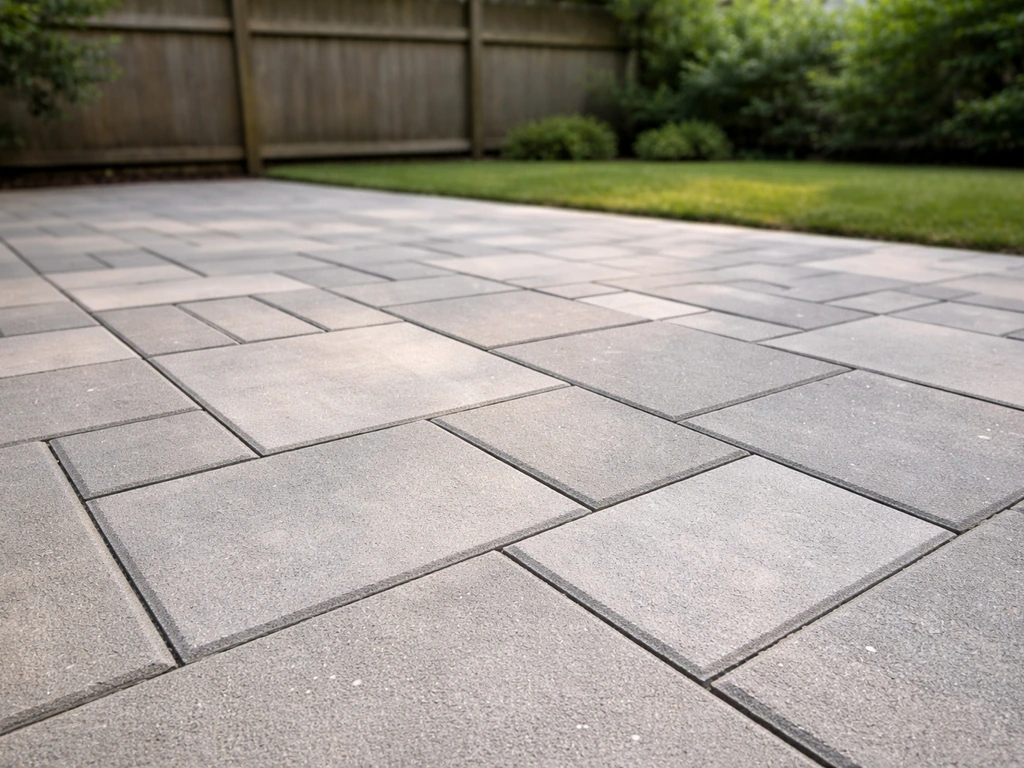
Pea gravel patios shift and sink because the base beneath them fails, not because the gravel itself is a bad material. Fix the base, get your drainage right, install proper edge restraints, and use the right layering approach, and pea gravel can hold up reliably underfoot for years. Skip any of those steps, and you'll be raking it back into place every spring no matter how many bags you add on top.
How to Stabilize Pea Gravel Patio: DIY Steps That Last

Talia Lang
26 Jun 2026
Why pea gravel patios move in the first place
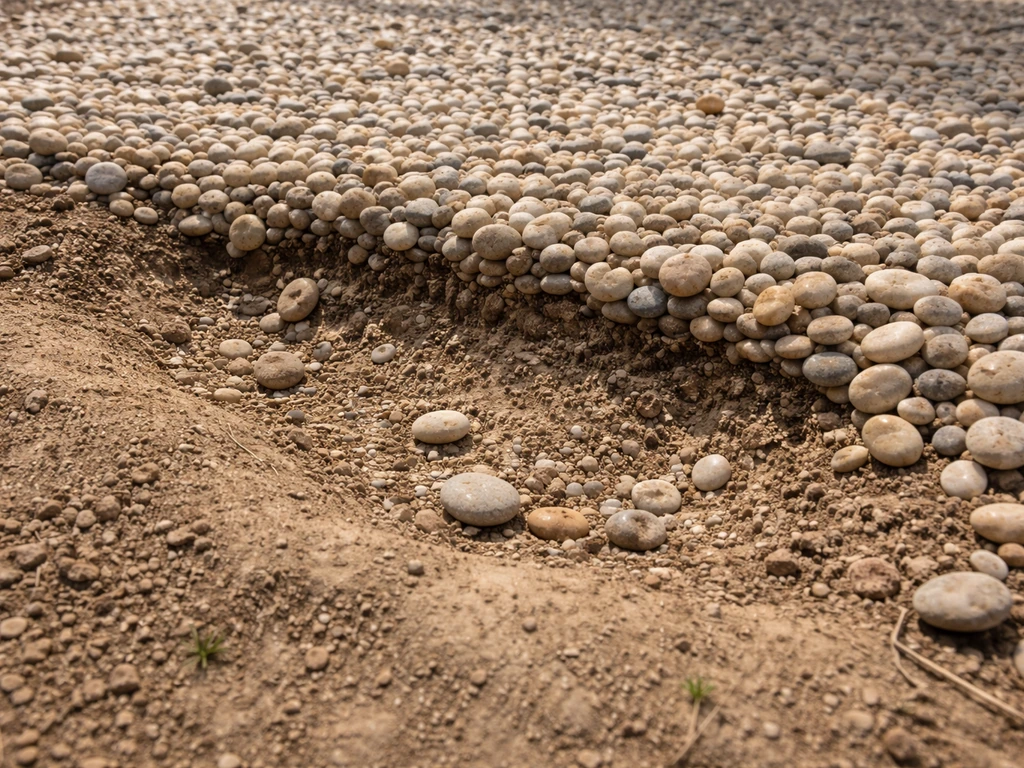
Pea gravel is round and smooth, which is exactly what makes it comfortable to walk on and terrible at staying put on its own. Unlike crushed angular stone that locks together when compacted, pea gravel beads roll freely under pressure. That property means anything wrong with the system underneath it gets amplified fast.
The most common root cause of a shifting or sinking pea gravel patio is water. When drainage is poor, either because the base has no slope away from the house or because there's no fabric layer separating the gravel from the soil below, water soaks into the subgrade, softens it, and the gravel sinks into it over time. The surface gets uneven in patches rather than all at once, which makes it look like a settling problem when it's really a drainage problem.
The second big cause is a base that was too shallow or never properly compacted. Patios need a compacted gravel base roughly 6 to 12 inches deep depending on soil conditions and expected use. If that base layer was skipped entirely, or laid in one thick lift instead of compacted in stages, the whole thing will gradually sink and shift, especially after a wet winter or a heavy rain event.
- No edge restraints: gravel migrates outward at the edges under foot traffic, leaving a thin, unstable center
- Missing or wrong geotextile: fines from the soil below migrate up through the gravel, causing soft spots and weeds
- Insufficient slope: less than 1/4 inch per foot away from the house allows water to pool and undermine the base
- Thin gravel layer: less than 3 inches of pea gravel on top compresses down to almost nothing
- Wrong gravel size: oversized stones or mixed sizes with too many fines won't drain properly and shift unevenly
- Weed intrusion: roots break up compaction and create voids that accelerate sinking
What to check before you touch a shovel
Before you start hauling gravel or buying stabilizer products, spend 20 minutes actually diagnosing what went wrong. Fixing the symptom without understanding the cause is how people end up rebuilding the same patio twice.
Walk the patio surface slowly and look for three things: where it's sinking, where the gravel has migrated, and where water sits after rain. Sinking in the center usually points to a base or subgrade failure. Sinking near the edges almost always means missing or failed edge restraints. Water pooling anywhere on the surface means the grade is wrong, the drainage layer is clogged, or both.
Dig a small test hole in one of the problem spots. You want to see what's underneath: is there a compacted gravel base layer, or does pea gravel go straight into native soil? Is there a fabric layer separating the two? How deep is the base? If you hit soft, muddy native soil within 3 or 4 inches, you've confirmed a base failure. If you find gravel but it's saturated and soupy, drainage is the culprit. If everything looks reasonably solid but the surface is uneven, you may just need a re-level and top-up.
- Check the slope: use a long level and measure the drop per foot away from the house (you want at least 1/4 inch per foot)
- Check the edge restraints: are they still in place, or have they heaved, cracked, or disappeared entirely?
- Check gravel depth: rake back the surface and measure; less than 3 inches means you need a top-up regardless
- Check for geotextile fabric: dig down and see if there's any separation layer between gravel and soil
- Check the base depth: probe with a metal rod or dig to see if there's a compacted aggregate base below the fabric
If you're dealing with widespread sinking across more than half the patio, serious erosion channels, or pooling water that doesn't drain within a few hours of rain stopping, that's a full rebuild situation. If it's localized soft spots or edge migration with an otherwise solid base, you can do a targeted repair. Step-by-step repair and rebuild guidance for an existing unstable patio is covered later, so if you are restoring a patio that has already shifted, use that section as your blueprint.
Base prep and drainage: the part most DIYers skip
This is where most pea gravel patios fail, and it's also the fix that makes the difference between a patio that lasts 10 years and one that needs attention every spring. Getting the base right isn't exciting work, but it's the whole job.
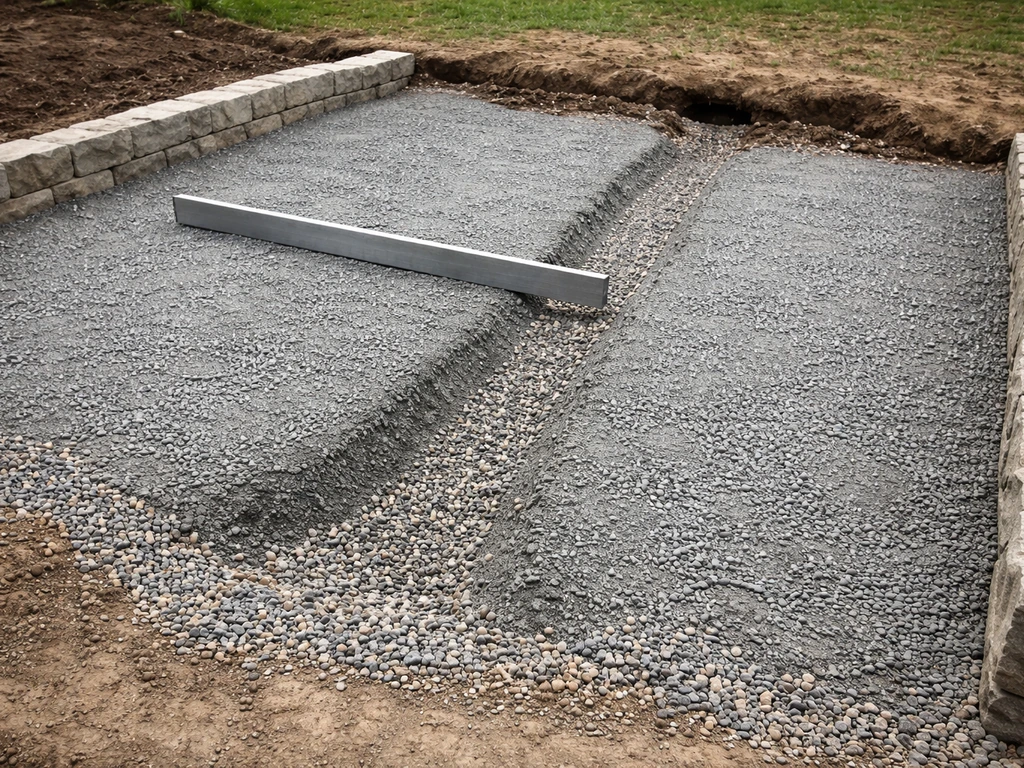
Excavation depth
For a residential patio with foot traffic, plan to excavate 6 to 8 inches below finished grade. That gives you room for roughly 4 to 6 inches of compacted aggregate base (crushed angular stone, also called road base or crusher run), plus your geotextile fabric, plus 3 to 4 inches of pea gravel on top. In areas with clay-heavy soil or poor natural drainage, go to 8 to 10 inches of base. Shallow bases are the single most common mistake on DIY gravel projects.
Grading and slope
Every inch of the patio surface needs to drain water away from your house and off the patio area. The minimum slope is 1/4 inch per foot, but 1/2 inch per foot is better if your site allows it. This isn't optional: water that pools on or under a pea gravel patio will work its way into the base and eventually undermine it no matter how well everything else is built. Set your grade at the excavation stage by checking with a level and a tape measure before you add any base material.
Compacting the base
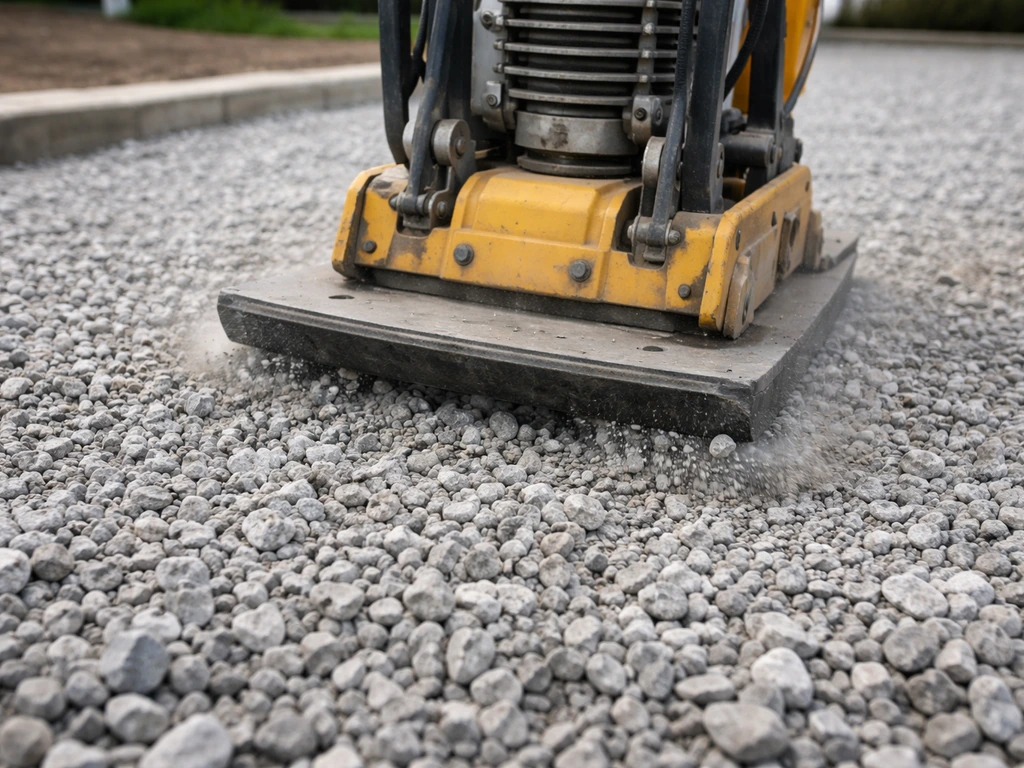
Rent a plate compactor. Don't skip this. Add your crushed aggregate base in lifts no thicker than 3 to 4 inches, then make 3 to 4 passes with the plate compactor over each lift before adding more. This multi-lift approach is what gets you to a genuinely solid base rather than one that looks stable but compresses when weight is applied later. The target is roughly 95% Standard Proctor compaction, which in practical terms means the surface doesn't deflect when you walk on it and shows no soft spots. A technical installation guide for crushed stone base preparation also cites a 95% Standard Proctor compaction target for the compacted stone base blank" rel="noopener noreferrer">The target is roughly 95% Standard Proctor compaction. Compact the native subgrade first before adding any base material, especially if the soil is loose or was recently disturbed.
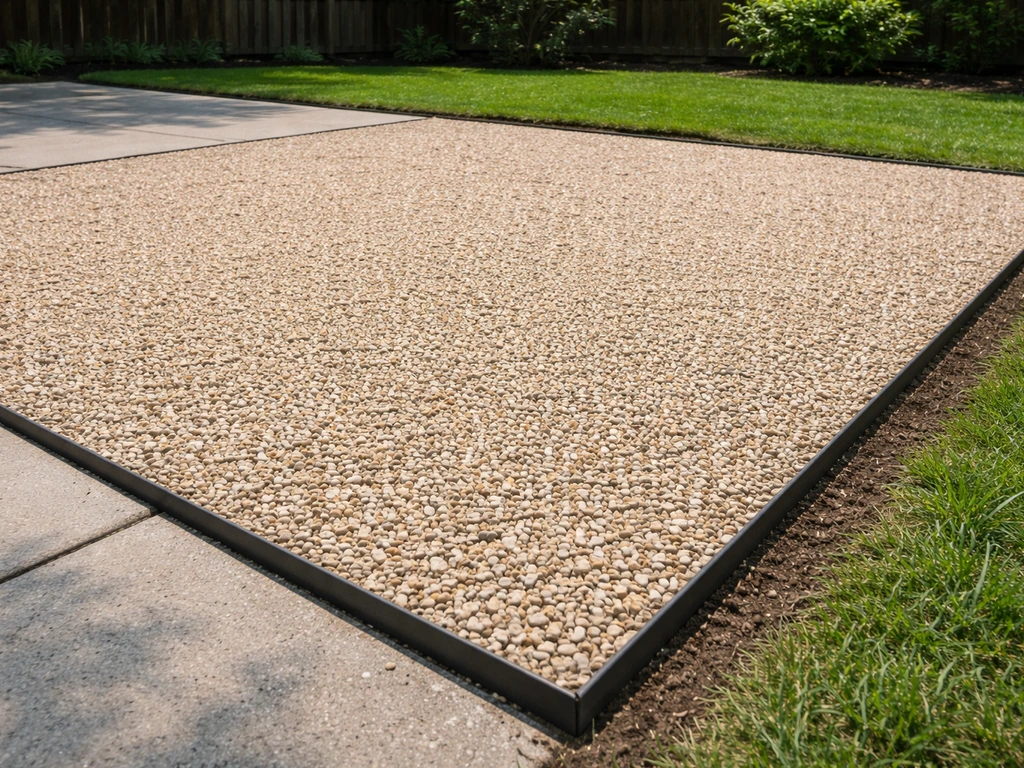
Stabilization layers: edging, geotextile, and gravel choices
Edge restraints
Edge restraints are what keep pea gravel from migrating outward over time. Without them, foot traffic pushes gravel off the edges constantly, the center thins out, and you're constantly raking gravel back in from the lawn or mulch bed. For a permanent installation, use plastic or metal landscape edging staked at 12-inch intervals, or pour a concrete mow strip, or install dimensional lumber framing. Whatever you choose, it needs to extend at least 3 inches below grade so it can't be pushed up or out. Edging that's surface-mounted or only an inch or two deep will fail quickly.
Geotextile fabric
Use a nonwoven geotextile fabric between the compacted base layer and the pea gravel on top. Nonwoven geotextile is the right choice here because it allows water to pass through freely (drainage and filtration function) while physically separating the gravel from the material below, preventing fines from migrating up and muddying the surface or causing soft spots. Lay the fabric with at least 12 inches of overlap at any seams so you don't create migration paths between sheets where fines can travel upward. Fold the fabric edges up and tuck them behind the edge restraints.
One honest note about fabric: it performs well for the first several years, but over a long service life, fine particles can slowly accumulate near the fabric surface (a process called blinding), which reduces drainage over time. This is less of a concern in a well-graded residential patio than in a heavy-load drainage trench, but it's why maintaining proper surface slope and keeping organic material from building up on top of the gravel matters. The fabric is still absolutely worth using; just don't expect it to last forever without any attention.
Pea gravel depth and size
Use 3/8-inch pea gravel and lay it at 3 to 4 inches deep. Shallower than 3 inches and it compresses to almost nothing under foot traffic, exposing the fabric. Deeper than 4 inches gets squishy and uncomfortable to walk on. Stick to pure, clean pea gravel without mixed fines. Fines reduce drainage and make the surface muddy when wet.
Which stabilization method is right for your situation
There are four main approaches to stabilizing a pea gravel patio, and they're not equally suited to every situation. Here's how they compare:
| Method | How it works | Best for | Drainage | Maintenance | Cost |
|---|---|---|---|---|---|
| Compacted base + fabric + pea gravel (classic layered system) | Proper base and separation layers prevent movement without altering the gravel itself | Most residential patios; best all-around choice | Excellent if built correctly | Annual top-up, periodic raking | Moderate (mostly labor) |
| Sand or fines mixed into gravel (sand-locked) | Fine particles fill voids between stones, locking them together somewhat | Low-traffic areas; areas where slight rigidity is wanted | Reduced; risk of waterlogging and muddy surface | Weed-prone; hard to re-level | Low material cost |
| Gravel binder / liquid stabilizer | Water-based spray-on product bonds gravel stones together while staying permeable | Slopes, high-traffic zones, areas where loose gravel is a hazard | Good if applied correctly | Reapplication needed every 1–3 years | Moderate (product cost) |
| Gravel paver panels / honeycomb grid | Rigid or semi-rigid grid cells contain gravel, preventing lateral movement entirely | Heavy use, vehicle traffic, areas where migration is a constant problem | Excellent | Very low once installed | Higher upfront cost |
For most homeowners dealing with a standard backyard patio, the classic layered system (compacted base, nonwoven geotextile fabric, 3 to 4 inches of clean pea gravel, proper edge restraints) is the right answer. It's DIY-friendly, drains well, and if built properly it doesn't need intervention for years. Gravel binders are a legitimate option for patios on slopes or where foot traffic is heavy in one spot, but they don't substitute for a proper base. Sand-mixed approaches reduce drainage and create more weed problems than they solve. Honeycomb paver panels work very well but cost more and are overkill for a low-traffic residential patio.
If you're considering whether to stabilize with a binder, those products typically cover 80 to 100 square feet per gallon on steeper grades (above 15%), so factor that into your material estimate. Always check the specific product's application rate because formulations vary.
Step-by-step repair and rebuild for an existing unstable patio
If your diagnosis showed base failure, poor drainage, or missing edging, here's how to fix it properly. If you need to re-sand between pavers, focus on the joint material and base prep so water can't undermine the surface how to re-sand patio pavers. This is a weekend project for a patio up to about 200 square feet if you have help. Larger areas or serious grading issues take longer.
- Clear the surface: rake all the existing pea gravel to one side or into a wheelbarrow. If it's contaminated with a lot of soil or weeds, replace it. If it's clean, set it aside to reuse.
- Remove the old fabric (if any): pull up any existing landscape fabric. Old, clogged fabric does more harm than good at this point and should be replaced.
- Assess and fix the base: dig down and see what you have. If there's a compacted aggregate base that's still solid, check the grade and re-compact any soft spots with a plate compactor. If there's no base, excavate to 6 to 8 inches below your target finished grade and add crushed angular stone in 3 to 4 inch lifts, compacting each lift with 3 to 4 passes of the plate compactor.
- Establish and check the slope: before adding any layers, confirm your grade slopes at least 1/4 inch per foot away from the house in all directions. Add or remove base material to hit this grade, then re-compact.
- Install or repair edge restraints: set plastic or metal edging at the full perimeter, staked at 12-inch intervals and extending at least 3 inches below the base surface. Make sure they're level with your intended finished gravel surface height.
- Lay new nonwoven geotextile fabric: roll it out over the compacted base, overlapping seams by at least 12 inches. Fold the edges up behind the edging. Secure it temporarily with landscape fabric pins while you add gravel.
- Add the pea gravel surface layer: spread 3/8-inch pea gravel to a depth of 3 to 4 inches. Work in sections, raking evenly. Check depth as you go.
- Level and settle: rake the surface flat, then walk the entire area slowly to settle the gravel. Rake again. The surface will compress slightly after the first few rains; plan to top up by about 1/2 inch after the first month.
- Apply binder if needed: if the patio is on a slope or in a high-traffic area, this is the time to apply a gravel stabilizer according to the product instructions. Apply to a dry surface and allow full cure time before use.
Honest expectations: a well-built pea gravel patio will not feel as firm as pavers or concrete underfoot. If you need to know how to refurbish a patio step by step, use the same diagnostic approach so you can address the underlying base and drainage issues before swapping out any gravel existing unstable patio. That slight give is normal and is part of why pea gravel is comfortable to sit on and easy on joints. What you're solving for is no more sinking, no more migration, and no more muddy or uneven patches, not a concrete-hard surface.
When to call a professional instead
Some situations are beyond DIY scope and trying to push through them yourself usually costs more in the long run. Call a professional if you're seeing widespread subsidence across the whole patio area (not just edge migration), if the ground is soggy for days after rain indicating a drainage problem that extends beyond the patio footprint, if the patio is built against a foundation wall and water pooling is happening near the house, or if re-grading the yard to fix slope issues is needed. These are drainage engineering problems, not surface repair problems, and they need someone who can spec and install a proper drainage solution.
Keeping it stable: maintenance and weed control
Once your patio is built correctly, the maintenance load is light, but it's not zero. Staying on top of a few things each year keeps the repairs from compounding.
Annual top-up schedule
Pea gravel loses depth slowly over time through compaction, migration, and displacement. Plan to top up with a thin layer (about 1 inch) of clean 3/8-inch pea gravel every 1 to 2 years, or whenever the gravel depth looks like it's dropped below 2.5 inches. Do this in spring before heavy use. More frequent top-ups are needed if you're seeing active edge migration, which means your edge restraints need attention.
Weed control
Weeds in a pea gravel patio come from two sources: seeds landing on top and blowing in, and organic debris that builds up in the gravel over time creating a seedbed. The geotextile fabric prevents most root-up weed growth from below, but it doesn't stop surface germination. The most effective approach is to rake the surface occasionally to disrupt seedlings before they establish, and to blow or rake out any leaves, pine needles, or organic matter that accumulates. A thin layer of organic debris on top of gravel is essentially a planting medium for weeds.
Avoid using solid plastic sheeting under gravel as a weed barrier. It blocks drainage, causes water to pond on the surface, and is actually worse for weed control over time because it traps the organic matter on top rather than letting it filter through. Stick with nonwoven geotextile fabric. For persistent surface weeds, a pre-emergent herbicide applied in early spring works well without sealing the drainage of the gravel.
Common maintenance mistakes to avoid
- Adding gravel on top of existing gravel without checking whether the base or drainage layer is the real problem
- Letting organic debris build up on the surface, which feeds weed growth and slowly contaminates clean gravel
- Ignoring loose or heaved edge restraints until gravel has migrated several inches beyond the patio boundary
- Using herbicide with a surfactant or residual that can wash into nearby lawn or garden areas
- Power washing the gravel surface, which disrupts the depth and can damage the fabric layer below
- Adding sand to the top layer to try to firm up the surface, which reduces drainage and creates mud problems
If you're also dealing with other surface problems elsewhere in your outdoor space, like failing jointing material in a paver area or a deteriorating slate surface, the same base and drainage principles apply across all outdoor hardscaping. A solid, graded, compacted base with proper drainage is the foundation of every durable outdoor surface, whether you're working with gravel, pavers, or stone.
FAQ
Can I just add more pea gravel to fix a sinking patio?
Usually no. If the base is soft or water is reaching the subgrade, adding depth only postpones the problem and can make the surface feel “stable” while the base continues to fail. A better approach is to confirm the cause with a test hole, then either re-level and top up only where the base is solid, or rebuild the base where native soil is within a few inches of the surface.
How can I tell if my issue is edge migration versus base failure?
Walk the perimeter after rain. If the gravel thins or pushes outward mainly along the edges, that points to restraints that are shallow, improperly staked, or missing. If you see soft spots in the center, depressions spreading across most of the patio, or the whole area feels spongy, base or drainage failure is more likely than an edging-only fix.
What slope should I use if my patio is close to the house or a wall?
Use a measurable cross-slope or outfall away from the foundation, the minimum is about 1/4 inch per foot, steeper is better when site conditions allow (around 1/2 inch per foot). Also ensure runoff has somewhere to go, like a lawn swale or drain line, because “slope” without a discharge path can move water into the foundation area.
Do I need geotextile fabric if I’m using a thick gravel layer?
Fabric is not optional if you want reliable filtration and separation. Thick gravel alone does not stop fines and muddy subgrade material from migrating upward over time, which leads to soft spots and reduced drainage. The fabric also makes the system more tolerant of minor movement by keeping the layers behaving as layers.
How do I know the base depth is correct for my soil?
If you hit muddy native soil within roughly 3 to 4 inches of digging into a problem spot, your effective base depth is too shallow or wasn’t compacted. For heavier or clay-prone soils, plan on the higher end of base depth (closer to 8 to 10 inches of compacted aggregate for residential patios) because water retention increases the risk of subgrade softness.
What’s the best way to compact the base, and how many passes are enough?
Compact the native subgrade first, then add crushed aggregate in 3 to 4 inch lifts, compact each lift with multiple passes (typically three or more), before adding the next. The goal is no soft deflection when walked on and no visible “give” later. If you can noticeably press into the surface with body weight, the compaction is insufficient.
Can I use sand or pea gravel mixed with fines to stabilize the patio?
Avoid it. Sand and fines reduce drainage and can create a muddy, less permeable surface. They also increase weed pressure because organic debris tends to retain moisture. Stick with clean 3/8-inch pea gravel for the top layer, and keep the bedding and separation role handled by the base and nonwoven fabric.
What’s the right gravel depth on top, and why does depth matter?
Plan for about 3 to 4 inches of pea gravel over a properly prepared base. Too shallow (under about 3 inches) tends to compact away under foot traffic and can expose the fabric, creating a messy surface. Too deep (over about 4 inches) often becomes uncomfortable and can feel squishy because there is less support from underneath.
How wide should the patio edge restraints extend below grade?
Make sure edging extends at least about 3 inches below final grade so it can’t be pushed upward or outward. If edging is only surface-mounted or barely buried, traffic and freeze-thaw movement commonly force gravel to escape and the patio requires frequent raking back into place.
How much overlap should I use on geotextile seams?
Use at least 12 inches of overlap at seams. Smaller overlaps can create migration paths where fines move upward, leading to localized muddy patches even when the rest of the patio is properly built.
Will geotextile fabric eventually stop draining (blinding)?
It can over long periods because fine particles accumulate near the fabric surface and reduce permeability. That risk is lower in typical residential patio conditions when the top slope is maintained and organic debris is cleaned off, but it’s still a reason to keep the surface sloped and perform light maintenance rather than letting leaves and pine needles build up.
How do I top up pea gravel without disturbing the drainage?
Top up with a thin layer, around 1 inch of clean 3/8-inch pea gravel, typically in spring and only where depth has dropped (for example, below about 2.5 inches). Keep the existing slope consistent when adding, and avoid using random fill that could alter how water percolates through the system.
What’s the best way to control weeds if I have fabric underneath?
Focus on what germinates on top. Rake occasionally to disrupt seedlings, and remove organic debris like leaves and pine needles because that becomes a seedbed. Nonwoven fabric blocks most root-up weeds from below, but it cannot stop seeds that land and sprout in the gravel surface layer.
Is plastic sheeting under pea gravel a good weed barrier?
No. It traps moisture by blocking drainage, which can worsen pooling and undermine the base. It also tends to keep organic debris from breaking down or filtering through, which can lead to more persistent surface weed issues over time.
When should I call a professional instead of doing a DIY repair?
If the ground under the patio is soggy for days after rain, if subsidence spans most of the patio rather than isolated spots, or if you have pooling water near a foundation wall, the problem is often drainage engineering. Those cases may require designed grading, subdrains, or other subsurface solutions, not just surface re-leveling.
Next Article
How to Restore a Patio: Step-by-Step DIY Repairs
Step-by-step DIY guide to restore a patio: fix cracks, level sunken pavers, improve drainage, and re-seal safely.