The best way to fill patio joints depends on two things: what your patio is made of and how wide the gaps are. If you're wondering how to fill gaps in patio slabs, the same basic idea applies, but you'll choose a flexible sealant that can handle slab movement fill patio joints. For paver patios with joints up to 2 inches wide, polymeric sand is the go-to material because it locks together when wet, resists weeds, and won't wash out in normal rain once it cures. For concrete slab joints and control joints, you want a flexible sealant (with a backer rod for anything deeper than half an inch) or a cementitious repair mortar, depending on the joint type. Getting this choice right from the start is what separates a repair that lasts years from one you're redoing next spring.
Best Way to Fill Patio Joints: DIY Steps That Last

Step 1: Figure out what kind of joints you're dealing with
Before you buy anything, spend five minutes actually measuring your joints. Width and depth change everything about which product you use and how you apply it.
Paver joints vs. slab joints
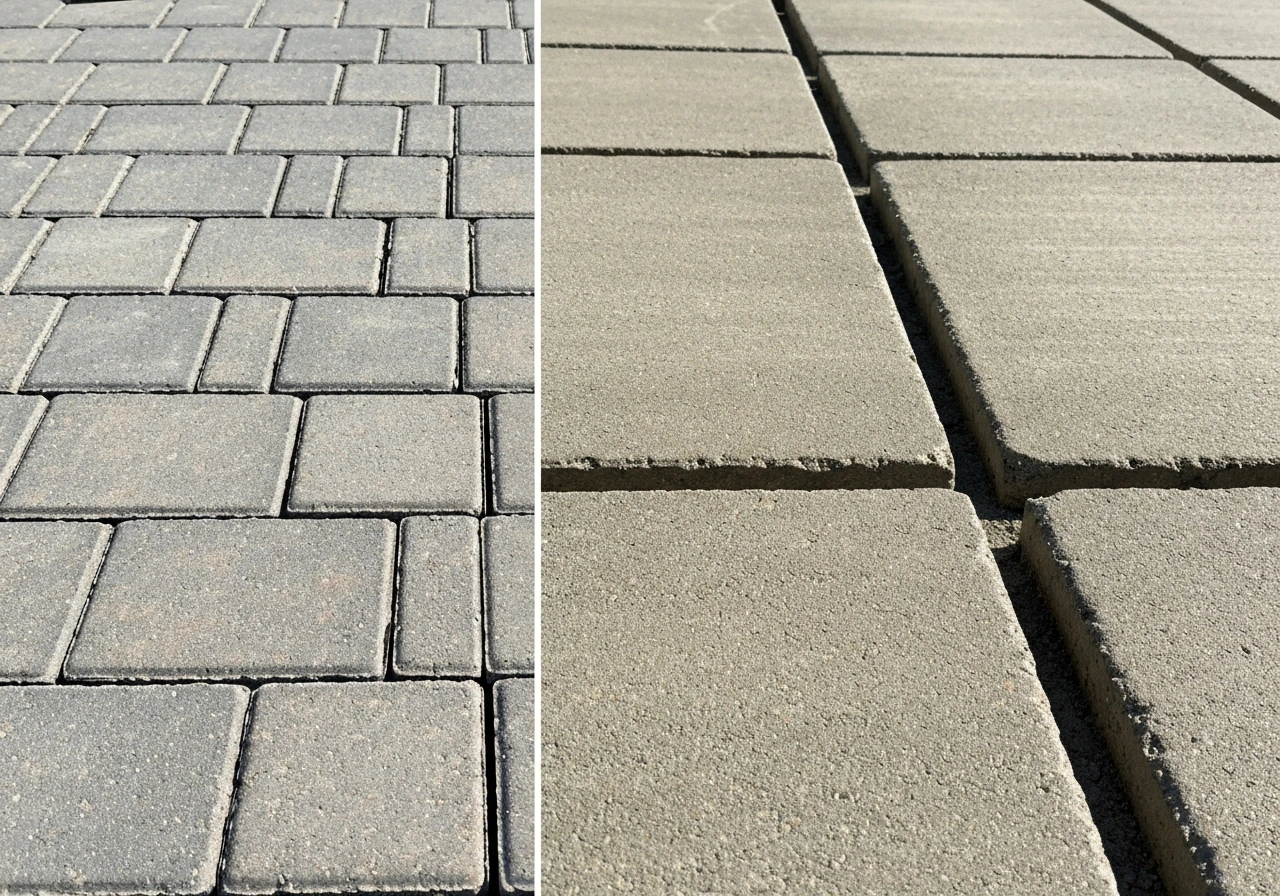
Paver patios (interlocking concrete pavers, brick, or natural stone) have narrow gaps between individual units, typically somewhere between 1/8 inch and 2 inches wide. These gaps go all the way down to the bedding sand or base underneath. Concrete slab patios have a different kind of joint: control joints (the tooled or saw-cut grooves cut into the slab to control where cracking happens) and expansion joints (the slightly wider gaps between slab sections, sometimes filled with a compressible material). If you’re wondering how to joint patio slabs, focus on the right control joints and expansion joints so the slab can move without cracking Concrete slab patios have a different kind of joint. These are completely different repairs.
Measure width and depth before you shop
Use a tape measure or a thin screwdriver to probe your joints. For paver joints, polymeric sand needs a minimum depth of about 4 cm (1.5 inches) to form a proper sand column and perform as intended. If your pavers are sitting on a very shallow bedding layer and the gap is less than that, you may have limited options. For concrete slab joints, note the width closely. A 1/4-inch-wide control joint needs a different sealant profile than a 3/4-inch expansion joint. The general rule for sealant depth is roughly 0.8 times the joint width, with a hard minimum. For anything deeper than about 1/2 inch, you'll need a backer rod (a foam cylinder you press into the joint) to control how deep your sealant sits, otherwise the sealant is too thick to flex properly and it'll crack or debond early.
Step 2: Choose the right filler for your patio
Here's a plain-English breakdown of the main options and when to use each one. This guide explains how to fill gaps in patio tiles using the right joint filler and prep steps.
| Material | Best For | Joint Width | Weed Resistance | Typical Lifespan |
|---|---|---|---|---|
| Polymeric sand | Paver and stone joints | Up to 2 inches | Yes, when installed correctly | 5–10+ years with good base |
| Regular kiln-dried sand | Temporary or budget paver joints | Any paver joint | No | 1–2 seasons |
| Flexible joint sealant (with backer rod) | Concrete slab control/expansion joints | 1/4 inch to 3/4 inch+ | N/A (slab joint) | 5–10 years |
| Cementitious mortar/repair mix | Wider slab joints, crumbled mortar joints on slabs | 1/4 inch and wider | N/A (slab joint) | 3–7 years |
| Jointing compound (brush-in type) | Patio slab gaps, flagstone, mixed surfaces | Up to about 1 inch | Good | 3–5 years |
Polymeric sand: the standard for paver joints
Polymeric sand is regular sand mixed with a polymer binder that activates when you wet it. Once it sets, it holds the joint together, resists weeds, and doesn't wash out in rain the way plain sand does. Products like QUIKRETE HardScapes Polymeric Jointing Sand are rated for joints up to 2 inches wide between interlocking pavers, brick, natural stone, and concrete slabs. It's the right call for most paver patios. The catch is that installation is less forgiving than people expect, and washout failures almost always come down to getting the activation step wrong. More on that below.
Flexible sealant for concrete slab joints
Concrete moves. It expands and contracts with temperature, and your filler has to move with it or it'll crack and fail. That's why rigid mortar in a concrete control joint almost always cracks within a season or two. A flexible polyurethane or polyurea sealant (Sikaflex, Tremco THC-901, and similar products) is the right material here. For any joint deeper than about 1/2 inch, press a foam backer rod into the joint first to control depth. The backer rod should be about 1/8 inch larger in diameter than the joint is wide, so it sits snugly with slight compression. For a 1/2-inch wide joint, use a 5/8-inch backer rod. This gives you the right sealant geometry and stops you from wasting product filling a deep void.
Cementitious mortar for crumbled slab joints
If your concrete slab has mortared joints that have crumbled or blown out, a cementitious repair product like SAKRETE Concrete and Mortar Repair can work well for replacing the lost material. This is a rigid repair, so it works best in joints that aren't expected to flex significantly. It needs temperatures above 10°C (50°F) during application and for 48 to 72 hours afterward while it cures. If you're filling deep sections, pack backer rod to within about 10mm (3/8 inch) of the surface first, then apply the repair material over it.
Step 3: Clean and prep the joints properly
This is the step most people rush, and it's why repairs fail. Jointing compound on a patio is usually only appropriate for filling specific cracks and gaps, so choose it based on the joint type and expected movement. No filler bonds well to dirt, loose material, or old product. It doesn't matter how good the sealant is if the joint is contaminated.
For paver joints
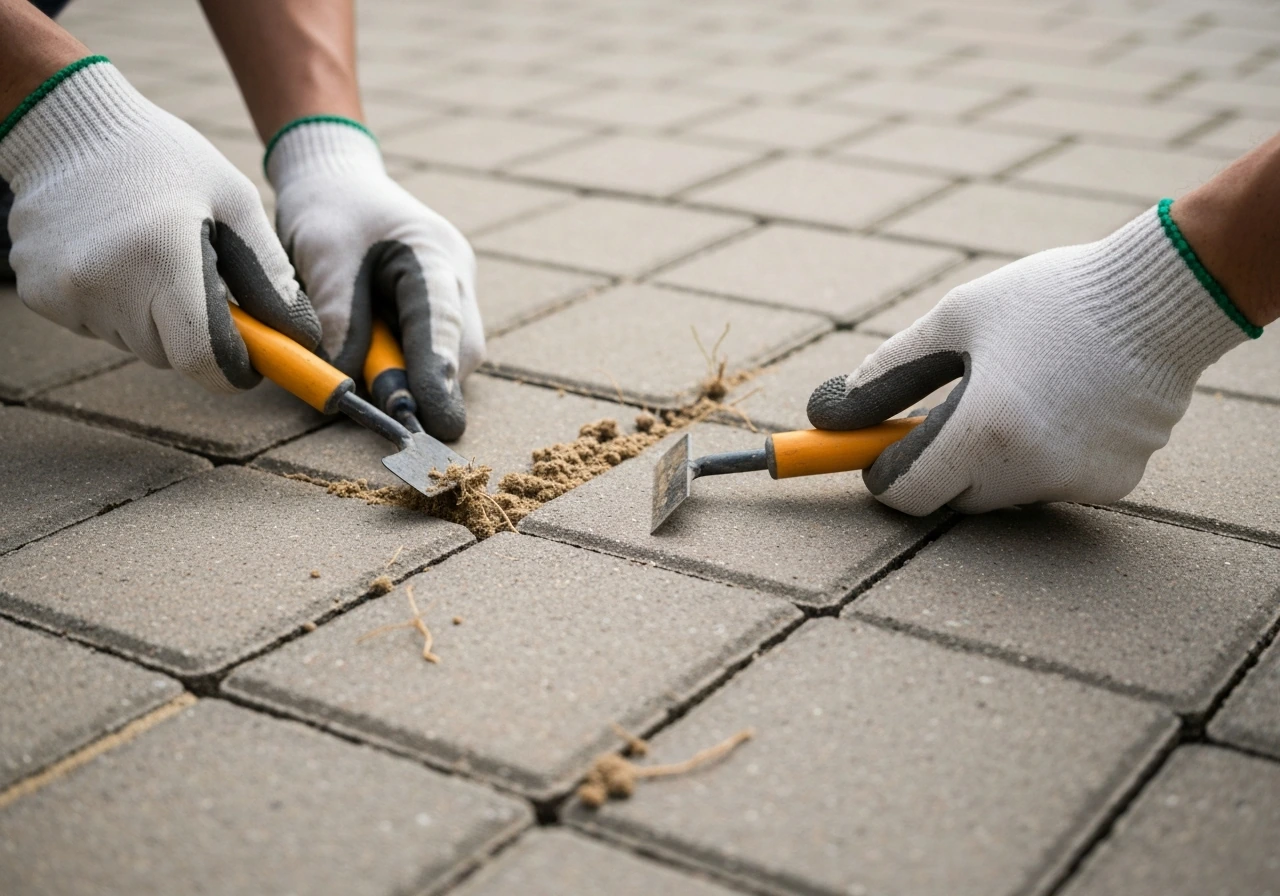
- Remove all weeds by hand or with a weeding tool. Get the roots out, not just the tops.
- If you're replacing old polymeric sand that has failed, remove ALL of the existing sand down to the bottom of the paver. Topping off over old failed material doesn't work. The old sand has compromised binder that prevents new material from bonding properly down the column.
- Blow out loose debris with a leaf blower or use a stiff brush. You want clean, empty joints.
- Let the joints dry completely. If pavers are damp or wet when you apply polymeric sand, the polymer activates prematurely and you get a gummy, uneven result. Aim for a dry spell of at least one day after any rain.
For concrete slab joints
- Remove all old sealant, old backer rod, and any foreign material from the joint. A oscillating tool, a joint scraper, or a flat chisel works well. Don't skip this: old sealant prevents adhesion and gives you the wrong joint geometry.
- Brush out dust and debris with a stiff brush or compressed air.
- Check for oil stains or contamination and clean with a degreaser if needed.
- Let the joint dry. Moisture trapped under a sealant is a leading cause of early failure.
- If the slab edges are spalling badly and chunks are breaking off, stop and assess. Deep spalling can indicate a structural issue with the slab that a sealant won't fix.
Step 4: Fill the joints the right way
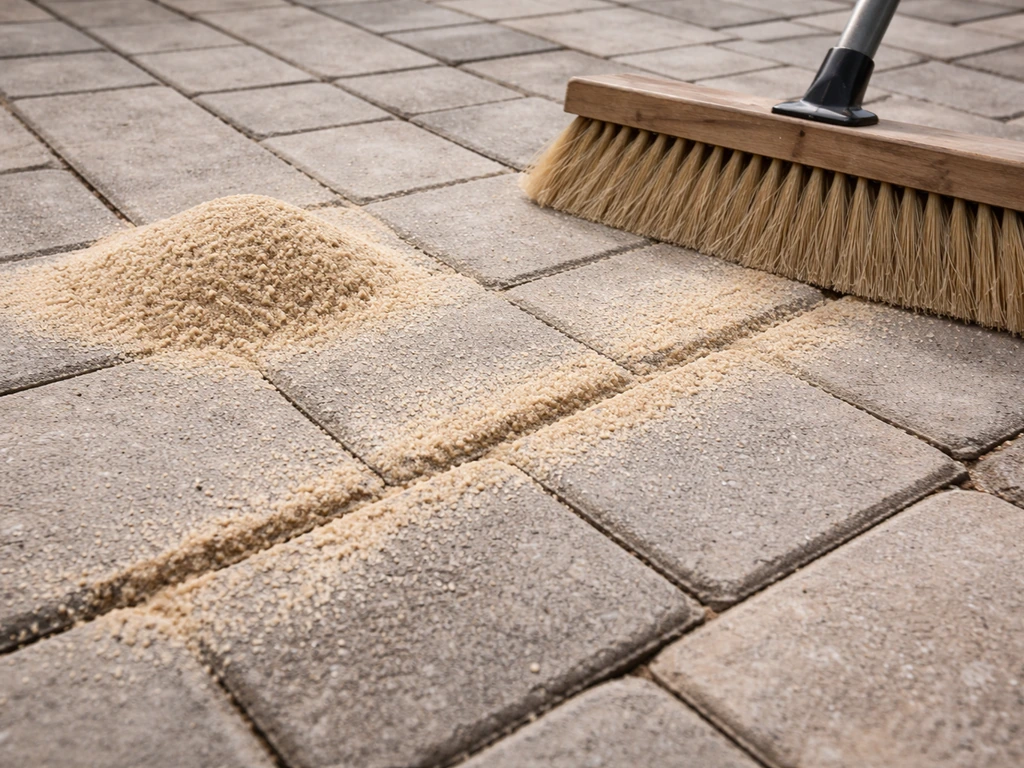
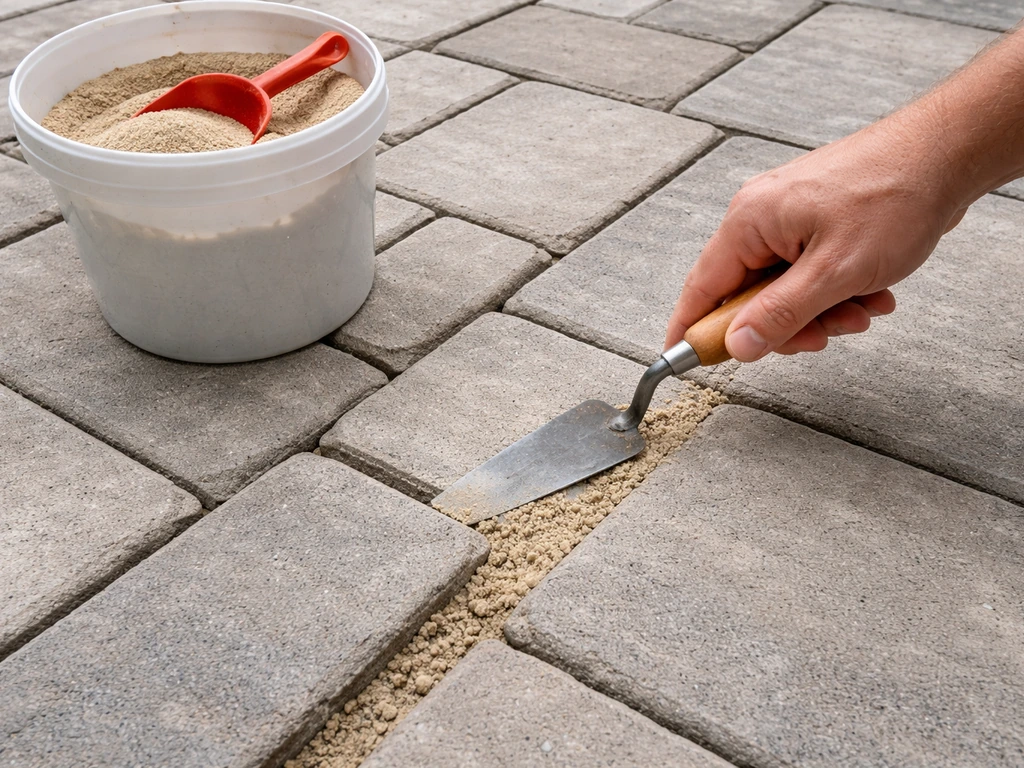
Filling paver joints with polymeric sand
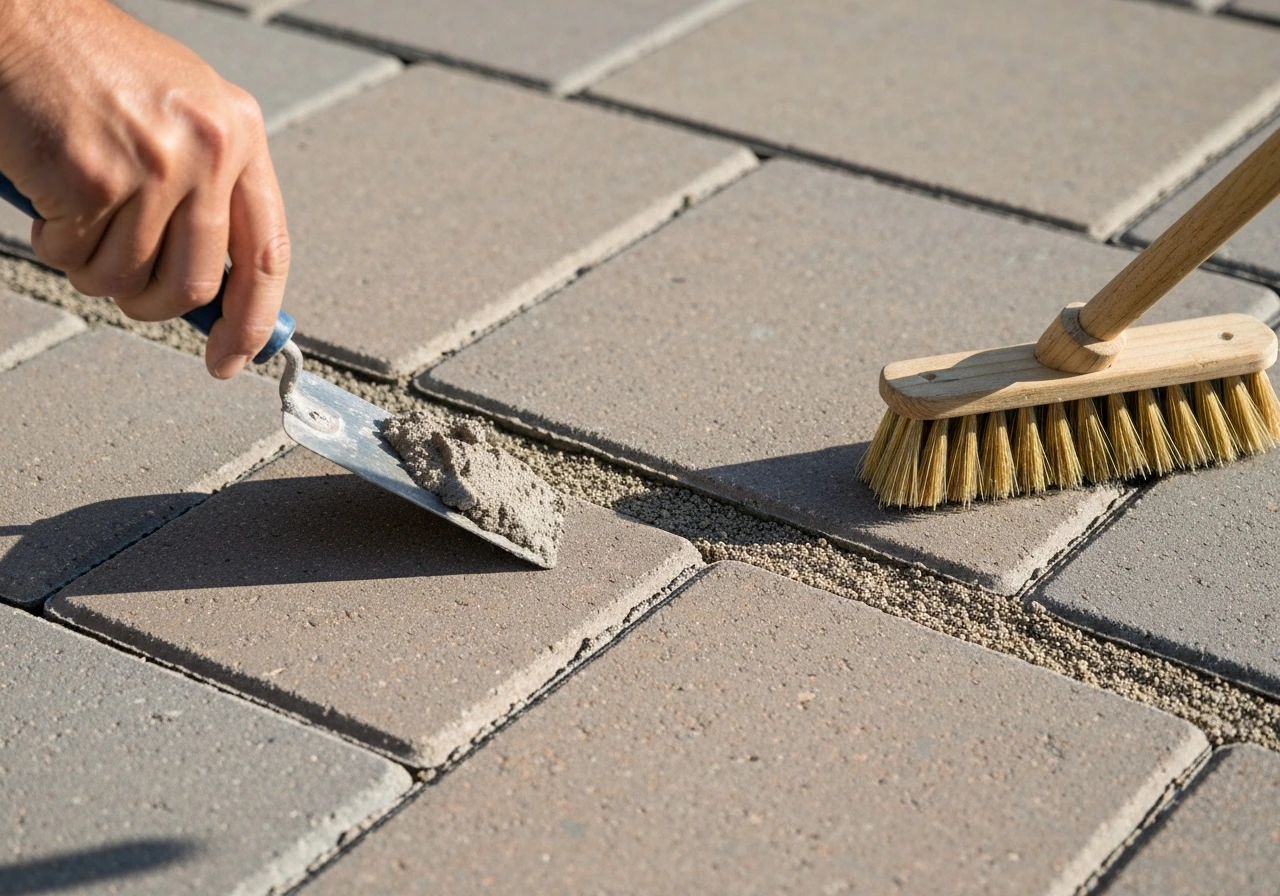
- Pour polymeric sand over a dry paver surface and spread it with a broom, working it into the joints in multiple passes. Don't try to fill everything in one sweep.
- Check that joints are filled to within about 1/8 inch of the top of the paver. You don't want sand sitting proud and coating the paver surface, but you also don't want a deep void.
- Compact the sand by running a plate compactor over the pavers (or use a rubber mallet and a piece of board for smaller areas). This settles the sand and may require a second round of sweeping and filling.
- Once joints are full and compacted, blow off ALL excess sand from the paver surface with a leaf blower before wetting. Any sand left on the surface will stick permanently once activated. This step matters more than most people realize.
- Set your hose nozzle to a gentle shower setting, NOT a jet. Wet the surface slowly and evenly, working in sections. Stop spraying once the sand stops absorbing water. You're not trying to flood the joints, just activate the binder.
- Keep the area dry. The biggest risk in the first 24 to 48 hours is a heavy rain washing the sand out before it sets. Check the forecast before you start. If heavy rain is coming, wait.
Filling concrete slab joints with flexible sealant
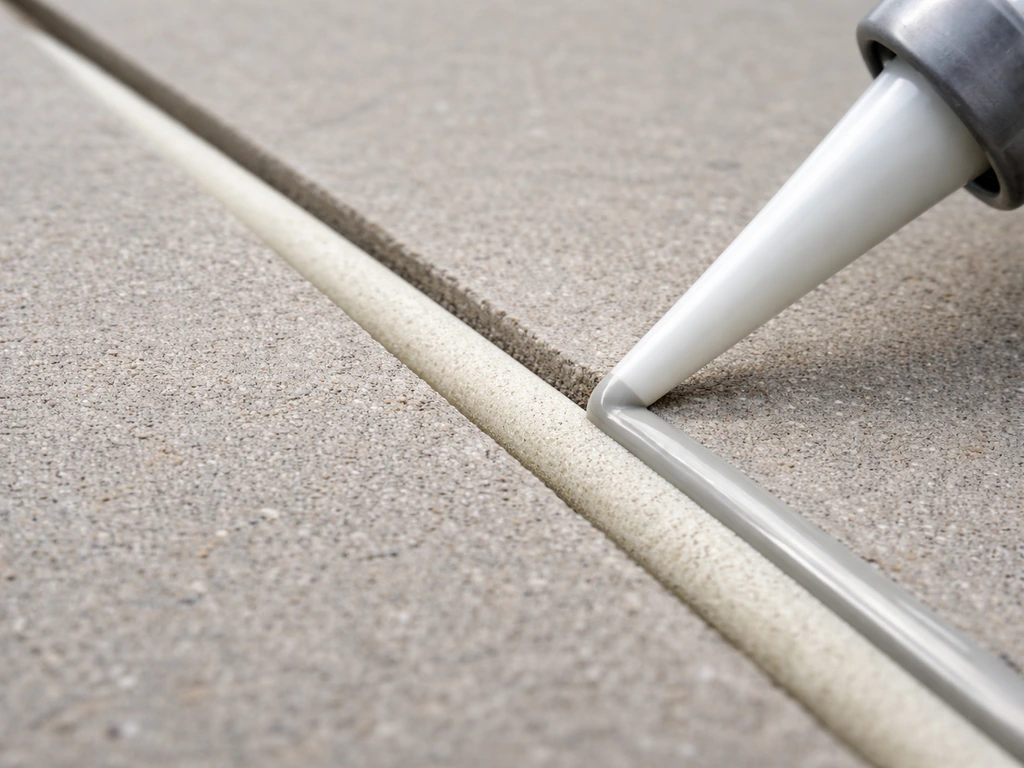
- If the joint is deeper than 1/2 inch, press a foam backer rod into the joint until its top surface sits at roughly the depth you want your sealant to end. For a 1/2-inch wide joint, the sealant should be about 1/4 inch deep (a 2:1 width-to-depth ratio is the standard starting point). The backer rod diameter should be about 1/8 inch wider than the joint so it seats with light compression.
- Apply painter's tape along both edges of the joint for a clean finish.
- Load your sealant into a caulk gun and apply it in a smooth, consistent bead. Work slowly and steadily to avoid air pockets.
- Tool the sealant slightly below flush with the surface using a putty knife or your finger (gloved). A slight concave profile sheds water better than a proud bead.
- Remove the tape while the sealant is still wet.
- Let it cure per the product instructions before exposing it to foot traffic or rain.
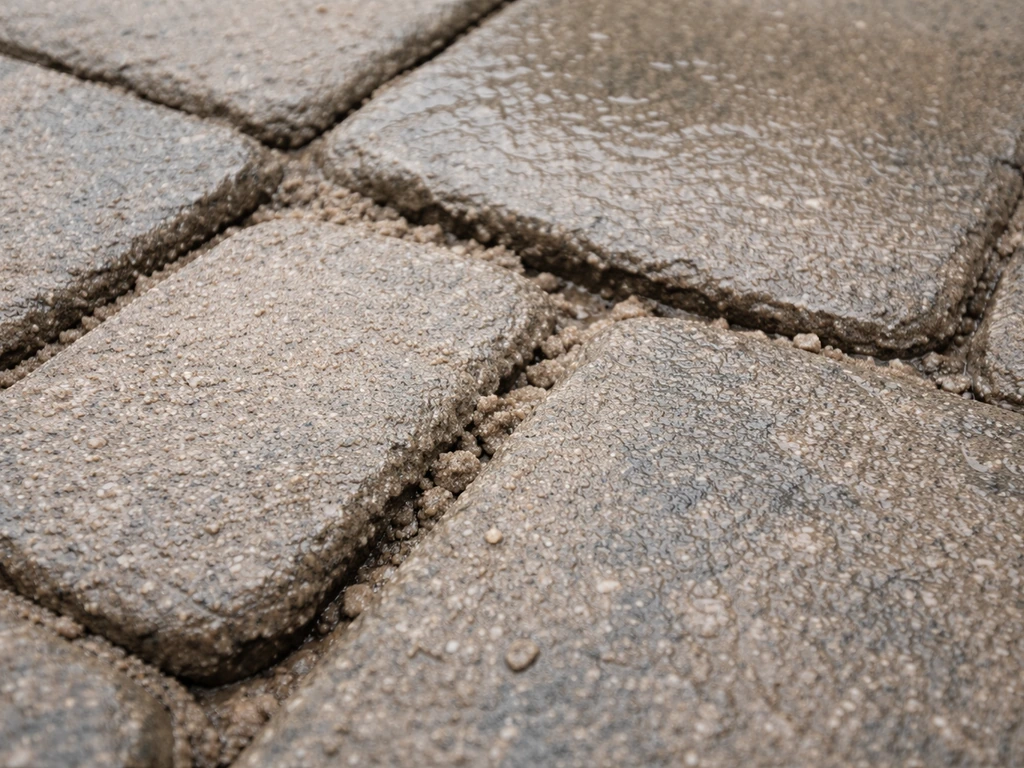
Filling slab joints with cementitious mortar
- If the joint is deep, pack backer rod to within 10mm (3/8 inch) of the surface first.
- Mix the repair mortar to a stiff, peanut-butter-like consistency. Too wet and it shrinks more as it cures.
- Pack the mortar firmly into the joint, eliminating air pockets. Use a pointing trowel or a putty knife.
- Strike the surface level or slightly below the surrounding concrete.
- Mist lightly with water for the first couple of days to slow the cure and reduce shrinkage cracking.
Curing, cleanup, and realistic lifespan
How long you wait before using the patio matters a lot. Rushing this is how you undo a good installation.
Polymeric sand cure times
Expect polymeric sand to take up to 48 hours or longer to fully set, depending on temperature and humidity. Quikrete’s HardScapes polymeric jointing sand data sheet specifies a protection-from-rain window and waiting period before significant foot traffic when installed per its instructions, commonly aligned with about blank" rel="noopener noreferrer">48 hours for major traffic. Most products clear foot traffic in about 24 hours. For vehicular traffic (if the patio connects to a driveway or parking area), wait at least 72 hours. Temperatures need to stay above about 35°F (2°C) during that window for the binder to cure properly. Don't let heavy rain hit it in the first 24 to 48 hours: a real downpour can dislodge the sand before the polymer sets, and you'll be starting over.
Sealant and mortar cure times
Flexible sealants typically skin over in a few hours but need 24 to 72 hours for a full cure before foot traffic, depending on the product. Cementitious repairs like SAKRETE Concrete and Mortar Repair need temperatures above 10°C (50°F) for 48 to 72 hours. Cold nights slow or stall the cure, so plan accordingly in spring and fall.
Weed prevention
Properly installed polymeric sand is genuinely effective at blocking weeds because there's no loose soil or void for seeds to root in. The key word is properly. If the joints aren't filled to depth, if there are voids, or if washout occurred early on, weeds will find their way in. Some people apply a polymeric sand joint sealer or a paver sealer over the top after the sand cures as an extra barrier, which also helps lock in the surface layer. For concrete slab joints, a fully sealed joint with flexible sealant removes the gap where seeds and moisture collect.
How long does it last?
A properly installed polymeric sand job on a well-built paver base can last 5 to 10 years or more before it needs significant attention. Real-world results vary based on freeze-thaw cycles, drainage, and foot traffic. Flexible sealants on concrete joints typically last 5 to 10 years if the joint was prepped correctly and the right product was used. Cementitious mortar in slab joints lasts 3 to 7 years depending on how much movement the joint sees. Regular kiln-dried sand in paver joints? Expect to redo it every season or two.
When things go wrong: troubleshooting common failures
Polymeric sand washed out or never set
This is the most common polymeric sand complaint, and it almost always comes down to over-wetting during activation or early rain. If the sand is gone or sitting loose and powdery, the fix is to remove all of it (don't just top up), clean the joints thoroughly, and reinstall. Topping off over failed polymeric sand doesn't work. The failed material has compromised binder that prevents the new layer from bonding down the joint. Remove it down to the bottom of the paver and start fresh.
Joints sinking or settling unevenly
If your paver joints look fine but individual pavers are sinking or rocking, the problem isn't the joint filler. It's the base. Filling the joints over a compromised base just masks the issue. Pavers that have sunken significantly (more than 1/2 inch relative to their neighbors) need to be lifted, the base re-leveled, and then reset before you address the joints. Trying to fill your way around a base problem won't hold.
Joint filler cracking or shrinking
Cracks or shrinkage gaps in cementitious joint repairs usually mean the mortar was mixed too wet, applied in too-thick lifts, or the joint was moving more than the material could handle. If your patio joint mortar is failing, an easy fix is to remove the loose material and use the right repair product for the amount of movement the joint sees cementitious joint repairs. In a concrete slab control joint, a cracking rigid filler is telling you the joint is doing its job (accommodating movement) and you need a flexible sealant instead. Switch materials rather than trying to patch the crack again. For paver joints, crumbling or cracked polymeric sand can indicate the paver base has movement or frost heave issues worth addressing.
Weeds coming back after polymeric sand
If weeds are pushing through polymeric sand joints, there are three likely causes: the binder never fully activated (moisture issue during installation), the joints weren't filled to the correct depth leaving voids the sand column couldn't bridge, or the surface layer has worn down over years and the joint is now partially open. For regrowth in a relatively new install, the repair is to remove and redo the joints properly. For gradual wear over years, you can sometimes clean the joints well, apply a thin layer of new polymeric sand, and reactivate, but only if the existing base layer is still solid and bonded.
Concrete slab sealant failing or debonding
Sealant that's peeling away from the sides of a concrete joint almost always means the old sealant wasn't fully removed before the new material was applied, or the joint surfaces were contaminated with dust, moisture, or oil. The fix is to remove everything, clean the joint properly, install fresh backer rod, and reseal. There's no shortcut that works reliably here.
Maintenance to keep joints from failing again
Once your joints are filled correctly, a little regular attention goes a long way. Check paver joints each spring after winter freeze-thaw cycles and top up any spots where the sand has settled or washed. Keep the patio surface clear of debris so organic material doesn't build up in joints and give weeds a foothold. If you have a concrete slab with flexible sealant joints, inspect them every couple of years and spot-repair any sections that have cracked or pulled away from the concrete edge, before water gets in and starts working on the base. Applying a paver sealer over polymeric sand every few years protects the binder from UV and surface wear, and extends how long the joint material holds up. These are small jobs when you catch them early. They become large ones when you don't.
FAQ
Can I use polymeric sand in all patio joint types?
No, joint fillers are not interchangeable. Polymer sand is for interlocking paver joints up to about 2 inches wide, while concrete control and expansion joints need flexible sealants that can stretch and compress. If you use polymer sand in concrete slab joints, the rigid particles won’t flex and the joint will open or debond faster.
What’s the best way to prep joints so the filler actually bonds?
Before adding any filler, remove loose or contaminated material and then vacuum the joint clean. If you are dealing with weeds, pull the growth first, then reach down to the bedding layer level and ensure the joint is free of soil residue, not just on the surface. Fresh product bonds much better to clean, exposed joint walls and base.
How do I avoid washout when activating polymeric sand?
For paver patios, the application method matters as much as the product. After spreading polymeric sand, sweep it into the joints thoroughly, then activate with a controlled, gentle mist. Over-wetting during activation is a primary cause of washout, and the fix is to remove the failed sand all the way down rather than topping it off.
What if my paver joints are wider than 2 inches?
If your paver joints are wider than the product rating, polymeric sand can fail because it cannot form a proper locked “sand column.” In that case, you may need a different jointing system, such as a polymeric sand variant rated for wider joints or a combination approach that includes adjusting the base thickness. Measure width and depth carefully before buying.
Can I still use polymeric sand on shallow paver joints?
Yes, but with limits. If the joint depth is less than the minimum depth required to create a sand column (the article notes about 4 cm or 1.5 inches for proper performance), polymeric sand may not lock correctly and weeds can return. Consider regrading or adding base material, or switch to an appropriate sealant approach if the patio design allows it.
Can I fix failing polymeric sand by applying a paver sealer anyway?
Don’t assume a “clear coat” or sealer solves a failed installation. If polymeric sand washouts happened or the joint is still loose and powdery, you need to remove all compromised sand, clean, and reinstall. Sealer over weak material can trap an already failing binder and won’t restore the joint structure.
What should I do if a concrete joint keeps cracking after repair?
Not for the same reason. Rigid cementitious patch material in concrete joints that experience movement will typically crack again quickly. For control joints that crack on purpose, and expansion joints that accommodate slab movement, use flexible polyurethane or polyurea sealant with a backer rod when needed.
How do I know whether I need a backer rod for my sealant?
If the joint depth is more than about 1/2 inch for flexible sealants, use a backer rod to control sealant geometry. A useful rule given in the article is to choose a backer rod about 1/8 inch larger than the joint width so it sits snugly with slight compression, then apply sealant to the correct finish profile.
Why does concrete sealant peel off the sides of the joint?
If you see sealant peeling, it usually means bond failure due to poor surface preparation or old material left behind, not that you ran out of sealant. Remove all failing material, clean the joint walls thoroughly, insert fresh backer rod if required, and then reseal. Avoid applying over dust, moisture, or oily residue.
What should I do if it rains soon after installing polymeric sand?
In early stages, not all dislodgement is irreversible, but heavy rain during the first 24 to 48 hours can wash polymeric sand out before the binder sets. If the joints are visibly empty or the sand is powdery and loose, remove all remaining material, clean, and redo the jointing rather than layering on top.
My patio pavers rock. Should I just refill the joints?
Yes, but do a quick diagnosis first. If pavers are rocking or sinking, the base likely needs re-leveling, because joint filler is only designed to treat the gaps. Lift and reset pavers when the height difference is significant (the article notes more than 1/2 inch), then joint again.
How often should I check and maintain patio joints?
Inspect joints after the biggest stress period, freeze-thaw season, and then again after the first warm months. For paver patios, the article suggests checking each spring and topping up settled spots. For concrete flexible sealants, inspect every couple of years and spot-fix any areas that pull away before water reaches the base.
What’s the most effective way to eliminate weeds coming up through patio joints?
If weeds appear in polymeric sand joints, the cause is often incomplete binder activation, incorrect joint depth that leaves voids, or surface wear that partially opens the joint. For relatively new joints, removal and redoing is usually the reliable fix. For older, worn joints, you may be able to clean and add a thin layer only if the base layer is still solid and bonded.
What Is the Best Way to Fill Gaps on a Patio? DIY Guide
DIY steps to fill patio gaps by gap type and size, using the right materials, prep, cure times, and prevention.