The right repair method depends entirely on what type of joint you have and why it failed. Paver joints filled with regular or polymeric sand need to be cleaned out, the underlying drainage or base problem addressed, and then re-sanded properly. Mortar or cement joints between concrete slabs need the crumbled material cut back, the joint cleaned, and fresh mortar or jointing compound packed in. Expansion and control joints need the old sealant stripped out, a backer rod set, and a flexible polyurethane sealant applied. Jump straight to the wrong fix and you'll be doing it again in a year.
How to Repair Patio Joints: Pavers, Concrete, Expansion

Talia Lang
6 Jun 2026
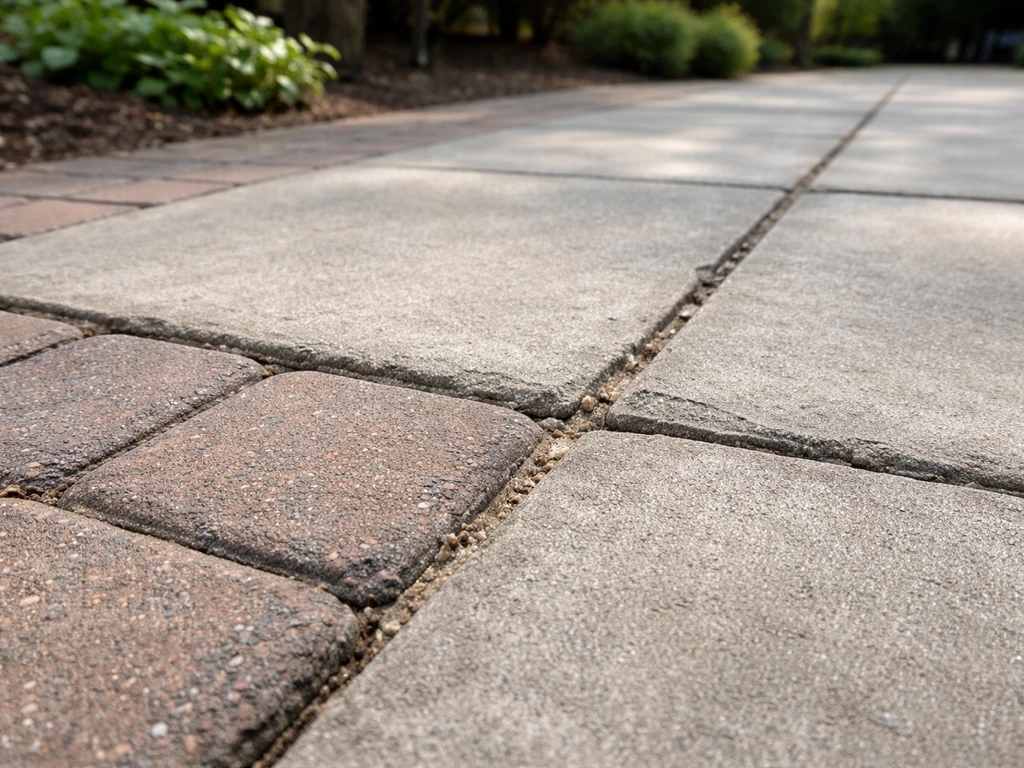
Figure out what type of joint you have and why it actually failed
Before you buy a single bag of anything, spend five minutes diagnosing the joint. Most failed patio joints fall into one of three categories, and each one needs a different approach.
- Paver joints: the gaps between individual pavers, flags, or slabs. Typically filled with kiln-dried sand, regular jointing sand, or polymeric sand. These erode, wash out, grow weeds, or crumble.
- Mortar or cement joints: rigid, grouted joints between concrete slabs, paving stones, or step edges. These crack, hollow out, spall, or pop loose entirely.
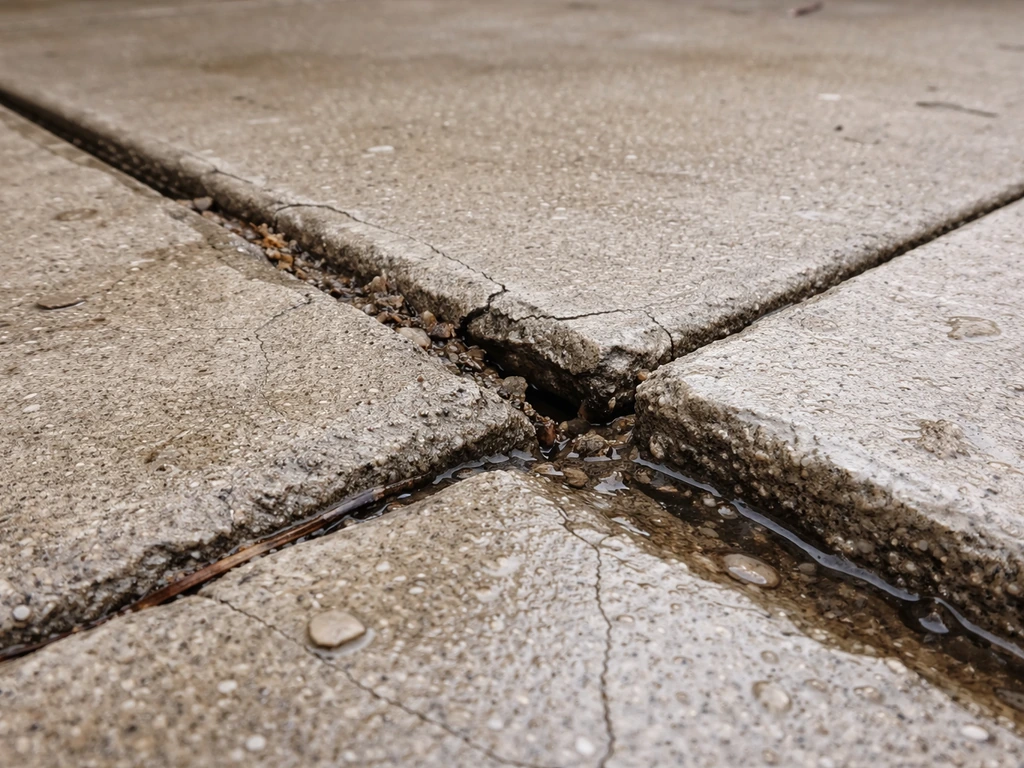
- Expansion and control joints: deliberately placed gaps (usually filled with a flexible sealant or compressible filler) that allow the patio to move with temperature and moisture changes. When these fail, water gets in and the slab edges start to crack or lift.
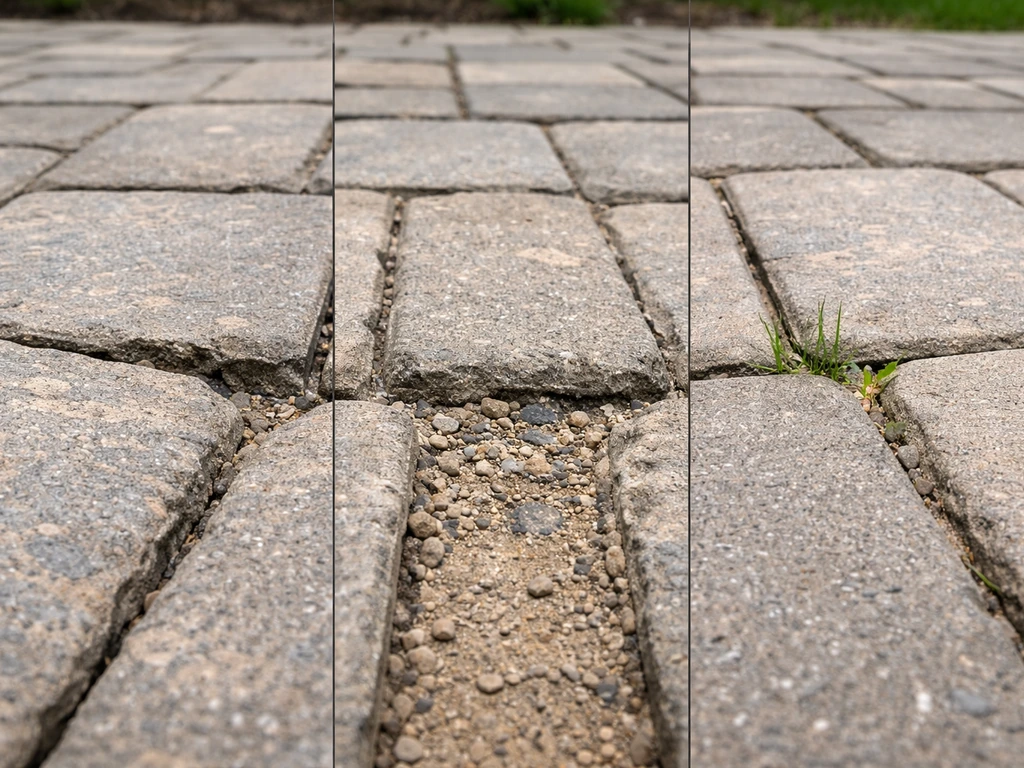
Now ask yourself why the joint failed, because if you don't fix the cause, the repair fails too. The most common culprits are: water draining toward or pooling at the patio surface (standing water after rain is a clear red flag), an inadequate base that allows movement and settlement, freeze/thaw cycles that push pavers up and crack rigid mortar, weeds whose roots have broken the joint material apart, or simply age and UV degradation of sealant or mortar. Weeds pushing up between pavers almost always mean the joint sand has already washed out, which usually points to a drainage or base grading problem underneath. Fix that first or the new sand goes the same way.
Common symptoms and what they mean
| Symptom | Likely cause | Repair type needed |
|---|---|---|
| Rocking or shifting pavers | Sand washout, base erosion, or sunken subbase | Re-sand pavers, check base level |
| Recurring gaps after refilling | Drainage problem or unstable subbase | Address grading before re-sanding |
| Crumbling or hollow mortar joints | Age, freeze/thaw, water infiltration | Repoint with fresh mortar or compound |
| Cracks along straight lines in concrete | Normal shrinkage, control joint movement | Re-seal with flexible sealant |
| Water pooling on patio surface | Poor grading, clogged joints, failed drainage | Regrade or clear drainage before any joint repair |
| Joint sealant lifting or bubbling | Failed adhesion, moisture trapped beneath | Strip sealant, dry thoroughly, re-apply with backer rod |
Tools and materials you'll need
The exact list depends on your joint type, but here's what covers most patio joint repairs. Having the right tools saves enormous frustration, especially for the prep stage which is where most DIYers cut corners and regret it.
| Job | Tools | Materials |
|---|---|---|
| Paver joint re-sanding | Stiff brush, leaf blower, plate compactor (rent one), garden hose with mist nozzle | Polymeric sand or regular jointing sand, paver sealer (optional) |
| Mortar joint repointing | Angle grinder with diamond blade or oscillating multi-tool, cold chisel and hammer, stiff wire brush, bucket, pointing trowel or grout bag | Quikrete mortar mix or pre-mixed jointing compound, water |
| Expansion/control joint sealing | Utility knife, oscillating tool or grinder, wire brush, shop vac, caulk gun | Closed-cell foam backer rod, self-leveling polyurethane sealant (e.g., Quikrete Non-Sag or self-leveling urethane for horizontal joints), bond breaker tape for narrow joints |
For paver re-sanding jobs, a plate compactor is not optional if you have more than a small section to do. You need it to seat the pavers firmly before sweeping in new sand. Renting one for a day runs $60 to $90 in most areas and makes the difference between a joint that lasts and one that fails after the first rain. For mortar work, an angle grinder with a diamond blade is the most efficient way to cut out old material cleanly, but if you're doing a small patch, a cold chisel and some patience works too.
Prep work: clean out, remove failed material, and get your joint depth right
Good prep is the whole job. Rushing this step is why most patio joint repairs fail within a season. The principle is the same across all joint types: get all the loose, failed, or contaminated material out, get the surfaces clean, and make sure your joint is deep enough to hold the repair material properly. The principle is the same across all joint types, so if you're working on how to fill gaps in patio tiles, make sure you remove loose material first and get the depth right so your new filler stays put. Once you’ve identified whether you’re dealing with paver joints, mortar joints, or expansion/control joints, fill the gaps using the right material and depth for a repair that lasts fill in gaps on patio.
For paver joints
- Pull any weeds by hand or with a weeding tool. Don't just spray and leave them: the roots and debris need to come out of the joint.
- Use a stiff brush, a jointing tool, or a flat-head screwdriver to rake out all the old sand, weed roots, and debris down to the full depth of the joint.
- Blow out the joints with a leaf blower to clear fine dust and remaining debris.
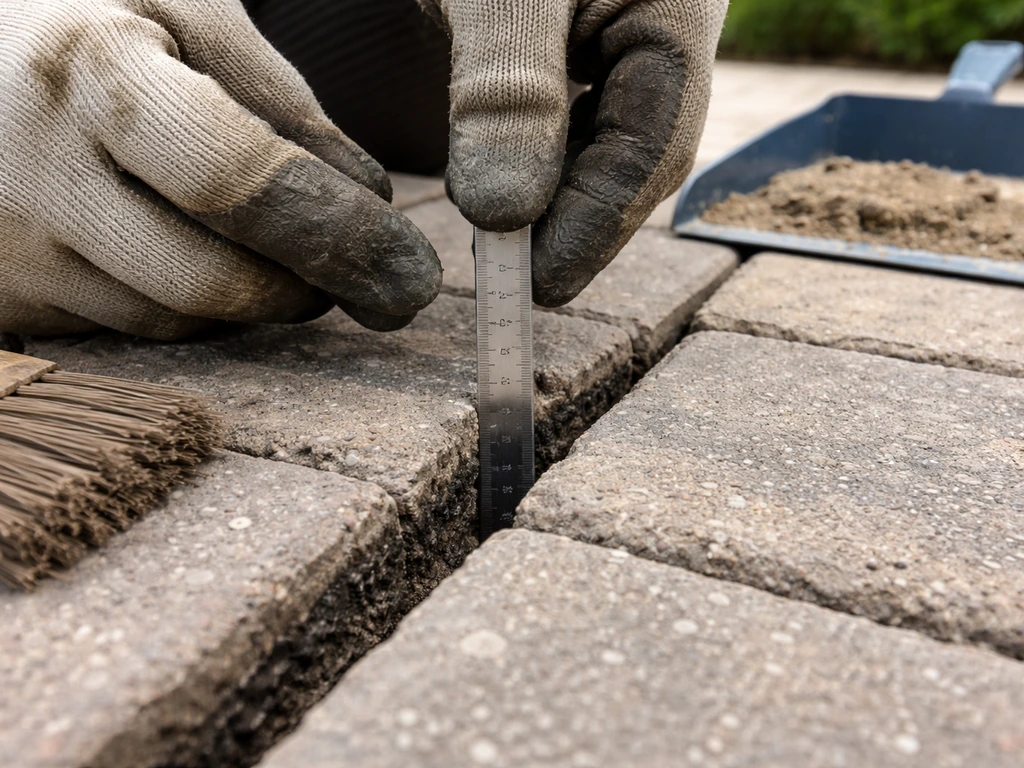
- Check the joint depth. Polymeric sand needs a minimum depth of about 1.5 inches (4 cm) in the joint to work correctly. If your joints are shallower than that because pavers have settled, you'll need to re-level the affected pavers before re-sanding.
- Look at the base: if you're lifting pavers to re-level, check that the bedding sand underneath is intact and evenly distributed. Add coarse bedding sand and re-level any sunken pavers before you move on.
For mortar or cement joints
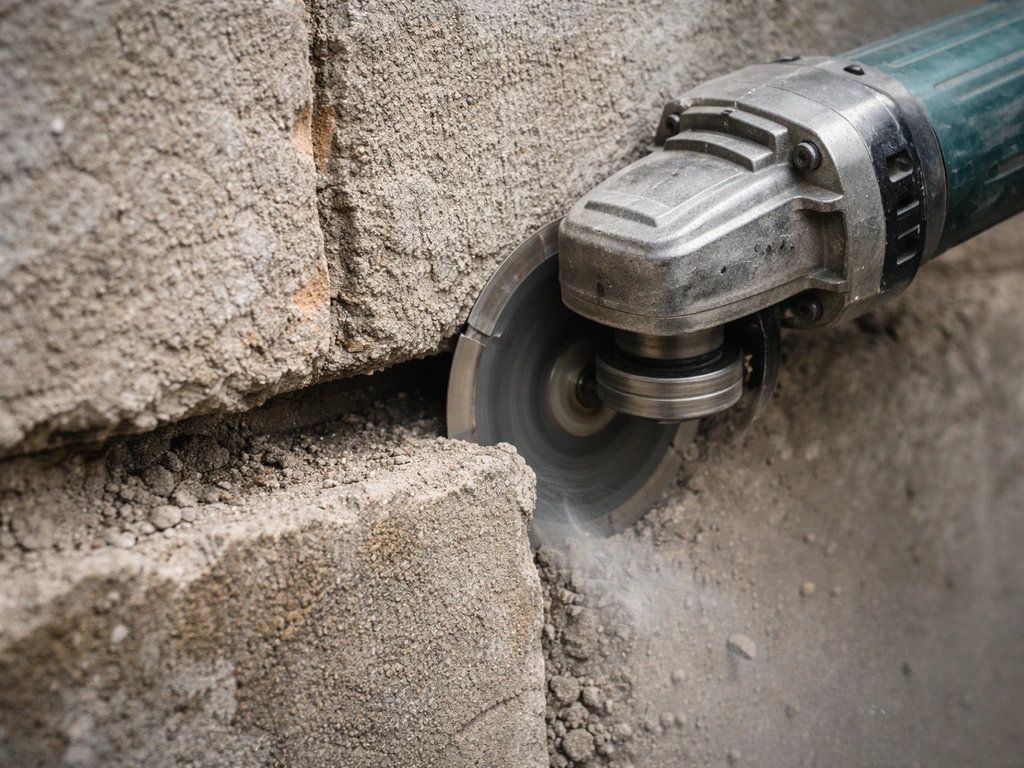
- Use an angle grinder with a narrow diamond blade or an oscillating tool to cut out the deteriorated mortar. You're aiming for a removal depth of at least twice the joint width. For a 3/8-inch joint, that means removing at least 3/4 inch of material, cutting back until you hit sound, solid mortar.
- Use a cold chisel to knock out any remaining loose fragments. Don't leave anything that can flex or crumble behind.
- Brush the joint walls with a stiff wire brush to remove all dust and loose particles.
- Blow out and vacuum the joint, then rinse lightly with water. The joint faces should be damp but with no standing water when you apply new mortar.
For expansion and control joints
- Cut out all the old sealant with a utility knife or oscillating tool. Don't try to apply new sealant over old: it won't bond.
- If there's an old backer rod or compressible filler inside, remove it too.
- Wire brush the joint walls and vacuum out all debris, grit, and dust.
- Let the joint dry completely before sealing. Even residual moisture under a new sealant will cause it to bubble and lift.
Repairing paver joints: regular sand vs polymeric sand
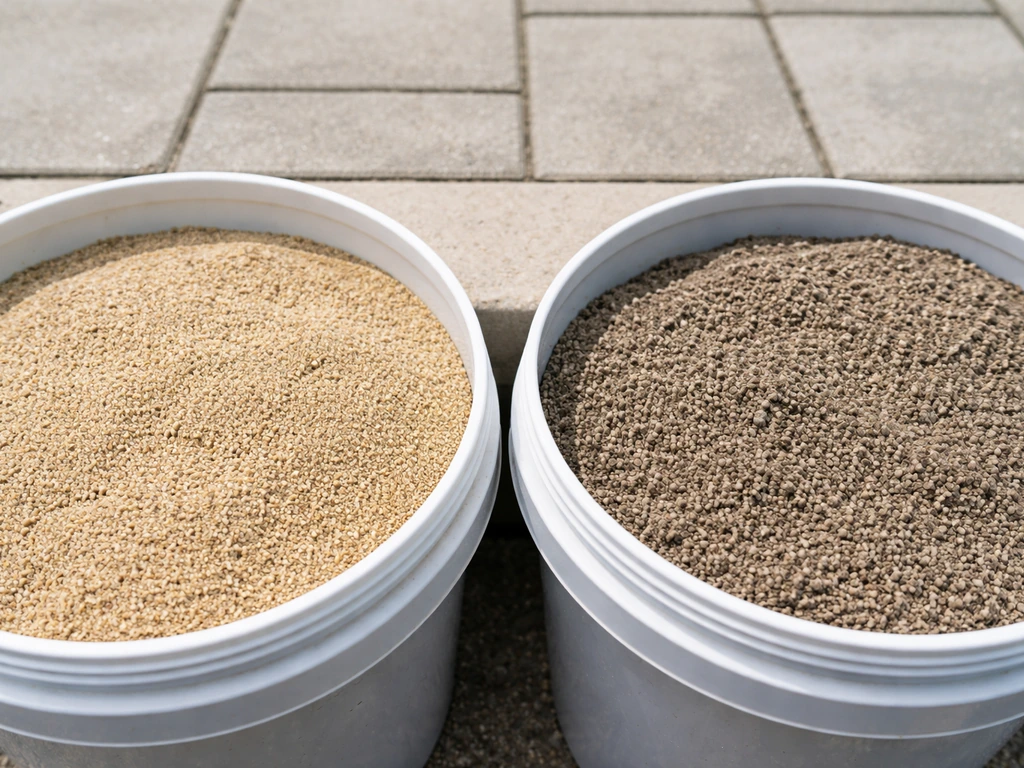
Regular kiln-dried jointing sand is cheap and easy to apply, but it washes out easily, allows weeds to establish quickly, and needs retreating every year or two. Polymeric sand contains a binder that activates with water and locks the sand particles together once it cures, making it significantly more resistant to washout and weed penetration. For most homeowners doing a repair, polymeric sand is worth the extra cost. When you choose the best way to fill patio joints, focus on the joint type and whether you need regular sand or polymeric sand for long-lasting results. A 40 lb bag covers roughly 30 to 45 square feet depending on paver size and joint width, so measure your area before you buy. PermaSand TDS lists example coverage of about 30 to 45 ft² per 40 lb pail, and it advises protecting the installed joints from rain for the first 24 hours A 40 lb bag covers roughly 30 to 45 square feet depending on paver size and joint width.
Steps for polymeric sand installation
- Make sure the patio surface and joints are completely dry before you start. Do not apply polymeric sand on the same day you've pressure washed. Wait for everything to dry out fully.
- Pour the sand across the surface and sweep it into the joints with a stiff broom. Work it in from multiple directions. Keep adding sand until the joints are filled to within about 1/8 inch of the paver surface.
- Run a plate compactor over the surface (with a protective pad or rubber plate) to seat the pavers and help the sand settle further into the joints. Add more sand and compact again if needed.
- Blow off all excess sand from the paver faces with a leaf blower. This step is critical: any polymeric sand left on the surface will leave a hazy residue once it gets wet. Make sure the surfaces are clean before you add water.
- Activate the sand by misting with water. Use a gentle mist setting, not a jet. Make multiple light passes rather than one heavy soaking. The goal is to wet the sand in the joints without washing it back out. Do not use a fine mist that creates a spray cloud over the surface (which can carry polymer dust and create surface haze).
- Keep the patio dry for at least 24 hours after activation. Don't let it rain on it and don't let anyone walk heavily on it during that period. For areas that will carry vehicle traffic, wait at least 48 to 72 hours.
- Avoid installing polymeric sand when temperatures are forecast to drop to 32°F or below within the following 48 to 72 hours. Freezing before the binder cures will ruin the job.
If you're working on an existing patio with some pavers still solid and just refilling joints (rather than a full re-lay), the same steps apply. Just make sure the existing joint material is completely removed first and the joints are at proper depth before you start. Partially filled joints over old sand won't bond properly.
Repairing mortar joints in concrete patios and between slabs
This is what's typically called repointing or tuckpointing. If you’re trying to repair or rebuild patio slab joints, the steps start with identifying the joint type and removing failed material before installing fresh jointing material. You're filling back in the joint with fresh mortar after cutting out the failed material. It's more physical work than re-sanding, but it's very achievable for most DIYers on a small to medium sized patio.
- Mix your mortar to a firm, peanut butter-like consistency. It should hold its shape but not be crumbly. Pre-mixed mortar repair compounds (like Quikrete Mortar Mix or a dedicated jointing compound) are the easiest option for most repairs.
- Dampen the joint with water so the joint walls are moist but not wet. This prevents the mortar from drying too fast and losing strength.
- Pack the mortar into the joint in layers if the joint is deep. For joints deeper than about 3/4 inch, apply in two passes, letting the first layer firm up before adding the second. Don't try to fill a deep joint in one go: it'll crack as it dries.
- Use a pointing trowel or a grout bag to push the mortar firmly into the joint. No air pockets. Compact it slightly as you go.
- Tool the surface of the joint to match the existing profile (flat, recessed, or rounded). Do this while the mortar is still workable, usually within 30 minutes of application depending on temperature.
- Keep the repair damp for at least 24 to 48 hours by misting with water or covering with damp burlap. Mortar that dries too quickly shrinks and cracks.
- Don't walk on repaired joints or allow any load for at least 24 hours, and give full mortar strength at least 7 days before heavy use.
For large or widespread mortar joint failure, pre-mixed jointing compounds designed specifically for patio and paver use are worth considering. They often contain polymers that improve adhesion and flexibility compared to plain mortar, which helps in areas subject to slight movement. If you’re repairing mortar joints or between concrete slabs, you’ll also want to know how to use jointing compound on patio surfaces so the filling bonds and holds up outdoors. If you're seeing cracking in the same joints repeatedly, that's movement in the slab: mortar won't hold long-term and you should look at whether those joints should actually be treated as control joints with a flexible sealant instead.
Repairing expansion and control joints
Expansion joints are the full-depth gaps deliberately left between concrete sections to allow movement. Concretemetric describes expansion joints as full-depth gaps that separate adjacent concrete sections to allow free movement blank" rel="noopener noreferrer">full-depth gaps deliberately left between concrete sections to allow movement. Control joints are the shallower, saw-cut or tooled lines that guide where the slab cracks. Both need a flexible sealant, not rigid mortar. If your issue is gap filling in concrete patios, the expansion and control joint sections are a helpful related option to match the right sealant and depth how to fill gaps in patio slabs. If you fill an expansion joint with mortar, it will blow out again the first time the slab moves. The right material here is a polyurethane sealant, either self-leveling for horizontal joints (flat patio surfaces) or non-sag for vertical or angled joint faces.
- After cleaning out the joint completely (see prep section above), check the joint depth. If the joint is more than 1/4 inch wide, you need to set a closed-cell foam backer rod before applying sealant. The backer rod sits in the bottom of the joint and does two things: it controls the sealant depth so you're not wasting material filling a deep gap, and it prevents the sealant from bonding to three surfaces (the two sides and the bottom). Three-sided adhesion is what causes sealant to tear and fail prematurely.
- Push the backer rod into the joint so it sits about 1/4 to 3/8 inch below the surface. Use a blunt tool (like the back of a marker or a dowel) to press it in evenly. For very narrow or shallow joints where a backer rod won't fit, use bond breaker tape instead.
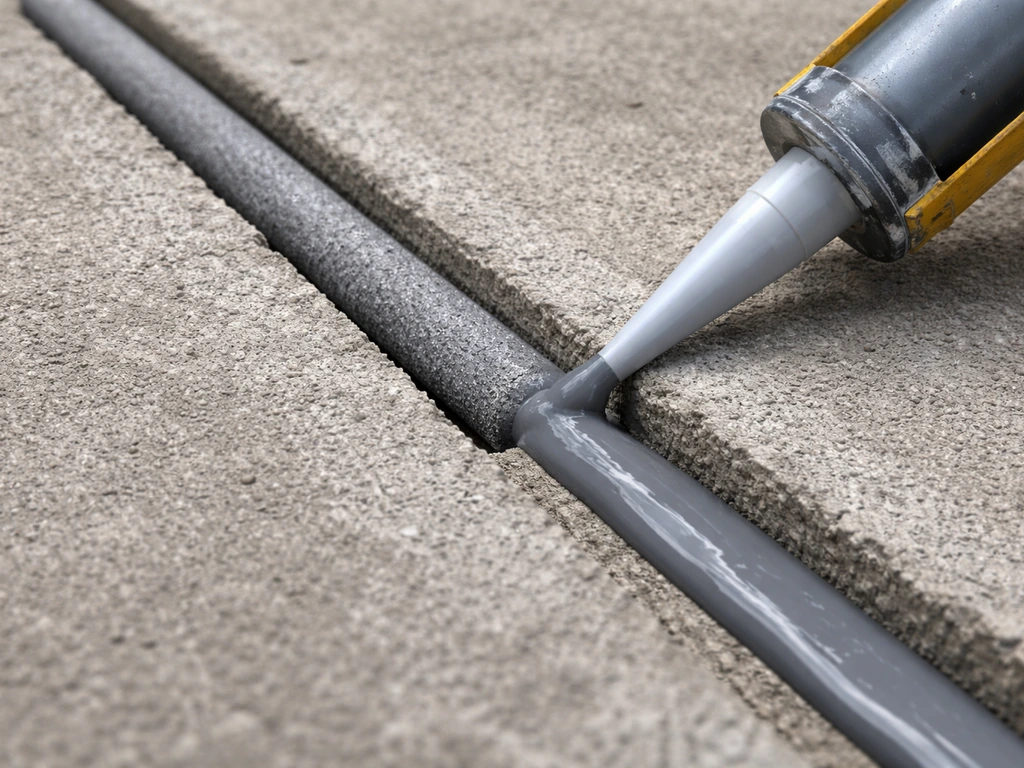
- Apply the polyurethane sealant with a caulk gun, filling the joint to slightly below the surface level. Don't overfill: a slight concave profile is correct and helps prevent water pooling on top of the sealant.
- Tool the sealant smooth with a wet finger or a caulk tool within a few minutes of application.
- Keep traffic off the joint for at least 24 hours, and keep it dry until the sealant has skinned over (check the manufacturer's data sheet, but typically 1 to 4 hours for skinning and 24 to 72 hours for full cure).
Self-leveling polyurethane sealants (Quikrete makes a widely available version) work well for flat patio surfaces where the sealant can flow and self-level into the joint. For angled or sloped joints, use a non-sag formula so it doesn't slump out before it cures. Don't use standard silicone or acrylic caulk here: they don't hold up to the movement and UV exposure that outdoor concrete joints experience.
Cure time, ongoing maintenance, and stopping joints from failing again
The repair isn't done when you put the tools down. Cure time matters more than most people expect, and the habits you build afterward determine whether the joints last five years or fifteen.
Cure time summary
| Repair type | Foot traffic | Vehicle traffic / full load | Keep dry for |
|---|---|---|---|
| Polymeric sand | 24 hours | 48 to 72 hours | 24 hours minimum after activation |
| Mortar repointing | 24 hours | 7 days | Keep damp for first 24 to 48 hours |
| Polyurethane joint sealant | 24 hours | 72 hours | Until surface is fully skinned (1 to 4 hours) |
Maintenance habits that actually extend joint life
- Check paver joints once a year and top up any areas where sand has eroded before weeds establish. A small top-up is a five-minute job; waiting until pavers rock is a full re-do.
- Keep the patio surface and any adjacent drainage channels clear of debris so water can move off the surface freely. Standing water after rain is the single biggest enemy of paver joint sand.
- Re-inspect polyurethane sealant in expansion joints every 3 to 5 years. It does degrade with UV and temperature cycling. Cutting it back and re-sealing is much cheaper than repairing cracked slab edges.
- If you seal the patio surface with a paver sealer, make sure the product you choose is compatible with polymeric sand. Some sealers applied over freshly activated polymeric sand trap moisture and interfere with curing.
- Control the vegetation around the patio edge. Roots from nearby beds or lawn can migrate under the base and cause settlement.
Fixing the actual cause, not just the symptom
If your joints keep failing in the same spots, the joint material is not the problem. Recurring washout almost always means water is draining toward the patio or pooling at the surface, which eventually erodes the bedding layer beneath the pavers. Recurring mortar cracks in the same joint line usually mean that joint is absorbing movement from the slab, and it should be cut back and treated as a flexible control joint rather than rigid mortar. Pavers that keep settling mean the subbase is moving, whether from inadequate compaction during installation, soil erosion, or freeze/thaw heave in the base layers. No amount of re-sanding or repointing fixes a base problem: you'll just keep spending weekends on the same repair. If you are dealing with u-can patio jointing repair, focus on removing failed material, addressing drainage or base issues, and using the right jointing compound so it stays stable after rain and freeze-thaw.
When to stop DIYing and call a professional
Most joint repairs are very manageable for a DIYer with a weekend and the right materials. But there are situations where professional help is the realistic answer, and recognizing them early saves money in the long run.
- Widespread settlement across large sections of the patio (more than a few pavers or a couple of slabs): this usually means the base or subbase has failed and needs to be excavated and rebuilt, not just re-sanded.
- Structural cracking in concrete slabs that runs through the full depth of the slab, especially if the two sides of the crack are at different heights: this is a foundation or base failure, not a joint repair job.
- Persistent drainage problems where water consistently pools on the patio despite multiple repair attempts: you likely need grading work, a French drain, or a channel drain installed by someone who can properly assess the site.
- Any patio that was installed directly on unstable or expansive soil without a proper compacted gravel base: joint repairs are a holding action at best. The whole structure needs rebuilding.
- Historic or specialty materials (natural stone, period brick, decorative concrete with integral color) where matching the existing finish requires specialist knowledge and materials.
Getting a quote from a paving contractor for a base rebuild doesn't commit you to anything, and it gives you a realistic benchmark for whether a DIY repair is actually worth attempting. A contractor who looks at the job and says the base is fine and it's just a re-sanding job is giving you confidence to do it yourself. One who says the base has failed is giving you information you need before you waste another season patching the same joints.
FAQ
How can I tell whether my patio joint failed because of washout versus movement or settling?
Before you choose sand or sealant, check the joint depth and whether water is crossing the patio rather than draining away. After rain, look for standing water directly above the joint line, and also inspect whether the pavers feel loose when you step on them, which usually signals a washout or bedding failure underneath.
Can I repair patio joints by just topping off the missing material?
If the joint material is still firmly bonded and only the surface has eroded, remove enough material to expose clean, sound edges and then re-fill to the same or slightly deeper depth. Do not top off over loose, old sand, because the new material will not bind or lock and will wash out again.
What are the common mistakes when using polymeric sand so it doesn’t wash out or haze?
For polymeric sand, keep it out of the joint faces, because excess on top can haze and become harder to remove. Sweep it in dry, then apply only the amount of water needed to activate it, and stop if you see it flushing out of the joints.
How deep should I remove failed mortar before repointing patio slab joints?
For mortar joints, cut back all crumbled or detached material until you reach solid bonding surfaces, then clean out dust. If you can pry the edge out by hand after patching, the substrate is still contaminated, and the patch will crack or fall out quickly.
Why do expansion and control joint repairs fail if I skip backer rod?
Expansion and control joints must be treated as movement locations, so remove the old material down to the proper depth and install backer rod before sealing. Backer rod controls the sealant thickness, and the sealant needs room to stretch and compress without tearing.
Can I use grout or caulk instead of polyurethane sealant in concrete expansion joints?
Don’t use rigid grout or mortar in expansion joints, it will blow out as the slab expands and contracts. Use a flexible polyurethane sealant, and choose self-leveling for flat horizontal joints and non-sag for vertical or sloped joint faces.
What should I do if the repaired joints keep cracking in the exact same spots?
If the same joint line cracks repeatedly, re-sanding or re-mortaring usually just restarts the cycle. Recut and treat that line as a flexible joint (control joint approach), then use the right flexible sealant so the system tolerates slab movement.
How do I stop weeds from coming back after repairing patio joints?
Yes, but you need to fix the root cause first. If weeds are coming back, it usually means the joint sand washed out or never compacted properly, so remove the loose material, re-prepare the base if needed, and then re-fill with the correct jointing material for your patio type.
How much jointing sand or compound should I buy for a patio re-sanding or repointing job?
Measure coverage by counting joint area and using joint width, then plan for extra material because you will lose some sand during cleanup and compaction. If joints are wider than expected, buy a bit more since underfilling leads to quick washout and easier weed establishment.
Do I really need a plate compactor, or can I repair paver joints by hand?
If your patio uses pavers and the joints are still missing or loose after re-sanding, the plate compactor can be the deciding factor, especially on anything more than a small patch. Compact to seat pavers firmly, then add more sand and re-compact as needed to reach full joint fill.
When should I stop DIY repair attempts and hire a paving contractor?
Consider professional help if multiple zones fail after short periods, if you see evidence of base erosion or improper grading, or if lifting and re-laying sections appear necessary. A contractor can assess whether a base rebuild is required, which is often the real solution when joints keep failing.
Next Article
How to Joint Patio Slabs: Fix Cracks, Gaps, and Drainage
Diagnose patio slab joint problems, then step-by-step fill and seal gaps to stop cracks, rocking, and pooling water.