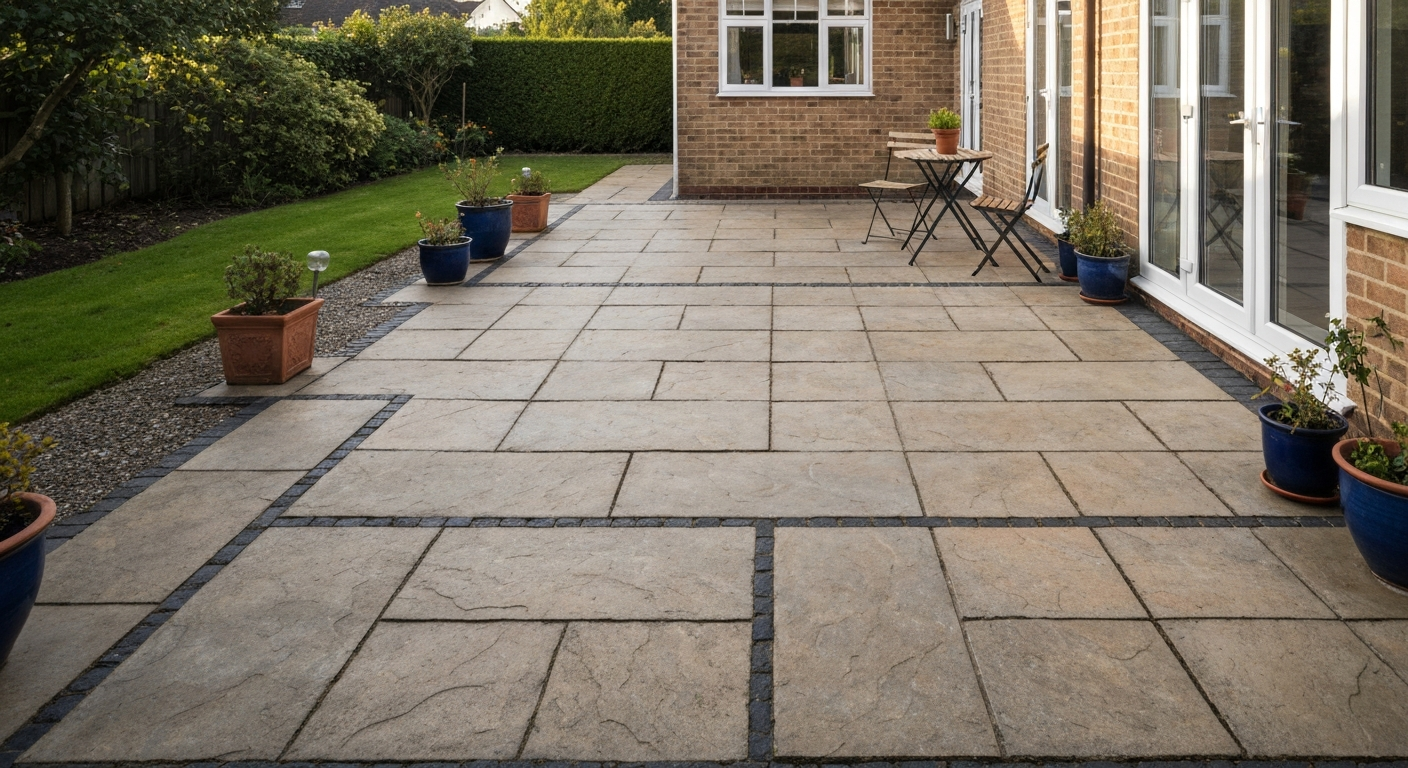
To brighten up patio slabs, start with a thorough clean: sweep off debris, scrub with a stiff brush and soapy water, then pressure wash at 1,500–2,500 PSI using a 25° or 40° fan nozzle. That alone transforms most dull or grey slabs. If moss, oil stains, weeds, or cracked joints are also in the picture, you need a slightly longer plan, but none of it is beyond a capable DIYer with the right sequence and the right products. For a detailed step-by-step restoration, see our guide on how to revive patio slabs.
How to Brighten Up Patio Slabs: DIY Cleaning to Seal and Colour

Talia Lang
12 Aug 2026
What 'brightening up patio slabs' actually means
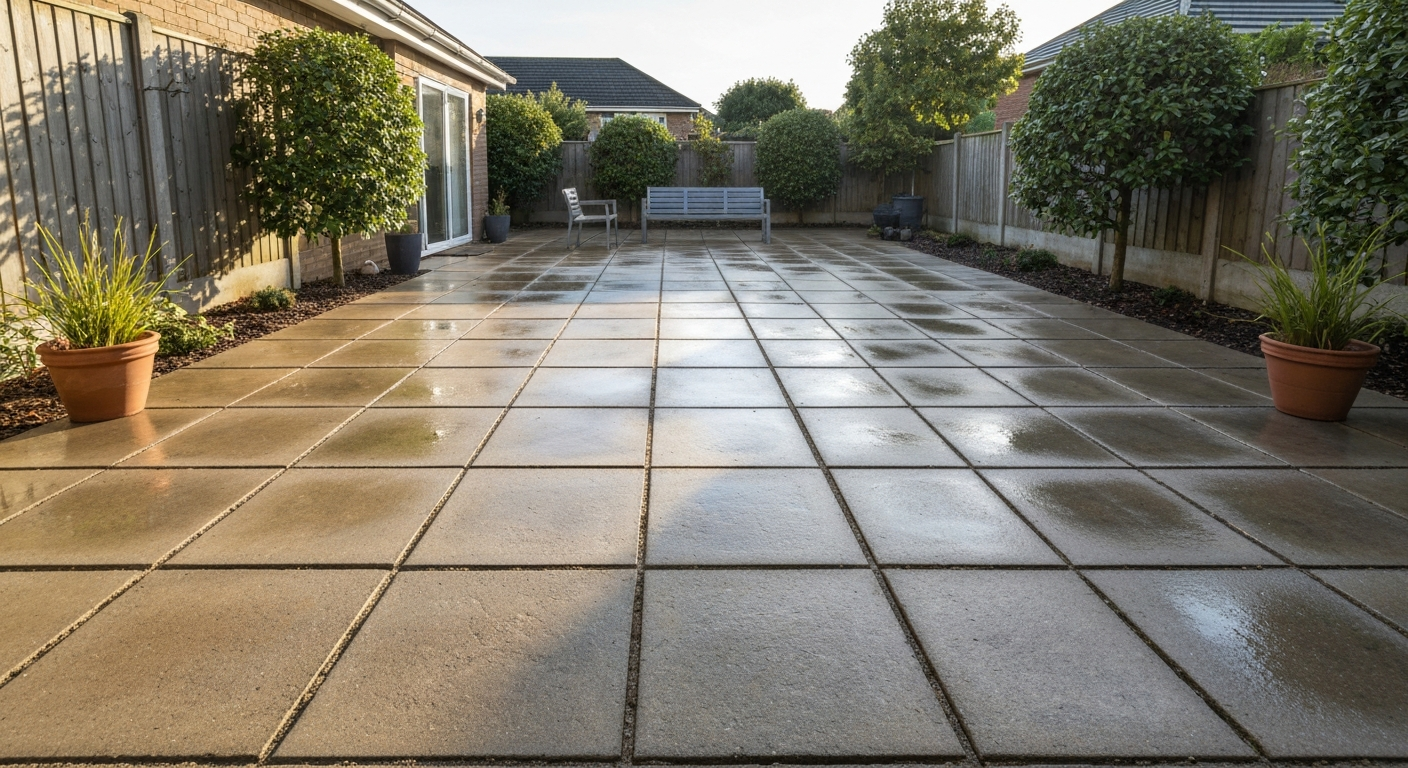
Brightening can mean anything from shifting a film of green algae to stripping years of embedded oil, repointing crumbling joints, and finishing with a colour-enhancing sealant. This guide is for homeowners whose slabs are dull, dirty, stained, or starting to look tired, but who aren't sure whether the job is purely cosmetic or whether something more serious is going on underneath. Before you rent a pressure washer or buy cleaning chemicals, it pays to spend ten minutes diagnosing what you're actually dealing with. A purely cosmetic problem and a structural one can look similar from the outside, and mixing up the two wastes time and money.
Cosmetic or structural? Run this checklist first
Walk across your patio slowly and look at it systematically. You're checking for visual clues and doing a couple of simple physical tests. Be honest with yourself, I've seen homeowners blast a pressure washer over a slab that was actually sinking and hollow underneath, and the cleaning just masked the real problem for another season.
Visual checks
- Crack width: hairline cracks under about 1–2 mm (roughly 1/16 inch) are almost always cosmetic and just need monitoring. Cracks between 3–6 mm (1/8–1/4 inch) may need repair. Cracks wider than 6 mm (1/4 inch), cracks that are displaced so one side sits higher than the other, or cracks that have visibly grown since last year all warrant a closer look before you proceed.
- Lippage between adjacent slabs or pavers: run your foot across the joint. A step of more than about 3 mm (1/8 inch) between two pavers is beyond normal cosmetic tolerance and suggests settling or a failed bedding layer.
- Discolouration patterns: grey or green film across the whole surface is usually algae or pollution grime. White powdery patches are efflorescence (salt deposits). Dark spots are likely oil or organic matter. All cosmetic. Staining that reappears quickly after cleaning can indicate a drainage or moisture issue.
- Joint condition: joints that are empty, crumbling, or have visible weeds growing through them need refilling, not just a clean.
- Surface spalling or flaking: if the surface layer of the slab is peeling away in flakes, the slab face is deteriorating. Cleaning won't reverse this.
Physical tests
- Hollow tap test: knock firmly on each slab with your knuckle or a rubber mallet. A solid thud means it's well-bedded. A hollow drum-like sound means the bedding underneath has failed — that slab needs re-laying, not just cleaning.
- Wobble test: stand on each corner and edge of individual pavers. Any rocking means the bedding is gone. Clean all you like, it'll still rock.
- Water pooling: pour a bucket of water on the surface after light rain. Water that sits for more than a few minutes indicates drainage failure or a low spot from settlement.
If you find hollow slabs, significant lippage, or wide displaced cracks, deal with those issues before any cosmetic work. Cleaning a slab that needs re-laying is a wasted afternoon. The sections on sunken slabs and cracked joints below cover those repairs. If everything passes these checks, you're dealing with cosmetic work and can move straight into cleaning.
Step-by-step plans for the most common problems
Dull, greying slabs with no specific staining
- Clear all furniture, pots, and debris from the surface.
- Sweep thoroughly with a stiff outdoor brush.
- Mix a squirt of washing-up liquid or a diluted concrete/patio cleaner in a watering can or bucket and apply across the surface.
- Scrub with a stiff-bristle deck brush or a long-handled scrubbing brush. Pay extra attention to shaded areas where algae starts.
- Rinse off with a garden hose, working the water toward a drain or off the patio edge.
- Pressure wash at 1,500–2,000 PSI with a 25° fan nozzle, keeping the nozzle 15–20 cm (6–8 inches) from the surface and sweeping in overlapping passes. For natural stone or older clay pavers, drop to 1,000–1,500 PSI and use a 40° nozzle.
- Allow to dry fully (usually 24–48 hours) before applying sealant or any coating.
Oil and grease stains
Fresh oil is far easier to deal with than oil that has soaked in for months. Common, effective oil/grease stain procedures for porous concrete are to start with mechanical methods (absorbent/poultice, dry brushing), then apply an alkaline or surfactant degreaser, agitate and rinse, with older or embedded oil often requiring a concentrated degreaser and repeated treatments, always test in a small area first. For fresh spills, cover the stain immediately with an absorbent material, cat litter, sawdust, or a dedicated oil absorbent powder. Leave it for at least 30 minutes, then sweep and bin it. Do not wash it into the drain.
- After absorbing as much oil as possible, apply an alkaline degreaser (available at most hardware or trade stores) undiluted to the stain.
- Agitate with a stiff brush and leave for the dwell time specified on the product label — typically 10–20 minutes.
- Scrub again vigorously, then rinse with hot water if possible.
- For older or embedded oil stains, repeat the process. It often takes two or three applications.
- Always test the degreaser on a hidden corner first — some stronger products can slightly lighten or bleach certain slabs.
- Do not allow oily rinse water to reach a storm drain. Soak it up with absorbent material or divert it to a collection point.
Moss, algae, and green slime
- Brush off as much moss or algae as you can with a stiff-bristle brush before adding any liquid — wet moss just spreads.
- Apply a purpose-made patio moss and algae killer, or make a diluted bleach solution: roughly 1 part household bleach (5% sodium hypochlorite) to 10 parts water. Do not mix bleach with any acidic cleaner or anything containing ammonia — it produces toxic chloramine gas.
- Apply with a watering can or garden sprayer, covering the affected area. Allow to dwell for the time on the label — usually 20–30 minutes.
- Scrub, then pressure wash or rinse thoroughly. Keep the solution off grass and planted borders.
- For persistent algae on shaded slabs, consider trimming back overhanging plants to increase light, and apply a breathable sealant afterward to reduce future colonisation.
Weeds in joints
- Pull or kill weeds first. A targeted weed killer applied to the joints works well, but check it won't stain your slab type.
- Once the weeds are dead and dry, rake out the old joint material using a pointing tool, a flat-head screwdriver, or a joint rake. Remove all organic debris from the joint.
- Blow or brush out dust and debris with a leaf blower or stiff brush.
- Refill joints with polymeric joint sand (products like GATOR MAXX G2 are widely available). These products need a minimum joint depth of about 38 mm (1.5 inches) and minimum width of 3 mm to work correctly — check the manufacturer spec before buying.
- Spread the polymeric sand over the paved area, sweep it into all joints, compact the surface with a plate compactor (or firm tamping), then sweep off all excess from the slab faces.
- Activate with water: a light shower-spray for about 30 seconds per square metre is a typical guideline, but follow the specific product instructions exactly. Most polymeric sands need to stay dry for at least 24 hours after activation to cure properly — don't do this job if rain is forecast.
Sunken or cracked slabs
A sunken or cracked slab that passed the structural checks above (no wide displaced cracks, no foundation concern) can often be repaired rather than replaced. A single slab that has sunk because its bedding has washed out can be lifted, the void filled with fresh sharp sand or a dry mortar mix, and the slab re-laid and levelled. A crack that is hairline and stable can be filled with a flexible concrete repair mortar or polyurethane sealant to prevent water ingress.
If multiple slabs are sinking in the same area, this almost always points to a drainage problem: water is washing out the bedding sand from below. Fixing individual slabs without addressing that underlying drainage issue means you'll be back doing the same job in 12–18 months. That's the kind of thing where it's worth calling a professional to assess sub-base drainage properly.
Cracks wider than about 6 mm (1/4 inch), cracks that show vertical displacement (one side higher than the other), and cracks that appear to be growing are outside the cosmetic category. These should be assessed by a structural engineer or an experienced contractor before you attempt any repairs, especially if they're near a house wall or foundation.
Tools and materials you'll need
| Item | What it's for | Notes |
|---|---|---|
| Stiff-bristle deck brush | Initial scrubbing and spreading cleaners | Long handle saves your back |
| Pressure washer | Deep cleaning and rinsing | 1,500–3,000 PSI for concrete; 1,000–1,500 PSI for stone/clay |
| 25° and 40° fan nozzles | Pressure washing at appropriate angle | Avoid the 0° (red) nozzle — it will etch or scar most patio surfaces |
| Surface cleaner attachment | Even cleaning of large flat areas | Reduces streaking vs. a single lance |
| Alkaline degreaser | Oil and grease stains | Test in an inconspicuous area first |
| Patio cleaner / algae killer | Moss, algae and general grime | Purpose-made products are safer around plants than raw bleach |
| Diluted household bleach (1:10) | Algae and moss on non-sensitive surfaces | Never mix with acids or ammonia |
| Oxalic or citric acid cleaner | Rust stains and efflorescence | Short dwell times; rinse and neutralise thoroughly |
| Efflorescence remover | White salt deposits | Dry-brush first; only use acid-based remover if brushing doesn't clear it |
| Polymeric joint sand | Refilling and stabilising paver joints | Check min. joint depth (38 mm) and width (3 mm) before buying |
| Pointing trowel or joint raker | Clearing and refilling joints | Flat-head screwdriver works in a pinch |
| Concrete repair mortar (flexible) | Filling stable hairline cracks | Polyurethane crack filler for fine cracks |
| Patio sealant | Protecting surface after cleaning | Choose breathable or colour-enhancing based on desired finish |
| Nitrile or rubber gloves | PPE for all chemical work | Acid-resistant gloves for oxalic/muriatic acid |
| Safety glasses / goggles | PPE for pressure washing and chemicals | Essential — especially when pressure washing upward angles |
| N95 or P100 respirator | Dry grinding, dry raking, or dry wire brushing | Required when generating silica dust from concrete or masonry |
| Old clothes / waterproof overalls | PPE | Bleach and acid cleaners will ruin clothes instantly |
| Plastic sheeting / drop cloths | Protecting plants and adjacent surfaces | Tape down edges to prevent runoff drift |
| Collection tray or absorbent granules | Capturing contaminated washwater | Required for oil-contaminated or chemical runoff |
Safety and environmental precautions
Most patio cleaning injuries come from two things: chemical splashback and pressure washer cuts. A pressure washer at 2,000 PSI can lacerate skin badly, always treat the lance with the same respect you'd give a power tool. Never point it at people, pets, or yourself, and don't try to clean footwear while wearing it. Wear safety glasses at a minimum; goggles are better.
When dry-raking old mortar from joints, dry-wire brushing concrete, or grinding any masonry, you are generating respirable silica dust. This is a serious long-term lung hazard. OSHA's silica standard (29 CFR 1926.1153) and NIOSH guidance both emphasise that engineering controls come first: wet methods (keep the area damp while you work) reduce dust at source. If you're doing significant dry mechanical work on concrete or mortar joints, wear at minimum an N95 particulate respirator, ideally a P100 half-face respirator. Do not rely on a basic dust mask.
Chemical handling: always read the Safety Data Sheet (SDS) for any cleaning product before use. Acid-based cleaners (oxalic, phosphoric, muriatic/hydrochloric) can cause serious burns to skin and eyes and release fumes. Work in well-ventilated conditions, keep bystanders and pets away, and never mix bleach with any acid or ammonia-containing product. Doing so produces chlorine or chloramine gas, genuinely dangerous.
On the environmental side: the EPA's stormwater guidance is clear that pressure-washing wastewater containing oils, detergents, or chemical cleaners must not be allowed to enter storm drains or surface water. In practice this means diverting runoff away from drains during cleaning, soaking it up with absorbent material, or directing it to a sanitary sewer connection, but only if your local authority permits that. When in doubt, call your local water authority and ask. Fines for contaminated stormwater discharges are real. Used absorbent material contaminated with oil or chemical cleaners is typically classed as hazardous waste and needs to go to a licensed disposal facility, not in the regular bin.
Preparation and site setup
Good prep turns a half-day job into an efficient clean rather than a wet, frustrating mess. Start by removing everything from the patio: furniture, planters, BBQ, kids' toys, everything. Not just moving them to the side, take them off completely. A pressure washer produces a wide mist cloud that travels several metres.
- Cover any planted borders directly adjacent to the patio with plastic sheeting weighted down at the edges. Cleaning chemicals — even diluted bleach — can scorch or kill plants.
- Tape plastic sheeting over any air bricks, vents, or gaps in adjacent walls to prevent ingress of cleaning solutions.
- Check the weather forecast. Ideally work on a dry, mild day: above about 5°C (41°F) and with no rain for 24 hours after you finish. Sealants, polymeric sand, and most repair mortars need to cure dry. Do not apply any of these products on a day where rain is likely within 24 hours.
- Do a test patch for any chemical cleaner before committing to the whole patio. Apply it to a small, inconspicuous area, wait for the full dwell time, rinse, and check for discolouration or surface damage once dry. This is not optional — different slab materials and colours react differently.
- Check where your surface water drains to before you start and plan your water management around it.
Basic cleaning: sweeping, scrubbing and detergent washes
Don't skip this step in favour of going straight to the pressure washer. A basic scrub-and-rinse removes loose debris and brings many tired patios back to life without the risks that come with high-pressure water. For light soiling, a stiff deck brush with a diluted patio cleaner or even washing-up liquid is genuinely effective.
Mix about 50 ml of dish soap or a capful of concentrated patio cleaner into a 10-litre bucket of warm water. Pour it over a manageable section of the patio, about 3–4 square metres at a time. Scrub vigorously with the stiff brush in overlapping strokes, working the lather into any visible green patches or grime lines. Let it dwell for 5–10 minutes, then rinse off with a garden hose. The difference this makes before pressure washing is significant: you're not just redistributing surface dirt, you're actively breaking down the organic film that makes slabs look permanently grey.
Detergent washes work well as a standalone method for slabs that are just dull and slightly green but not deeply stained or mossy. They're also the right approach for sensitive surfaces, hand-painted tiles, certain decorative natural stones, and older soft sandstone flags that would be damaged by pressure washing at any meaningful PSI. If you're unsure whether your slabs can take a pressure washer, start with a scrub wash and see how much of the problem it solves first.
How to pressure wash your patio correctly
Pressure washing is the fastest way to transform a dirty patio, but it's also the easiest way to damage one if you get the settings wrong. The most common mistake is using too much pressure at too close a range, it etches the surface, opens up the texture of the slab, and makes it attract dirt even faster afterward.
Pressure settings by slab type
| Slab Type | Recommended PSI | Nozzle | Distance from Surface |
|---|---|---|---|
| Concrete paving slabs | 1,500–2,500 PSI | 25° fan nozzle | 15–25 cm (6–10 in) |
| Concrete block pavers | 1,500–2,500 PSI | 25° fan nozzle or surface cleaner | 15–20 cm (6–8 in) |
| Natural stone (slate, sandstone, limestone) | 1,000–1,500 PSI | 40° fan nozzle | 20–30 cm (8–12 in) |
| Old clay pavers / handmade brick | 1,000–1,500 PSI | 40° fan nozzle | 20–30 cm (8–12 in) |
| Porcelain tiles | Up to 2,000 PSI | 25° fan nozzle | 20 cm (8 in) — avoid grout lines |
| Painted or sealed slabs | 1,000–1,500 PSI | 40° fan nozzle | 25–30 cm (10–12 in) |
Never use the 0° (red) nozzle for patio cleaning. It concentrates the full flow into a pinpoint jet that will gouge concrete, strip mortar from joints, and chip stone. It has no place in routine outdoor cleaning.
Technique
- Start at the highest point of the patio and work downward toward the drain or edge. This avoids washing dirty water back over clean areas.
- Keep the nozzle moving constantly — never hold it static over one spot. Slow, overlapping sweeping strokes about 30 cm (12 inches) wide give even results.
- Overlap each pass by about a third to avoid streaky lines where passes meet.
- For large areas, a rotary surface-cleaner attachment is significantly better than a lance: it applies even pressure across a disc-shaped cleaning head and eliminates the streaking you get from sweeping a single lance.
- Avoid spraying directly into joints at a steep angle — you'll excavate the joint sand. Keep the nozzle angled at about 45° to the surface, not perpendicular.
- Stand at a comfortable working distance and adjust based on results. If the slab surface looks unchanged, move slightly closer. If you see surface pitting or texture opening up, move further away and reduce pressure.
- Rinse detergent or chemical treatments off completely before they dry on the surface — residue can attract more dirt or leave marks.
After pressure washing
After a thorough pressure wash, your joints will almost certainly need topping up, the water will have displaced some joint sand or loosened old mortar. Check the joint depth across the patio once it's dry and refill as needed before applying any sealant. Sealing over inadequate joints just locks in the problem.
Targeted stain removal
Rust stains
Rust stains on concrete or paving usually come from metal furniture legs, bbq feet, or ferrous materials in the stone itself. Oxalic acid, citric acid, and phosphoric acid-based cleaners are the standard approach. Apply the product to the stain at the dilution specified on the label, allow it to dwell for 5–30 minutes (check the instructions, don't let acid dry on the surface), then scrub and rinse very thoroughly. Neutralise the area with a baking soda and water solution if using a strong acid cleaner. Always test in a hidden spot first: acid cleaners can bleach or slightly etch some slab types.
Efflorescence (white powdery deposits)
Efflorescence is mineral salt being pushed to the surface by moisture moving through the slab. It's common on new concrete and brick, and also appears after wet winters on older patios. The PCA and most masonry guidance recommends starting with dry brushing, a stiff brush often removes a surprising amount without any chemical. If dry brushing doesn't clear it, use a proprietary efflorescence remover or a diluted acid solution (typical guidance suggests 1 part acid to 4–10 parts water depending on severity and product, follow the specific label). Rinse and neutralise thoroughly. Note that if efflorescence keeps coming back, it's a sign of persistent moisture movement through the slab, which points to a drainage or damp-proofing issue worth investigating.
Sealing, colouring and protecting your slabs
Once your slabs are clean and dry, a sealant is the single best thing you can do to keep them looking good longer. For a step-by-step walkthrough on how to update patio slabs, including repairing sunken slabs and choosing the right sealant, see our guide on how to update patio slabs (internal reference). For step-by-step advice on more extensive makeover options, see how to revamp patio slabs. For a step-by-step checklist and product recommendations on how to make your patio slabs look better, see the dedicated guide (a343090f-a617-4636-8293-0f0994cecf61). It reduces porosity, making future cleaning much easier, and slows the colonisation of algae and moss. There are a few different routes depending on the look you want.
| Product Type | Effect | Best For | Approximate Durability |
|---|---|---|---|
| Impregnating / breathable sealant | Invisible protection, no sheen change | Natural stone, textured concrete | 3–5 years |
| Colour-enhancing sealant | Deepens the natural colour, semi-sheen | Dull or washed-out concrete and stone | 2–4 years |
| Wet-look / gloss sealant | High shine, noticeably changes appearance | Smooth concrete, block pavers | 2–3 years (more maintenance) |
| Patio paint / floor paint | Solid colour change | Old, marked, or patchy slabs you want to unify | 1–3 years before recoating needed |
| Limewash / mineral wash | Softened, aged appearance | Natural stone and rough-textured slabs | 1–2 years, easy to reapply |
Whatever product you choose, make sure the slab is genuinely dry before applying, 48 hours after cleaning in good drying conditions is a reasonable minimum. Apply sealants in thin coats (usually two coats are better than one heavy coat) and follow the manufacturer's temperature requirements: most sealants should not be applied below 5°C (41°F) or in direct strong sunlight, which causes them to dry unevenly.
Quick cosmetic upgrades that make a big difference
Sometimes the slabs themselves are fine, it's the surroundings that make the patio feel dull. A clean, well-jointed patio looks dramatically better with a few simple additions.
- Repoint or re-sand joints: fresh, even joints pull the whole patio together visually and make the slab surface look newer.
- Add low-voltage LED border lighting or solar spike lights along the edges. The difference at dusk is significant and neither requires an electrician.
- Place planters or raised beds at the corners or along one edge to break up the flat expanse of paving.
- Use outdoor rugs on clean, sealed slabs to define zones — a dining area rug changes the feel entirely.
- Power-wash the adjacent walls and fences at the same time — a clean patio next to grimy rendered walls still looks unfinished.
Realistic time and cost expectations
| Task | DIY Time (approx.) | Rough Material Cost |
|---|---|---|
| Sweep and scrub clean (medium patio ~20 m²) | 1–2 hours | Under £10 / $12 |
| Pressure wash (rent machine) | 2–4 hours including setup | £40–80 / $50–100 machine rental |
| Moss/algae treatment and rinse | 1–2 hours (plus dwell time) | £10–25 / $12–30 for product |
| Oil stain removal (fresh) | 30–60 minutes | £5–15 / $6–18 |
| Repointing joints (20 m² patio) | Half to full day | £20–50 / $25–60 for polymeric sand |
| Re-laying a single sunken slab | 1–2 hours | £5–15 / $6–18 (sand/mortar) |
| Applying a penetrating sealant (20 m²) | 1–2 hours plus drying time | £20–60 / $25–75 |
| Patio paint (20 m²) | Half day, two coats | £30–80 / $35–100 |
A full clean-and-reseal on a standard domestic patio (around 20 square metres) is a realistic weekend project. If you add joint repair and a couple of sunken slabs, budget a full day or split it across two days to allow proper drying time between stages.
When to call a professional
I'll be straight with you: most of what's covered in this guide is well within DIY capability. But there are situations where calling someone in is the right call, not a cop-out.
- Multiple slabs sinking across a wide area, or sinking near a house wall or foundation: this can indicate sub-base failure or a drainage problem that needs proper assessment.
- Cracks wider than about 6 mm (1/4 inch) that show vertical displacement or that have visibly grown: these should be evaluated by a structural engineer before repair.
- Persistent efflorescence that returns weeks after cleaning: this often points to damp ingress through the structure beneath, not just a surface issue.
- Any patio immediately adjacent to a retaining wall that shows cracking or movement: retaining wall failures can be dangerous.
- Chemical cleaning where the runoff cannot be controlled away from drains or watercourses: a professional with appropriate waste management equipment is the safer choice.
Maintenance schedule to keep slabs bright
The best way to avoid a day-long restoration project every few years is a light maintenance routine that keeps on top of things before they get bad. Algae and moss are far easier to treat when they first appear as a faint green tinge than when they've built up into a thick mat over several seasons.
| Frequency | Task |
|---|---|
| Monthly (spring–autumn) | Sweep off leaves, soil and debris before they decompose and stain |
| Every 6 months | Scrub with diluted patio cleaner and rinse — catches algae before it takes hold |
| Annually (spring) | Inspect joints, check for weeds, assess any settling or lippage |
| Every 1–2 years | Pressure wash the full surface and top up joint sand as needed |
| Every 3–5 years | Reapply sealant (or as soon as water stops beading on the surface) |
| After any frost-heavy winter | Check for new cracks or spalling and fill promptly to prevent water ingress |
Brightening up patio slabs isn't one single job, it's a sequence of decisions based on what's actually wrong. Run the diagnosis first, address any structural issues before cosmetic ones, clean in the right order, and protect the surface when you're done. Done that way, the work you put in this weekend should still be visible in five years. For a step-by-step checklist and product recommendations, see our guide on how to refresh patio slabs.
FAQ
How do I diagnose whether my patio slabs need cosmetic cleaning or structural repair?
Start with a visual and tactile checklist: look for hairline cracks (<1–2 mm) and minor surface staining (usually cosmetic); check for larger cracks (>3–6 mm), vertical displacement between adjacent slabs (lippage >≈3 mm), sinking/settling, stair‑step cracks, horizontal cracks, or actively growing fractures — these suggest structural/foundation issues. Tap slabs to hear hollow sounds (indicates voids) and probe joints for deep erosion. Note drainage problems (ponding after rain) and check if multiple slabs have similar patterns (may indicate subbase failure). If unsure about crack width, movement, or drainage-related settlement, photograph measurements and consult a professional.
What’s the safest first step for brightening dirty or algae‑covered patio slabs?
Begin with dry methods: sweep to remove loose debris, then remove weeds and overhanging organic matter. Apply a stiff broom, nylon brush or scraper for light moss/algae. Test a small inconspicuous area before chemicals. For many concrete and concrete paver patios, pressure washing (use 1,000–2,500 PSI for most; up to 3,000 PSI for heavy concrete but lower for natural stone) with a 15°–40° nozzle or surface cleaner effectively brightens surfaces while minimizing damage. Contain and collect washwater if cleaners, oil or contaminants are present — do not discharge to storm drains without local permission.
Which cleaners and treatments remove common stains (oil, rust, algae, paint, efflorescence)?
- Oil/grease: absorb with cat litter or dry poultice; use alkaline degreaser/surfactant, scrub and rinse; repeat or use specialty concrete degreasers for embedded oil. - Rust: use chelating or mild acid cleaners (oxalic, citric or phosphoric‑based) per product instructions; test patch, short dwell times and rinse/neutralize. - Algae/moss: apply diluted household bleach (follow SDS and do not mix with acids) or commercial algicide; let sit, scrub and rinse; for porous stone, use lower concentrations and test. - Paint: mechanical removal (wire brush, scraper) or paint strippers formulated for masonry; avoid aggressive acids on decorative stone. - Efflorescence: dry‑brush first, then commercial efflorescence remover or dilute acid per manufacturer instructions; rinse thoroughly. Always read product labels, perform a small test patch and use PPE.
How should I use a pressure washer without damaging slabs or surrounding areas?
Use appropriate pressure and nozzle: concrete/pavers often tolerate 1,500–3,000 PSI; natural stone or older clay pavers use 1,000–1,500 PSI. Avoid the 0° red nozzle; use 15°–40° fan nozzles or a surface‑cleaner head. Keep the nozzle 6–24 inches away and spray at an angle, not straight down at joints. Move evenly and avoid prolonged targeting on one spot to prevent etching. Contain washwater: block storm drains and capture runoff if detergents, oils or paint are present; follow local wastewater rules. Wear eye protection, gloves and hearing protection.
What’s the step‑by‑step process for cleaning and removing oil stains on patio slabs?
1) Sweep and remove debris. 2) Absorb fresh oil with cat litter, sawdust or commercial absorbent; allow to sit then brush up. 3) Apply an alkaline degreaser per instructions, agitate with a stiff brush, let dwell, then rinse. 4) For persistent stains, apply a poultice (absorbent mixed with solvent or cleaner), cover and leave to draw out oil, then remove and repeat as needed. 5) For deep or old stains consider repeating treatments or replacing affected slabs if appearance cannot be restored. Test products first and dispose of contaminated absorbent per local regulations.
How do I repair joints, remove weeds, and re‑sand patio joints?
Remove weeds and old joint material using a jointing tool, narrow chisel, or power broom with a joint rake attachment. For small joints, hand‑rake and vacuum debris. Refill with kiln‑dried sand (for traditional joints) or polymeric/polymer‑modified joint sand per manufacturer specs: ensure minimum joint depth (often ~1½" / 38 mm for polymeric products) and width limits, compact sand into joints, sweep off excess, then lightly mist to activate polymeric sands following the product’s water‑activation method and rain‑safe time. For damaged or missing mortar joints in flagstone or block paved patios, repoint using suitable mortar or a paving jointing compound.
Next Article
How to Make Your Patio Slabs Look Better: DIY Guide
Step-by-step tips to clean, repair, reseal or refinish patio slabs, DIY costs, tools, and when to hire a pro.