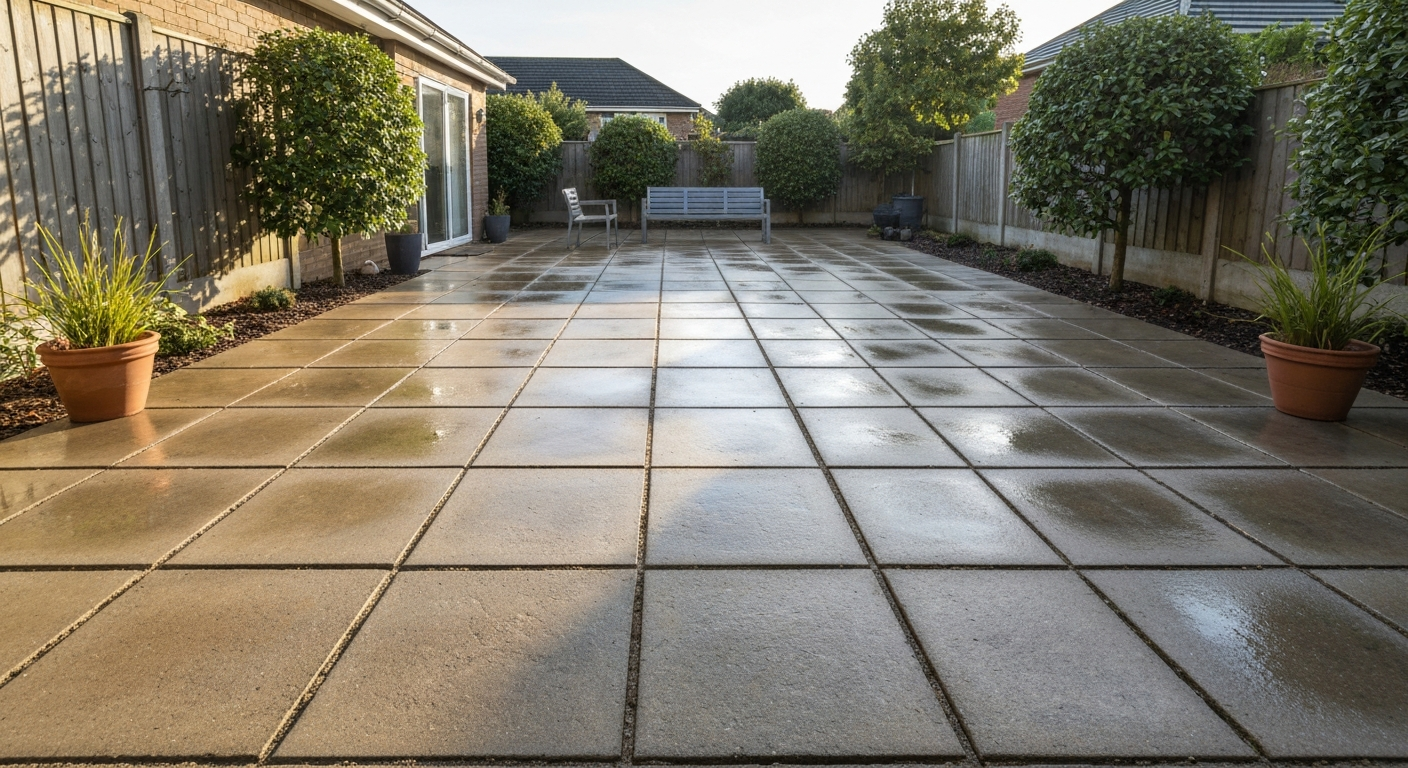
Refreshing patio slabs usually means one of three things: cleaning away years of grime, moss and staining so the surface looks close to how it did when new; making minor repairs to cracked joints, chips or sunken slabs so the surface is safe and solid again; or applying a colour or sealer finish to genuinely change how the patio looks. Most patios need a mix of all three, and the order you tackle them in matters a lot. Clean before you repair, repair before you seal, and diagnose before you do anything else. Get that sequence right and a weekend's work can transform a tired, slippery patio into something you're actually happy to use.
How to Refresh Patio Slabs: Clean, Repair & Restore

Talia Lang
13 Aug 2026
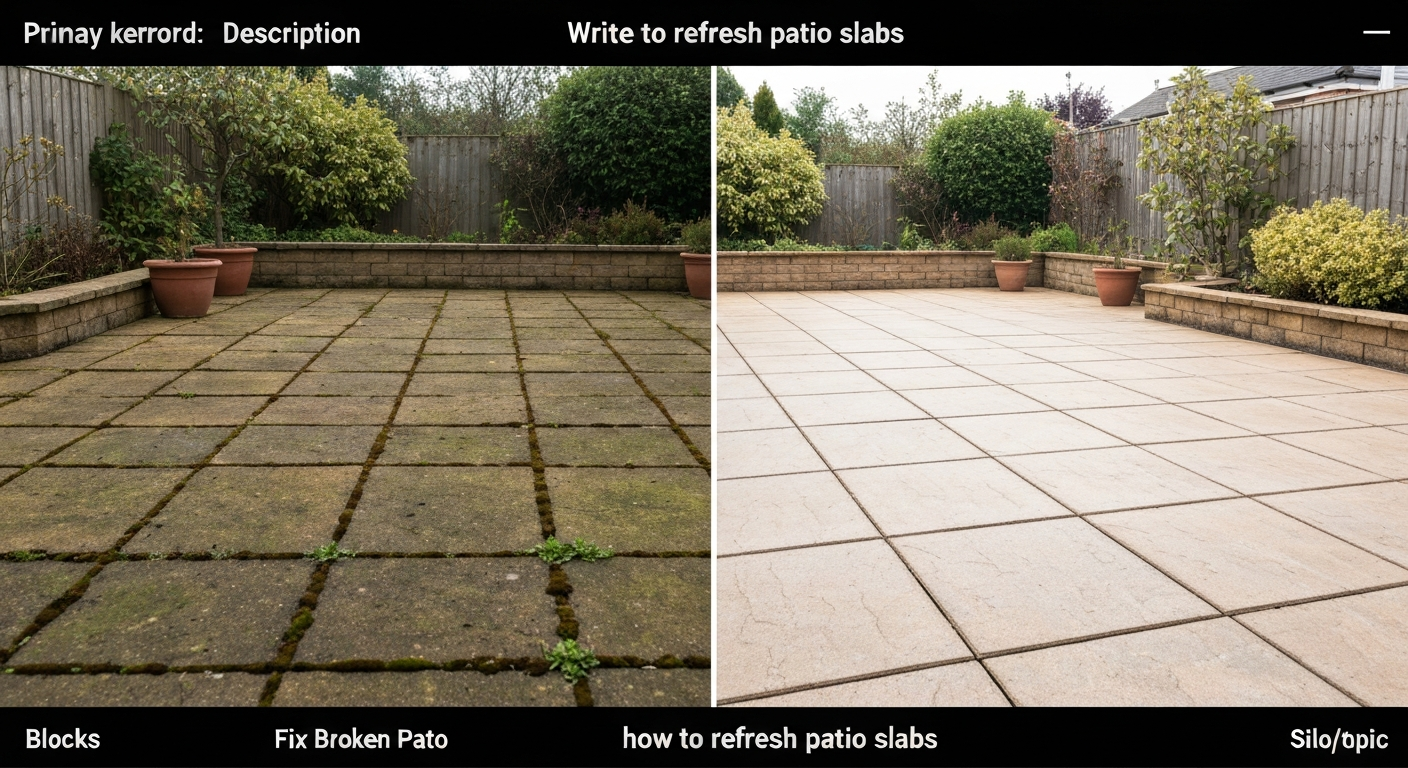
What refreshing your slabs can realistically achieve
A thorough clean removes organic growth, surface staining and the general grey film that builds up from weather and traffic. On most slabs this alone makes a dramatic difference and costs almost nothing beyond your time. Repairs to cracked or sunken areas stop minor problems from becoming expensive replacements. Repointing or re-sanding joints closes off the gaps that feed moss and weeds. And a quality sealer, applied to a properly cleaned and repaired surface, slows down staining and organic growth for the next few years. What refreshing cannot do is hide deep structural cracks, fix a badly subsided base, or reverse severe spalling on concrete that has lost its surface layer. Those problems need more than a refresh, and this article will tell you when you've crossed that line.
Clean, repair or replace? A quick decision flow
Before you buy anything or hire a pressure washer, spend ten minutes walking the patio and asking three questions. For step-by-step instructions on how to update patio slabs, see our practical guide on how to update patio slabs. First: are the slabs structurally sound? Tap each one with your foot and listen for a hollow sound, which means the bedding has failed underneath. Press the edges and corners. If slabs rock or tilt, the base needs attention before anything cosmetic matters. Second: are the problems surface-only? Moss, algae, dirt, light staining and efflorescence are all surface issues. They look terrible but they clean off and they don't threaten the longevity of the patio. Third: are there cracks, chips or failed joints? These need repair, but most are DIY-friendly if the underlying base is intact.
| What you see | Likely cause | Right action |
|---|---|---|
| Green or black biological growth | Algae, moss or lichen — surface only | Clean and treat with biocide |
| White powdery haze on surface | Efflorescence — salt deposits from moisture | Dry brush, rinse, treat with dilute acid if persistent |
| Dark oily rings or patches | Petroleum / grease staining | Degrease with poultice or alkaline cleaner |
| Brown or red discolouration | Rust / iron staining | Specialist rust remover; assess source |
| Paint splashes or residue | Surface contamination | Chemical stripper or careful scraping |
| Narrow hairline cracks in slabs | Thermal movement or light settlement | Monitor; fill with flexible sealant if widening |
| Wide cracks, broken pieces | Structural movement or heavy load | Replace affected slabs |
| Hollow-sounding, rocking slabs | Failed bedding or base settlement | Lift, re-bed or repoint; address drainage |
| Crumbling, weed-filled joints | Joint sand or mortar failure | Re-sand with polymeric sand or repoint |
| Surface pitting, flaking concrete | Spalling — freeze-thaw or poor mix | Resurface if minor; replace if severe |
If the answer to all three questions is mostly 'surface problems only,' you're in clean-and-treat territory. If there are rocking slabs, failed joints and cracking all at once, you're looking at a proper repair job. And if more than roughly a third of slabs are structurally compromised, replacement is usually more economical than patching. Be honest with yourself at this stage because starting the wrong job wastes a lot of time and money.
Full diagnostic checklist: know what you're dealing with before you start
Identify your slab type first
Different slab materials respond very differently to cleaning chemicals, pressure and sealers. Getting this wrong can permanently damage the surface. Here's a quick guide to the most common types and their key characteristics.
| Slab type | Typical porosity | Frost resistance | Cleaning sensitivity | Sealer needed? |
|---|---|---|---|---|
| Granite / quartzite | Very low (<0.4% water absorption) | Excellent | Tolerates most cleaners; use care with acids | Optional but beneficial |
| Marble | Low to moderate | Moderate | Avoid acids — etches easily | Yes, impregnating sealer |
| Limestone | Low to high (1–7%+ water absorption) | Variable — test before treating | Avoid acids; gentle cleaners only | Yes, always |
| Sandstone | Moderate to very high (can exceed 10%) | Poor if wet/porous | Very gentle only; low pressure washing | Yes, always |
| Porcelain (outdoor tiles) | Virtually zero (non-porous) | Excellent | Tolerates higher pressures and most cleaners | Rarely needed; can cause slip issues |
| Concrete pavers (factory-made) | Low to moderate | Good if quality mix | Most cleaners fine; avoid very high acid concentration | Beneficial after cleaning |
| Cast/poured concrete (monolithic) | Moderate | Moderate to good | Moderate — avoid etching surface | Beneficial, especially if stained |
Porcelain pavers are a special case. Because they're virtually non-porous, they're the easiest to clean and the most resistant to staining. However, sealing porcelain improperly can actually reduce slip resistance, which is a safety concern outdoors. For porous stones like sandstone and limestone, porosity directly drives stain susceptibility, freeze-thaw damage risk and how often you'll need to reseal. World Natural Stone Association, FAQ (porosity / water absorption tables): porosity and water‑absorption tables show granites and quartzites typically very low (<0.4% open porosity / <1% water absorption), marbles low to moderate, and limestones and sandstones ranging from roughly 1% up to >10%, which directly affects stain risk, freeze‑thaw vulnerability and sealing frequency World Natural Stone Association — FAQ (porosity / water absorption tables).
Go through this checklist slab by slab
- Surface colour and growth: Is it uniformly dirty, or are there green, black or grey patches? Green soft growth = algae or moss. Black crust = lichen (harder to remove). Grey-black = likely a mix of dirt and algae.
- White or chalky haze: Present on the surface or around joints? This is almost always efflorescence — salt deposits left when moisture evaporates through the slab.
- Staining: Dark rings = oil or grease. Brown/red = rust. Multi-coloured streaks = paint or chemical spill. Each needs a different treatment.
- Joint condition: Are the joints full, crumbly, missing entirely, or packed with moss and weeds? Failed joints allow water underneath and speed up every other problem.
- Structural integrity: Walk every slab. Does it rock? Sound hollow when you tap it with a heel? Is it visibly sunken or raised compared to neighbours?
- Cracks: Hairline cracks (less than 1mm) are usually cosmetic. Cracks wider than 3mm, or running across the full width of a slab, suggest movement that needs investigating.
- Drainage: Does water pool on the surface after rain? Does it drain toward the house? Poor falls are a base or installation problem, not just a surface one.
- Sealant condition: Is there a peeling, flaking or milky-looking film on the surface? That's old sealant that needs to be stripped before anything else is applied.
Tools, materials and products you'll need
I've broken this down by task so you can buy only what you actually need for your specific job. There's no point in buying a sealer before you know whether your joints need replacing first.
| Task | Tools | Materials / products |
|---|---|---|
| Deep cleaning | Pressure washer (1000–1500 psi for most slabs), surface cleaner attachment, stiff-bristle brush, bucket, hose | Patio cleaner / alkaline detergent, clean water |
| Organic growth treatment | Knapsack sprayer or watering can, stiff brush, scraper | Biocide/algaecide (sodium percarbonate or sodium hypochlorite based), moss killer |
| Efflorescence removal | Stiff dry brush, low-pressure hose, acid brush | Dilute phosphoric or muriatic acid (for persistent cases only), efflorescence remover |
| Stain removal | Plastic scraper, old cloths, nylon brush | Degreaser (for oil/grease), rust remover, paint stripper (type matched to stain) |
| Joint re-sanding | Angle broom, plate compactor (hire), leaf blower, garden hose | Polymeric jointing sand |
| Mortar repointing | Cold chisel, club hammer, pointing trowel, angle grinder with mortar rake (optional) | Lime-based or hydraulic lime mortar (matched to slab hardness) |
| Crack and chip repair | Wire brush, vacuum, mixing paddle, bucket | Flexible polyurethane sealant (cracks), mortar repair compound (chips) |
| Levelling / re-bedding slabs | Bolster chisel, club hammer, spirit level, rubber mallet | Sharp sand, cement, or proprietary bedding compound |
| Sealing | Paint roller or pump sprayer, lambswool applicator | Impregnating sealer (natural stone), enhancing sealer (if colour boost wanted), topcoat sealer (concrete) |
| Resurfacing / painting | Angle grinder with diamond disc (surface prep), roller, brush | Concrete dye or patio paint, resurfacing compound, anti-slip additive |
Safety precautions before you pick up a tool
This section isn't filler. Several of the chemicals used in patio refreshing are genuinely hazardous, and pressure washers cause more injuries than most people expect. Take five minutes to read this before you start.
- Eye protection: Wear chemical-splash goggles (not just safety glasses) when mixing or applying any acid-based cleaner, bleach product or biocide. A pressure washer jet will also send debris straight at your face.
- Gloves: Chemical-resistant nitrile or rubber gloves for any cleaning product work. Standard DIY gloves won't stop acid or bleach penetration.
- Non-slip footwear: A wet, algae-covered patio is extremely slippery before and during cleaning. Wear rubber-soled boots, not trainers.
- Respiratory protection: A P2/FFP2 half-mask respirator when mixing dry polymeric sand (fine silica dust) or grinding old mortar joints. A simple dust mask is not adequate for silica dust.
- Acid handling: Dilute acid products must always be diluted acid-into-water, never water-into-acid. Work in well-ventilated conditions. Never use muriatic acid on limestone, marble or sandstone — it will etch and dissolve the surface permanently.
- Biocide and herbicide: These are pesticide-registered products in the US. Read and follow the EPA-accepted label exactly — it specifies dilution rate, required PPE, re-entry intervals and disposal. Do not allow runoff into drains, ditches or water bodies; copper-based algaecides in particular are toxic to aquatic life.
- Pressure washer: Never point the jet at people, pets or glass. Keep the nozzle moving. Keep children and animals out of the work area.
- Electrical safety: Use RCD-protected extension leads for any corded tools outdoors.
Deep cleaning: how to actually get slabs looking good again
Deep cleaning is the foundation of every other step in this process. Applying sealer over a dirty slab just locks the dirt in. Repointing over organic growth means the growth comes back within months. Get the surface genuinely clean first.
Step-by-step pressure washing and scrubbing
- Clear the patio completely. Remove furniture, pots and anything else. Sweep off loose debris and leaves — don't try to blast these off with a pressure washer or you'll just spread them around.
- Pre-wet the entire surface with a hose. This prevents cleaning chemicals from drying too fast in sunlight and stops them soaking into porous stones too rapidly.
- Apply your patio detergent or alkaline cleaner according to the label. Let it dwell for the recommended time (usually 5–15 minutes). Don't let it dry on the surface.
- Set up your pressure washer. For most concrete pavers and porcelain, you can work at 1,200–1,500 psi with a 25-degree fan nozzle or a surface cleaner attachment. For sandstone and limestone, drop to 600–800 psi maximum and keep the nozzle well back — at least 12 inches from the surface. For polished or honed natural stone, use low pressure only (400–600 psi) and test a hidden corner first.
- Use a surface cleaner attachment if you have one. It cleans evenly and eliminates the stripe marks ('wand marks') that a handheld lance leaves on smooth surfaces. Those stripes are etching damage, not just dirt, and they're permanent.
- Work in overlapping passes, moving consistently across the surface. Keep the nozzle moving at all times — pausing in one spot concentrates the pressure and damages the surface.
- For stubborn areas, scrub with a stiff-bristled brush while the detergent is still wet, then rinse with the pressure washer.
- Rinse the entire patio thoroughly with clean water to remove all detergent residue. Residue left behind can cause slipping and interfere with sealers.
- Allow the surface to dry completely — usually 24–48 hours in warm weather before applying any sealer, dye or repair product.
A word on permeable pavers: if your patio is a permeable/water-draining system (often identified by wider joints filled with aggregate or grass between slabs), do not pressure wash it. High-pressure water forces fine particles into the reservoir layer below, blocking the drainage channels that are the whole point of the system. For permeable patios, use a vacuum sweeper and a stiff broom. Spot-treat stains with minimal water and cleaning product only.
What to expect from a good clean
On most concrete pavers and porcelain slabs, a thorough clean will remove 80–90% of what's making the surface look tired. On porous natural stone that hasn't been sealed, expect improvement but not perfection, deeply ingrained organic staining in pores won't fully lift without biocide treatment (covered below). Efflorescence and mineral deposits need their own approach. And some stains, particularly old oil on unsealed limestone, may be permanent.
Stain removal: what works, what doesn't, and honest limits
Not all stains respond to a general patio cleaner, and using the wrong product can make things worse, especially on porous natural stone. The key is matching the treatment to the stain chemistry. Here's how to approach the most common ones.
Oil and grease stains
Fresh oil is much easier to remove than old oil that has cured into the pores of the stone or concrete. For fresh spills, absorb as much as possible immediately with cat litter or dry sand, then treat with a strong alkaline degreaser. Work the degreaser in with a stiff brush, leave it to dwell for 10–15 minutes and rinse. For old, cured oil stains, you'll need a poultice treatment: mix an absorbent powder (diatomaceous earth or fuller's earth) with a degreaser or acetone to a peanut-butter consistency, apply a thick layer over the stain, cover with plastic film and leave for 24–48 hours. The poultice draws the oil out as it dries. Repeat up to three times. Results on very old stains in porous stone are often partial rather than complete, be realistic about this before you start.
Rust stains
Rust stains usually come from steel furniture, planters, fixings or iron minerals in the stone itself. Use a proprietary rust remover (oxalic acid or citric acid based) applied to the wet surface. Work it in with a nylon brush and rinse well. Never use muriatic acid to remove rust on limestone, marble or sandstone. If the rust staining is coming from within the stone (a yellow-brown blush throughout the slab rather than a surface ring), it's a characteristic of that particular stone and won't clean off, this is worth knowing before you buy new stone too.
Paint stains
Wet paint: remove mechanically with a plastic scraper immediately. Dried paint: apply a chemical paint stripper suited to the paint type (water-based vs oil-based) and allow the dwell time specified on the label. Scrape off the softened paint, then clean the area with a degreaser and rinse. On rough or textured surfaces, a stiff brush helps lift paint from the texture. Very old paint ground into porous stone may not fully lift, and aggressive stripping products can bleach or etch some stone types, so always test on an inconspicuous area first.
Grease from cooking or barbecues
Treat the same as oil: alkaline degreaser for fresh staining, poultice method for old. If your barbecue sits in one spot season after season, the grease builds up in layers and may take several treatments. Consider a patio mat or slab protector under your barbecue going forward, it's much easier than repeated stain removal.
Honest limits of stain removal
Some stains cannot be fully removed, particularly old oil in unsealed porous limestone or sandstone, and deep rust from iron-rich stone. If you've treated a stain multiple times without full success, applying a colour-enhancing sealer over the whole patio after cleaning can even out the tone and make residual staining much less visible. That's often a more practical solution than chasing a perfect clean on a genuinely stained slab.
Treating moss, algae, weeds and efflorescence
Moss and algae
Moss and algae grow on patios that are shaded, damp or not cleaned regularly. Green soft growth is usually algae or moss and will clean off. Concrete Masonry & Hardscapes Association, Operation & Maintenance Guide (common distresses incl. efflorescence, oil, organic growth) states that organic growth (green or black) is typically algae, moss or lichen and is usually removable with a biocide plus scrubbing Concrete Masonry & Hardscapes Association — Operation & Maintenance Guide (common distresses incl. efflorescence, oil, organic growth). Black or grey-green crusty growth is often lichen, which bonds chemically to stone and requires longer treatment times and more effort to remove. Start by physically removing what you can with a stiff brush and scraper before applying any chemical treatment. Trying to chemically kill growth that's still thick on the surface wastes product and gives patchy results.
For chemical treatment, choose a biocide that's registered for hardscape use. Products based on sodium percarbonate are a good general choice: they're effective, less harmful to surrounding plants than bleach-based products when diluted correctly, and they break down relatively quickly in soil. Sodium hypochlorite (bleach) is faster-acting but can bleach surrounding soil and vegetation and must not run off into drains or water bodies. Copper-based algaecides are highly effective but are specifically flagged by the EPA for aquatic toxicity, avoid using them if your patio drains toward a pond, stream or planted area.
- Physically scrub and remove as much growth as possible with a stiff broom or scraper.
- Pre-wet the surface with clean water.
- Apply the biocide at the dilution specified on the label using a watering can or sprayer. Do not exceed the stated concentration — it won't work faster and creates more runoff risk.
- Allow the dwell time on the label (typically 30 minutes to several hours depending on product).
- Scrub again with a stiff brush, then rinse thoroughly with a hose or pressure washer at low pressure.
- For heavy lichen, you may need to leave the biocide working overnight under plastic sheeting and repeat the treatment.
Weeds in joints
Weeds in joints are almost always a sign of failed or absent jointing material. The plants aren't damaging the slabs themselves, but the root action and moisture they introduce will eventually destabilise the bedding layer. Mechanical removal first: a weeding knife, wire brush or old screwdriver along every joint, followed by vacuuming or sweeping out the debris. For a non-chemical approach, boiling water poured directly into joints kills annual weeds and seedlings effectively, check local restrictions on open-flame weed burners before using those. If you're using a herbicide like glyphosate, apply it carefully with a brush or targeted sprayer, not a general spray, to protect nearby plants. The permanent fix is to remove all the material from joints, clean them out, and re-sand or repoint so weeds have nowhere to establish again.
Efflorescence
Efflorescence looks like a white powdery or crystalline haze on the surface of concrete or natural stone. It forms when water moves through the slab, dissolves soluble salts in the substrate and then evaporates at the surface, leaving those salts behind. It's a cosmetic issue, but persistent efflorescence can also be a signal that water is getting in somewhere it shouldn't, worth investigating if it keeps coming back season after season.
- Start dry: brush off the deposits with a stiff dry brush before doing anything else. Fresh, light efflorescence often brushes off completely.
- For deposits that don't brush off: try rinsing with low-pressure clean water and scrubbing with a stiff brush.
- For hardened or persistent deposits: use a dilute phosphoric acid efflorescence remover (follow label dilution — typically 10:1 water to acid). Pre-wet the surface first, apply the solution, scrub, and rinse thoroughly.
- Never use muriatic or phosphoric acid on limestone, marble or calcareous sandstone — it will etch and dissolve the surface. Use a specialist non-acid efflorescence remover for those materials.
- After treatment, allow the surface to dry fully, then investigate whether a sealer would help reduce future moisture transport through the slab.
If efflorescence keeps returning in the same area, the root cause is a moisture problem underneath, possibly poor drainage, a high water table locally, or water ingress from a wall or step. Cleaning it off is only a temporary fix until the moisture source is addressed.
Prevention: keeping biological growth from coming back
The conditions that grow moss and algae are shade, moisture and undisturbed surface. You can reduce all three. Trim back overhanging plants or fences that shade the patio. Improve drainage so water doesn't sit on the surface after rain. Apply a biocide treatment once a year as a preventative in autumn (the season when spores establish most easily in the UK and northern US) rather than waiting until the patio is visibly green. And seal porous natural stone so the surface isn't offering the porous, nutrient-rich environment that moss and algae prefer. These steps together can dramatically reduce the cleaning workload year to year.
Fixing the joints: re-sanding and repointing
Joint failure is one of the most common reasons patios degrade faster than they should. Water gets in, the bedding erodes, slabs become unstable, and weeds establish. Getting the joints right is arguably more important to the long-term condition of your patio than cleaning or sealing.
Polymeric jointing sand (for paver patios)
For concrete or porcelain pavers laid on a sand or aggregate base, polymeric jointing sand is the best modern option. It's a sand-and-polymer blend that sets hard when activated with water, locking joints against weeds, ants and water erosion. The installation process matters, done wrong, it either doesn't set properly or leaves a haze on the slab surface that's hard to remove.
- Remove all existing joint material, weeds and debris from joints. Joints must be dry — do not apply polymeric sand to wet joints.
- Check that joints are the correct width for your product (most polymeric sands specify minimum joint width of around 6mm). Very narrow joints don't compact well.
- Pour or sweep the dry polymeric sand across the surface and work it into the joints with a stiff broom, sweeping diagonally across the slabs.
- Make multiple passes until joints are filled to within about 3–6mm of the slab surface.
- Compact the surface with a plate compactor to vibrate the sand into joints. A low-amplitude plate compactor set over 5,000 lbf compaction force is recommended for most installations — hire one if you don't own one. Compact from the edges inward.
- Sweep more sand into any joints that have settled below the required level after compaction, and compact again.
- Blow off all excess sand from the surface with a leaf blower before activating. Any polymer residue left on slabs will haze when wetted.
- Activate by misting the entire surface with clean water using a fine spray — do not use a strong jet or you'll wash the sand out of joints. Follow your product's specific activation instructions.
- Do not use the patio for 24–48 hours while the polymer sets. Avoid rain within 24 hours of installation — check the forecast before you start.
Mortar repointing (for natural stone or older mortared patios)
Natural stone patios are often bedded and pointed in mortar rather than sand. When this mortar cracks and falls out, it needs repointing. The critical mistake most DIYers make here is using standard Portland cement mortar, which is too hard for most natural stone. A hard mortar doesn't flex with the stone as it moves seasonally. Over time this forces cracks into the slabs themselves rather than the joints, which is exactly what you don't want. For most natural stone paving, particularly limestone, sandstone and any historically softer stone, use a lime-based or hydraulic lime mortar. It's slightly weaker than the stone, so movement stress goes into the joint rather than the slab.
- Remove all loose and failing mortar from joints using a cold chisel, club hammer or angle grinder with a mortar rake. Remove to a minimum depth of 15–20mm.
- Brush and vacuum out all debris from joints.
- Dampen the joints with clean water before applying mortar — this prevents the stone or concrete from absorbing water from the mortar too quickly, which weakens the joint.
- Mix your lime or hydraulic lime mortar to a firm but workable consistency. Follow product instructions for water ratios.
- Pack the mortar firmly into joints using a pointing trowel, working in sections.
- Tool the joint to a slightly recessed or flush finish before the mortar begins to stiffen.
- Keep the work damp for 2–3 days if using hydraulic lime (mist with water or cover with damp hessian) to allow it to cure slowly and gain proper strength.
- Do not apply in frost conditions or when rain is forecast within 24 hours.
Crack and chip repairs
Hairline cracks (under 1mm wide) in concrete pavers or natural stone slabs are usually cosmetic and don't need immediate treatment. If they're in an area prone to water pooling, fill them with a flexible polyurethane joint sealant to prevent water ingress, especially important in climates with frost, where water in cracks freezes, expands and widens the crack over time. Match the sealant colour to the slab as closely as possible.
Larger cracks (3mm or wider) or cracks that run across the full face of a slab suggest structural movement. Check whether the slab is still fully bedded below by pressing on each side of the crack, if it flexes, the bedding has gone and you need to lift and relay the slab rather than just filling the crack. Filling a crack on an unbedded slab is a temporary cosmetic fix at best. Chipped edges and corners on concrete pavers can be repaired with a mortar repair compound, bonded with a PVA primer. On natural stone, edge chips can be filled with a colour-matched stone-repair epoxy, though the repair will usually be visible close up.
Lifting, levelling and resetting sunken or rocking slabs
A slab that rocks, tilts or has sunk below its neighbours is a trip hazard and a sign that the bedding or base layer has failed. This is one of the most common structural issues on older patios, and the good news is that individual slabs can be lifted and relaid without disturbing the whole patio. The ICPI standard for paver installation specifies bedding sand screeded to roughly 25mm (1 inch) nominal depth, a compacted base within about 10mm tolerance over 3 metres, and base compaction at or close to 98% Proctor density. Most domestic patios were never built to this standard, which is why settlement happens.
- Remove all joint material around the affected slab and any immediately adjacent ones.
- Use a bolster chisel and club hammer to lift the slab carefully from one edge. If it's mortared down, work around all four sides before trying to lift.
- Inspect the bedding underneath. Is the sand compacted unevenly? Has water washed it away beneath the slab? Is there root intrusion or clay heave?
- Add or remove bedding material as needed to achieve the correct level. Use sharp sand or a purpose-made bedding compound. Firm it down with a hand tamper.
- Set a spirit level across the slab position and across to its neighbours to confirm you have the right level and crossfall (aim for a minimum 1:80 fall away from the house — about 12mm fall per metre).
- Lower the slab back into position and press down firmly. Tap with a rubber mallet to bed it in.
- Check the level again and adjust if needed.
- Repoint or re-sand the joints and allow to cure before use.
If more than three or four adjacent slabs are sunken or the whole patio area is gradually sinking in one direction, you're likely dealing with a base layer problem rather than individual bedding failure. This often involves drainage issues causing base material to wash away or compact unevenly. At that point you're into a full repair that goes beyond a surface refresh, worth reading up on sunken paver repair and patio drainage issues before committing to a DIY approach.
Resurfacing, painting and sealing for an aesthetic refresh
Once the surface is clean and structurally sound, there's a genuine range of options for changing how the patio looks, not just restoring what was there before. For practical, step-by-step tips on how to brighten up patio slabs, see our dedicated guide on how to brighten up patio slabs.
Sealers
A sealer is the most common finish applied after cleaning, and it's genuinely useful on porous natural stone and concrete pavers. An impregnating sealer (also called a penetrating sealer) soaks into the surface and blocks the pores from within without changing the appearance. This is what most natural stone patios benefit from most. An enhancing sealer does the same but deepens the colour of the stone, useful if you want a 'wet look' or if cleaning has left the surface looking washed out. Topcoat or film-forming sealers sit on the surface, provide a visible sheen, and offer good stain protection on concrete, but they can peel, trap moisture and make surfaces slippery when wet if not specified with an anti-slip additive. For porcelain, be cautious: sealing is rarely necessary and can reduce slip resistance.
Concrete dye and patio paint
If you want to change the colour of concrete pavers or a cast concrete patio, concrete dye or patio paint are both options. Concrete dye penetrates the surface and gives a translucent colour change that looks more natural than paint. Patio paint (specifically formulated for outdoor concrete) sits on the surface and gives a solid, opaque colour. Both require a clean, dry, fully degreased surface and usually a primer coat. Expect to repaint or re-dye every 3–5 years depending on traffic and UV exposure. This works well on cast concrete but is generally not applied to natural stone or porcelain.
Resurfacing compounds
If the surface of a cast concrete patio is pitted, worn or has shallow spalling, a concrete resurfacing compound (sometimes called a micro-topping or overlay) can restore a smooth, uniform surface without a full replacement. This is a thin cement-based layer, typically 3–6mm, applied over the existing concrete after thorough preparation. The existing surface must be structurally sound, resurfacing over a concrete slab that's moving, cracking at depth, or poorly bonded to the ground will result in the overlay cracking and peeling within a season. If you want to go down this route, address any structural issues first, use a bonding primer, and add an anti-slip aggregate to the final coat.
Realistic time and cost expectations
| Task | Typical DIY time | Approximate material cost (mid-range) |
|---|---|---|
| Deep clean (pressure wash + detergent) | Half day (40–50 sq ft/hour) | $20–$60 for detergent; pressure washer hire $50–$80/day if needed |
| Biocide/moss treatment | 1–2 hours application + dwell time | $20–$50 for a concentrate covering 100–200 sq ft |
| Efflorescence removal | 1–3 hours depending on severity | $15–$40 for specialist cleaner |
| Polymeric sand re-jointing | Half to full day for average patio | $30–$80 per bag (covers ~50–75 sq ft of joints); plate compactor hire $60–$100/day |
| Mortar repointing (20 linear ft) | 3–5 hours | $30–$60 for lime mortar materials |
| Lifting and relaying 3–5 slabs | Half day | Minimal material cost if reusing slabs; bedding sand $10–$20 |
| Sealing (impregnating sealer) | 2–4 hours | $40–$120 per litre depending on product (coverage varies widely by stone porosity) |
| Patio paint / dye application | Full day including prep | $60–$150 for paint; $30–$60 for primer |
When to call a professional
Most of what's covered in this article is genuinely DIY-friendly if you're comfortable with physical work and patient with preparation. But there are clear signals that a job needs a professional, and ignoring them usually results in spending more money later than calling someone in earlier.
- More than a third of your slabs are rocking, sunken or cracked across the full face: this is a base failure, not a slab problem, and fixing it properly involves excavating, compacting and relaying the entire area.
- The patio drains toward your house or there is recurring standing water: this is a drainage design issue that requires regrading, possibly a drain installation, and sometimes base reconstruction.
- The mortar or base beneath slabs is soft, wet or crumbling when you lift a slab: indicates long-term water infiltration from below; a partial relay will fail again quickly.
- Cracks on a monolithic poured concrete patio are wide, structural and progressively growing: these often reflect movement in the subgrade below, and surface repair is temporary without addressing the cause.
- You're working on a listed building, a historic property, or commercial premises: specialist knowledge is required, particularly for mortar selection on period stone.
- You need to install or regrade drainage channels: requires excavation and construction skills beyond standard DIY.
Maintenance schedule to avoid doing this all again next year
The biggest mistake after refreshing a patio is not maintaining it. Here's a simple schedule that keeps most patios in good condition without major effort.
| Frequency | Task |
|---|---|
| Every 2–4 weeks | Sweep off debris, leaves and dirt — don't let organic matter sit on porous stone or concrete |
| Every 3 months | Check joints for early weed establishment and remove immediately; easier when plants are small |
| Once a year (autumn) | Apply a preventative biocide/algae treatment before winter spores establish |
| Once a year (spring) | Inspect joints for deterioration; top up polymeric sand in any depleted areas; repoint any failed mortar sections |
| Every 3–5 years (or when water stops beading) | Reseal porous natural stone and unsealed concrete pavers |
| After any hard frost or harsh winter | Check for new cracking, lifted slabs or frost-spalled surface; address before the growing season |
| Every 5–7 years | Full pressure wash and deep clean; reassess condition of all joints, slab bedding and sealant |
Refreshing patio slabs covers a lot of ground, from a quick clean that takes a morning to a full repair job that takes a weekend. The key is diagnosing what you actually have before spending money on products. For a step-by-step guide on how to revamp patio slabs, consult how to revamp patio slabs. If you've identified issues that go beyond the surface, drainage problems, significant settlement, structural cracking, those need specific attention beyond a general refresh. Exploring topics like cracked cement repair, how to renew patio slabs in depth, or how to revamp patio slabs with resurfacing or replacement materials gives you the next level of detail once your diagnostic work is done. For a practical step‑by‑step guide on visual improvements and finishing touches, see our article on how to make your patio slabs look better.
FAQ
How do I decide whether to clean, repair or replace patio slabs?
Run a quick diagnostic: if slabs are mainly dirty, algae/moss, weeds, efflorescence or surface stains — cleaning and joint work will usually suffice. If there are isolated chips/cracks, uneven joints or small sunk slabs — repair, re-sand/repoint or reset individual units. Replace when slabs are extensively cracked, delaminated, heavily spalled, permanently stained, or the base has failed across large areas. Use this flow: Clean (organic, surface stains) → Repair (cracks, chips, joints, single sunken slabs) → Replace (widespread structural/base failure or aesthetics beyond reasonable DIY limits).
What should I check first when diagnosing patio slab problems?
Checklist: slab material (porcelain, concrete, natural stone), porosity (stone varies widely), joint condition, organic growth (green/black), efflorescence (white haze), oil/rust stains, chips/cracks, sunken/uneven slabs, drainage issues, sealant condition and whether pavement is permeable (don’t pressure-wash permeable systems). Identify extent and cause (e.g., poor drainage, tree roots, overloaded base) before choosing a fix.
What cleaners and cleaning methods are safe for different slab types?
Match method to material and soil: porcelain and concrete tolerate more aggressive cleaning than porous natural stone. Start with sweeping, then low-pressure rinsing and a stiff brush. For algae/moss use a biodegradable algaecide/cleaner (sodium percarbonate or manufacturer-labelled product) and scrub; avoid copper biocides near water. For oil use a degreaser and a poultice for stubborn rings. For efflorescence try dry brushing and low-pressure rinse; persistent deposits may need a dilute acid wash (muriatic/phosphoric) only after identifying moisture source and with PPE. Keep pressure-washer psi low for sensitive surfaces (refer to low/medium/high categories; generally ≤1000 psi for architectural concrete, use wide-fan tips and keep nozzle moving). Do not power-wash permeable pavements—vacuum sweep instead.
How do I remove moss, algae and weeds from joints safely?
Mechanically remove moss/weeds with a joint knife, wire brush or vacuum to clear silt. For regrowth, use boiling water, non-selective contact herbicide or an approved hardscape algaecide per label. For long-term prevention refill joints with clean kiln-dried sand or polymeric jointing sand and compact properly. Avoid runoff to drains and nearby plants when using chemicals.
When and how should I treat efflorescence?
If efflorescence is light, start with dry brushing and low-pressure rinsing. If deposits persist, use a diluted acid cleaner following manufacturer instructions and neutralize afterward; always test a small area first and ensure you control the moisture source (rising damp or poor drainage) to prevent recurrence. Use PPE and avoid sensitive plants/soil.
How do I repair small cracks and chips in slabs?
For small chips, clean the area, use a colour-matched patching mortar or epoxy filler designed for the slab material and finish to match surface texture. For narrow hairline cracks in concrete, rout (open) the crack, clean, use a flexible sealant or epoxy injection as appropriate. For natural stone, use a compatible lime-based repair mortar on historic soft stone. Expect a DIY fix to be cosmetic; large structural cracks or multiple cracking patterns usually need professional assessment.
Next Article
How to Brighten Up Patio Slabs: DIY Cleaning to Seal and Colour
How to brighten up patio slabs: step-by-step DIY cleaning, stain removal, repairs, resealing and quick revamps.