To relay loose patio slabs, you lift them carefully, fix whatever caused them to move in the first place (usually a failed bed, washed-out sand, or poor drainage), then re-lay them on a freshly prepared base of either compacted sharp sand or a 5:1 mortar bed, tap them level, and finish the joints. Do it in the right order and they'll stay put. Skip the diagnosis step and you'll be doing this again in two years.
How to Relay Loose Patio Slabs Step by Step

Talia Lang
28 Jun 2026
Why your slabs moved: the three usual suspects
Before you lift a single slab, spend five minutes figuring out what caused the problem. It changes how you fix it. There are three main culprits, and they often overlap.
Base settlement
If the sub-base (the hardcore or compacted gravel layer beneath the sand or mortar bed) was too thin, poorly compacted, or laid over soft ground, it gradually settles under load and foot traffic. You'll notice this as slabs that have sunk in one area, or a patio that's generally lower than it used to be. A proper sub-base should be 150–200mm deep depending on ground conditions. If yours was skimped at 50mm over soft soil, that's your answer.
Bedding failure: sand wash-out or mortar breakdown
The bedding layer directly under the slab is either a sand laying course or a mortar bed. Sand can wash out over time, especially if your patio has no proper edge restraints or if water drains across the surface and carries fines away. Mortar beds crack and crumble when the sub-base moves beneath them, or simply when the original mix was too weak or too dry when laid. Water washing out joint material is one of the most common causes of progressive loosening: once the joints empty, water gets under the slabs more easily, and the cycle accelerates.
Drainage problems and frost damage
Standing water on or near your patio is a red flag that something is wrong underneath. A saturated sub-base combined with freezing temperatures is particularly destructive: water expands as it freezes, physically lifting slabs, and when it thaws, they drop back down unevenly. Repeat this over a few winters and you get a patio that rocks in all directions. Weeds forcing their way up through joints are also a sign that sand has washed out and water is pooling below.
What you'll need before you start
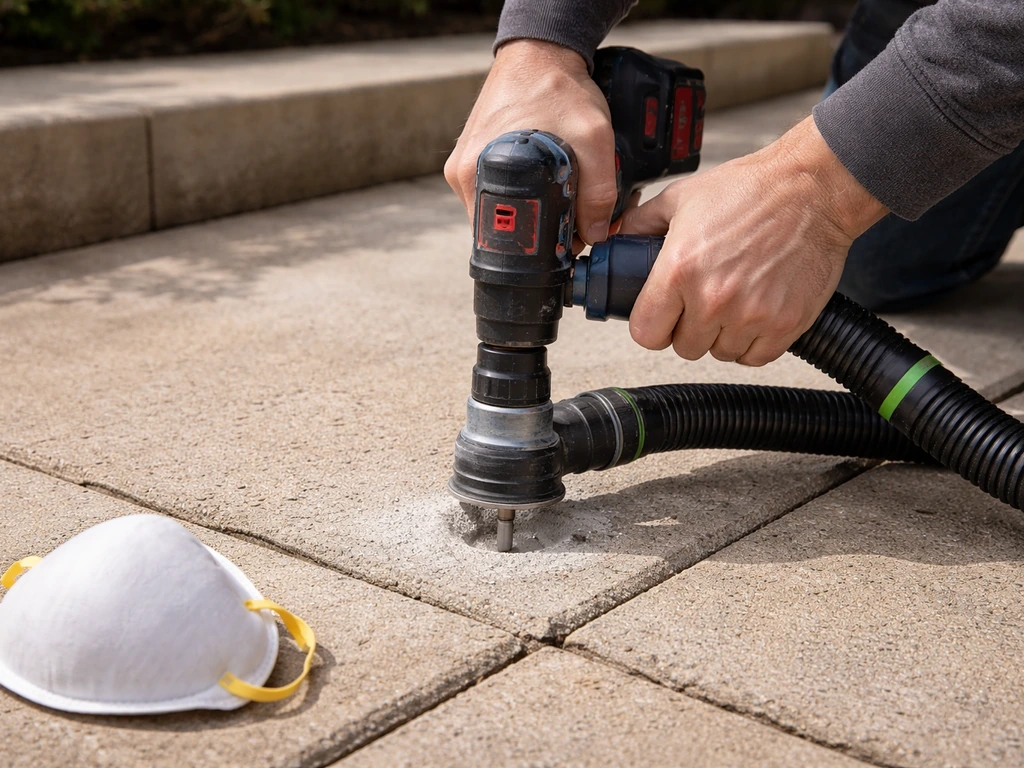
Gather everything before you lift a slab. If you need to drill into patio slabs for an anchor or fixing, use the right bit and avoid damaging the bedding and joints lift a slab. You do not want to be halfway through a job with slabs upended and then realise you need a trip to the builder's merchant.
Tools
- Club hammer and bolster or plugger chisel (for breaking out old mortar)
- Robust spade or garden fork (for lifting slabs)
- Piece of scrap timber (to protect adjacent slabs when levering)
- Spirit level (ideally 1.2m or longer)
- Rubber mallet or dead-blow hammer
- Plate compactor / wacker plate (hire one if you don't own it — it's worth it)
- Screeding rails or straight lengths of timber
- Stiff brush and pointing trowel
- Bucket and mixing paddle or spot board for mortar
- Garden hose with fine spray head
Materials
- Sharp sand (not soft/building sand) for bedding course
- Portland cement for mortar bed (if using mortar method)
- Type 1 MOT sub-base aggregate if you're rebuilding the base
- Jointing sand, dry mortar mix, or polymeric sand for joints
- Edge restraints (aluminium edging or mortar haunching) if borders are loose
Safety
Patio slabs are heavy and have sharp edges. Wear safety goggles when chipping mortar, because chips fly. Wear gloves throughout, and if you're using cement or polymeric sand, use chemical-resistant gloves rather than standard work gloves. When lifting slabs, bend at the knees, not the back, and get a second pair of hands for anything larger than 450x450mm. When mixing cement, consider a dust mask or respirator, especially in enclosed spaces.
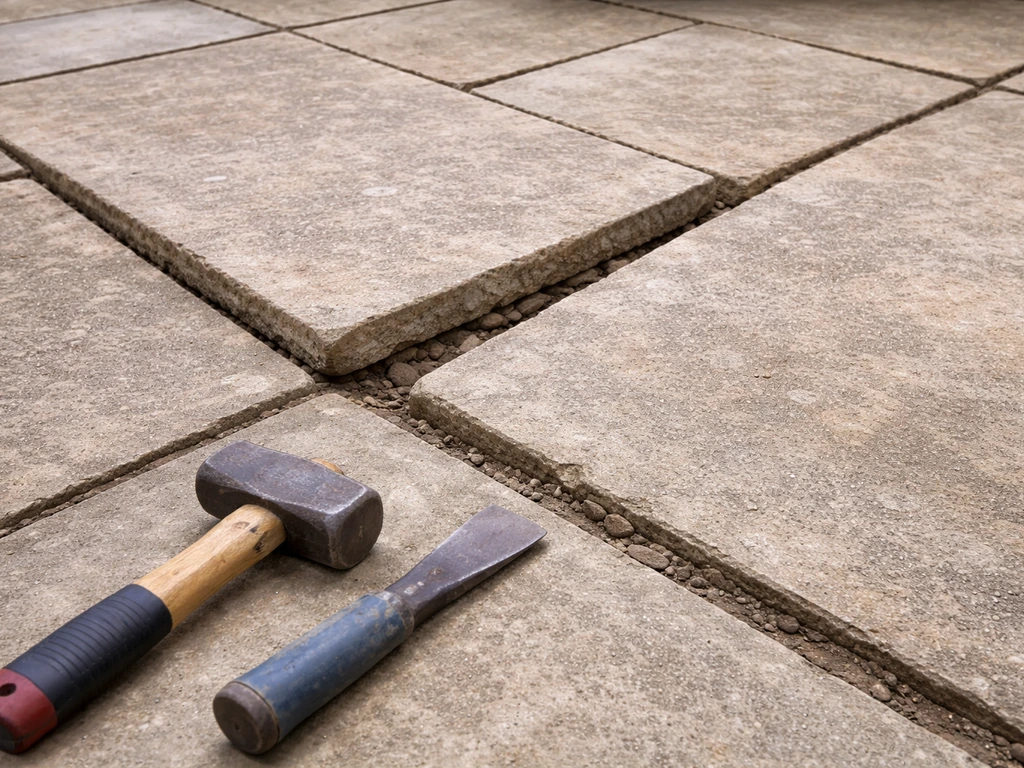
How to lift the slabs without wrecking them
Start with the loosest slab first. If there's old mortar around the edges, chip it away carefully with a plugger chisel and club hammer. Work around all four edges before you try to lever the slab up. Forcing the slab before the mortar is broken will crack both the slab you're lifting and the ones next to it.
- Chip away mortar from all four edges of the slab using a plugger chisel and club hammer, working in short, controlled strikes.
- Slide a robust spade under one edge. Place a piece of scrap timber on the adjacent slab and use it as a fulcrum to lever without scratching or cracking your good slabs.
- Once you have enough purchase, lift the slab clear and stand it on its edge against a wall or fence well away from your work area.
- Repeat for any other loose slabs. Stack them carefully with timber offcuts between them so they don't chip each other.
- Scrape out the old bedding material and pile it to one side. You'll need to see what you're working with underneath.
Once the slabs are up, take a proper look at the base. Press your foot down firmly on the sub-base. If it feels soft or spongy, or if you can see water pooling in the void, you've got a base problem that needs fixing before anything goes back down. If the base feels solid and even and it's just the bedding layer that's failed, you may only need to re-bed rather than rebuild from scratch.
Preparing the base: what needs to go back in
This is the step most DIYers rush, and it's why slabs keep moving. How much work you do here depends on what you found when you lifted the slabs.
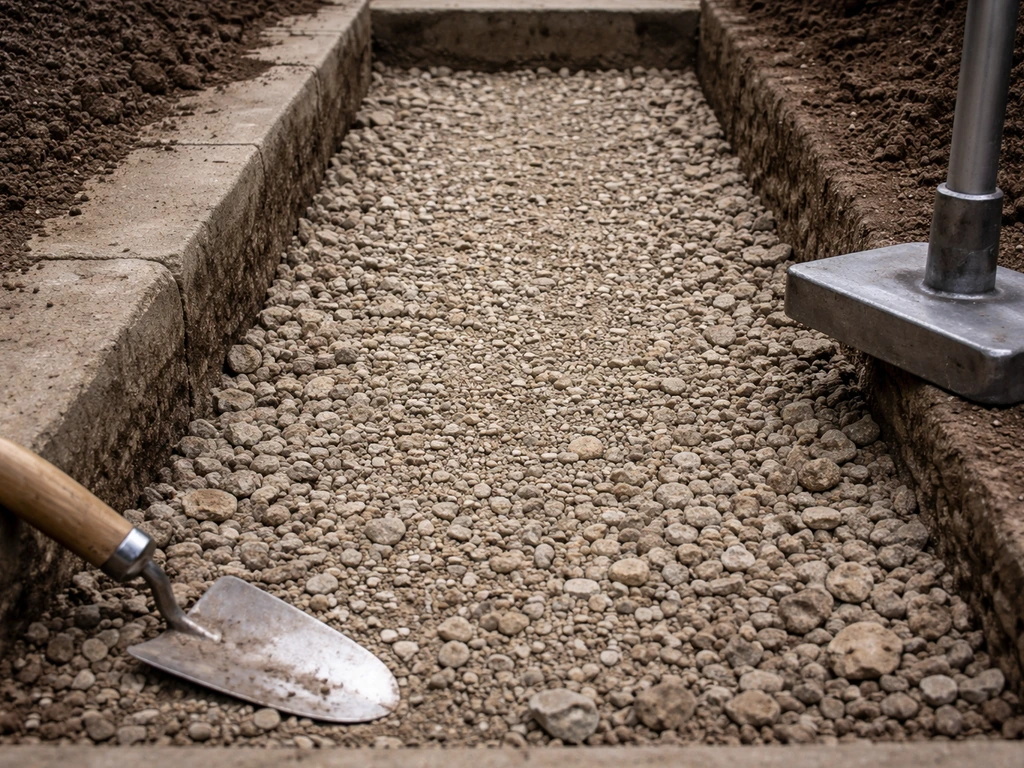
If the sub-base is soft or damaged
You need to excavate to a total depth of around 200–250mm (roughly 8–10 inches) from the finished patio surface. Lay and compact Type 1 MOT hardcore in layers of no more than 100mm at a time, using a plate compactor (wacker plate) on each layer before adding the next. Don't skimp on compaction. This is the most important step in the whole job because no amount of careful screeding fixes a soft base.
If the sub-base is solid and level
Lucky you. Scrape off the old bedding material down to the sub-base, remove any debris, and you're ready to lay a fresh bedding course. If you're re-laying with old bricks, remove all old bedding material and rebuild the base so the reclaimed units sit firmly and evenly. Don't try to top up a failed mortar bed with fresh mortar on top of the old one. Remove it completely.
Sand bed vs mortar bed: which one should you use?
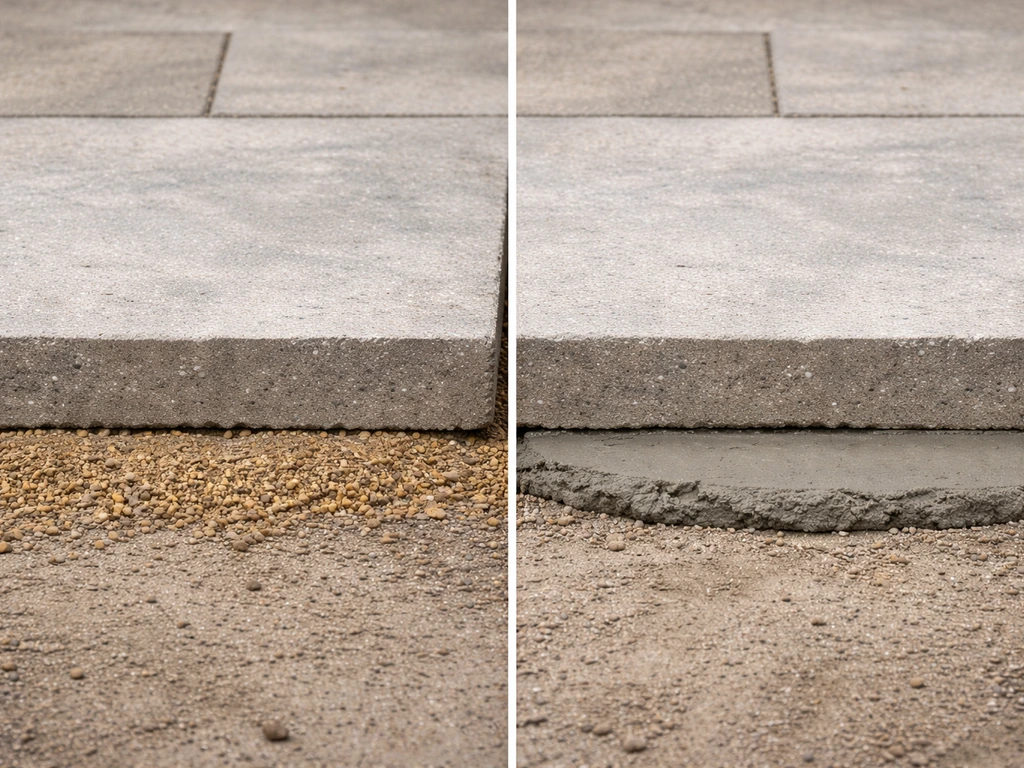
This is the most common question people have, and the honest answer is: both work, but they suit different situations. If you are wondering can i use old bricks to make a patio, the same base and bedding principles still apply. Here's a clear comparison.
| Method | Best for | Main advantage | Main drawback | Sand thickness |
|---|---|---|---|---|
| Compacted sharp sand bed | Domestic patios, large slabs, easier future maintenance/re-lifting | Forgiving to work with, easy to re-level, slabs can be lifted again later without damage | Fines can wash out if drainage is poor or edges aren't restrained | 25–30mm pre-compacted |
| Mortar bed (5:1 sharp sand:cement) | Patios that take heavier use, uneven sub-bases, areas prone to movement | Strong bond, good for irregular base profiles, holds slabs in awkward positions | Harder to lift slabs later, mortar can crack if base moves, takes 24–48hrs to set | 40–50mm wet, reduces as mortar cures |
| Resetting on existing solid base | Minor re-bedding where sub-base is confirmed good and only the bedding has failed | Quickest method, least disruption | Only appropriate if base and drainage are genuinely fine | As needed to achieve level |
For most domestic patio re-laying jobs, a mortar bed is the better long-term choice. Use of the right jointing mortar matters for compatibility with BS 7533-101:2021 requirements, and the externalworksindex listing for Steintec’s Tufftop notes it meets or exceeds the table requirements for specific jointing mortar types meets or exceeds BS 7533-101:2021 table requirements. Use a 5:1 mix of sharp sand to cement (not soft sand, which weakens the mix). If you want something faster-setting and pre-measured, some prem-bedding mortars are available at ratios of around 6:1 for domestic patio use. Whatever you use, keep the mix firm and damp, not sloppy. A wet mortar bed shifts under the slab as you set it.
If you're using a sand bed, the key is pre-compaction. Lay your sharp sand at around 30mm depth, compact it with your wacker plate, then screed it level. Uncompacted sand under slabs is problematic: the slab will consolidate it when you walk on it, and you get settlement almost immediately.
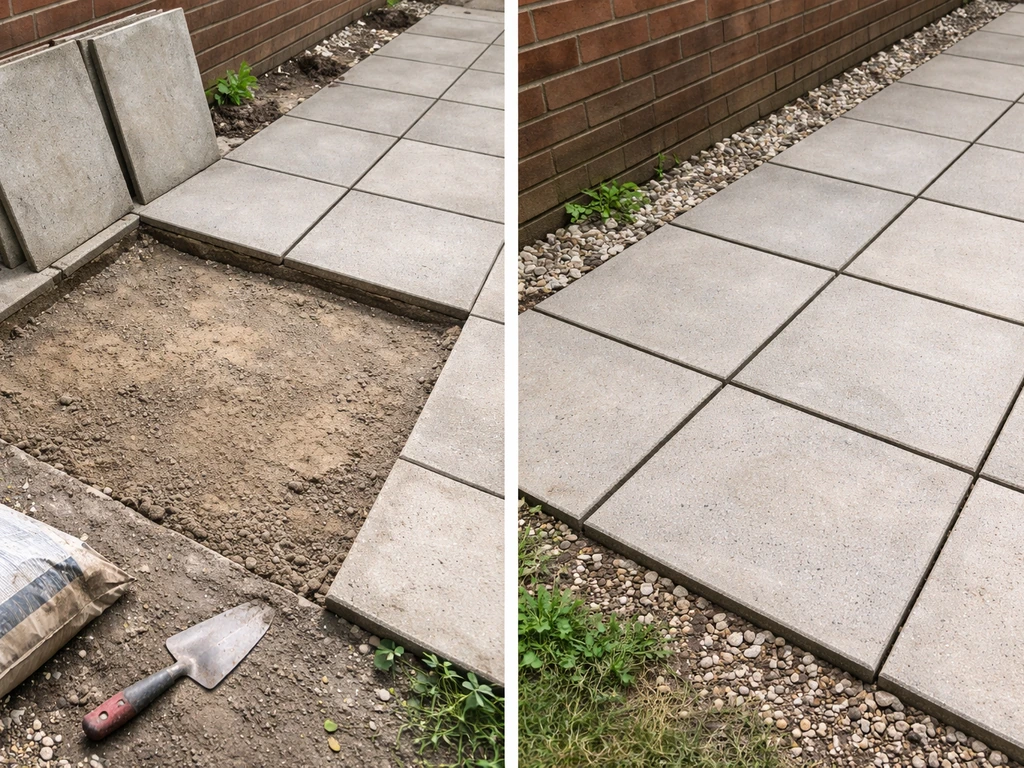
Re-laying the slabs: leveling, spacing, and edges
Screeding your bedding course
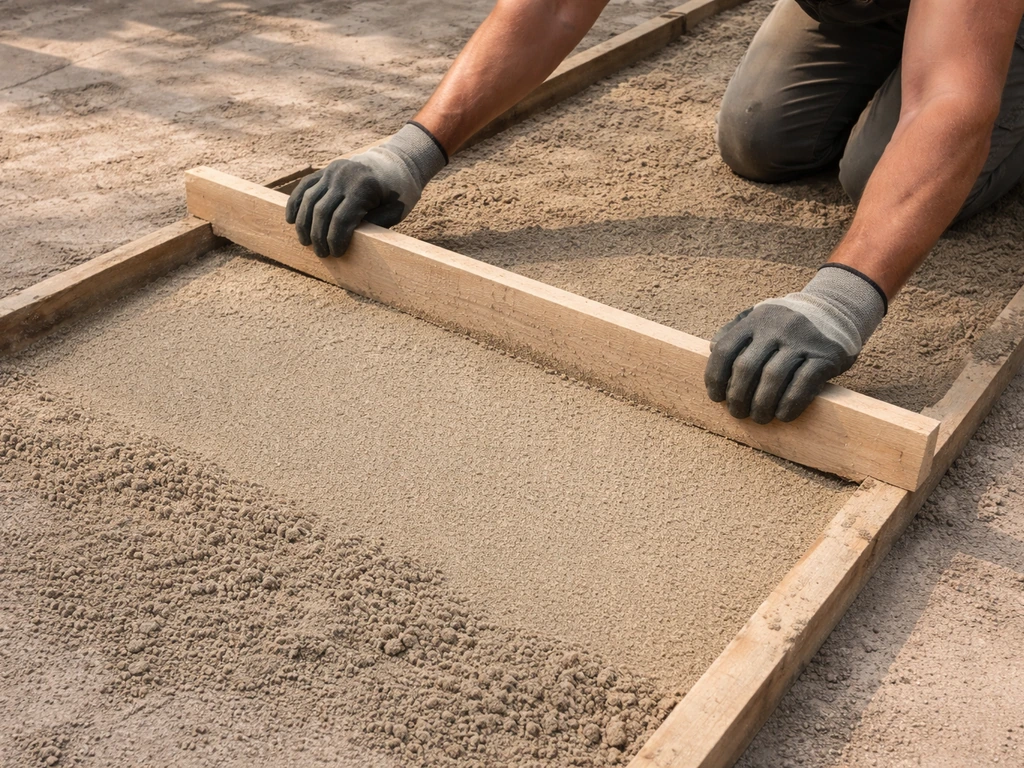
Set up screeding rails (timber battens work fine) at either side of your working area at your target height. Pull a straight length of timber across them to level the sand or mortar. The key thing to understand is that the bedding layer cannot compensate for big dips or humps in your sub-base. If the sub-base varies by 30mm across its surface, your bedding course will vary too, and you'll fight the level constantly. Sort out the base profile first.
Placing and tapping slabs to level
- Lower the slab onto the bed carefully, starting at one corner and lowering to the opposite corner to avoid air pockets.
- Tap it down firmly and evenly with a rubber mallet, working from the centre outward.
- Check with your spirit level in both directions and across the diagonal.
- Where a slab is high, tap it down further. Where it's low, lift it and add a little more bedding material. Don't try to fix a low slab by just hammering its neighbour down to match.
- Maintain a consistent joint gap, typically 8–15mm for most patio slabs. Use tile spacers or cut pieces of timber offcut as temporary spacers.
- Check the cross-fall (drainage gradient) regularly as you go. Aim for a fall of around 1:60 away from the house or toward a drain.
Edge restraints and borders
Loose edges are one of the biggest reasons slabs rock at the perimeter of a patio. If your outer slabs have no solid restraint, the bedding simply spreads outward under load and the slabs tip. Fix this with either aluminium edge restraints pinned into the base, or by haunching (buttering the back of edge slabs with a thick mortar collar). This doesn't have to look heavy or visible from above. A neat mortar haunch on the outside of the last slab row makes a big difference.
Finishing the joints and deciding whether to seal
Dry mix pointing
The classic method for pointing patio slabs is a dry mix of 1 part cement to 3 parts sharp sand. Work on a dry day with dry slabs. Brush the mix into the joints, tamp it down with a pointing tool or old brush handle, and brush off the excess. Then lightly mist with water to activate the cement. Don't drench it. The goal is to dampen the mix just enough to start the chemical reaction. Leave it undisturbed for 24 hours. This is a simple, cheap method that works well for standard concrete or natural stone slabs.
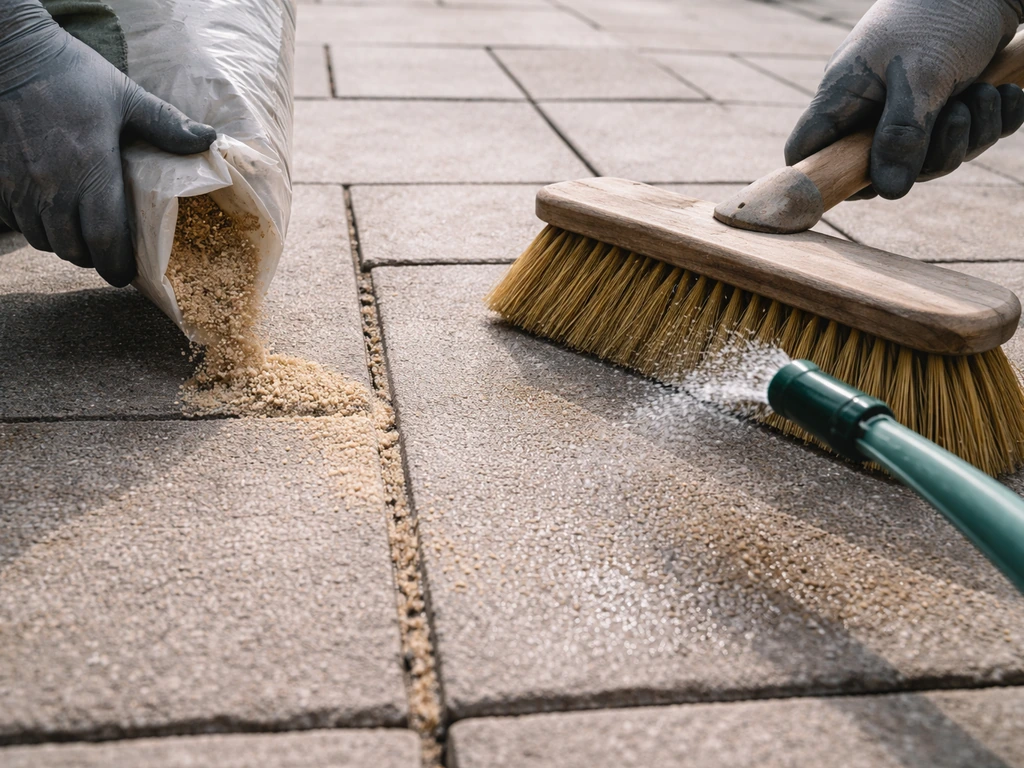
Polymeric jointing sand
For a more flexible joint that resists washout and weed growth, polymeric sand is a good option, especially if you're using a sand bedding course and want joints that move slightly with the slabs. The process is straightforward: sweep the polymeric sand into dry joints, compact it in, sweep off the excess completely (any residue left on the slab face can leave a white film once wet), then activate it with a light mist in passes rather than a single heavy soak. Hanover Pavers’ polymeric sand installation guidelines advise following the manufacturer’s instructions and using the correct misting and activation approach rather than incorrect application practices then activate it with a light mist in passes rather than a single heavy soak.. Don't apply polymeric sand if rain is forecast within 48–72 hours: premature wetting before the material has been fully swept and residue-cleared will cause problems. Follow the manufacturer's instructions specifically for the product you've bought, because activation methods vary between brands.
To seal or not to seal
Sealing is optional for most domestic concrete patio slabs, but it's a sensible step for natural stone, which is more porous and prone to staining. If you do seal, wait until the jointing mortar or sand is fully cured (at least 48–72 hours for pointing, a week is better). Once the mortar or jointing sand is fully cured, you can begin walking on the patio according to the weather and the product instructions. Use a breathable, penetrating sealer rather than a film-forming one for outdoor use. A film-forming sealer traps moisture and can peel in freeze-thaw conditions. Clean the slab surface thoroughly before sealing. If you've removed old mortar from the slab faces during the re-laying process, that's a good opportunity to get them properly clean before the sealer goes on.
Final cleanup
Once pointing is set and any sealer is dry, sweep the whole patio clean. Check that no mortar or polymeric sand residue remains on the slab surface, as this hardens and becomes difficult to remove later. A stiff brush and water usually handles light residue. For anything more stubborn, a diluted patio cleaner works well, but test it on a hidden slab first if you're using natural stone.
Stopping this from happening again
The most common reason people end up re-laying the same patio twice is that they fixed the slabs but not the underlying cause. The same approach also helps if you're trying to decide what to do with old patio slabs, since identifying the real cause determines whether you can re-lay or should replace them. Here's what actually prevents repeat movement.
Sort out the drainage
If water sits on your patio after rain, it will eventually get under the slabs. Check your cross-fall gradient. The surface should slope away from the house at roughly 1:60 (about 17mm per metre). If it doesn't, that's something to correct when re-laying. Also check that downpipes, gullies, and any drainage channels are clear and directing water away from the patio sub-base. If water is pooling against the edge of the patio from a lawn or border, a simple linear drain or French drain along the edge can solve the problem.
Maintain your joints every couple of years
Joint material degrades over time. Weed roots, frost, and water all attack it. Check your joints annually, ideally in spring. If you can see gaps, missing filler, or weeds starting to take hold, re-sand or re-point those areas before water gets a chance to undermine the bedding. Catching this early is a ten-minute job. Ignoring it leads to the full re-lay you're doing right now.
Edge restraints are not optional
If the outer edge of your patio is just slabs sitting against soil or grass, the bedding will migrate outward and the perimeter slabs will loosen first. Mortar haunch the edges or fit a permanent restraint. It makes a noticeable difference to long-term stability.
When to call a professional
Most patio re-laying jobs are genuinely DIY-friendly if you're patient and methodical. But there are situations where professional help makes more sense. If your entire patio has sunk significantly, if you're finding soft, waterlogged ground when you excavate, or if you have a large patio area that needs a full sub-base rebuild, the machinery involved (mini-excavator, heavy plate compactor) and the volume of material mean that a professional landscaper will do it faster, cheaper per hour, and with better results. If you have to replace patio slabs across the whole area, also see how to replace patio slabs for a focused walkthrough of the end-to-end process. Also, if your drainage problems seem to involve blocked or broken underground pipes, that's a separate specialist job before any paving work makes sense. There's no shame in knowing where to draw that line.
FAQ
What should I do if only a few slabs keep rocking after I re-lay them?
If you find individual slabs rock even after re-bedding, suspect a localized hollow in the sub-base (often a void under a corner) rather than “just bad sand.” Lift the affected slab, excavate a small pocket down to solid sub-base, rebuild with compacted Type 1 in thin lifts, then re-lay. Topping up on top of soft or hollow material will settle again quickly.
Can I fix loose patio slabs by re-pointing the joints instead of re-bedding?
Don’t rely on pointing to fix movement. Pointing, whether cement-sand or polymeric, only fills gaps between slabs. If slabs shift, the bedding or base restraint is wrong. Re-check sub-base firmness by pressing and look for washout paths, especially near edges and around any downpipes or drainage outlets.
Should I always use mortar, or can I use a sand bed for relaying loose patio slabs?
Yes, but only if the joints and bedding will still drain and allow a stable base. For sand beds, you typically need to prevent water from washing the sand and fines out, usually with effective perimeter restraints and correct cross-fall. If you have standing water or freeze-thaw risk, a mortar bed plus edge restraint is often more durable than sand alone.
How do I handle a patio base that isn’t level, can I just adjust the bedding thickness?
For uneven base, first correct the sub-base profile, because the bedding course cannot “average out” large dips or humps. If the sub-base varies, you’ll end up with slabs at different heights and joints that open. Measure across with a straightedge, then rework the base until it’s within a small tolerance before screeding bedding.
What’s the best way to avoid problems when using polymeric sand for the joints?
Avoid wetting polymeric sand more than necessary. Apply on a dry, calm day, brush it fully into joints and remove residue from slab faces first. If rain is forecast within 48 to 72 hours, delay the job or protect the area, because early activation or residue can lead to haze, weakened joints, and messy staining.
Can I leave some old bedding material in place and just add fresh mortar or sand on top?
If you removed old bedding, don’t “save time” by stacking new bedding on top of remaining old material. Old mortar lumps or contaminated sand create soft spots and weak interfaces, leading to localized settlement. Scrape down to the sub-base, remove debris, then lay the new bedding on a clean, firm foundation.
Is it okay to use extra-thick mortar or grout to level slabs during relaying?
Don’t pour a thick layer of cement-sand grout to “level” slabs. The correct approach is to rebuild the base or re-bed at the correct thickness, with compaction under Type 1 MOT and firm bedding under the slab. Over-thick grout beds shrink or crumble and can crack, letting water get underneath again.
How can I drill or fit fixings into patio slabs without weakening the bedding?
If you need to anchor a slab, plan the drilling so you don’t undermine the bedding or break joint areas. Use the correct bit for the slab type, drill with steady pressure (no hammering unless specified for that material), and clear dust so the fixing sits properly. After drilling, keep the bedding and jointing intact by re-pointing or re-sanding around the area if you disturb it.
Why do my relaid patio slabs loosen first at the edges, and how do I prevent it?
Yes, but only if the perimeter has restraint and your drainage is sorted. Loose edges are a common failure point, so fit edge restraints or use a mortar haunch on the outer row before you relay. If the patio meets lawn or soil directly, add proper drainage away from the slab edge, otherwise the bedding will migrate outward again.
Can I relay or point patio slabs during cold weather or when frost is expected?
If you’re working in freezing conditions, pause until conditions are suitable. Freezing can damage partially cured mortar and can also lock in moisture trapped under or around slabs. For pointing or jointing, don’t activate cement-sand or polymeric joints when temperatures are likely to freeze before it cures properly.
Next Article
Can I Drill Into Patio Slabs Safely and Correctly
Yes, drill patio slabs safely: choose the right bit, control dust and hammer mode, drill correctly, then anchor and seal