Yes, you can drill into patio slabs, and it's a pretty routine job once you know what you're working with. The key variables are what your slab is made of, what tool and bit you're using, and whether there's anything buried underneath that you could hit. Get those three things right and drilling a patio slab is no harder than drilling into a brick wall.
Can I Drill Into Patio Slabs Safely and Correctly

Talia Lang
14 Jun 2026
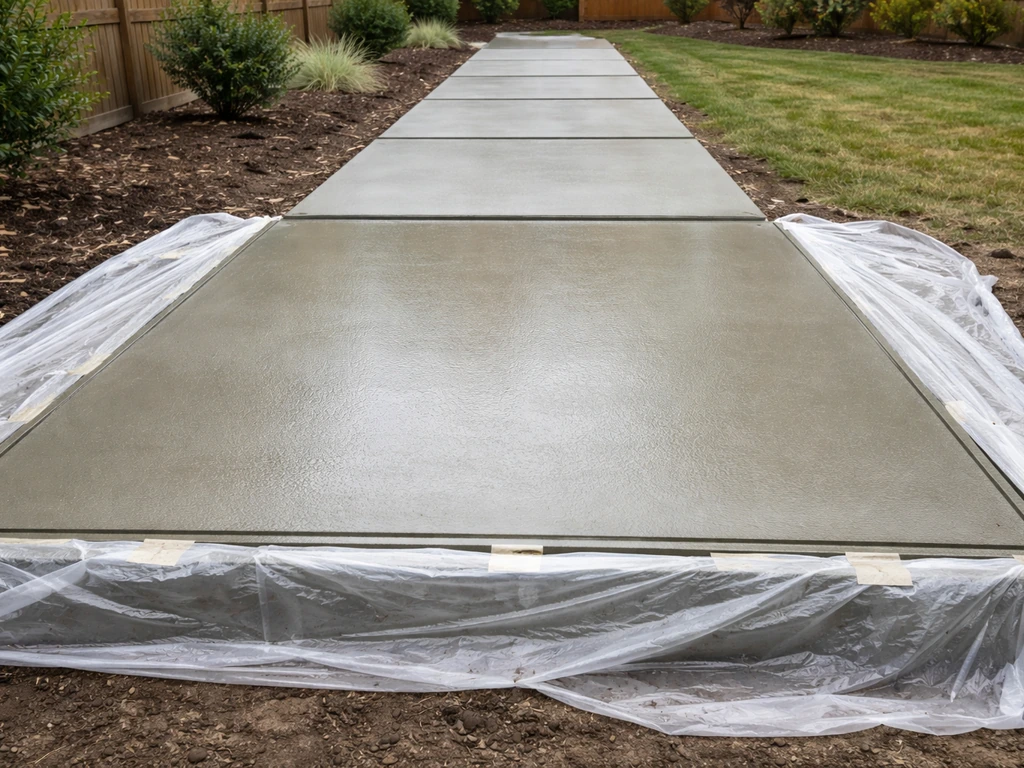
First: Figure Out What Kind of Slab You Have
This matters more than most people expect, because the material determines your bit choice, your drill settings, and how cautious you need to be about cracking.
| Slab Type | What It Looks Like | Drilling Difficulty | Main Risk |
|---|---|---|---|
| Poured concrete slab | One continuous surface, no joints (or only expansion joints) | Moderate | Cracking, rebar contact |
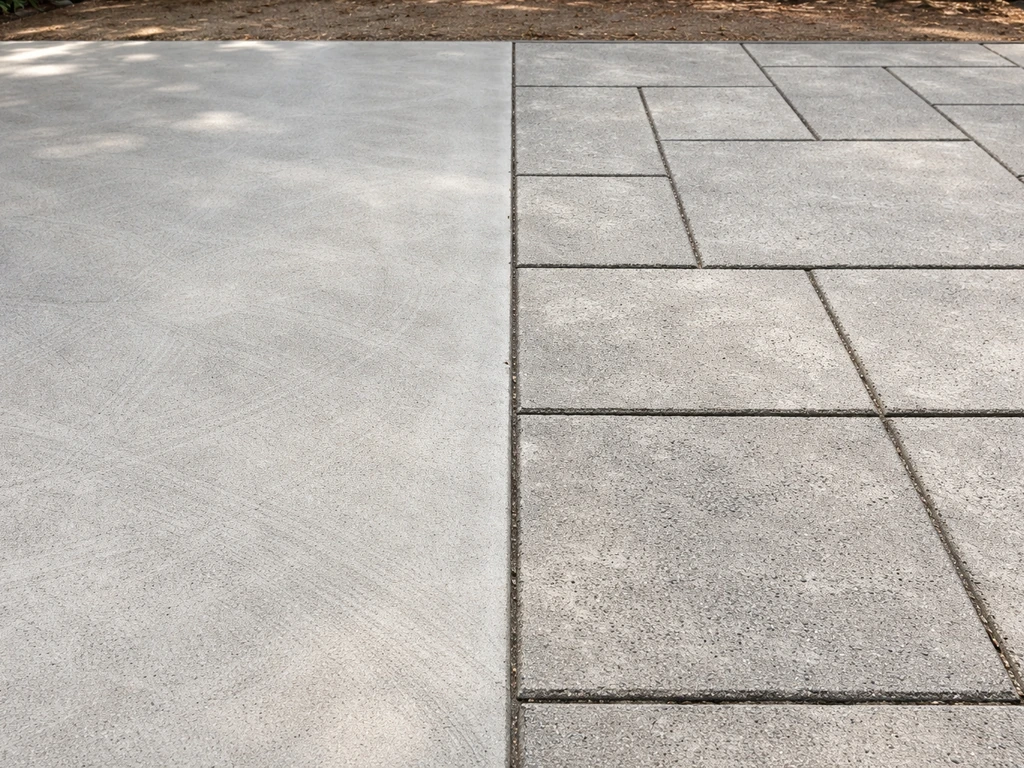
| Concrete/cement pavers | Individual units, usually 400–600mm squares or blocks | Easy to moderate | Slab splitting at edges |
| Natural stone (sandstone, slate, granite) | Irregular or cut slabs, visible grain or texture | Moderate to hard (granite is tough) | Spalling, surface flaking |
| Porcelain/ceramic pavers | Smooth, very hard surface, often looks like tile | Hard | Surface crazing, cracking without a pilot guide |
If you're working on individual pavers rather than a continuous slab, you have one big advantage: if a paver cracks during drilling, you can usually replace just that unit. If you crack a poured concrete slab, the repair is more involved. Knowing which you have also tells you whether there's likely a sand or mortar bed underneath, which affects what anchors you can use after drilling.
The Safety Check You Can't Skip
Before you put a drill bit anywhere near the surface, check what's underneath. Buried irrigation lines, electrical conduit, and drainage pipes are all common under patios, especially around the edges where they tend to run toward the house. In the UK, call 0800 023 2023 (the gas emergency line) and use a service like Dial Before You Dig. In the US, call 811 at least two to three days in advance. Even on a private patio, if you laid the slab over an existing garden or near the house, there's a real chance something is buried there.
Also think about the structural role of what you're drilling into. A poured concrete patio slab is often reinforced with rebar or mesh. Drilling into rebar isn't just bad for your bit, it can weaken the reinforcement. If you hit something solid and metallic after a few centimetres, back out immediately. Rebar locators (also called rebar scanners or covermeter tools) are cheap to hire and worth using if you're planning multiple holes or any hole deeper than 50mm.
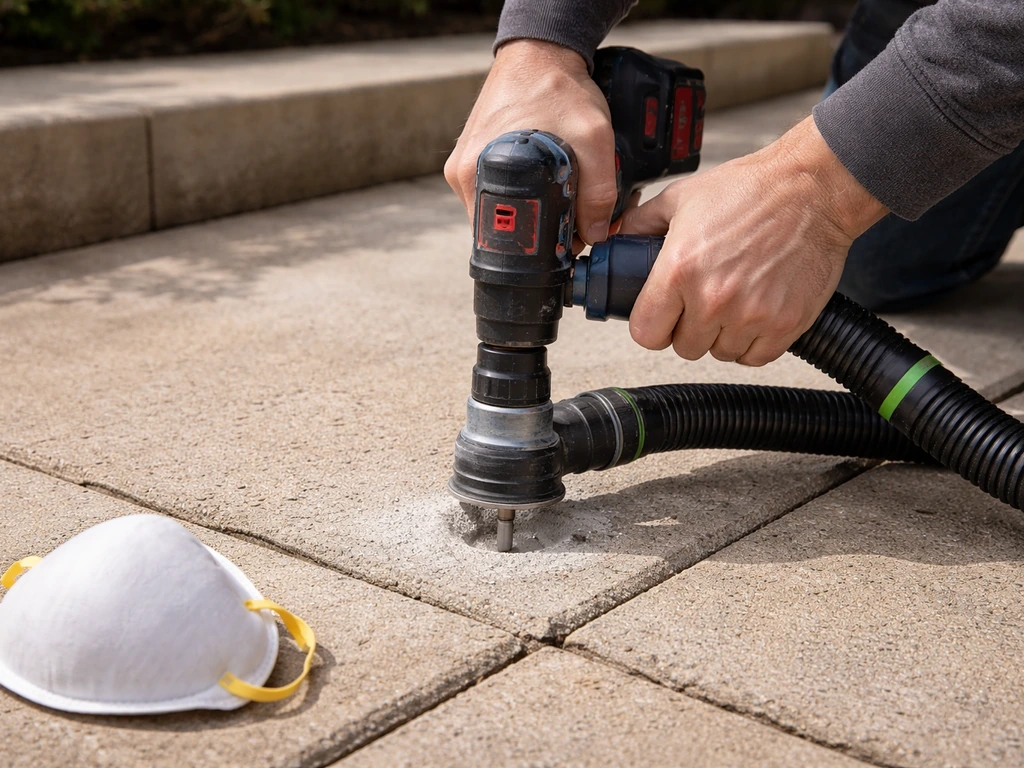
Controlling the Dust, This Is a Genuine Health Issue
Concrete and stone dust contains respirable crystalline silica, and that's not something to wave away. OSHA's silica construction standards specifically address drilling operations and require engineering controls: [a shroud or cowling around the drill bit connected to a vacuum with appropriate filtration, or water applied at the point of drilling to suppress dust](https://www. osha. gov/sites/default/files/publications/OSHA_FS-3630.
pdf). NIOSH and CDC guidance reinforces the wet method approach as one of the most practical controls for outdoor concrete work. In plain terms: [either keep the hole wet while you drill, or use a dust shroud attached to a vacuum](https://www. osha.
gov/laws-regs/regulations/standardnumber/1926/1926. 1153). Don't just drill dry and blow the dust away with your breath. A fitted P100 or FFP3 half-mask respirator is also non-negotiable for anything more than one or two quick holes.
Choosing the Right Drill and Bit
Drill Type and Mode
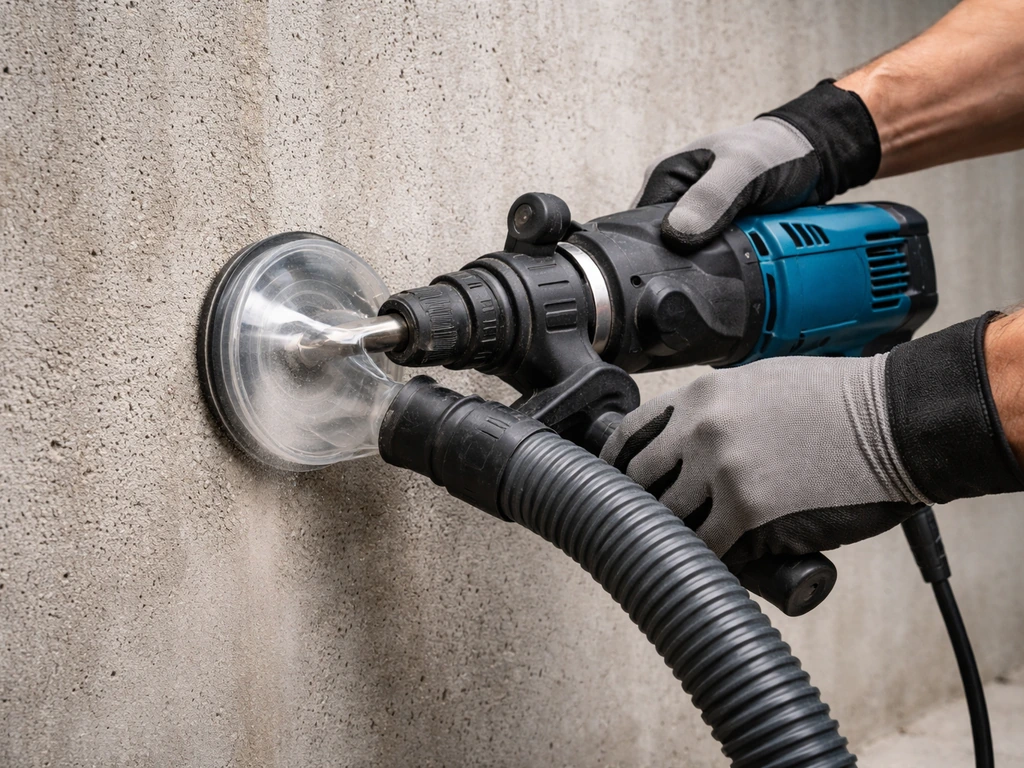
For poured concrete or hard cement pavers, you need a hammer drill (also called a rotary hammer or combi drill in hammer mode). A standard drill driver, even a powerful one, will barely scratch the surface. The hammer action is what chips through the aggregate in the concrete. For thicker slabs or larger diameter holes (above 20mm), a dedicated SDS rotary hammer is the right tool, it delivers far more impact energy than a combi drill and won't cook the bit. For porcelain or natural stone, switch off the hammer mode entirely and use rotation only with a diamond-tipped bit. Hammer action on porcelain will shatter or craze the surface.
Bit Selection
| Material | Bit Type | Notes |
|---|---|---|
| Poured concrete | Carbide-tipped masonry bit (SDS for rotary hammer) | Tungsten carbide tip; SDS-plus shank for rotary hammers |
| Concrete/cement pavers | Carbide-tipped masonry bit | Standard hex or SDS depending on your drill |
| Natural stone (sandstone, slate) | Diamond core bit or carbide masonry bit | Carbide works for softer stone; diamond for harder types |
| Granite | Diamond-tipped core bit, rotation only | Hammer action will chip the surface |
| Porcelain pavers | Diamond-tipped tile/porcelain bit, rotation only | Go slow, keep cool with water |
Bit diameter matters too. Match the bit to the anchor or fixing you're planning to use, the anchor packaging will state the required hole diameter and depth. Common sizes for outdoor fixings run from 6mm to 12mm diameter. Always go with a quality bit from a reputable brand: cheap masonry bits lose their edge fast and make the job much harder.
Speed and Pressure Settings
Concrete drilling is not about brute force or high speed. Use a low to medium speed with steady, moderate pressure. Pressing too hard doesn't speed up the drilling; it overheats the bit tip and dulls it faster, and it gives you less control over direction. Let the hammer action do the work. If you're using a rotary hammer, most have a depth stop, set it so you don't drill deeper than needed. For porcelain and stone in rotation-only mode, keep the speed low and the pressure light.
How to Drill the Hole: Step by Step
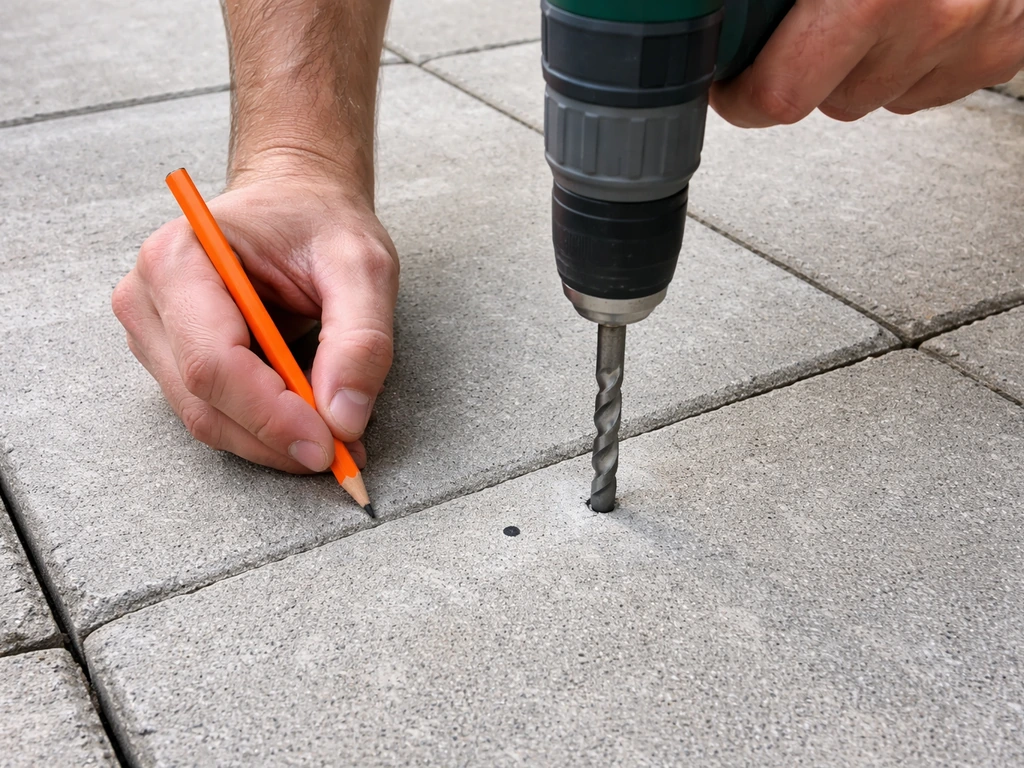
- Mark your hole location with a pencil or chalk marker. Double-check it's away from any cracks, edges, or paver joints by at least 50mm — drilling too close to a joint or edge dramatically increases the chance of cracking.
- For porcelain or smooth stone: place a piece of masking tape over the mark. This gives the bit something to grip and prevents the tip skating across the surface before it bites in.
- Start the hole with the drill in rotation-only mode (no hammer) for the first 5–10mm to create a small starter divot. Then switch to hammer mode (for concrete/pavers) once the bit is seated. This prevents the bit wandering.
- Keep the drill vertical. Tilting even slightly causes the bit to bind, slows progress, and can chip the slab edge. Use a small spirit level taped to the drill body if you need a visual guide.
- Drill in short bursts of 10–15 seconds, then withdraw the bit to clear dust from the hole. This also lets the bit cool slightly and reduces heat buildup.
- For deeper holes (over 75mm) in thick concrete: periodically pour a small amount of water into the hole, or use your wet method continuously, to cool the bit and suppress dust.
- Once you reach the target depth, withdraw the bit slowly while still running, to clear any loose material from the hole.
If you're drilling through a poured concrete slab that's 100mm or more thick, expect it to take longer than you think. How long you should wait before walking on new patio slabs depends on the slab material and curing time, so always follow the product or installer’s guidance. A 10mm hole through 100mm of poured concrete with a decent SDS hammer drill might take 60 to 90 seconds, longer in old, dense concrete. If you're drilling separate pavers, the job is usually quicker because the material is more uniform and often less dense than site-poured concrete.
After the Hole: Anchors, Fasteners, and Keeping Water Out
Choosing the Right Anchor for Outdoor Use
Not all anchors are created equal for outdoor patios. The ground-level environment means the fixing will be exposed to rain, frost, and freeze-thaw cycles, all of which are much harder on fixings than an interior application. Use stainless steel or hot-dip galvanised anchors, plain zinc-plated anchors will rust within a season or two outdoors, and that expansion from rust corrosion can crack the slab around the hole.
For most patio applications (fixing down a post base, securing a drain grating, anchoring a structure), a resin anchor (also called a chemical anchor or epoxy anchor) is often the best choice outdoors. You inject two-part resin into the hole, insert the threaded rod or bolt, and let it cure. Resin anchors handle wet conditions better than expansion anchors, don't rely on friction against the concrete, and are less likely to cause cracking in older or thinner slabs. Allow the resin to cure fully, usually 30 to 60 minutes at room temperature, longer in cold weather, before loading the fixing.
Expansion anchors (sleeve anchors, wedge anchors) work fine in solid poured concrete but apply outward pressure as they expand, which risks splitting a paver or cracking a thin slab. Use them only in solid, uncracked concrete with at least 50mm of material around the hole.
Sealing Open Holes Against Water Intrusion
Any hole that isn't filled with an anchor needs to be sealed, full stop. An open hole in a patio collects water, and in climates where temperatures drop below freezing, that water expands when it freezes and will crack the slab around the hole. Even in mild climates, water sitting in a hole and wicking down to the substrate accelerates deterioration. Use a flexible, waterproof exterior sealant (polyurethane or silicone-based) to fill any unused holes or gaps around anchors. Work the sealant in with a narrow nozzle so there are no voids, and tool the surface smooth and slightly recessed so water runs off rather than pooling.
Common Mistakes That Wreck the Job
- Using a regular drill bit or flat bit instead of a masonry or diamond bit. This destroys the bit and barely scratches the slab.
- Drilling in hammer mode on porcelain or glazed stone. You'll crack or craze the surface before the hole is halfway done.
- Too much downward pressure. It feels like you're making progress but you're just overheating the tip. Back off and let the hammer action work.
- Drilling right through a crack that's already in the slab. This almost always makes the crack worse. Fix the crack first, or choose a different location.
- Drilling too close to the edge of a paver or slab. Less than 50mm from an edge and you're almost certainly going to chip or crack the corner off.
- Not clearing dust from the hole before inserting an anchor. Dust debris prevents full contact and dramatically reduces holding strength.
- Using standard interior anchors or zinc-plated hardware outdoors. They'll corrode and fail within a year or two.
- Skipping the silica dust controls because it's just one hole. Even short exposures add up over a lifetime of DIY work.
When to Stop and Call a Professional
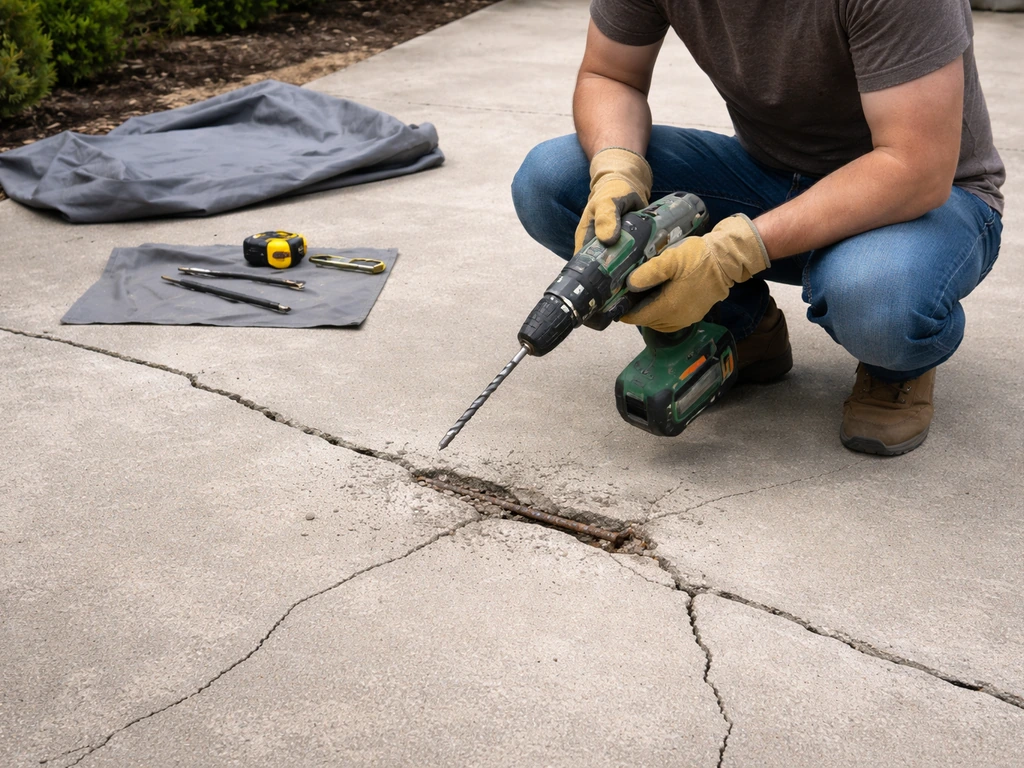
Most homeowners can handle drilling a patio slab themselves, but there are situations where it genuinely makes sense to bring someone in. If your slab is heavily cracked or showing signs of structural movement, adding more holes is likely to accelerate the damage rather than help. The underlying problem needs to be addressed first. Similarly, if you need large diameter holes (above 50mm) or multiple holes in a pattern for something like a drain installation, hiring someone with a core drill rig is faster, neater, and much safer than trying to do it with a consumer-grade rotary hammer.
If you hit rebar on the first attempt and can't easily shift the hole location, stop. Cutting through rebar requires specialist equipment and an understanding of whether that steel is structural. If you're not sure, an experienced contractor can assess whether it's safe to proceed and use the right tools to do it properly. And if the slab itself is crumbling, spalling, or hollow-sounding when you tap it, the better fix might be to remove and replace the affected area rather than drilling into compromised material. That's worth exploring before investing time in a hole that might not hold an anchor reliably anyway.
Drilling into patio slabs is genuinely achievable as a DIY job when the slab is in reasonable condition and you have the right tools. If your slabs are older or damaged, deciding what to do with old patio slabs can be just as important as drilling a new fixing point.
The work that tends to follow, replacing slabs, re-laying loose pavers, or dealing with a patio that needs more than just a fixing point, is where the job can escalate. If your patio slabs are loose, it helps to stabilize the surface first so any new fixings have a solid base loose pavers. If you do need to replace patio slabs, plan the excavation and base setup first so the new slabs settle properly replacing slabs.
It's worth taking a clear-eyed look at the overall condition of your patio before you start drilling, so you know what you're committing to. Old bricks are usually best used for the patio surface itself, but before you drill or anchor anything into them, make sure the mortar and base are sound Old bricks to make a patio.
If you are working with older bricks for patios or walkways, the same careful approach to drilling, anchors, and water sealing helps you avoid cracking.
FAQ
Can I drill into patio slabs with a regular drill instead of a hammer drill?
For poured concrete, a standard drill driver will usually struggle to break the aggregate, so you typically need hammer mode or (for thicker slabs and bigger holes) an SDS rotary hammer. If you do try a non-hammer drill, use it only for softer concrete or for drilling into individual paving blocks, and expect slower progress and faster bit wear.
What if I see cracks forming as I drill, should I stop right away?
Yes. Stop drilling if you notice new cracking radiating from the hole, crumbling edges, or the bit starts grabbing and walking. That usually means the slab is too thin for your anchor choice, you are drilling too close to an existing edge or joint, or the bit is the wrong type/size. Finishing the hole can worsen the damage and weaken the anchor.
How do I choose the right hole depth for patio anchors?
Match the hole depth to the anchor packaging, and then add a small margin for drilling tolerance and dust removal (especially with SDS holes). If you are using a resin anchor, depth alone is not enough, you also need correct hole cleanliness, because leftover dust can reduce adhesion and pull-out strength.
Do I need to clean the hole after drilling before putting in an anchor?
In most cases, yes. Dust in the bottom can block the anchor from seating and can interfere with resin curing or reduce expansion performance. Blow out and brush the hole (and vacuum if available) until it looks clean, then install immediately so the hole does not re-collect debris.
Is drilling into the edges of patio slabs safe?
It is riskier. Near edges and joints, slabs and pavers often have less thickness or less confinement, so expansion anchors can split them and even small cracks can propagate. If you must drill near an edge, use the recommended edge-distance guidance from the anchor instructions and consider resin anchors instead of expansion types.
Can I drill into a patio that is porcelain or has a tile finish?
Yes, but do not use hammer action. Use rotation only with a diamond-tipped bit, keep speed and pressure low, and consider applying masking tape to reduce chipping. If the slab is a porcelain tile over concrete, drilling through tile and into the substrate requires careful bit depth and a compatible anchor strategy.
What should I do if I hit something metallic like rebar or conduit?
Back out immediately and do not force the hole. Hitting rebar can compromise structural integrity and damage the bit, and hitting buried services can create safety hazards. If it is rebar and you cannot shift the location, the safer move is to have a contractor assess whether the target area can be relocated or whether specialized cutting or different attachment methods are needed.
How many holes can I drill before it becomes unsafe for the slab?
There is no single number, it depends on slab condition, thickness, reinforcement layout, and how close holes are to each other. As a practical rule, avoid clustering holes, use the smallest diameter that meets the fixing, and consider rebar cover scanning for multiple holes or anything deeper than about 50mm to reduce the chance of hitting reinforcement.
Can I use expansion anchors for a patio paver or only for solid concrete?
Use expansion anchors only when you have solid, uncracked concrete with enough material around the hole (at least 50mm is a common minimum guideline). For separate pavers, thin slabs, or older concrete that may be prone to cracking, resin anchors are usually the safer choice because they do not rely on outward expansion pressure.
Should I seal only unused holes, or also seal around installed anchors?
Seal both when the design allows it, at minimum you must seal any void that could hold water. Around installed anchors, ensure the annular gap is filled with a compatible exterior sealant so water cannot wick into the substrate and worsen freeze-thaw or corrosion over time.
How long until I can load the fixing after resin anchoring?
Wait until the resin has fully cured before tightening or applying load. The article mentions typical cure times, but the key variable is temperature, so in cold weather you may need longer than the label time. If you cannot wait, switch to an anchor system with a documented fast cure that matches the conditions.
Next Article
How Long Before You Can Walk on New Patio Slabs
Wait times to walk, place loads, and fully cure new patio slabs based on concrete type, curing conditions, and thickness