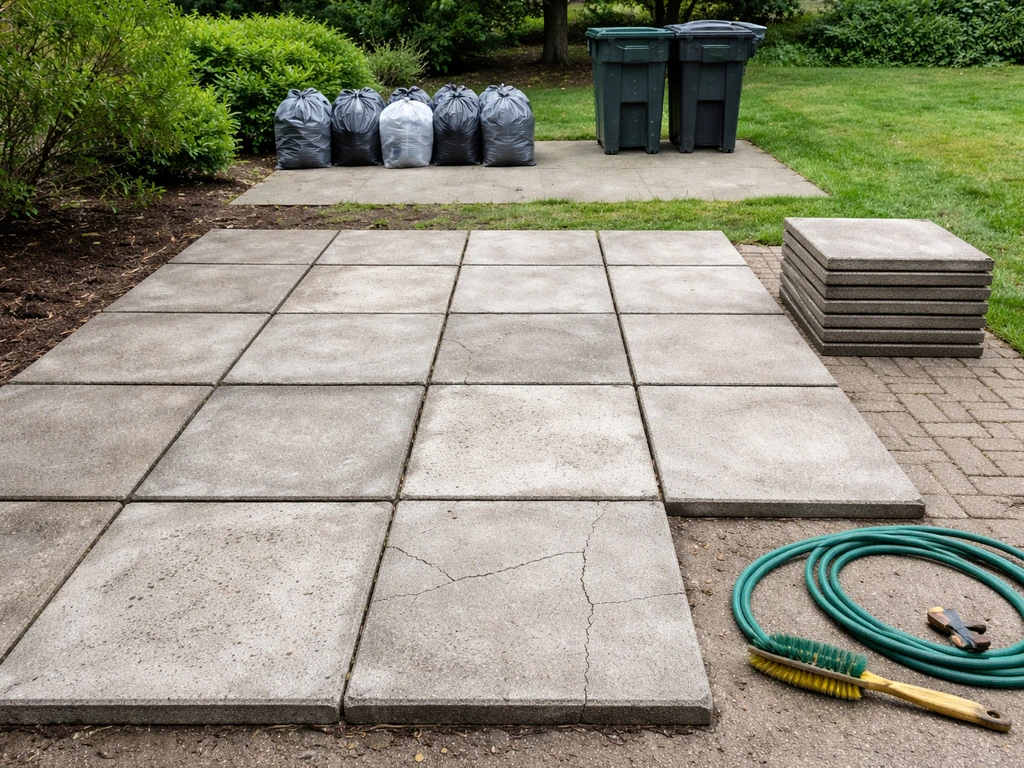
Yes, you can absolutely reuse old bricks for a patio or walkway, and if the bricks are in decent shape, the results can look better than new. For a clear, focused answer to the question can I use old bricks to make a patio, see the dedicated guidance in this article. Reclaimed clay bricks develop a patina and character that no fresh-from-the-pallet paver can replicate. But there is real work involved: you need to inspect every unit, chip off old mortar, sort out the damaged ones, and build the base correctly. Skip any of those steps and you will end up with a sunken, uneven surface within a couple of seasons. Do them properly and a reclaimed-brick patio can last decades.
How to Use Old Bricks for Patios & Walkways: Complete Guide

Talia Lang
26 Jul 2026
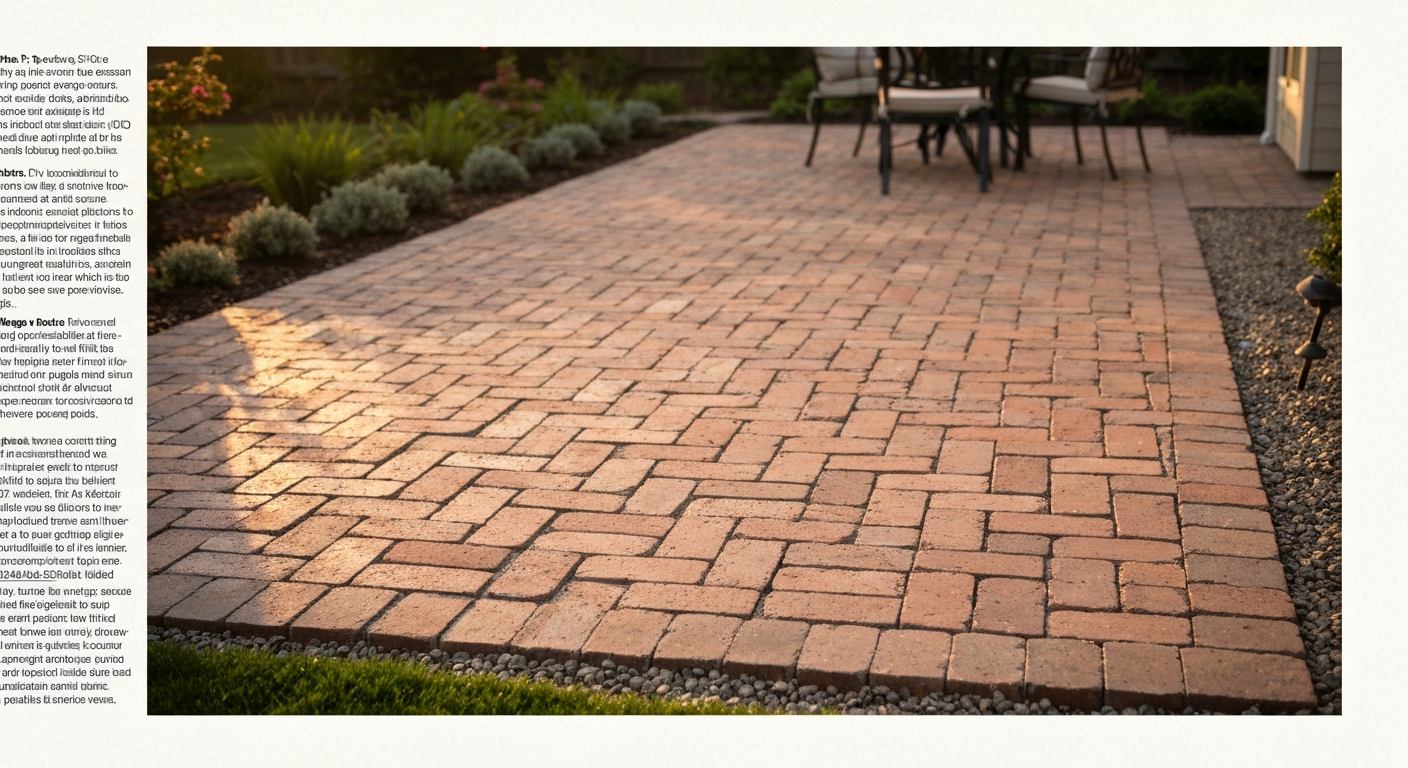
Reclaiming old bricks and slabs: what this guide actually covers
This guide walks you through the full process of reusing old bricks (and, where relevant, old patio slabs) to build a patio or walkway from scratch. That means inspecting and sorting your material, cleaning it, stripping old mortar, planning the layout with proper drainage, building a correct base, laying the bricks, jointing, and sealing. It also covers what to do when bricks or slabs are not reusable, how to handle drilling or anchoring into reclaimed material, and when the job genuinely calls for a professional rather than a weekend of DIY.
If you have existing patio slabs that are loose, cracked, or just tired-looking, some of the same thinking applies: deciding whether a slab is worth relaying versus replacing is the same inspection logic you will use here for bricks. For a step-by-step walkthrough on removing and replacing paving, see how to replace patio slabs. If you need step-by-step instructions, see our guide on how to relay loose patio slabs for lifting, bedding, and re-leveling techniques. Topics like relaying loose patio slabs and replacing patio slabs overlap with this guide, and understanding how mortar removal works (covered below) is directly relevant if you are also trying to clean and reuse concrete slabs.
Who this guide is for, and honest expectations
This guide is written for homeowners who already have a stockpile of old bricks (from a demolished wall, lifted patio, or salvage yard) and want to put them to use without buying all-new material. It assumes you are comfortable with a shovel, a rubber mallet, a hand saw or angle grinder, and some weekend labor. You do not need prior masonry experience, but you do need patience: reclaimed work is slower than installing new pavers because every brick needs individual assessment.
On durability: a properly laid reclaimed-brick patio on a well-compacted base will last 20-plus years. The failure points are almost never the bricks themselves; they are a badly prepared base, no edge restraints, or poor drainage. On appearance: reclaimed bricks will not be perfectly uniform in color or size, and that is part of the charm. If you want military-precise uniformity, buy new. On effort: plan on one full weekend to prep and inspect your bricks, another to excavate and build the base, and a third to lay and joint. For a 100 sq ft patio that is realistic. Scale accordingly.
Materials and tools you will need
Materials
- Reclaimed clay bricks (order 10-15% more than your calculated square footage to account for breakage and culls)
- Coarse, washed concrete sand for bedding (not stone dust or screenings, which retain water)
- Compactable gravel aggregate for the base (crushed stone, road base, or recycled concrete aggregate)
- Edge restraints: manufactured plastic or steel paver restraints, or poured concrete curbing
- Polymeric jointing sand for the finished joints
- Brick sealer (penetrating silane/siloxane type) if you choose to seal
- Masonry cleaner: a proprietary formulation like PROSOCO Sure Klean 600 for general cleaning; muriatic acid (hydrochloric acid) diluted 1:10 (acid:water) only as a last resort
- Type S or Type N mortar mix if you are mortaring joints (optional for a dry-lay installation)
- Landscaping fabric (optional, placed under the gravel base to limit weed intrusion from below)
Tools
- Spade and flat-ended shovel for excavation
- Plate compactor (rent one — do not rely on hand tamping for anything larger than a small repair)
- Rubber mallet
- Level (4 ft minimum) and a long straightedge
- Mason's line and string pegs
- Tape measure
- Brick bolster (wide cold chisel) and club hammer for mortar removal
- Wire brush (stiff steel bristles) for cleaning
- Angle grinder with a masonry disc for stubborn mortar (use wet-cutting where possible)
- Rotary multi-tool for detailed mortar removal in tight spots
- Brick splitter or angle grinder for cutting bricks to fit
- Stiff-bristle broom for sweeping jointing sand
- Garden hose with a spray nozzle
- Buckets and stiff scrubbing brushes
- Wheelbarrow
Safety gear (do not skip this)
- P100 or N95 respirator rated for silica dust — mandatory when cutting, grinding, or chipping brick and mortar
- Safety glasses or goggles
- Heavy work gloves (leather preferred for chipping work)
- Acid-resistant rubber gloves and safety glasses for any chemical cleaning
- Steel-toe boots
- Knee pads for laying work
- Hearing protection when using power tools
A note on silica dust: cutting and grinding brick and mortar releases respirable crystalline silica, which causes serious, irreversible lung damage over time. OSHA's Respirable Crystalline Silica standard requires engineering controls for construction work, in practice that means wet-cutting whenever possible, and wearing a proper respirator even for short DIY sessions. This is not a formality.
Are your bricks (or slabs) worth reusing? How to decide
Not every old brick deserves a second life on your patio. The Brick Industry Association is clear that reclaimed clay brick is suitable for reuse when units are structurally sound, free of severe spalling or cracking, and properly cleaned of old mortar and contaminants. The key word is structurally sound. Before you spend hours cleaning a pile of bricks, run through the following criteria and be ruthless about the rejects.
Pass criteria: bricks worth keeping
- Faces are intact with no flaking, spalling, or surface delamination
- No through-cracks (a crack that goes all the way through a brick, even if tight, is a structural failure waiting to happen)
- Corners are reasonably intact — minor chips are acceptable, but missing corners more than about 1/2 in. deep will show in a finished surface
- Consistent nominal dimensions (variation of more than about 1/4 in. in thickness makes leveling very difficult)
- Sound when tapped with a cold chisel: a solid ring means intact; a hollow thud suggests internal cracking or delamination
- No visible white bloom (efflorescence is manageable, but heavy crystalline salt deposits inside the face suggest high moisture uptake)
Red flags: bricks to cull
- Severe spalling — the face has lifted or flaked off in layers (a sign of frost damage and high absorption)
- Through-cracks in any direction
- Soft, crumbling texture (indicates underfired or heavily weathered brick that will continue to deteriorate)
- Deeply pitted faces that would collect water and freeze
- Bricks that feel noticeably lighter than peers of the same size (porous internal structure)
- Any brick with oil, tar, or bituminous coating that you cannot remove — these stain surrounding material and resist mortar bond
The ASTM C67 standard defines formal laboratory tests for brick quality including cold-water absorption, saturation coefficient, and freeze-thaw resistance. ASTM C216 for facing brick, for example, caps cold-water absorption at 8% for severe weathering exposures. You are not running a lab test in your back garden, but the visual and tap-test criteria above track directly with what those tests measure. When in doubt about a borderline brick, set it aside. The cost of a rejected brick is nothing compared to the cost of relaying a patio because you used too many weak units.
Inspecting bricks and slabs on-site: what to look for up close
Do your inspection before you clean. It is much faster to reject a brick with a clear through-crack than to clean it and then reject it. Work through your pile systematically: stand each brick on end and sight down the face for warping, then check both faces for spalling, then hold it at chest height and tap it firmly with the handle of a cold chisel. A solid ring passes; anything hollow or dull gets set in the reject pile.
For frost damage specifically, look at the faces rather than the edges. Frost acts on the outer face of a brick when moisture is trapped inside and freezes, it pushes the face layer outward in a thin delamination. Run your fingernail across the face; if you can catch the edge of a layer that lifts or flexes, that brick is going to continue spalling in service. This is the most common failure mode you will see in bricks from UK and northern-climate walls.
For reclaimed patio slabs, look for the same things plus flexural cracking, which shows as a crack running roughly parallel to the long axis. Slabs flex when the ground beneath them is unsupported, and a crack that runs through the middle of a slab is a structural failure that cannot be reliably repaired. Fine surface crazing (a network of tiny surface cracks with no depth) is cosmetic and acceptable. Fixing cracked and broken patio slabs properly usually means replacement rather than repair, the same logic applies here.
Check dimensions. Measure a representative sample of 20-plus bricks with a tape measure. If your thickness variation is more than about 3/8 in. across the batch, you will have a very hard time achieving a level surface. Consider sorting bricks into thickness groups and using the most consistent group for the main field, with outliers reserved for cut pieces at edges where minor height differences matter less.
Lifting existing patio slabs safely: how to get them up without breaking them
If your old bricks or slabs are still in place (rather than already stacked in a pile), you need to lift them before you can prep them. How you lift them determines how many survive the process.
- Start at an edge or a loose slab: if any slab or brick is already rocking, start there. Drive a flat pry bar into the joint and lever gently upward. Sudden force snaps corners.
- For mortared joints: use a cold chisel and club hammer to break the mortar joint along all four sides before attempting to lift. Trying to pry a mortared slab free directly usually cracks the slab.
- Lift with your legs, not your back: slabs and brick clusters are heavy. Use the NIOSH safe-lifting approach — keep the load close to your body, bend at the hips and knees, and use a helper or a suction-cup slab lifter for anything over about 50 lbs.
- For large slabs (600mm/24 in. or bigger): use two people or a rented slab-lifter tool. Suction-cup lifters designed for paving slabs cost very little to rent and save a lot of back strain and breakage.
- Stack carefully: lay lifted slabs or bricks flat on a pallet or on grass, never leaning — a leaning stack will fall and shatter. Leave clearance around the stack so you can walk safely.
- Mark your rejects immediately: as you lift each piece, give it the quick tap-test. Mark rejects with a chalk cross before they join the keeper pile so you do not clean them later by mistake.
If you are lifting bricks from a wall rather than a patio, the process is similar but mortar removal at the wall face is more aggressive. Use a cold chisel to cut the mortar bed above and below before trying to extract each brick. Work from the top of the course downward.
Cleaning reclaimed bricks and slabs properly
Cleaning has two goals: removing biological growth (moss, lichen, algae) and removing mortar smear and general grime. Do these in order, clean the biology first, then address mortar residue in the next stage. Trying to do both at once usually means using a stronger chemical than you need.
Step 1: dry brush and inspect
Before wetting anything, use a stiff wire brush to knock off loose dirt, cobwebs, loose mortar fragments, and any dry organic material. This dry pass also gives you another chance to spot surface delamination that might not have been obvious before.
Step 2: pressure or hand washing
Rinse the bricks thoroughly with a garden hose or a low-pressure washer (under 1,500 PSI). High-pressure washing on already-weathered reclaimed brick can force water into soft faces and accelerate spalling. A firm scrubbing brush and a bucket of water work fine for most bricks. Soaking in a container of clean water for 10-15 minutes before scrubbing helps loosen biological staining.
Step 3: moss, lichen, and algae removal
For heavy biological growth, apply a proprietary masonry biocide or a diluted bleach solution (roughly 1 part household bleach to 10 parts water). Let it dwell for 10-15 minutes, scrub, then rinse thoroughly. Do not mix bleach with any acid cleaner, you will produce chlorine gas. Rinse everything completely before moving to any chemical mortar cleaning.
Step 4: proprietary masonry cleaner for residue
For mortar smear, general grime, and mild efflorescence, a purpose-formulated masonry cleaner like PROSOCO Sure Klean 600 is the right first step. These products are safer than straight muriatic acid, come with clear safety data sheets and application instructions, and are less likely to etch the brick face or leave residues that cause problems later. Follow the manufacturer's dilution rate, apply to a pre-wetted surface, scrub, and rinse thoroughly.
Removing old mortar from bricks: step-by-step methods
Mortar removal is the most labor-intensive part of working with reclaimed bricks. For a focused walkthrough on techniques and tools for how to remove mortar from patio slabs, see our dedicated guide. The right approach depends on how much mortar is attached, how well it is bonded, and how soft or hard the brick face is. Always start with the gentlest method that works, and test on a few reject bricks first before working on your keepers.
Method 1: cold chisel and wire brush (gentlest)
- Hold the brick firmly on a stable surface (a sandbag works well as a rest — it absorbs impact without cracking the brick).
- Place a brick bolster or wide cold chisel at the mortar-to-brick interface and strike firmly with a club hammer. The goal is to shear the mortar off at the joint line, not to scrape across the face.
- Work along the mortar bed in short strokes rather than long scraping passes.
- Use a stiff wire brush to remove crumbs and residue after chiseling.
- Wear your P100 respirator and safety glasses throughout. The dust from mortar and brick contains silica.
Method 2: angle grinder or rotary tool (for stubborn mortar)
When mortar is thick, well-bonded, or spread across the face, power tools speed the process considerably. Use an angle grinder fitted with a masonry disc or a diamond cup wheel. Keep the disc running along the mortar line, not across the brick face, and maintain a shallow angle. Use a rotary multi-tool with a carbide rasp for mortar in tight spots or near corners. Wet-cutting is strongly preferred, a cheap water attachment for an angle grinder reduces silica dust dramatically. If you are working dry, wear the respirator without exception.
Method 3: pneumatic chipping hammer (for large volumes)
If you have hundreds of bricks to clean, a small pneumatic chisel or mini-jackhammer with a flat chisel attachment is much faster than manual chiseling. The technique is the same: work at the mortar-to-brick interface, keep the chisel angle shallow, and do not let the tool run across the face. This method requires good control, on softer bricks it is easy to accidentally score the face.
Method 4: chemical cleaning for mortar smear (not bulk mortar)
Muriatic acid (hydrochloric acid) dissolves cementitious mortar residue effectively, but it is aggressive and hazardous. Use it only after mechanical methods have removed the bulk of the mortar, and only to address the remaining smear or haze across the face.
- Pre-wet the brick thoroughly with clean water before applying any acid. Acid applied to a dry surface penetrates too fast and etches.
- Mix at roughly 1 part acid to 10 parts water — always add acid to water, never water to acid.
- Apply with a stiff bristle brush, working in a well-ventilated area outdoors. Wear acid-resistant rubber gloves, safety glasses, and old clothing.
- Allow 5-10 minutes dwell time. You will see light fizzing as the acid reacts with carbonates in the mortar.
- Scrub with the brush and rinse extremely thoroughly with clean water.
- Neutralize any residual acid by rinsing with a baking soda solution (about 1 cup per gallon of water), then rinse again with plain water.
- Test on reject bricks first. Some older bricks have faces that respond badly to acid — you will see etching or color change on a test piece before you damage your keeper pile.
Soda blasting (using sodium bicarbonate as the blasting medium) is a gentler alternative to sandblasting for bricks with soft faces, and it does not introduce silica dust the way sand media does. It is worth considering if you have a very large volume of soft-faced reclaimed bricks. Sandblasting is the most aggressive option and will erode the face of most older bricks, avoid it unless the brick has a very hard, dense face and you accept that you will alter the texture permanently.
Sorting, repairing, and planning before you lay anything
Once your bricks are clean and mortared, sort them into three groups: prime (full, intact, consistent dimensions), seconds (minor chips or slight color variation), and rejects. Use prime bricks for the main field of the patio, seconds for the edges and cut areas where irregularities are less visible, and set aside the rejects.
Calculate your area and order top-up new bricks to match your reclaimed stock if you are short. A 10-15% overage above your square footage calculation accounts for cuts and any late-stage rejects. For an approximate quantity, a standard UK brick (215 x 102.5 x 65 mm) laid flat covers about 0.022 sq m per brick, so around 45 bricks per square metre plus wastage. US standard bricks (roughly 7.625 x 3.75 x 2.25 in.) at about 4.5 bricks per sq ft flat-laid, plus wastage.
Drainage planning
Every patio and walkway needs to shed water away from structures. The standard minimum slope is 1/4 inch per foot (approximately 2%) falling away from your house or any buildings. Mark this slope into your string lines before you excavate, and maintain it through every stage of the build. Do not treat drainage as an afterthought, it is the single most common reason patios fail over time. Poor drainage keeps water under the surface, which leads to frost heave in cold climates, base erosion, and eventually sunken and uneven pavers.
Pattern selection
Running bond (each row offset by half a brick length) and herringbone (45 or 90 degree) are the two most common patterns for brick patios. Herringbone creates excellent interlock that resists spreading under foot traffic, which is why it is often recommended for driveways and high-traffic areas. Running bond is simpler to cut and lay. For a walkway, running bond with the bricks perpendicular to the direction of travel (soldiers) is a clean, practical choice. Sketch your pattern before you start cutting, especially with reclaimed bricks where dimensions vary slightly.
Step-by-step: building the base and laying the bricks
Step 1: mark out and excavate
Mark the perimeter of your patio or walkway with stakes and string lines. Set the string lines at your finished surface height, incorporating the 1/4 in./ft drainage slope. Excavate to a depth that accommodates: the brick thickness, a 1 in. bedding sand layer, and the compacted gravel base. For a pedestrian patio or walkway, ICPI guidance recommends a minimum 4 in. compacted aggregate base (increase to 6 in. in frost-prone climates or on clay soils). Add those depths together to get your total dig depth, typically 8-10 in. for a brick patio.
Step 2: compact the subgrade
Once excavated, compact the exposed subgrade (the native soil) with your plate compactor before adding any base material. If you are on clay or frost-susceptible soil and you live somewhere that gets hard frosts, this is where you should consider adding a layer of geotextile fabric before the aggregate base as a capillary break and soil separator. FHWA states frost heave requires frost‑susceptible soils, freezing temperatures, and available water, and recommends mitigations such as removing/replacing susceptible soils, installing capillary breaks, or increasing base depth or weight in cold climates FHWA Chapter 3 (NHI-05-037) on frost heave. FHWA guidance on frost heave is clear that susceptible soils plus moisture plus freezing temperatures equals heave, cutting off capillary moisture rise is one of the most effective mitigations.
Step 3: install the aggregate base in layers
Add your crushed stone aggregate base in 2-3 in. lifts, compacting each lift with the plate compactor before adding the next. Do not dump the full base depth in at once and compact it, the compactor cannot effectively densify more than about 3 in. at a time. Check your slope across the compacted base with a level and straightedge. The surface of the base should mirror your finished surface drainage slope.
Step 4: install edge restraints
Before you lay bedding sand, install your edge restraints on all free edges of the patio. Manufactured plastic or steel paver restraints spike down into the compacted base (not into the sand). This is important: the restraints must bear on the base, not the bedding layer. Without edge restraints, bricks migrate outward under foot traffic and the whole field eventually spreads and loses level. For a patio abutting a house, the wall itself acts as one edge restraint. The other three sides need manufactured or poured concrete restraints.
Step 5: screed the bedding sand
Spread coarse, washed concrete sand over the compacted base to a depth of approximately 1 in. Use two lengths of conduit pipe (about 1 in. diameter) as depth guides and drag a long straightedge or 2x4 across them to screed the sand to a flat, consistent depth. The sand will compress to roughly 3/8-1/2 in. after the bricks are compacted in. Do not compact the bedding sand at this stage. Do not walk on the screeded sand, keep a kneeling board handy so you can work from the brick surface as you lay.
Step 6: lay the bricks
Start from the most visible corner or from a straight edge (like the house wall) and work outward. Set each brick firmly onto the sand with a slight downward push and a tap from a rubber mallet. Keep joint spacing consistent, typically about 3/16 to 1/4 in. for a dry-lay installation. Check level frequently with a 4 ft level and a straightedge across multiple bricks. If a brick sits high, lift it and scrape a small amount of sand away; if it sits low, add a little sand. Because reclaimed bricks vary slightly in thickness, you may need to adjust the sand depth under individual bricks more often than you would with new pavers. This is normal and is why you checked dimensions during sorting.
Step 7: cut bricks to fit
At edges and obstacles, cut bricks with an angle grinder and masonry disc or a rented brick splitter. The splitter is faster for straight cuts; the angle grinder gives you more control for curves or notches. Wet-cut whenever possible. Wear your respirator, safety glasses, and gloves for all cutting. When cutting reclaimed bricks, cut slowly and watch for internal cracks, the cut sometimes reveals a hidden fracture that was not visible from the surface.
Step 8: compact the finished surface
Once all bricks are laid, run the plate compactor over the entire surface to drive the bricks firmly into the bedding sand. Critically: place a sheet of rubber mat or a piece of old carpet between the compactor plate and the brick surface. Reclaimed bricks often have imperfect faces, and a bare compactor plate will crack corners or chip faces. Make two passes in perpendicular directions.
Jointing, sealing, and when you can walk on it
Jointing with polymeric sand
After compaction, spread polymeric jointing sand over the surface and sweep it into the joints with a stiff broom, working it in with multiple passes. The sand should fill the joints to about 1/8 in. below the top of the brick. Once filled, compact again lightly (with the rubber mat), then brush away all surface sand. Activate the polymeric sand by misting the surface with water according to the manufacturer's instructions. The binder in the sand sets and resists erosion and weed germination. Allow the jointing sand to cure fully before heavy use, typically 24 hours for foot traffic, though 48-72 hours is safer. For more detail on recommended wait times before walking on newly laid surfaces, see how long before i can walk on new patio slabs.
Mortared joints (optional)
You can grout the joints with Type S mortar for a more traditional look. Mix mortar to a stiff consistency, pack it into the joints with a pointing tool or gloved fingers, and strike it flush or slightly recessed. Protect the mortar from rain for at least 24 hours. Note that mortared joints are more prone to cracking over time than polymeric sand joints because they do not flex with seasonal movement of the base. On a well-built base this is rarely an issue, but if your base has any movement at all, polymeric sand is more forgiving.
Sealing
Sealing is optional for brick patios but worthwhile in climates with hard frosts or where you want to reduce staining from leaves and organic debris. Use a penetrating silane/siloxane sealer rather than a film-forming sealer. Penetrating sealers waterproof from within without changing the appearance significantly, and they do not peel or trap moisture like some film-forming products can. Apply to clean, dry bricks at least 28 days after laying (or after any mortar joints have fully cured). Reapply every 3-5 years.
Drilling and anchoring into reclaimed bricks and patio slabs
Sometimes you need to drill into laid bricks or slabs to anchor a post, fence base, or outdoor furniture fixing. Reclaimed bricks are more variable in density than new ones, so approach drilling carefully. Use a hammer drill with a carbide-tipped masonry bit. Start at a slow speed without the hammer function to establish the hole location, then switch to hammer mode. Keep the drill perpendicular to the surface. If you feel the drill suddenly break through into a void, stop immediately, you have hit an air pocket or a hidden internal crack and you need to assess whether that brick can hold a fixing at all.
For through-bolts or anchors, use a sleeve anchor or chemical anchor resin rated for masonry. Chemical anchors (resin cartridge systems) spread the load over a larger area of material, which is better suited to the variable density of reclaimed brick than expansion anchors, which rely on uniform material strength to work. Wear your respirator and safety glasses when drilling brick, dust from drilling is silica-containing even at low volumes.
Troubleshooting common problems
| Problem | Most likely cause | Fix |
|---|---|---|
| Sunken or rocking bricks | Poorly compacted base, or bedding sand washed out by water infiltration | Lift the affected area, check and recompact the base, relay on fresh bedding sand |
| Bricks spreading apart at edges | No edge restraints, or restraints placed in sand rather than base | Install proper edge restraints pinned into the compacted base; relay the edge bricks |
| Frost heave (area rises in winter, drops in spring) | Frost-susceptible subgrade, insufficient base depth, or water collecting under the surface | Excavate deeper, remove frost-susceptible soil, increase base depth, improve drainage slope |
| Mortar joints cracking | Inadequate base compaction causing movement, or mortar applied in freezing conditions | Remove cracked mortar, recompact base if there is movement, repoint with fresh Type S mortar or switch to polymeric sand |
| Weeds growing through joints | Polymeric sand not properly activated, or insufficient joint fill depth | Remove weeds, refill joints with fresh polymeric sand, activate properly with water mist |
| White staining (efflorescence) | Soluble salts migrating to surface through moisture movement | Dry brush first, then use a proprietary efflorescence cleaner; address drainage if moisture is ongoing |
| Uneven surface despite care during laying | Reclaimed bricks with inconsistent thickness not adequately sorted | Lift the uneven areas and adjust the bedding sand depth under each brick individually |
When to call a professional
Most brick patio work is genuinely DIY-friendly if you take the time to do the base properly. But there are situations where professional help is the right call. If your site has significant slope changes or cross-falls, or if water pooling is already a recurring problem in the area, a landscaper or drainage contractor can assess what is actually happening beneath the surface before you build on top of it. If your subgrade is predominantly clay and you are in a frost-prone climate, getting a professional opinion on base depth and drainage design is cheap compared to relaying a failed patio two years later.
For large areas (anything over about 50 square metres), the plate compactor work alone becomes a significant job, and equipment hire costs start to add up. A professional hardscaping crew will work faster, have better equipment, and often source reclaimed brick through trade suppliers at better rates. The economics start to shift around that size. Similarly, if the area involves steps, retaining walls, or load-bearing elements, do not DIY those elements, brick and masonry structural work requires proper design and, in most jurisdictions, is subject to building regulations.
What to do with bricks and slabs you cannot reuse
Even after a good inspection, you will end up with a pile of rejects. Here is what to do with them, in order of practicality:
- Use as rubble fill for raised beds, drainage channels, or trench backfill around drainage pipes — cracked bricks are perfectly adequate for these uses
- Break them into aggregate for use as hardcore under a new base (this is what a lot of demolition contractors do with waste brick anyway)
- List whole broken slabs and bricks on local recycling sites (Freecycle, Facebook Marketplace, or equivalent) — someone often wants them for garden projects, rockeries, or as hardcore
- Contact a local masonry recycler or aggregate company: many accept clean broken brick and concrete as fill material at no charge or for a small fee
- For large volumes, hire a skip (dumpster) and have it taken away — most general waste facilities can handle inert masonry material
- Whole old patio slabs that are cracked but structurally sound can be repurposed as garden path edges, raised bed borders, or as paving in a less-visible utility area
One thing worth knowing: if you have large quantities of good old patio slabs that are simply the wrong size or style for your project, it is worth exploring whether they can be relaid or repurposed somewhere else on the property before you commit them to the skip. For more options on what to do with old patio slabs, including repurposing ideas and disposal routes, see our guide on what to do with old patio slabs. Good reclaimed slabs have real value, and there is a market for them.
Reclaimed vs. new: a quick comparison
| Factor | Reclaimed bricks | New pavers/bricks |
|---|---|---|
| Cost | Low to free if sourced yourself; cleaning labor is the main cost | Higher upfront material cost; lower labor prep cost |
| Appearance | Aged, characterful, unique patina that improves with time | Uniform and consistent; ages more slowly to a natural look |
| Dimensional consistency | Variable; requires sorting and individual adjustment during laying | Consistent; faster to lay and level |
| Durability | Excellent if properly inspected and frost-damaged units culled | Excellent; grade-certified for intended exposure |
| Environmental impact | Very low: reuses existing material, avoids new manufacturing | Moderate: new firing and transport energy required |
| Availability | Dependent on what you have or can source locally | Readily available from builders merchants and paving suppliers |
| DIY difficulty | Moderate to high due to cleaning, mortar removal, and dimension variation | Moderate: base and drainage work is the same; laying is faster |
The recommendation: if you already have a stockpile of good reclaimed bricks and you are willing to put in the prep work, reuse them. The result will look better than any new paver you can buy at the same price point, and the material cost is essentially zero. If your reclaimed bricks are mostly frost-damaged or dimensionally inconsistent, it may actually be faster and cheaper to buy a batch of new facing bricks in a complementary style and use the best of your reclaimed stock as a feature border or accent course rather than trying to build an entire surface from compromised material.
FAQ
What criteria determine whether old bricks or patio slabs are reusable for a patio or walkway?
Check structural soundness, weathering, and contamination. Reusable if: intact (no through‑cracks), limited spalling or freeze‑thaw damage, compressive strength adequate for intended use, not heavily salt‑crusted or chemically stained, and mortar can be removed without excessive face loss. Avoid units with large areas of delamination, severe spalling, or long hairline networks indicating internal breakup. For exterior/freeze climates, prefer units with low absorption and demonstrated freeze‑thaw resistance (industry standards such as ASTM C67/C216 describe lab criteria). When in doubt, set aside questionable units for non‑structural reuse (planters, edging) or recycling.
How do I inspect reclaimed bricks/slabs on site — what to look for and simple tests?
Visual: surface cracks, spalls, efflorescence, flaking, voids, and embedded contaminants. Tap test: a clear ringing sound suggests sound unit; dull thud indicates internal damage. Thickness/size check: ensure consistent thickness for slabs; major variation complicates laying. Absorption check: drop water—if it soaks instantly and darkens uniformly, high porosity is likely (risk in freeze climates). Fit test: dry‑fit a few units to ensure they seat flat. Record questionable units into a ‘repair/replace/recycle’ pile.
What tools and materials do I need to reclaim, clean and prepare old bricks/slabs?
Tools: cold chisels, brick hammers, wire brushes, masonry grinders/rotary tools (with control), pneumatic chisel (optional), scrapers, shop vacuum with HEPA, wet saw or diamond blade for cutting slabs, plate compactor, hand tamper, wheelbarrow, buckets, measuring tape, carpenter’s level, string line, rubber mallet, edging stakes, gloves, eye protection, N95/respirator (or higher for silica), ear protection, knee pads. Materials: coarse washed bedding sand, compacted crushed stone/aggregate base (4–6 in. compacted for pedestrian), geotextile fabric (optional), edge restraints, polymeric sand or jointing compound, masonry cleaner (proprietary cleaner preferred), muriatic acid only as last resort, brick or mortar repair products, sealers (optional). Safety: PPE, silica controls (wet cutting/LEC), and lifting aids.
How do I remove old mortar and clean reclaimed bricks safely without damaging faces?
Start gentlest: dry chisel, wire brush, and tapping to loosen mortar. For stubborn mortar, use a rotary tool or grinder with depth control and a masonry grinding wheel—work slowly to avoid removing face glaze. Consider pneumatic micro‑chisel for heavy mortar. Use proprietary masonry cleaners (e.g., Sure Klean 600) per label before acids. If acid is needed, dilute responsibly (commonly ~1:10 acid:water), always add acid to water, use PPE, test on a hidden piece, rinse thoroughly, and neutralize residue. Avoid sandblasting or aggressive media unless prepared to accept surface wear. Control dust (wet methods, vacuum) due to silica hazards—follow OSHA silica guidance.
How should I sort, repair and select bricks/slabs for reuse?
Sort by size, thickness, color, and face condition. Keep a batch for visible field/capstone units and set aside lesser units for borders, infill, risers, or non‑walked features. Repair minor chips with polymer patching or tuckpoint small mortar voids. Discard or recycle units with severe freeze‑thaw damage, large through‑cracks, or undermined cores. For slabs, reject ones with large planarity deviation or internal delamination. Balance aesthetics and structural needs when choosing face units vs. filler.
How do I plan the patio or walkway layout, pattern, drainage and edging when using reclaimed brick?
Plan pattern to accommodate variable sizes—running bond, herringbone, and basketweave are forgiving; herringbone offers interlock for load distribution. Measure and sketch area, factoring for cutting loss and irregular units. Design 1/8–1/4 in. per foot fall away from structures (≈1–2% slope) for drainage. Include edge restraints on all free edges anchored to the compacted base, not bedding sand. Account for expansion joints where meeting fixed elements (house, walls). Lay out a dry test bed to confirm pattern and unit counts, and plan transition details to existing surfaces.
Next Article
What to Do With Old Patio Slabs: Reuse or Dispose Safely
Decide safely what to do with old patio slabs: assess cracks, clean prep, reuse ideas, or proper disposal after base fix