If you've got leftover or lifted patio slabs sitting in a pile, you have a few solid options: reuse them as stepping stones, garden edging, a walkway, or a low-traffic pad; relay them as infill if they're in good shape; or dispose of them responsibly if they're too far gone. The right call depends on the slab's condition, why it failed in the first place, and whether the base problem that caused the damage has actually been fixed. Skip that last part and you'll be dealing with the same sunken, cracked mess in a couple of years.
What to Do With Old Patio Slabs: Reuse or Dispose Safely

Talia Lang
28 Jun 2026
First, check whether your old slabs are worth keeping
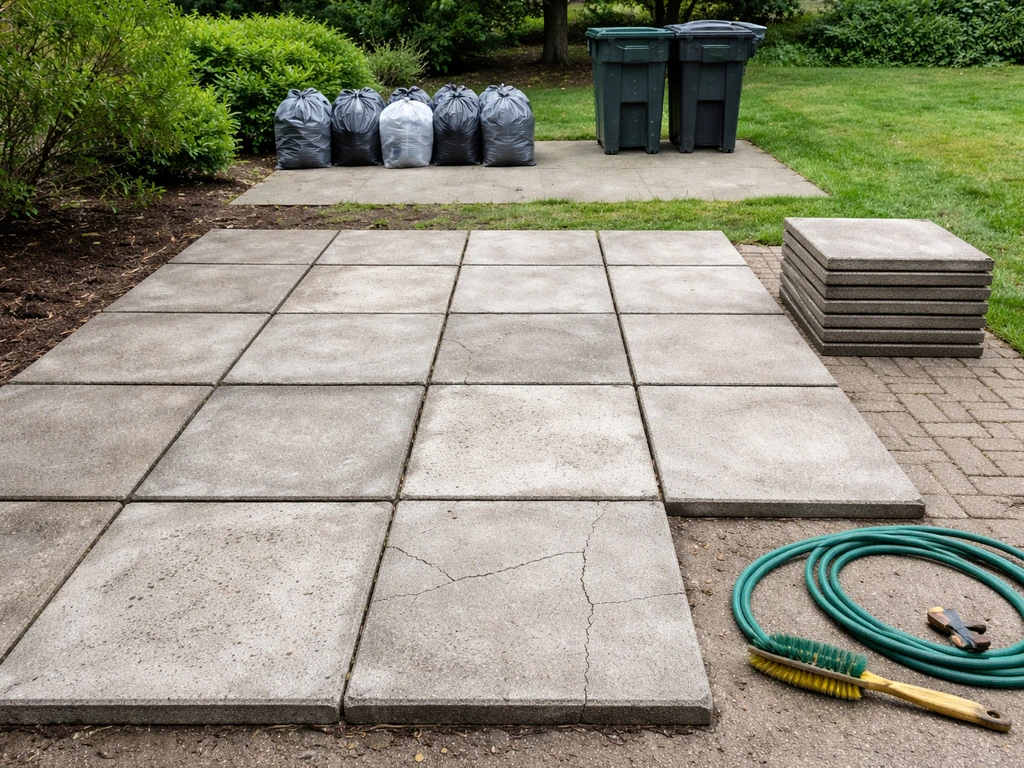
Before you haul anything anywhere, spend ten minutes doing a proper condition check. Not all old slabs are equal. Some are perfectly usable for low-traffic reuse projects; others look fine on the surface but are structurally compromised and will crumble the moment you put load on them.
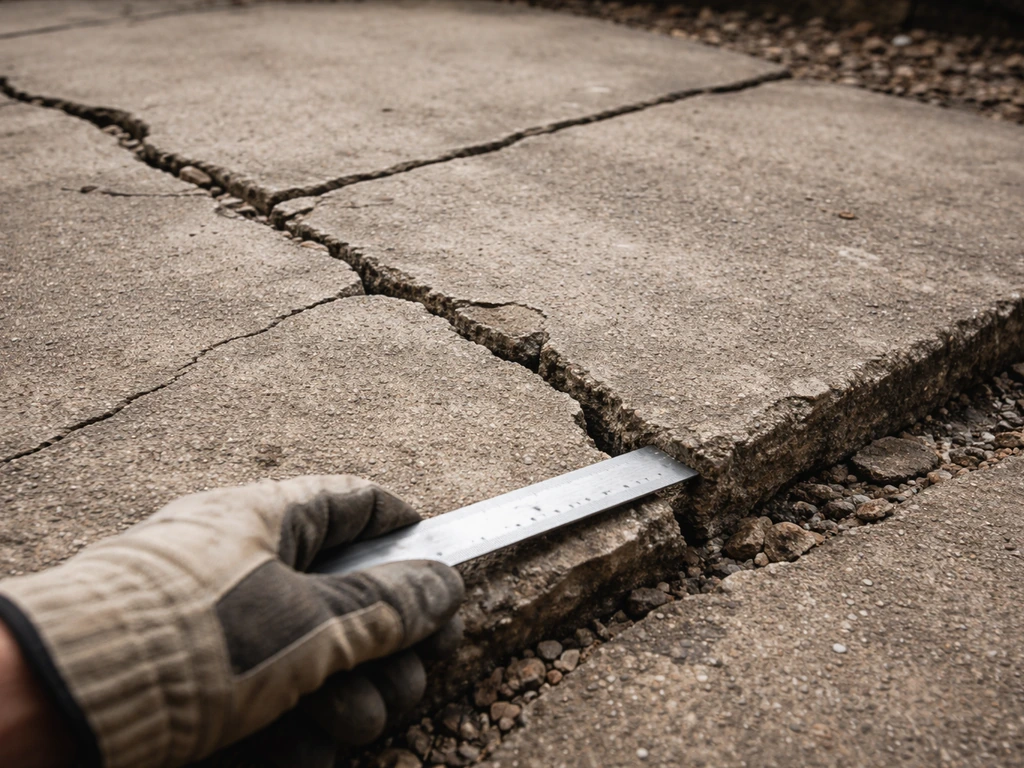
Start with a visual check. Look for deep cracks that run all the way through the slab (not just surface crazing), spalling where the surface layer is flaking or popping off, crumbling edges, or any sign the slab has broken into pieces and been held together by friction. These are automatic disqualifiers for structural reuse.
Next, do a hammer tap test. Grab a regular claw hammer or a rubber mallet and tap firmly across the surface in a grid pattern, about every 6 inches or so. A clear, sharp ringing sound means the concrete underneath is solid and well-bonded. A dull, hollow thud means you've hit a delaminated zone, where the surface layer has separated from the core. This is the same technique highway engineers use to inspect bridge decks and tunnel linings, and it works just as well on backyard patio slabs. Mark any hollow areas with chalk. If more than about a third of the slab sounds hollow, it's not worth reusing for anything that needs to hold weight.
One important caveat: the hammer test catches late-stage delamination well, but it can miss early-stage or deeper internal separation. Hammer sounding can be used to identify and locate delamination in concrete by striking the surface, where defective areas produce a hollow or drum-like sound blank" rel="noopener noreferrer">hammer sounding to identify and locate delamination. A slab that passes the tap test isn't guaranteed to be perfect, just that it's not obviously failing. For light-duty repurposing like garden edging or a planter base, that's fine. For anything that needs to support regular foot traffic or a structure, be conservative with borderline slabs.
Also think about why the slab failed. If it cracked because of poor base prep, tree root movement, or drainage problems that sent water pooling underneath, those issues caused the damage, not the slab itself. A slab pulled from a waterlogged, poorly compacted base might actually be in decent shape once it dries out. On the other hand, a slab that failed because the concrete mix was weak or it was too thin for the load it was carrying isn't going to improve with a second chance.
| Condition | Hammer Test Result | Verdict |
|---|---|---|
| Surface crazing only (hairline cracks) | Rings solid | Good for reuse |
| One or two minor cracks, edges intact | Mostly solid, small hollow spots | Fine for low-traffic reuse |
| Significant cracking, some spalling | Mixed hollow/solid | Garden edging or fill only, not foot traffic |
| Broken pieces, heavy spalling, crumbling | Hollow throughout | Dispose of, do not reuse |
| Thin slab under 50mm, any cracking | Any result | Not suitable for foot traffic reuse |
The best ways to actually reuse old patio slabs
Good-condition slabs that pass the visual and hammer check have a lot of life left in them. Here are the most practical reuse options, roughly ordered from simplest to most involved.
Stepping stones and garden paths
This is the easiest repurpose and works with slabs of almost any shape. If the slab is solid, you can lay it directly into the ground as an informal stepping stone. Dig down about 50mm (2 inches), set a layer of sharp sand, press the slab in, and level it so there's no rocking. Irregular shapes actually look good in garden paths. Just keep the spacing to a natural walking stride, roughly 600mm (about 24 inches) center to center.
Garden bed edging
Slabs with cracked edges or minor spalling that you wouldn't trust underfoot still make excellent garden edging. Stand them vertically in a shallow trench to create a clean border between lawn and beds, or lay them flat as a mowing edge. This is a great use for irregular shapes and broken pieces that would otherwise go to waste.
Firepit surround or bench base
Solid slabs, particularly larger ones (600x600mm or bigger), work well as a flat, stable base around a firepit or under a garden bench. Lay them on compacted ground with a sand bed and they'll handle the static load without any issues. For a firepit ring, you can use broken slab pieces as informal surrounds, though stick to solid slabs underfoot near the fire.
Low-traffic shed or bin store pads
If you need a small base for a garden shed, a wheelie bin area, or a bike store, salvaged slabs can do the job perfectly well, especially if the area is sheltered from direct rainfall. Match the slab thickness to the load: for a small shed, 50mm slabs on a compacted sub-base are fine. For anything heavier, you want at least 75mm and a proper sub-base, not just soil.
Planter and raised bed supports
Heavy planters and raised beds can sit directly on salvaged slabs to protect your lawn or existing patio surface. Lay the slab flat on level ground, and use it as a stable, moisture-resistant platform. Even slabs with cosmetic surface flaking are fine for this because no one is walking on them.
Patio infill and re-leveling
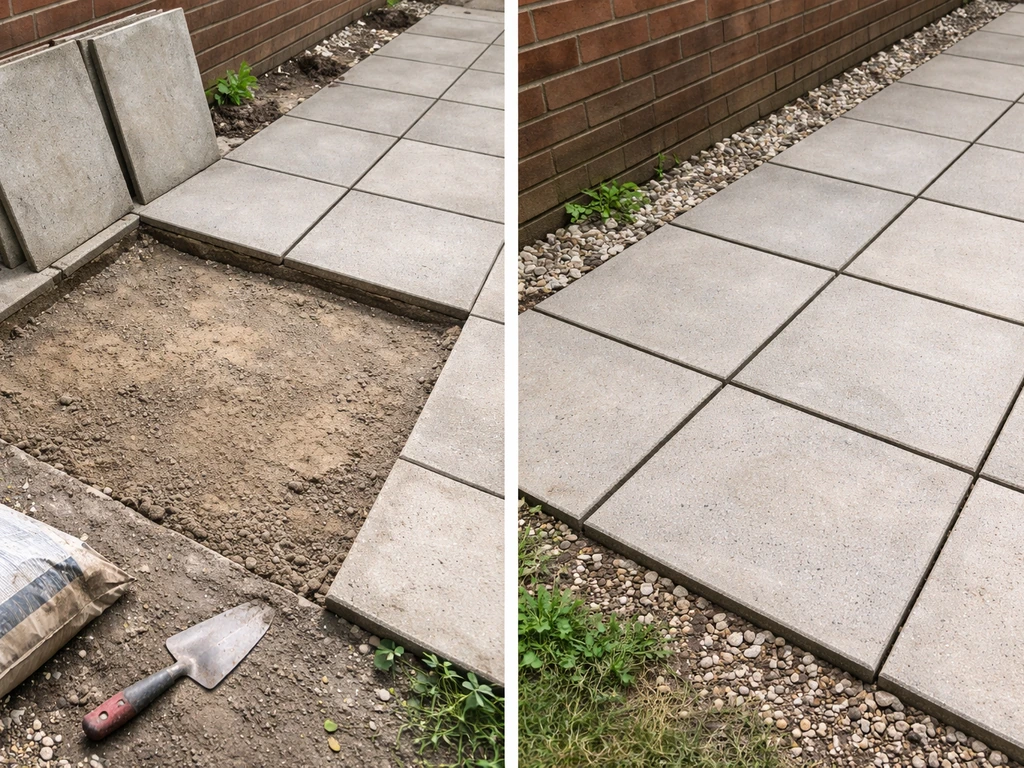
If you lifted slabs to fix a sunken area and the slabs themselves are in good condition, relaying them is absolutely the right move. This is the same as replacing patio slabs from scratch, just with familiar material. The key thing here is that you must fix the base problem first. Re-laying slabs over a poorly compacted or waterlogged sub-base will give you the exact same sinking and cracking within a season or two. More on that in the reinstallation section below.
How to clean and prep old slabs before you reuse them
Old slabs that have been lifted will usually have mortar residue, soil, moss, algae, or old sand on them. To remove mortar from patio slabs before reuse, use a stiff wire brush and a suitable concrete cleaner, then rinse thoroughly and let the surface dry mortar residue. Don't skip the cleaning step, especially if you're relaying them as part of a patio, because debris under a slab creates uneven bedding and hollow spots.
- Scrape off loose mortar with a bolster chisel and club hammer. Work at a low angle to avoid gouging the slab face. For stubborn mortar, soak the area with water first to soften it slightly.
- Pressure wash the slab surface to remove algae, moss, dirt, and loose material. A 130-bar domestic pressure washer is more than enough. Let slabs dry for at least 24 hours before relaying.
- For slabs going back into a mortar bed, rough up the back face lightly with a wire brush if it's very smooth. This improves adhesion.
- Check flatness: lay a long spirit level or straight edge across the slab. If it rocks significantly, the slab itself has a warp or bow. Minor warps under 5mm are manageable with bedding adjustments; anything more than that and the slab will rock underfoot and is better used as garden edging or stepping stones.
- Mark any slabs that need cutting with a pencil or chalk line before moving them to the work area.
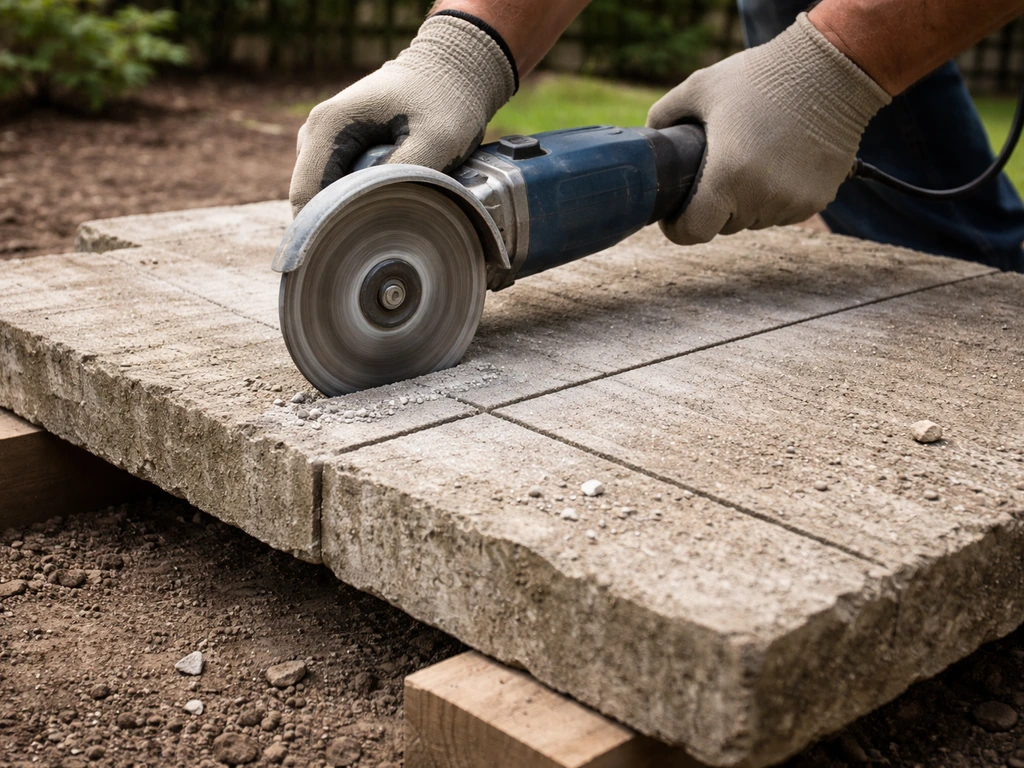
Cutting slabs to size
If you need to cut an old slab to fit a gap or trim an irregular edge, a diamond blade angle grinder (115mm or 230mm) works for most cuts. Score a line first with light passes, then deepen gradually rather than trying to cut through in one pass. For straight cuts across a full slab, a hired disc cutter (also called a floor saw or cut-off saw) is faster and cleaner. Always wet-cut concrete to control dust, or wear an FFP3-rated dust mask minimum if dry-cutting is unavoidable. Concrete dust contains silica, and the respiratory risk is real and serious.
How to reinstall salvaged slabs properly
This is where most DIY patio relays go wrong the second time around. Cleaning and relaying a slab onto the same broken base that caused the original problem is wasted effort. Before you place a single slab, you need to sort the ground underneath.
Fix the base and drainage first
Dig out the area to at least 150mm below finished patio level. If the ground was waterlogged or you saw pooling water under lifted slabs, that's a drainage issue that needs addressing now, not patched over. This might mean adding a perforated drain channel at the low point of the patio, improving the fall across the surface (aim for a minimum 1:80 gradient away from the house), or breaking up a compacted clay layer that was trapping water.
If you had serious subsidence or the ground was sinking significantly, that's a job where a professional opinion is worth getting before you relay anything. If you want to relay loose patio slabs safely, focus first on fixing the base and drainage so the slabs do not sink again relaying anything.
Build the sub-base properly
For most domestic patio slabs, the standard sub-base is 100mm of compacted Type 1 MOT (crushed limestone hardcore) topped with a 25-40mm sharp sand bedding layer. Lay the hardcore in two 50mm layers, compacting each with a plate compactor before adding the next. If you don't compact properly, you'll get settlement again within months. Hire a plate compactor for a day; they're not expensive to rent and they make a significant difference.
Bedding and laying
For a sand-only (dry) bed: screed the sharp sand to your falls, lay the slab, and tamp it down level with a rubber mallet. Check with a spirit level constantly. For a mortar bed (more stable, better for heavier slabs): use a 5:1 sharp sand to cement mix, dry or with a little water to make it just workable. Apply as five dabs (one per corner plus centre) or a full bed depending on slab size. Butter the back of the slab with a thin layer of neat cement if bonding to mortar. Leave a 10-15mm joint gap between slabs for pointing later.
Once laid, don't walk on mortar-bedded slabs for at least 24 hours, and keep foot traffic light for 48-72 hours. To keep your schedule, let the mortar bedding cure properly before stepping on it and avoid heavier foot traffic until it has fully set walk on new patio slabs. Joint the gaps with a brush-in polymeric sand or a standard pointing mortar mix once the bedding is fully set. This prevents water and weed ingress into the joints, which is one of the main things that undermines slabs over time.
Leveling checks
As you lay, check for level across adjacent slabs and for consistent falls across the whole area. A long spirit level (at least 1.2m) or a string line pulled tight across the area will show up any high or low spots quickly. Fix them while the bedding is still fresh; trying to relay a slab after the mortar has partially set is a pain and usually means chipping out and starting again.
When you shouldn't reuse old slabs (and how to dispose of them)
Some slabs just aren't worth keeping. If you are wondering, can I use old bricks to make a patio, the same basic idea applies: only reuse materials that are sound and supported by a properly built base. If you're on the fence, the honest answer is: broken, heavily spalled, or severely delaminated slabs create uneven surfaces, trap water, and can become trip hazards. No amount of clever laying fixes a slab that's structurally compromised.
Avoid reusing any slab that shows structural cracking (cracks running fully through the depth, not just surface crazing), is thinner than about 40-50mm and already cracked, has large delaminated zones covering more than a third of the surface, is breaking apart at the edges when handled, or came from an area with ongoing subsidence that hasn't been fully resolved. That last point matters: if the ground is still moving, even perfect slabs will crack again.
For disposal, you have a few practical routes. Concrete is a fully recyclable material and most local household waste recycling centres (HWRC or skip tip) accept it for free or at low cost, though call ahead as some have weight limits per visit. Skip hire is the most practical option if you have a large quantity, and a standard 6-yard skip typically holds around 2-3 tonnes of concrete.
Aggregate recycling companies will sometimes collect broken concrete in large quantities and use it as crushed aggregate, occasionally at no charge if you have enough volume. Alternatively, post broken slabs on local free-cycle or Facebook Marketplace groups: broken concrete is genuinely useful to people doing hardcore filling or drainage projects, and it often goes quickly.
One thing not to do: don't bury broken slabs in your garden. It's tempting as a quick fill solution, but buried concrete can obstruct drainage, create voids as it settles unevenly, and cause headaches for anyone doing groundwork later.
Tools, materials, and safety before you start
Whether you're relaying slabs, cutting them, or just moving them to a skip, have the right kit lined up first. Patio slabs are heavy. If you’re wondering can i drill into patio slabs, focus on the slab’s condition first and only drill where the concrete is solid and not delaminating. A standard 600x600mm concrete slab at 50mm thickness weighs around 40-50kg. Trying to manage them without the right technique or equipment is how backs get hurt.
Tools you'll need
- Club hammer and bolster chisel (for lifting slabs and removing mortar)
- Rubber mallet (for bedding slabs without cracking them)
- Claw hammer or sounding hammer (for the tap test)
- Spirit level, minimum 1.2m long
- String line and pins (for setting levels across a wider area)
- Plate compactor, hired (essential for sub-base compaction)
- Angle grinder with diamond cutting disc, or hired disc cutter for longer cuts
- Pressure washer (for cleaning slabs before reuse)
- Stiff-bristle brush and wire brush
- Wheelbarrow and shovel (for hardcore and sand)
- Pry bar or bolster to lever slabs without chipping edges
Materials
- Type 1 MOT hardcore (100mm compacted depth as sub-base)
- Sharp sand (25-40mm bedding layer, or for dry-lay stepping stones)
- Ordinary Portland Cement (for mortar bedding mix: 5 parts sharp sand, 1 part cement)
- Polymeric jointing sand or pointing mortar for joints
- Weed membrane (optional but useful under the sand layer for garden stepping stone paths)
Safety checklist
- Wear heavy-duty work gloves whenever handling slabs: concrete edges are sharp and the weight is unforgiving
- Use steel-toed boots, not trainers
- Lift with two people for any slab over 600x600mm, or use a slab trolley/suction lifter
- When cutting: wear an FFP3 dust mask (silica dust causes silicosis with repeated exposure), safety glasses, and hearing protection
- Wet-cut wherever possible to suppress dust
- Keep children and pets well away from any cutting or demolition work
- If pressure washing, wear eye protection and non-slip footwear: the surface gets extremely slippery
When to call a professional instead
Most of what's covered here is genuinely DIY-friendly if you're comfortable with physical outdoor work and have a free weekend. But there are a few situations where spending money on a professional is the smarter call. If you have significant ground subsidence (slabs were sinking noticeably, not just lifting), there may be a deeper drainage or soil issue that needs proper diagnosis before anything is relaid.
If you're seeing structural cracking across multiple slabs in a pattern (not just random individual cracks), that often points to a systemic base or drainage failure across the whole area. And if the patio is close to a house foundation and you've had drainage problems, getting a drainage specialist to assess before you disturb more ground is worth the cost of a call-out.
Relaying slabs over an unresolved drainage problem doesn't just fail again, it can direct water toward your foundations.
For anything straightforward, though, salvaging and reusing old patio slabs is a practical, cost-effective choice, and the prep work you do now (fixing the base, improving drainage, laying properly) is exactly what stops you having the same conversation about another pile of lifted slabs in three years.
FAQ
Can I put old patio slabs back down if the cracks are only on the surface (not through)?
If the cracks are shallow and the slab passes the visual “through-depth” check and the hammer tap rings clearly, it can be suitable for light-duty uses (stepping stones, garden edging, planters). If you need it for regular foot traffic, be conservative, because surface cracking can hide early delamination that the tap test may not catch.
What’s the best way to clean old patio slabs before reuse, beyond brushing off soil?
Besides wire brushing and using a concrete cleaner for mortar residue, scrub the underside too. Dirt or moss on the bottom can create uneven bedding and increase the chance of hollow spots, especially when you’re laying on a thin sand bed. After rinsing, let the slabs fully dry before relaying so the bedding doesn’t start to wash out.
How do I decide between a dry sand bed versus a mortar bed when relaying old slabs?
Use a dry sharp sand bed for stepping stones, edging, and areas that are mostly not heavily loaded, because it’s easier to adjust and replace. Choose a mortar bed if you need extra stability (heavier slabs, tighter alignment, less rocking risk), but plan on longer setup time, you should avoid foot traffic for at least 24 hours and keep it light for 48 to 72 hours.
Can I relay slabs over an old compacted base if it looks flat now?
Flat today can still mean unstable underneath. If the original failure involved water pooling, poor base prep, or settlement, you need to excavate to at least the article’s recommended depth and recompact. Relaying onto the same problematic layers is the most common reason “repaired” patios sink again.
Is it safe to reuse slabs that are thin (for example around 30 to 40 mm)?
In general, no for anything that needs to support regular foot traffic, because thin slabs are more prone to cracking and edge break-up. If they’re around 40 to 50 mm but structurally sound, you might use them for low-load applications like garden edging or a planter platform, but for shed or heavier loads you should match thickness to load (and use a proper sub-base).
What if only part of a slab sounds hollow in the hammer test?
If the hollow sound is localized, you can sometimes use the slab for non-structural roles like a planter base or decorative stepping use. If hollow areas are extensive, especially with a delamination “zone” across much of the surface, treat it as not suitable for any application that will bear weight.
How much spacing should I leave between old slabs when relaying them?
Leave a joint gap so you can point properly, a 10 to 15 mm gap is the typical target. Keeping joints too tight can prevent bedding adjustments, it can also increase the chance of chipping when slabs settle slightly.
Do I need to use polymeric sand or mortar to fill joints?
You can use either approach, but the goal is the same: prevent water and weed growth in joints. Polymer sand can be convenient for small gaps and routine sealing, mortar pointing can be more robust for durability. Whatever you choose, fill only after the bedding has set so you do not disturb slab level.
Can I drill into old patio slabs for bolts or anchors during a reuse project?
Only if the slab is sound in the areas you’ll drill. Drill where the concrete rings clearly, avoid zones that went dull in the hammer test or where there’s visible spalling. If you find delamination near the proposed hole, drilling will often worsen the break and create an unsafe anchor point.
Is it okay to bury broken slabs as fill under soil, especially if they’re small pieces?
Avoid burying broken slabs in the garden. Even if it seems like good hardcore, buried concrete can trap water, leave voids as it settles unevenly, and complicate future drainage or planting work.
How should I manage disposal if I cannot get the slabs to a recycling center or skip?
If you have broken pieces, posting them locally for drainage hardcore filling can move them quickly, just be clear about their condition (whole versus broken, thickness if known). If you want to reuse but can’t safely relay yet, store slabs off the ground so they don’t pick up more moisture, then revisit after base and drainage work is fixed.
When is hiring a professional actually worth it for patio slab reuse?
Consider a pro when there was noticeable subsidence, systemic cracking across multiple slabs, or ongoing drainage issues near a house foundation. If the ground is still moving, even perfect slab replacement will not hold up, and a specialist can identify the real base or drainage cause before you spend on materials and labor.
Next Article
How to Relay Loose Patio Slabs Step by Step
Learn how to relay loose patio slabs with diagnosis, base prep, sand or mortar bedding, leveling, grouting, and drainage