The fastest way to remove mortar from patio slabs depends entirely on two things: how long it's been sitting there and how thick it is. Fresh mortar (still soft, wiped on within the last hour or two) comes off with warm water and a stiff brush. Cured mortar that's been bonding to the surface for days or weeks needs mechanical tools, and sometimes a chemical mortar remover on top of that. Get those two situations mixed up and you'll either waste hours scrubbing something that needs a chisel, or you'll drag a grinder across a slab that just needed soapy water.
How to Remove Mortar From Patio Slabs: DIY Steps

Talia Lang
23 May 2026
First, figure out what you're actually dealing with
Before you pick up a tool, take five minutes to look closely at the residue. The type and age of the mortar changes everything about how you remove it safely.
Fresh mortar smears (less than 24 hours old)
If mortar got onto your slabs during laying or repointing and hasn't fully cured yet, you're in luck. It's still workable. The surface will look like a thin, slightly wet or chalky smear. Press a fingernail into it: if it dents, it's fresh. At this stage, warm water and a sponge or wire brush is genuinely all you need. Don't reach for chemicals yet.
Cured surface haze (dried film, days to weeks old)
This is the most common problem. It shows up as a white, slightly cloudy film across the face of slabs after a laying job. It's what happens when mortar or grout residue dries onto the surface before it gets cleaned off. You can't scratch it off with a fingernail. It's not thick or raised, but it resists simple washing. This is grout haze, and it needs either a light mechanical scrub or a dedicated mortar/haze remover, depending on how stubborn it is.
Thick, hardened mortar blobs or lumps
This is the worst-case scenario: chunks of mortar that have fully cured and are sitting on or bonded to the slab surface. These need physical removal first, tools second. A scraper or cold chisel gets the bulk off, then you deal with what's left underneath. Trying to dissolve thick lumps with acid or chemical remover before knocking them off is slow and wasteful.
Polymeric sand haze
If your patio used polymeric sand in the joints and you're seeing a white film, that's a different beast. It's not standard mortar residue, it's polymeric haze, and it won't respond well to regular mortar removers or acid. You need a purpose-made poly haze remover. Using the wrong product here can lock the haze in rather than lifting it.
Stone type matters just as much as mortar type
Before going any further, identify what your slabs are made of. Concrete pavers and porcelain are relatively forgiving. Natural stone, especially marble, limestone, and travertine, is acid-sensitive. If you’re thinking about drilling into patio slabs, be careful because mortar and filler type, stone sensitivity, and the risk of cracking can change what approach is safest natural stone. Any acid-based cleaner on those stones will etch the surface, dissolving the calcite and causing permanent dull patches or pitting. If you have natural stone, skip any acid-based product and use a pH-neutral stone cleaner instead. This is a hard rule, not a suggestion.
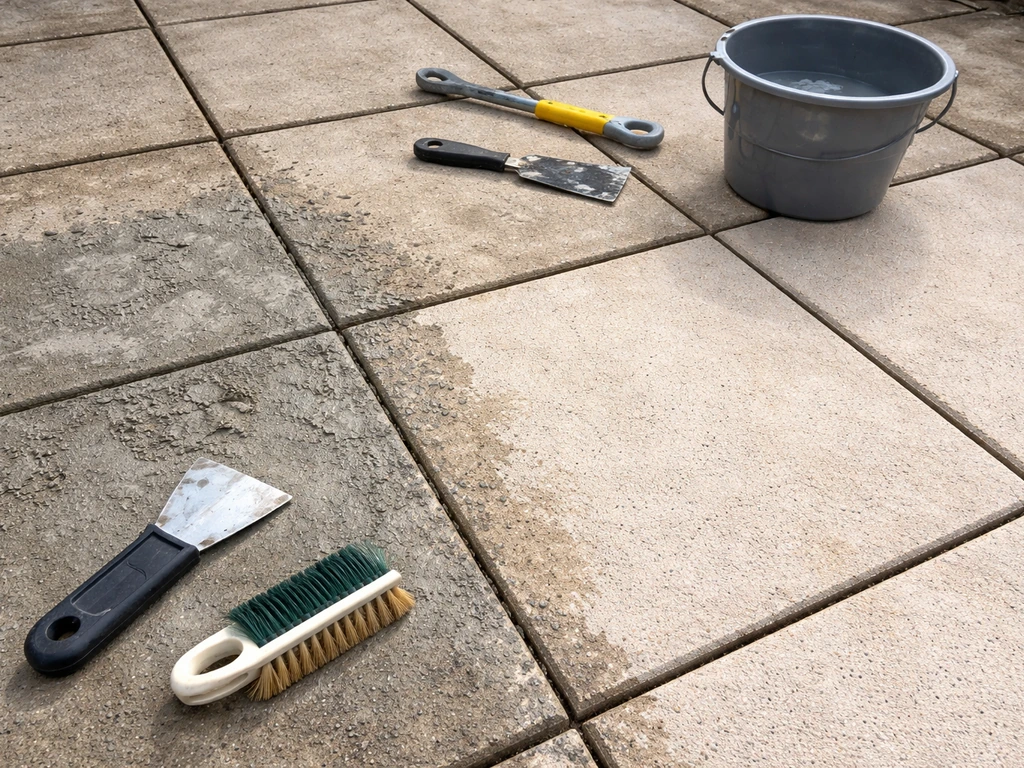
Tools and materials you'll need (matched to mortar type)
Don't buy everything on this list. Match your tools to what you identified above. Buying a grinder for a mild haze problem is overkill, and using just a wire brush on a thick cured lump will cost you an entire afternoon for nothing.
| Mortar Type | Primary Tool | Chemical Option | Safety Gear |
|---|---|---|---|
| Fresh smear (under 24 hrs) | Sponge, warm water, wire brush | None needed | Gloves |
| Cured haze (thin film) | Wire brush or stiff-bristle scrub brush | Dedicated mortar/grout haze remover | Gloves, eye protection |
| Thick cured lumps | Cold chisel, club hammer, floor scraper | Follow-up with haze remover | Gloves, eye protection, knee pads |
| Polymeric sand haze | Stiff brush | Poly haze remover (diluted 1:1) | Gloves, eye protection |
| Heavy bonded mortar (large area) | Angle grinder with diamond cup wheel | Follow-up chemical rinse | Full PPE: gloves, goggles, dust mask, hearing protection |
For dust control when grinding, a wet-dry vacuum connected to your grinder makes a significant difference. Silica dust from cured mortar and concrete is a genuine health hazard, and grinding without dust collection fills the air with it fast. If you don't have a vacuum attachment, work in short bursts and keep a garden hose nearby to wet the area down.
Mechanical removal: scraping, chipping, and grinding
For any mortar that's raised off the surface (lumps, blobs, thick ridges), start here. Chemical treatments alone won't dissolve bulk mortar efficiently, and you'll just waste product.
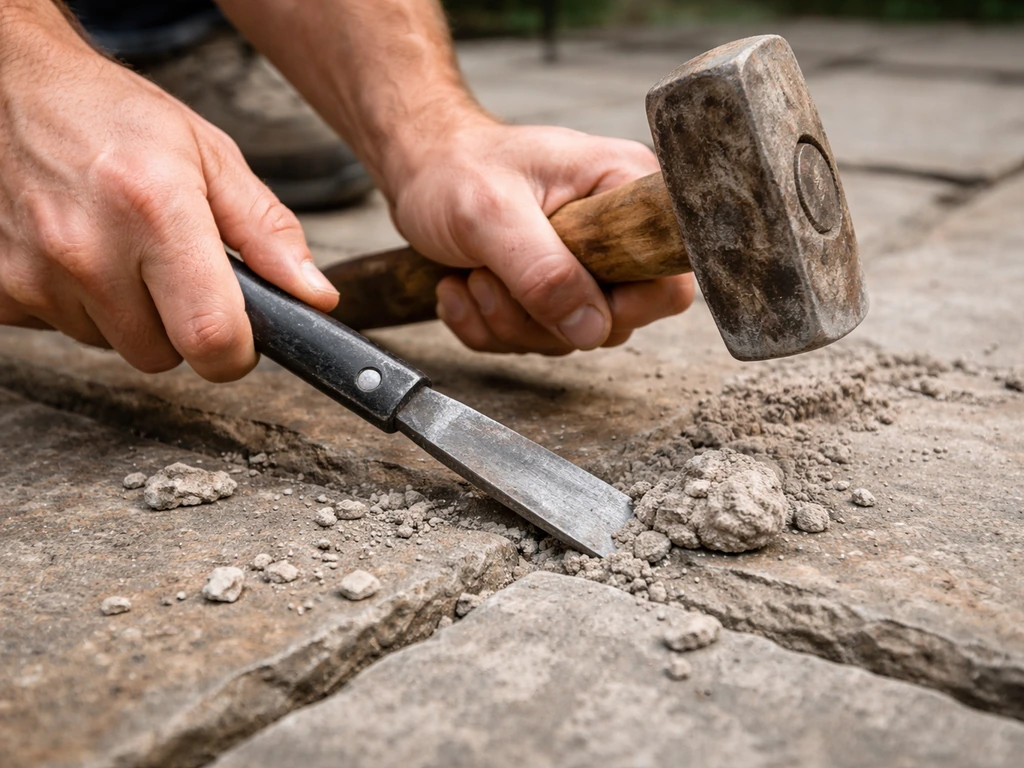
Scraping and chipping by hand
For small areas and thin to moderate deposits, a cold chisel and club hammer is your most controlled option. Hold the chisel at a shallow angle, maybe 15 to 20 degrees from the slab surface, and tap it forward. You're skimming the mortar off, not driving the chisel into the slab. Keep the angle low and work with short strokes. A flat floor scraper (the kind with a long handle and a wide metal blade) works well on flatter, thinner deposits and gives you more control because both hands are on the tool.
The biggest mistake people make hand-chiseling is working at too steep an angle. If you come in from above, you'll chip the slab surface. Come in from the side, and you'll slip the mortar off cleanly. On delicate or textured slabs, hand tools are genuinely preferable to power tools because you feel the resistance and can stop before you damage anything.
Wire brushing for haze and loose residue
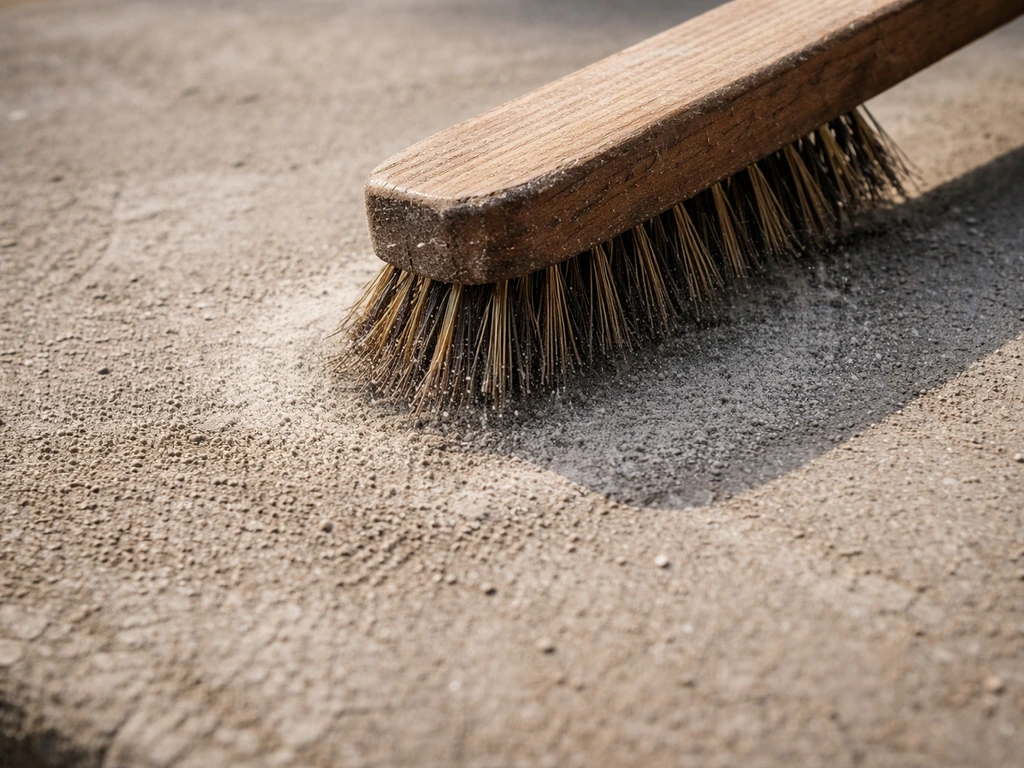
After chipping off the bulk, or if you're dealing with haze rather than lumps, a stiff wire brush does the heavy lifting. Work in circular motions rather than back-and-forth strokes. This gives better coverage and lifts more of the residue from the pores of the surface. For a larger area, a wire brush attachment on a power drill speeds this up considerably, but keep the speed moderate on textured or softer stone.
Angle grinder with diamond cup wheel
This is for stubborn, large areas of bonded mortar that hand tools can't shift efficiently. A diamond cup wheel on an angle grinder cuts fast, but it's aggressive. The key is to keep the grinder moving constantly and never let it sit in one spot. Use the edge of the cup rather than the flat face, keep the tool nearly flat to the slab (low attack angle), and make overlapping passes. If you dig in or pause, you'll leave marks or gouges that are very obvious once the area is clean.
Test on a small, inconspicuous area first. This is especially important on textured concrete or any natural stone. The grinder removes mortar effectively, but it also removes whatever it touches. On coloured or brushed concrete, grinding can leave patches that look different from the surrounding surface even after cleaning. If you're not comfortable with the risk, stop here and consider calling someone in.
Pressure washing
A pressure washer is useful for rinsing loose material and cleaning up after mechanical work, but it won't remove cured mortar on its own. Don't expect it to do what a chisel or grinder does. That said, it's excellent for blasting out debris from joints and rinsing away chemical residue at the end of the job.
Chemical and solvent approaches for stubborn mortar
If mechanical work has removed the bulk but a film or haze remains, this is where chemical removers earn their place. Use them after mechanical methods, not instead of them.
Dedicated mortar and grout haze removers
Products like Aqua Mix Cement Grout Haze Remover, LATICRETE Heavy Duty Grout Haze Remover, and Techniseal SR Slurry Remover are formulated specifically for this job. They're diluted acid-based solutions designed to dissolve the calcium compounds in cured mortar without being as aggressive as straight muriatic acid. Always follow the dilution ratio on the label. The Techniseal SR, for example, calls for 1 part product in 8 or more parts water. Going stronger doesn't work faster, it just increases the risk of surface damage.
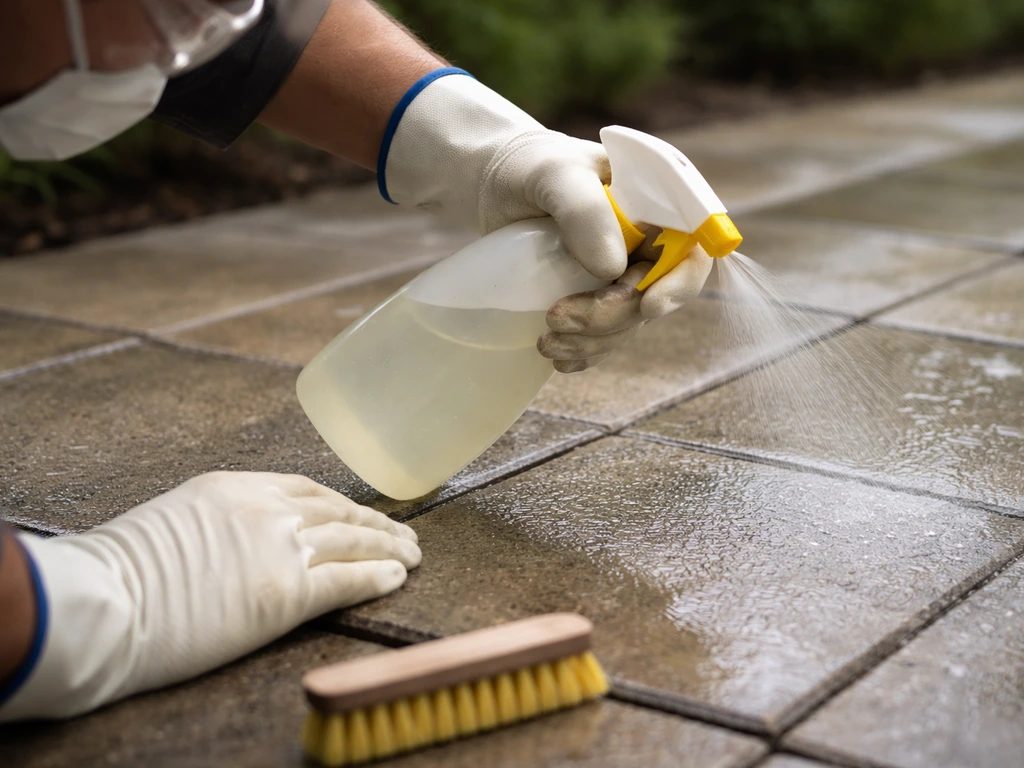
- Wet the slab surface with clean water first. This slows the acid's penetration and protects the pores of the stone or concrete.
- Apply the diluted cleaner with a brush or sprayer. Work in small sections (roughly 1 square metre at a time) so it doesn't dry before you can scrub it.
- Let it dwell for 10 to 15 minutes. You should see light fizzing or bubbling where it's reacting with the mortar residue. If nothing happens, the product may be too dilute or the residue may not be cement-based.
- Scrub with a stiff brush while the product is still wet.
- Rinse thoroughly with clean water immediately after scrubbing. Don't let the product dry on the surface.
Muriatic acid (for concrete pavers only, use with care)
Muriatic acid is more aggressive than dedicated haze removers and should only be used on plain concrete pavers, never on natural stone, never on coloured or decorative concrete without testing first, and never neat. If you are reusing old bricks for patios and walkways, use the right mortar and cleaning approach so you do not damage brick faces or joints muriatic acid. Always dilute it (typically 1 part acid to 10 parts water or more), and always add acid to water, never water to acid. That order matters because it prevents a violent reaction.
Apply it to a pre-wetted surface, let it react (you'll see bubbling), scrub with a stiff brush, and rinse thoroughly. Protect nearby plants with plastic sheeting beforehand as runoff will damage grass and vegetation. Wear chemical-resistant gloves, safety goggles, and long sleeves. This is not a product to use casually.
Poly haze remover (for polymeric sand residue)
If you confirmed the white film is polymeric sand haze, use a dedicated poly haze remover. For light build-up, dilute 1 part product to 1 part clean water and apply by spray. Always add product to water as with all acid-adjacent products. Let it dwell, scrub, and rinse. Standard mortar removers won't work on poly haze and can sometimes make it worse, so don't substitute.
pH-neutral cleaners for acid-sensitive stone
For marble, limestone, travertine, or any stone you're unsure about, use a pH-neutral stone cleaner. These won't dissolve mortar as aggressively as acid-based products, but they won't etch your surface either. You may need to combine neutral cleaning with more careful hand scrubbing or repeat applications. It's slower, but it's the only safe option for sensitive materials.
Rinsing, neutralizing, and getting the surface actually clean
This step gets skipped or rushed more often than any other, and it causes problems later including white streaks, re-bonded residue, and sealant failure. Take it seriously.
Rinsing after mechanical cleaning
After scraping and brushing, rinse the whole area with clean water to remove grit, dust, and loose particles. A garden hose works fine. A pressure washer is better. Pay attention to joints between slabs where debris collects. Let the surface dry and look at it again in good light before deciding if chemical treatment is still needed.
Neutralizing after acid-based products
If you used any acid-based cleaner (including diluted muriatic acid or commercial haze removers), you need to neutralize the surface before sealing or leaving it. Rinse generously first to flush the acid away, then apply a baking soda solution (about half a cup dissolved in a bucket of water) across the surface and let it sit for a few minutes. This neutralizes any acid residue. Then rinse again with clean water.
To check if the neutralization worked, use pH testing strips (available from garden centres or hardware shops) on the final rinse water. You're aiming for a pH around 7.0. Anything between 6.0 and 9.0 is acceptable. If the water is still testing below 6.0, you have acid residue remaining. Rinse and neutralize again before proceeding.
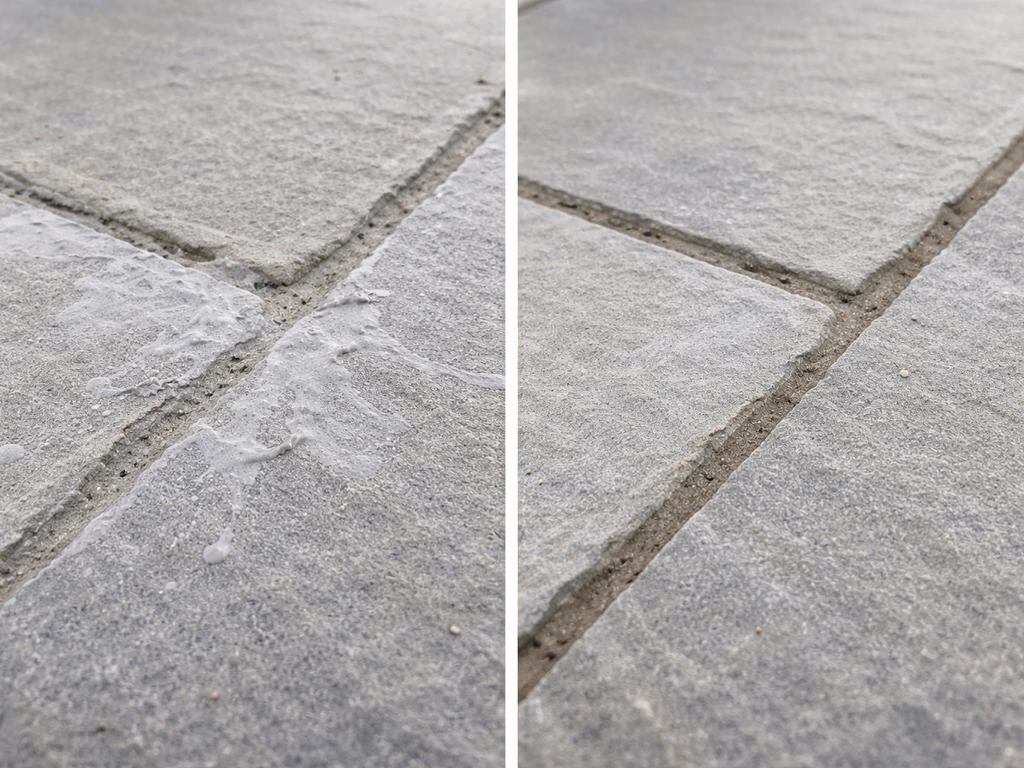
Final visual check
Let the surface dry completely (give it at least a few hours of dry weather), then check it in raking light, ideally early morning or late afternoon sunlight hitting the surface at a low angle. This highlights any remaining haze, streaks, or residue that flat overhead light hides. A persistent white film usually means the dwell time was too short, the rinse was insufficient, or the mortar required a stronger product. Repeat the treatment on affected sections rather than the whole area.
Protecting the surface after removal
Once the slabs are clean and dry, you have a short window to do the right follow-up work before the surface is exposed to foot traffic, weather, and staining. In general, you should only walk on new patio slabs once the mortar and any setting materials have fully cured, which is usually at least several days depending on conditions how long before i can walk on new patio slabs.
Check for surface damage and patch if needed
Inspect each slab for chips, gouges, or scratches left by tools. Minor chipping at the edges is common and mostly cosmetic. Deeper gouges on the slab face can be filled with a compatible patching compound or a mortar mix matched to the slab colour. Get this done before sealing so the sealer locks everything down uniformly. If you're relaying any slabs that moved during the process, that's a separate job worth looking at.
Sealing the cleaned slabs
Sealing after mortar removal is a good idea for several reasons: it protects the surface from future staining, makes cleanup easier next time, and restores any colour that the cleaning process dulled. But timing matters. The slabs need to be completely dry before you apply sealant. For recently laid and cleaned pavers, wait 60 to 90 days before sealing. This lets any remaining moisture or curing compounds finish off-gassing. Sealing too early traps moisture and causes the sealer to cloud, bubble, or peel.
For existing slabs that were already sealed before the mortar got on them, check whether the old sealer is still performing well. If it's peeling, flaking, or absorbed water unevenly, strip and reapply rather than sealing over a failing coat. Choose a sealant suited to your slab type: penetrating/impregnating sealers for natural stone, film-forming sealers for concrete pavers if you want a sheen. Apply only after at least 24 to 72 hours of dry, sunny weather and make sure more dry weather is forecast for the following day.
Protecting plants and surrounding surfaces going forward
Acid cleaners and mortar removers will damage lawn edges, plants, and timber decking if they run off during your next job. Get in the habit of sheeting up garden borders before any chemical treatment, and flush any hard surfaces that got splashed with clean water immediately.
When to stop and call a professional
Most mortar removal on standard concrete or porcelain pavers is realistic DIY territory. If your goal is to build a patio using old bricks, plan for inspection, cleaning, and a suitable base before you start can i use old bricks to make a patio. But there are situations where pushing on yourself creates bigger problems than the original mortar residue.
- Delicate or expensive natural stone (marble, limestone, sandstone) with thick or embedded mortar: the risk of etching with chemicals or grinding through with power tools is high, and the cost of damaging irreplaceable stone usually exceeds the cost of a professional clean.
- Large areas (more than about 10 to 15 square metres) requiring grinding: extended grinder work requires proper dust extraction, consistent technique, and significant physical endurance. Professionals have the right equipment and can often finish in a fraction of the time.
- Mortar that has penetrated into cracks or structural joints: if the mortar is between load-bearing elements or has filled expansion joints that need to flex, removing it incorrectly can cause the slabs to crack or shift. This is worth a professional assessment.
- Repeated treatment that's not working: if you've applied a chemical remover twice at the right dilution with proper dwell time and the haze won't shift, the residue may be something other than standard cement mortar. A professional can identify it and apply the right treatment.
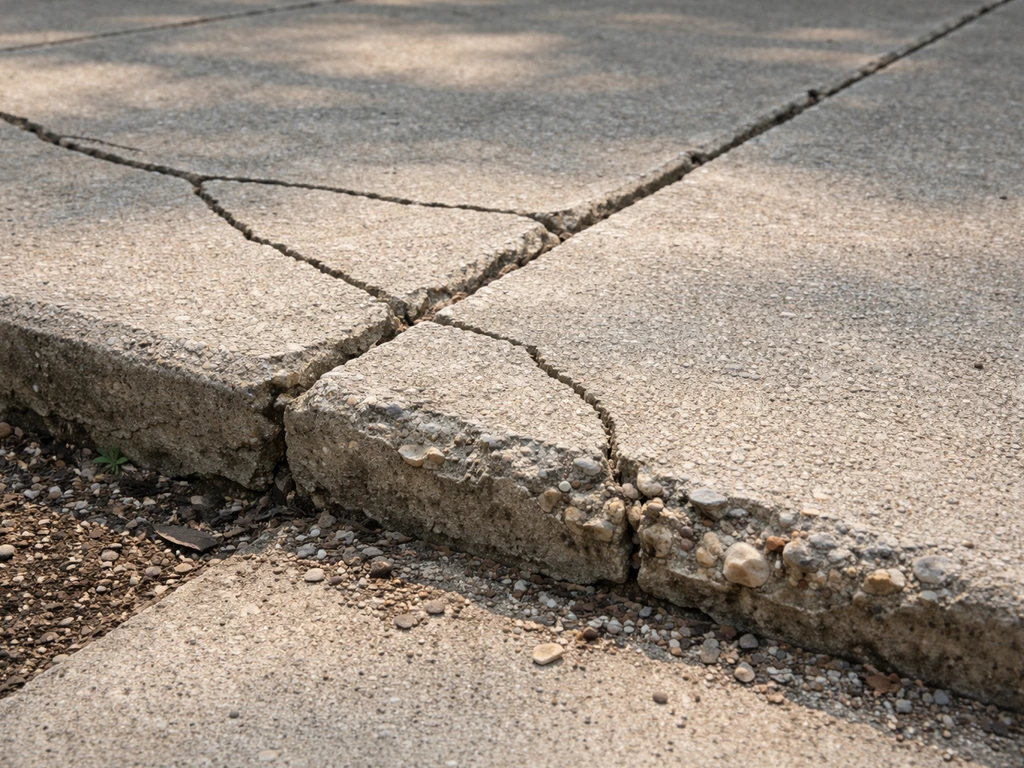
- Any sign of slab movement, lifting, or cracking beneath the mortar: mortar cleanup is the least of your problems at that point. Get the structural issue assessed first before cleaning anything.
It's also worth saying: if you're removing mortar because you're planning to relay loose or damaged slabs, or replace some entirely, sort the structural work out first. If you are replacing patio slabs, you’ll also want to plan the laying and bedding so the joints and base stay stable replace some entirely. Cleaning slabs only to then lift and re-bed them adds unnecessary steps. Get the laying and bedding right, then do the final cleanup once everything is set. Once everything is set, fixing patio slabs means finishing with a thorough mortar and haze cleanup so the surface can seal properly fix patio slabs. That sequence saves a lot of repeated effort.
FAQ
Can I use a pressure washer to remove mortar, or will it just leave it behind?
A pressure washer is mainly for rinsing loosened debris and cleaning after you scrape or scrub. Cured mortar and haze typically require mechanical removal and, for films, a dedicated haze remover. If you try to blast mortar with high pressure, you may gouge softer slab surfaces and push residue deeper into pores.
How do I tell the difference between cement grout haze and paint or sealant residue?
Grout haze usually appears as a uniform white or cloudy film that follows the mortar contact area and doesn’t smear like paint. Sealant residue often looks patchy, glossy, or slippery and may feel slick. If unsure, do a small test in a corner with your planned cleaner and check whether the finish changes or the film lifts.
What should I do if I accidentally used acid-based mortar remover on natural stone?
Stop further treatment immediately and rinse very thoroughly with clean water. Then neutralize using the baking soda solution and rinse again. After it dries, inspect under raking light for dull patches or pitting. If etching is visible, additional neutralization won’t fully reverse it, but you can prevent further damage by sticking to pH-neutral cleaners from then on.
Is it safe to mix chemicals (like mortar remover and neutralizer) in the same bucket?
No. Neutralization steps should be done separately, and you should follow one product at a time. Mixing acid products with other cleaners or additives can create unwanted reactions or reduce effectiveness. Also, never combine stronger solutions “to speed it up,” since that increases the risk of surface damage and uneven etching.
How long should I wait before sealing after mortar removal if I used only warm water and brushing?
If you did not use any acid-based cleaner and you removed only fresh or grout residue with water and mechanical scrubbing, you still need the slabs to be fully dry before sealing. In practice, that usually means waiting for a complete dry period, often at least overnight, then verifying in good light that no dampness remains in joints before applying sealer.
Do I need to neutralize even if the haze remover was a “safer” diluted product?
Yes. Any acid-adjacent haze remover can leave reactive residue. The neutralization check with pH test strips matters because labels often don’t account for how much residue is left in pores or joints. If your rinse water tests below roughly pH 6, rinse and neutralize again before sealing.
What if the white film comes back after I think I finished cleaning?
This usually means residue remained in pores, joints, or you didn’t rinse enough after dwell time, or neutralization was incomplete before sealing. Re-rinse, brush the affected sections again, then repeat the haze removal step matched to what it actually is (cement haze vs polymeric haze). Avoid sealing over it, since trapped residue can cause streaking and premature sealer failure.
Can I remove mortar from colored or brushed concrete without damaging the finish?
Treat colored and brushed concrete like a finish-sensitive surface. Always test your planned method in an inconspicuous spot first, especially with any acid-based product. Grinder marks are also a risk on decorative textures, so if you must use mechanical tools, keep passes controlled and stay off the flat face as much as possible.
What’s the safest way to remove mortar near plantings and lawn edges?
Cover borders and nearby vegetation with plastic sheeting before any acid or chemical dwell. If anything splashes or runs off, rinse hard surfaces immediately with clean water, then watch for leaf burn or grass damage over the next day. Don’t assume dilution makes it safe, runoff concentration still matters.
How do I avoid damaging joints when removing mortar on or between slabs?
When chisel work or scraping reaches joint areas, aim for shallow skim angles and short strokes so you don’t undercut slab edges. After bulk removal, rinse joints thoroughly to remove dust. If you used polymeric sand, be careful not to treat it with standard mortar haze products, since it can destabilize the jointing material.
Do I need special protection if I’m only using a grinder to remove mortar?
Yes. Mortar dust, especially from cured cement, is a respiratory hazard. Use a wet-dry vacuum with dust collection, wear eye protection, and keep the grinding wet only as your method allows so dust control is consistent. If you can’t control dust well, consider switching to hand tools for small areas or use a more controlled localized method.
Next Article
Fix Patio Slabs: Diagnose Cracks, Uneven Sections, and Base Issues
Step-by-step guide to diagnose and fix patio slabs: cracks, uneven sections, spalled edges, base and drainage causes, an