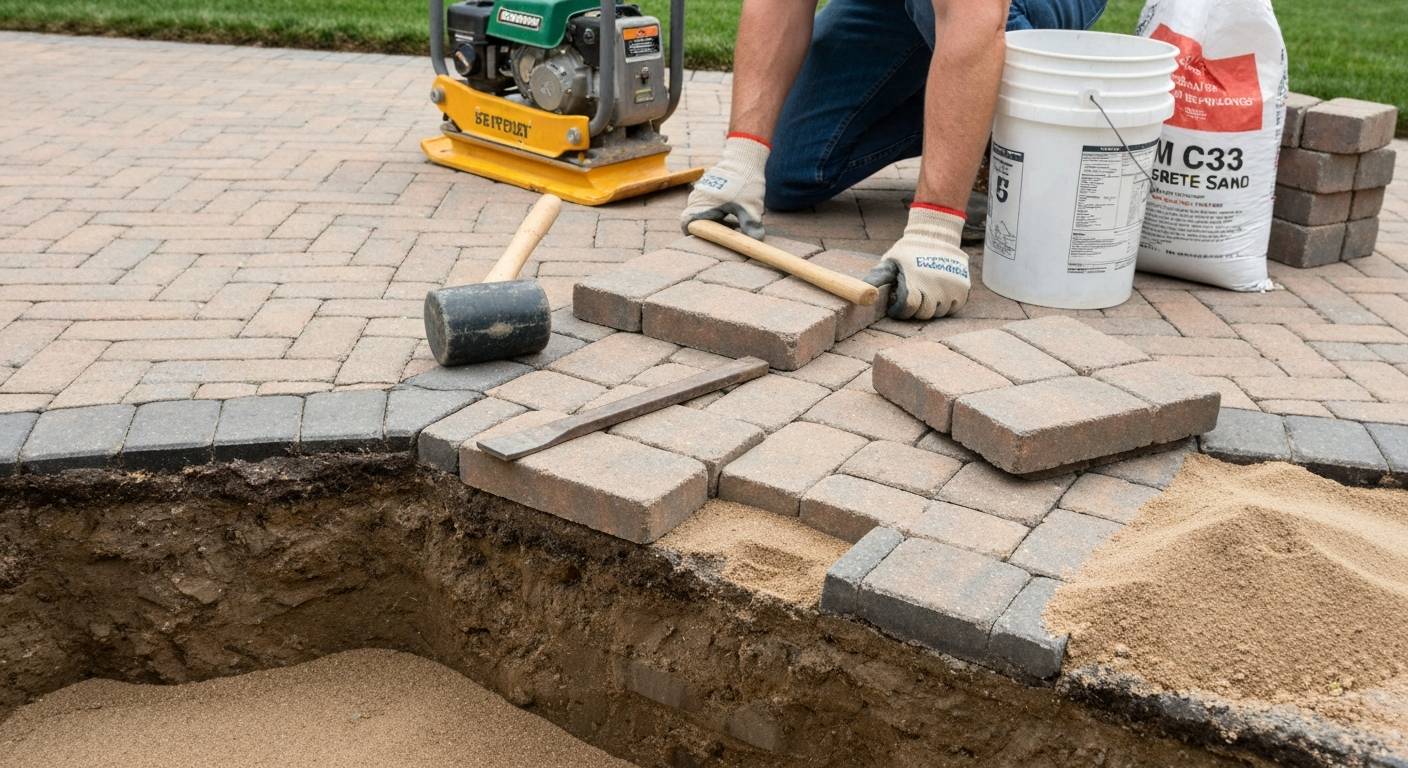
Most loose patio bricks can be fixed by lifting the affected units, cleaning the base, adding or replacing the bedding layer, and resetting the bricks level with the surrounding surface. The work is genuinely DIY-friendly for a handful of loose bricks, but if a large area is shifting, the base has failed, or drainage is the underlying problem, you are looking at a more involved repair that involves excavation and base reconstruction. This guide walks you through diagnosing why your bricks moved, picking the right repair method, and doing the actual work step by step.
How to Fix Loose Patio Bricks: DIY Steps for Repairing Pavers & Base

Talia Lang
9 Aug 2026
What this guide covers and when to call a pro
This article covers repairs to sand-set and mortar-set brick patios: resetting a single loose brick, re-leveling a small uneven area, and rebuilding the base where the underlying structure has failed. It also applies closely to loose pavers and loose patio stones, since the diagnosis and technique are nearly identical. You will find guidance on polymeric sand vs mortar, edge restraint repair, compaction, drainage, and joint finishing.
Most homeowners can handle a few loose bricks or a small sunken area on a weekend. You should seriously consider hiring a professional when: the affected area is larger than roughly 50 square feet, the subgrade (the soil underneath everything) is unstable or water-saturated, tree roots have caused widespread damage across multiple sections, or the patio is adjacent to a foundation and any grading changes could affect drainage toward the house. A one-off loose brick is a two-hour job. A failing base across most of a 300-square-foot patio is a multi-day project that benefits from professional equipment and experience.
Tools and materials you will need
The exact list depends on your repair scope, but gather these before you start so you are not stopping halfway through. Nothing is more frustrating than having a half-excavated patio and realizing you need to run to the hardware store.
General tools for all repairs
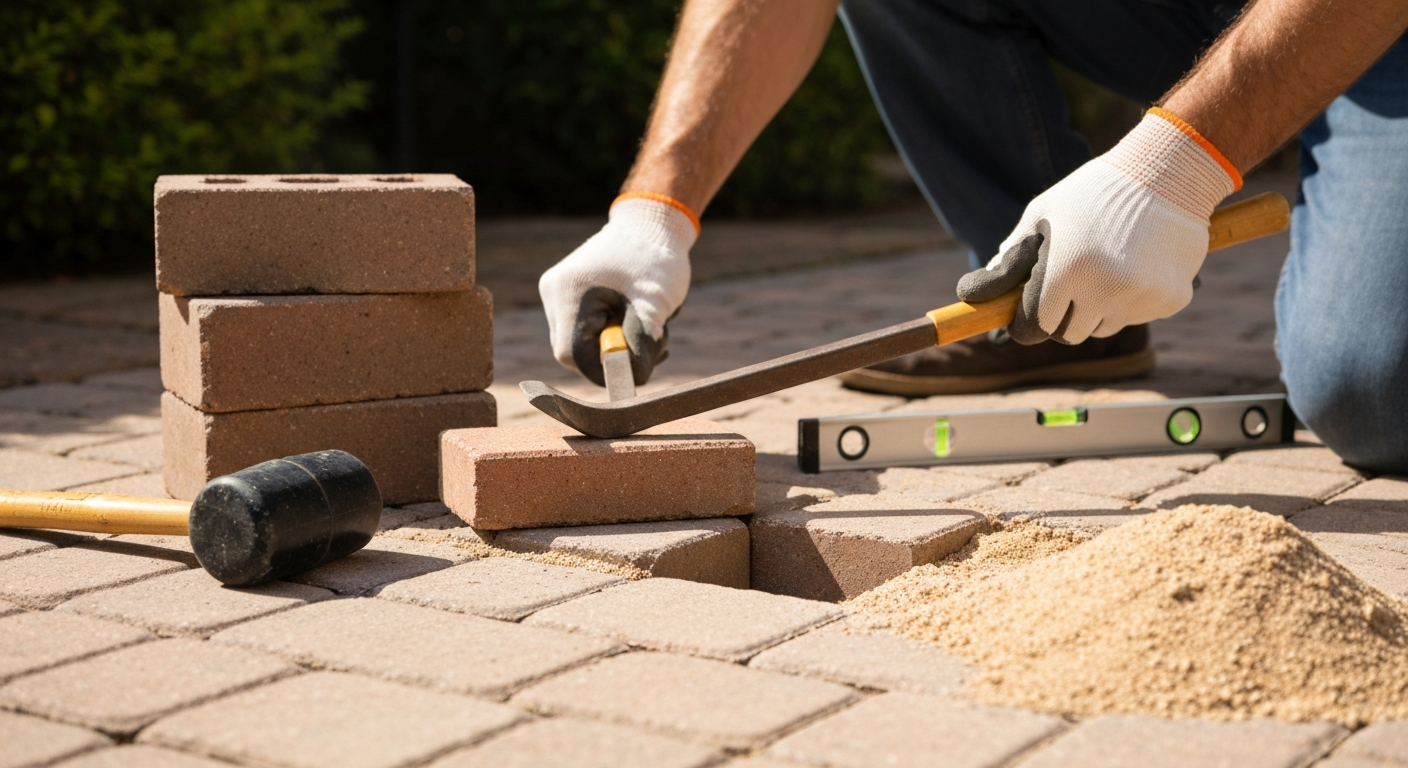
- Flat pry bar or brick chisel for lifting bricks without breaking adjacent units
- Rubber mallet for seating bricks level
- Stiff brush or shop vacuum for cleaning old sand and debris from the base
- Level (a 4-foot level is ideal; a 2-foot level works for single bricks)
- Tape measure
- Garden hose or watering can for activating polymeric sand
- Safety glasses and work gloves
- Dust mask (N95 or better) for mortar mixing and dry sand work
- Knee pads — you will thank yourself later
Method-specific supplies
- Coarse bedding sand or screeding sand: enough to fill a 3/4 to 1-1/2 inch bedding layer under the bricks being reset
- Polymeric sand for joint filling on sand-set patios (choose a product matched to your joint width)
- Type S or Type N mortar (for mortar-set applications or pointing individual joints): Type N is 1 part Portland cement, 1 part hydrated lime, 6 parts sand; Type S is stronger and preferred for exterior bedding situations
- Clean crushed stone or dense-graded aggregate (also called crusher run or road base) for base rebuilding — no fine-only sand or topsoil
- Geotextile landscape fabric for base reconstruction projects
- Plate compactor: rent one from a local tool rental for anything beyond a single brick reset; a hand tamper works for very small spots
- Screed rails or straight metal pipes (1-inch diameter) for leveling the bedding sand layer
- Straight 2x4 board for screeding
- Edge restraints: spiked HDPE plastic or steel/aluminum restraints with 10-inch spikes, if yours are damaged or missing
- Paver or brick sealer (optional, applied after repairs are complete and joints are set)
Diagnosing why your bricks are loose
Before you touch a brick, spend 10 minutes understanding why it moved. Resetting bricks without fixing the cause just means you will be back doing it again in two years. Walk the patio and press on every brick you can reach. A loose brick rocks or has visible gaps along its edges. A sunken area will be obvious with a long level. Look for patterns: is it one corner near a downspout? A strip along one edge? Random single units throughout? Each pattern points to a different cause. Common diagnostic causes of loose or rocking patio pavers include insufficient or poorly compacted aggregate base, erosion or washout of bedding sand, failed or missing edge restraints, tree‑root intrusion, and freeze–thaw/frost heave (CMHA / PAV‑TEC technical note, edge/base/failure modes and causes) CMHA / PAV‑TEC technical note — edge/base/failure modes and causes.
| Symptom | Likely cause | What to look for |
|---|---|---|
| Single brick loose, surrounding bricks fine | Local bedding sand loss or small void under that unit | Lift the brick and look for an air pocket or washed-out sand beneath it |
| Several bricks sunken in a low spot | Base settling or water pooling that washed out bedding sand | Check for nearby downspout, standing water after rain, or soft/spongy feel underfoot |
| Bricks lifting or tilting near the patio edge | Failed or missing edge restraint allowing lateral spread | Look at the edge of the patio — plastic restraint should be there, spiked into the base; missing or pulled-away restraint is the giveaway |
| Uneven bricks in a pattern that follows a root | Tree root intrusion underneath | Probe the area with a screwdriver or look for visible root lines; bricks will be pushed up rather than sunken |
| Widespread looseness after a hard winter | Freeze-thaw frost heave damaging bedding and joints | Multiple units affected, often pattern-less; joint sand has also washed or blown away |
| Bricks loose near a low corner or drain | Poor drainage concentrating water flow into the base | Check that slope is directing water away from the house at roughly 1-2%; look for blocked drains or concentrated runoff paths |
Once you have lifted one or two bricks to inspect, the story becomes clear pretty quickly. If the bedding sand looks dry and intact but the brick was still rocking, the brick itself may be slightly damaged or a neighboring restraint has shifted. If the sand beneath is completely gone and the aggregate base looks disturbed or soft, you are dealing with a drainage or base problem that needs more than just adding new sand on top.
Choosing the right repair method
Not every loose brick requires the same fix. Matching the method to the actual problem saves you time and prevents you from doing more work than necessary, or worse, doing the minimum when the job actually requires something bigger.
| Situation | Right repair method | Approximate difficulty |
|---|---|---|
| 1-3 isolated loose bricks, base intact | Reset individual bricks on fresh bedding sand or mortar | Easy — 1 to 2 hours |
| Small area (4-20 bricks) sunken or uneven | Remove units, adjust bedding layer, re-level and compact | Moderate — half a day |
| Large area (20+ bricks) shifting, base soft or washed out | Full base reconstruction: excavate, rebuild compacted aggregate base, screed bedding, reset bricks | Hard — full day or more, may need professional help |
| Edge of patio spreading outward | Replace or re-anchor edge restraints, reset bricks in that section | Moderate — can DIY if base is still solid |
| Tree root lifting bricks | Remove units, trim or remove root, rebuild base in that zone, reset bricks | Moderate to hard — depends on root size |
| Mortar-set bricks loose on a concrete slab | Chip out old mortar, clean slab, re-bed with fresh Type S mortar | Moderate — requires mortar mixing and curing time |
One important distinction: most residential patios are sand-set, meaning bricks sit on a compacted aggregate base covered with a thin bedding sand layer. These are easy to repair piece by piece. A mortar-set patio has bricks bonded with mortar to a concrete slab underneath. The repair process differs because you need to chip out the old mortar and re-bed with new mortar rather than scooping in more sand. If you are not sure which type you have, lift one brick, if it pulls away cleanly with a pry bar and nothing is stuck to the bottom, it is sand-set. If it has hardened material stuck to it, it is mortar-set.
Safety and site preparation
This is not the most exciting part of any repair article, but skipping it creates real problems. Patio work involves digging, and digging involves underground utilities. Before any excavation deeper than a few inches, call 811 (the US national call-before-you-dig number) to have utilities marked. This is free and required by law in most states. Give them at least 3 business days before you plan to dig.
- Wear safety glasses whenever you are chipping mortar, breaking bricks, or running a plate compactor — debris travels farther than you expect
- Use an N95 dust mask when mixing dry mortar, sweeping polymeric sand, or cutting bricks with an angle grinder or saw
- Wear work gloves: mortar is alkaline and will dry out and crack your skin with prolonged contact
- Knee pads are worth it for anything beyond 20 minutes of ground-level work
- If you are using a plate compactor, wear hearing protection — rentals are loud
- Protect nearby garden beds and lawn edges with plastic sheeting before excavating or mixing mortar; cement wash is hard on plants
- If you are working near a foundation, do not change the grading in a way that redirects water toward the house — maintain the existing slope away from the structure
- Mortar generates heat as it cures; in direct sun on a hot day, mist freshly set bricks lightly to slow the cure and prevent cracking
Resetting a single loose brick or paver
This is the most common repair and the most approachable for a first-timer. If one or two bricks are rocking independently and the rest of the patio is solid, you can almost certainly fix this yourself in an afternoon. For a more comprehensive walkthrough and additional tips, see our guide on how to fix loose patio pavers. For detailed, step‑by‑step instructions on how to fix uneven patio pavers, see our guide on how to fix uneven patio pavers. For a step-by-step walkthrough and troubleshooting tips, see how to fix patio pavers. Here is how to do it correctly, not just quickly. For a detailed, step-by-step walkthrough on re-leveling and repairing uneven brick surfaces, see our guide on how to fix uneven brick patio.
- Lift the loose brick carefully. Slide a flat pry bar into the joint on one edge and lever it up. Try not to damage the surrounding bricks. Set the lifted brick aside somewhere it will not get walked on or broken.
- Vacuum or brush out the cavity completely. Get rid of all the old sand, debris, and any crumbled material. You want a clean look at what is underneath. A shop vacuum works better than a brush here.
- Inspect the base. Press down on the exposed aggregate base with your hand or a piece of rebar. It should feel firm and solid. If it feels soft, spongy, or you can push material around easily, the repair is bigger than just this one brick — see the base rebuilding section below.
- For sand-set patios: add fresh coarse bedding sand into the cavity and screed it flat. The sand layer should bring the brick surface up to match the surrounding level — typically about 3/4 to 1 inch of sand is right. Tamp the sand down lightly with a hand tamper or the bottom of a rubber mallet handle.
- For mortar-set patios: chip out all the old mortar from the slab surface and the bottom of the brick using a cold chisel and hammer. Brush clean. Mix a Type S mortar (stronger than Type N and appropriate for exterior bedding) to a thick peanut butter consistency and spread a 3/4-inch layer on the slab. Comb it with a notched trowel if you have one.
- Set the brick back in place. Press it firmly down and tap it level with a rubber mallet. Lay a level across it and the surrounding bricks to check that the surface is even — the brick should not be high or low by more than 1/8 inch.
- For sand-set: run a plate compactor over the repaired area with a protective rubber pad or piece of carpet between the compactor and the brick surface to avoid scuffing. If you are only resetting one brick, a hand tamper and firm rubber mallet tapping works too.
- Fill the joints. For sand-set patios: sweep dry polymeric sand into the joints around the reset brick, making sure the sand is dry and the weather is dry. Tamp it in with a hand roller or broom, sweep off any excess from the brick face, then activate it with a light mist of water per the product instructions. Do not flood it. For mortar-set patios: pack fresh mortar into the joints with a pointing trowel and tool the joints smooth before the mortar sets.
- Keep foot traffic off the repaired area for at least 24 hours for sand-set repairs and 48 to 72 hours for mortar joints to cure properly.
A note on polymeric sand: it needs to be applied to completely dry surfaces and joints. If you apply it over damp bricks or when rain is coming in the next several hours, the polymers activate unevenly and can leave a white haze on the brick face that is very difficult to remove. Most manufacturers also require at least 1 inch of joint depth for the product to hold properly. If your joints are shallower than that, standard fine joint sand is a better choice.
Re-leveling a small uneven area
When several bricks in a cluster are sunken, rocking, or have shifted out of level, you need to approach it as an area repair rather than going brick by brick. For step-by-step instructions on how to fix low spot in a paver patio, consult our detailed guide. If your small uneven area is flagstone rather than brick, see our guide on how to fix uneven flagstone patio for methods that suit irregular stones. Trying to fix individual bricks in a sunken zone usually results in a lumpy, uneven patch because the bedding depths underneath all differ. The right approach is to pull up the whole affected section, fix the bedding consistently, and reset them all together. For a detailed walkthrough on how to fix uneven patio slabs, including step-by-step leveling techniques and material recommendations, see our guide on how to fix uneven patio slabs.
- Mark the boundary of the repair area with chalk or chalk spray. Add about one brick-width of buffer beyond the visibly affected bricks, since the problem often extends slightly beyond what you can see.
- Remove all the bricks in the marked area and stack them carefully nearby in order if they are in a pattern — this makes reinstallation easier. Stack them flat, not on edge, so they do not tip and crack.
- Vacuum and clean the exposed base. Look for drainage issues: if water has been pooling here, you should be able to see evidence of erosion channels in the sand or displacement in the aggregate.
- Check and adjust the bedding sand layer. Rake or vacuum out the existing bedding sand across the whole area. You want a fresh, consistent bedding surface. Set two 1-inch diameter pipes or screed rails parallel to each other across the area as guides. Fill in with fresh coarse bedding sand and pull a straight 2x4 across the rails to screed the sand to a perfectly flat 1-inch depth. Remove the screed rails and fill the grooves they leave with a little extra sand, patted down gently.
- Before screeding, make sure the bedding surface will result in the correct finished slope. The patio surface should drain at 1 to 2 percent away from the house (that is roughly 1/8 to 1/4 inch of drop per foot). Use your level with a slope gauge or a simple string line to confirm this as you screed.
- Reinstall the bricks in the same pattern, starting from one corner and working outward. Set each brick firmly into the sand without sliding it (sliding disturbs the screeded surface). Tap each one level with a rubber mallet as you go.
- Once all bricks are back in place, run a plate compactor over the area using a protective pad. Make two passes in perpendicular directions. This seats the bricks into the bedding sand consistently and removes any small humps.
- Sweep polymeric sand into all joints in the repaired area and the adjacent joints around the perimeter. Activate per product instructions. Keep traffic off for 24 hours.
If this repair is near the edge of the patio, check the edge restraint while you have the bricks out. Edge restraints should be spiked firmly into the compacted aggregate base with 10-inch spikes, not just sitting in soil. Pull on the restraint with your hand. If it flexes, pulls away, or the spikes pull out easily, replace that section. This is a common reason why edge bricks keep shifting year after year even after you re-sand them.
Rebuilding the base for larger failures
If you have pulled up bricks and found that the aggregate base underneath is soft, eroded, or poorly compacted, or if you are dealing with widespread settling, root damage across a section, or repeat failures in the same area, you need to rebuild from the ground up. This is the most labor-intensive repair in this guide, but doing it properly is the only way to get a patio that stays put.
Excavation depth and base thickness
For a residential pedestrian patio, the total excavation depth needs to accommodate the base layer, the bedding sand, and the brick itself. ICPI (Interlocking Concrete Pavement Institute) technical guidance calls for a minimum 4-inch compacted aggregate base for pedestrian patios, plus approximately 1 inch of bedding sand, plus the brick thickness (typically 2-1/4 to 2-3/8 inches for standard clay brick or concrete paver). For detailed compaction and subgrade/base specifications, see ICPI Tech Spec 2, compaction and subgrade/base specifications (mirror) blank" rel="noopener noreferrer">ICPI Tech Spec 2 — compaction and subgrade/base specifications (mirror). That is roughly 7 to 8 inches of total depth below finish grade. In cold climates with significant frost penetration, or where the underlying soil drains poorly, increase the base to 6 inches or more. When in doubt, go deeper rather than thinner.
- Remove all bricks from the affected area and set them aside. Remove and save the edge restraints if they are in good condition.
- Excavate the base material down to undisturbed, firm subgrade. If you hit soft, wet, or loose soil that compresses easily under your foot, you need to go deeper until you reach firm material. Remove any roots you find — and if you are dealing with a large or actively growing root, cut it back as far as you reasonably can and treat the cut end to discourage regrowth.
- Grade the subgrade to slope slightly (1 to 2 percent) away from the house so water in the base layer has somewhere to go. Compact the subgrade firmly with a plate compactor. Make at least two passes.
- Lay a sheet of geotextile fabric over the compacted subgrade. This separates the base aggregate from the soil below, preventing fine soil particles from migrating up into the base over time and causing future softening. Overlap fabric edges by at least 12 inches.
- Install clean, crushed dense-graded aggregate (road base, crusher run, or processed gravel — not pea gravel or ungraded fill) in lifts of 3 to 4 inches. Do not dump the entire depth in at once. Compact each lift with a plate compactor, making two passes in perpendicular directions, before adding the next layer. This is how you build a base that will not settle. Compaction targets in professional installation spec at around 98 percent of standard Proctor density — in practical DIY terms, this means the surface feels hard underfoot with no give, and the compactor is not pushing material around anymore.
- Check the total base depth after compaction — compaction reduces the loose thickness by roughly 10 to 20 percent, so start with slightly more material than your target depth. After your final compacted base layer, the surface should be 1 inch below the bottom of where your bricks will sit (to accommodate bedding sand).
- Reinstall or install new edge restraints along all exposed edges before adding bedding sand. Spike them through the compacted base with 10-inch spikes. The base should extend at least 6 inches beyond the restraint spikes so the spikes have solid material to grip. Soil backfill alone will not hold restraints — they must be anchored in the compacted aggregate.
- Screed a 1-inch layer of coarse bedding sand over the compacted base. Use the rail-and-straightedge method described in the re-leveling section above. Do not walk on the screeded sand surface before setting bricks.
- Reinstall bricks in your pattern, working from one corner outward. Set each brick without sliding it. Tap level with a rubber mallet. Once all units are in place, run a plate compactor over the whole area with a protective pad.
- Fill all joints with polymeric sand on a dry day, activate with water per product instructions, and keep traffic off for 24 hours. If any low spots become apparent after the first rainstorm, top up the joints with additional polymeric sand.
Drainage: fix it before you button everything up
If poor drainage caused the base failure in the first place, you need to address it before you backfill and reset bricks, otherwise you will be back doing this repair again. Look at where water comes from: is a downspout discharging onto or near the patio? Is the patio sitting in a low point that collects sheet flow from a lawn or driveway? Fix downspout extensions to carry water at least 4 feet from the patio perimeter. If the patio sits in a genuine low spot, consider installing a channel drain along the lowest edge to intercept water before it gets into the base. These are sold at most big-box home improvement stores and are straightforward to set into the base while you have the bricks out.
Sand-set vs mortar-set: which to use for your repair
If your patio was originally sand-set, stick with sand-set for the repair. It is easier to work with, more forgiving for DIY, and allows any future repairs to be done the same way. Mortar-set repairs (using a bonded mortar bed over a concrete slab) are appropriate when the original installation was mortar-set, when you are working with natural stone that does not perform well on loose sand, or when you need a rigid installation that will not shift. Mixing sand-set and mortar-set in the same area creates problems because the two systems move differently with temperature and load changes, which can cause cracking at the joints between them.
| Factor | Sand-set | Mortar-set |
|---|---|---|
| Base required | Compacted aggregate base + bedding sand | Existing concrete slab in good condition |
| DIY friendliness | High — forgiving and reversible | Moderate — requires mortar mixing and curing patience |
| Repairability | Easy — lift individual units anytime | Harder — must chip out old mortar and re-bed |
| Best for | Most residential patios, clay brick, concrete pavers | Natural stone, pool surrounds, areas needing rigid surface |
| Joint material | Polymeric sand or fine joint sand | Mortar (Type S for exterior beds) |
| Drainage within system | Permeable at joints if using sand | Impermeable — surface drainage only |
Finishing, sealing, and what to expect after the repair
Once bricks are reset and joints are filled, give everything at least 48 hours before applying sealer. Sealer is optional on brick patios but it does help stabilize joints (some sealers are marketed as joint stabilizing sealers and essentially do the same job as polymeric sand), enhance color, and make the surface easier to clean. Apply sealer with a pump sprayer or roller on a dry day above 50 degrees Fahrenheit, and follow the manufacturer's recoat window. Do not over-apply, one thin coat is better than one thick one.
Be realistic about what the repair will look like. New bricks or cleaned bricks rarely match the weathered patina of the surrounding surface perfectly. Over a season or two of sun and rain exposure, the difference usually softens. If matching appearance matters to you, try to source replacement bricks from a salvage yard or specialty supplier rather than a big-box store, older bricks from salvage often blend in better than brand-new ones.
Preventing the same problem from coming back
The repairs covered here all have specific causes that are largely preventable. Once you have fixed the immediate problem, these habits keep a patio in good shape long-term.
- Inspect joints every fall and top up any areas where sand has washed or eroded away — early joint maintenance prevents water from getting into the base
- Direct downspout extensions at least 4 feet away from the patio edge; concentrated roof runoff is one of the most common causes of base erosion
- Check edge restraints annually; push on them firmly and spike any that have loosened
- After winter in cold climates, do a walking inspection and mark any bricks that have been heaved by frost — catch these before they become trip hazards or worsen
- Avoid using metal snow shovels directly on brick surfaces; they catch the edges and chip or shift bricks over time
- If a tree near the patio is growing, check every two to three years whether root growth is approaching the base
- Re-apply polymeric sand every two to three years in high-traffic areas or after major ant activity, which can hollow out joints surprisingly quickly
FAQ
What are the common causes of loose patio bricks, pavers, or stones?
Loose units usually come from one or more of: inadequate or poorly compacted aggregate base, washout or loss of bedding/joint sand from concentrated water flow or poor drainage, failed or missing edge restraint allowing lateral spread, tree roots heaving units, freeze–thaw/frost heave damaging bedding and joints, or heavy/point loads beyond the design. Diagnose by locating patterns (single unit vs area, linear wash paths, proximity to trees or downspouts).
How do I quickly diagnose whether a single brick is a simple fix or a sign of a deeper problem?
Check these steps: 1) Tap surrounding units—if only one rocks, it’s likely local bedding or joint loss. 2) Lift the loose unit—inspect the underside for washed‑out sand, voids, or mortar. 3) Examine nearby joints and edge restraints—loose or missing joint sand or weak edge restraints point to drainage or lateral spread issues. 4) Look for tree roots, standing water, or frost damage. Local bedding loss or joint washout is usually DIY; widespread base failure needs larger repair.
What tools and materials do I need for typical DIY repairs of single loose bricks or small areas?
Tools: rubber mallet, pry bar/trowel, shop vacuum or brush, level, straightedge/screed board, measuring tape, plate compactor or hand tamper (and protective pad for compactor on single units), wheelbarrow, shovel, gloves, safety glasses. Materials (sand‑set): washed concrete sand (bedding/screeding sand), joint sand or polymeric sand for joints, crushed aggregate if base repair needed, edge restraint pieces and spikes if replacing restraint. Materials (mortar‑set): masonry cement/Portland cement, hydrated lime per instructions, masonry sand, bond breaker/weep control as needed, and mortar tools (mortar board, pointing trowel).
Step‑by‑step: how do I reset a single loose brick or paver (sand‑set)?
1) Remove the loose unit(s) and set aside. 2) Clear and vacuum old joint and bedding sand from the cavity and joints. 3) Inspect the base: if there’s only a small loss of bedding sand and the base is stable, add 1 in (20–40 mm) of screeded bedding sand and compact lightly. If there’s a base void/softness, see the base repair steps below. 4) Place the unit and seat with a rubber mallet; check level and slope. 5) Use a protective pad and run the plate compactor or hand‑tamper to bed the unit. 6) Refill joints with joint sand or polymeric sand per manufacturer instructions and compact/brush off excess. 7) If using polymeric sand, follow dry/temperature/rain window and activation instructions exactly.
How do I repair multiple adjacent loose or sunken bricks (small area relevel)?
1) Remove all units across the affected area plus a one‑unit border. 2) Remove old bedding and inspect the aggregate base/subgrade. If base has lost material or is soft, remove to sound base and rebuild (see base rebuild). 3) Rebuild or re‑compact the base in 4–6 in (100–150 mm) lifts using clean, crushed aggregate and compact each lift to high density. 4) Screed a uniform bedding course (typical sand‑set bedding 3/4–1 1/2 in or per product). 5) Re‑lay pavers maintaining original pattern and slope (1–2% away from structures). 6) Plate compact with protective mat and refill joints with joint sand/polymeric sand; compact and finish joints.
When do I need to rebuild the aggregate base, and what are the best practices?
Rebuild the base when you find soft/loose material under bedding, large voids, progressive settlement across multiple units, or if the original base is too thin. Best practices: use clean, crushed, dense‑graded aggregate; follow ICPI minimum compacted thickness (min. 4 in/100 mm for pedestrian patios, 6 in/150 mm for driveways) and increase depth for weak soils or poor drainage; place and compact base in 4–6 in lifts; achieve high compaction (industry guidance targets ~98% standard Proctor where practical); extend the compacted base under edge restraints and beyond spike depth. Only add bedding sand after the base is compacted to spec.
Next Article
How to Fix Low Spot in Paver Patio: Repair & Prevent
Fix sunken pavers: step-by-step diagnostics, repairs, materials, tools, cost estimates, and when to call a pro