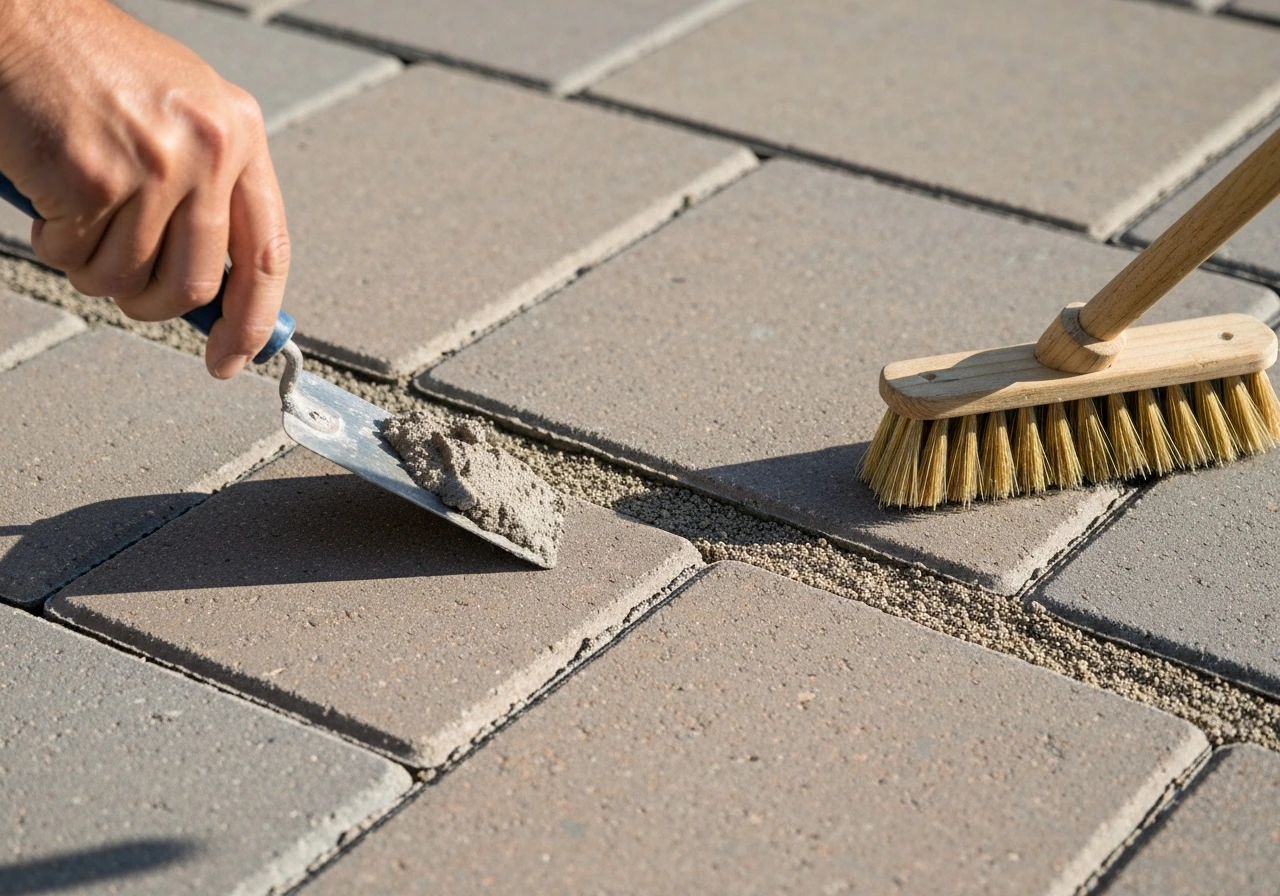
Jointing compound goes into the gaps between your patio pavers, slabs, or tiles to lock them in place, keep weeds out, and stop water undermining the base. For step-by-step instructions on how to fill gaps in patio slabs, see our detailed guide on the subject. For most DIY homeowners, the right product is either a polymeric jointing sand (for pavers and slabs with joints up to about 4 inches wide) or a dry sweep-in compound (for finer joints and smaller areas). Mortar pointing is also an option for slabs with wide joints, but it cracks more readily and is less forgiving to apply. This guide walks you through all three approaches, from choosing the right product to finishing the job properly, so you don't have to redo it in six months. For a concise comparison and step-by-step advice on what is best way to fill in gaps on patio, see our detailed guidance on choosing and applying the right jointing method. For step-by-step instructions on how to joint patio slabs, see our detailed guide.
How to Use Jointing Compound on Patio: DIY Step‑by‑Step

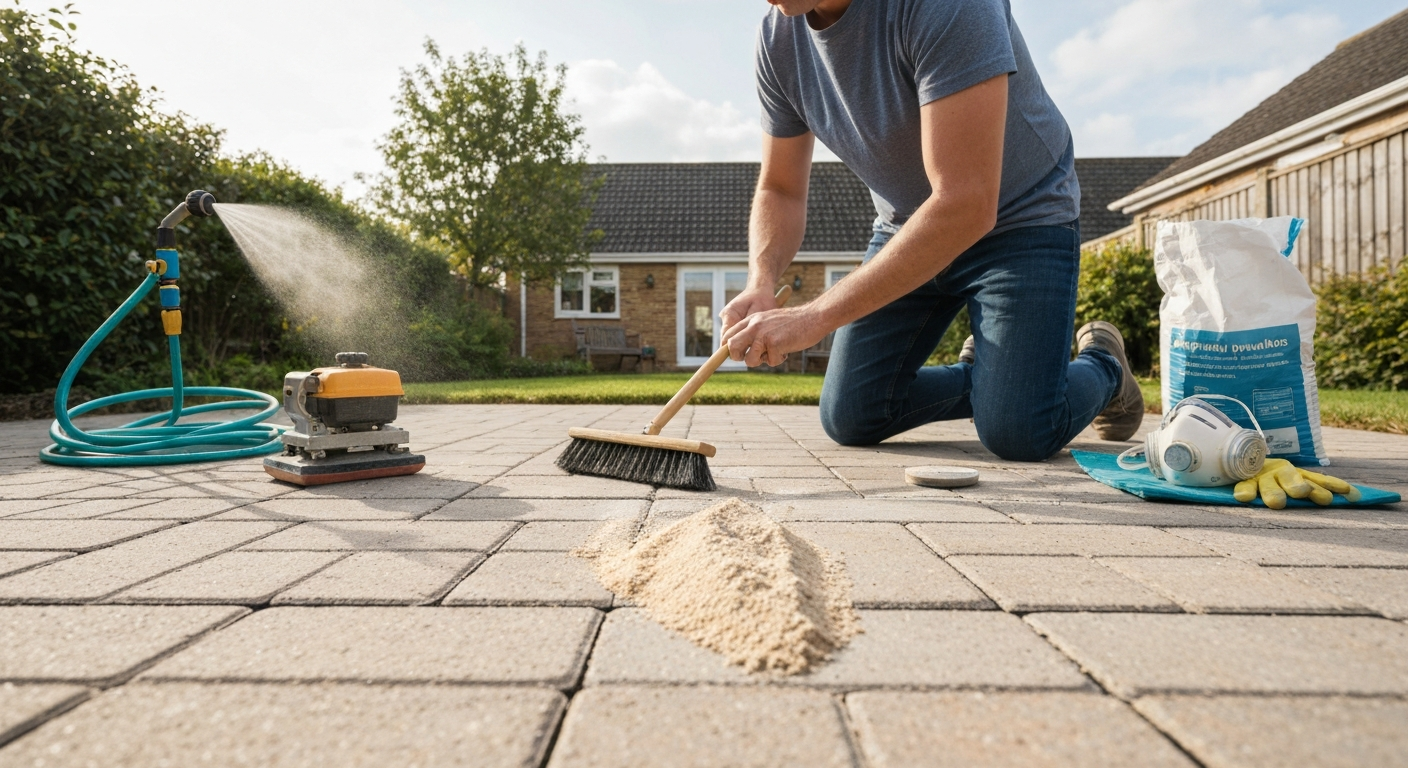
What jointing compound actually does
The joints between your patio units aren't just cosmetic gaps. They carry out several practical jobs at once: they let minor movement happen without cracking the surface, they direct rainwater through or away from the paved area, and they resist weed seeds finding a foothold. When joints fail, you get weeds pushing up, pavers rocking or sinking, water pooling in the wrong places, and edges starting to spread apart. Jointing compound, when applied correctly and in the right product for your situation, restores all of that. It won't fix a sunken paver caused by a failed base or a drainage problem that's eroding the bedding layer underneath, but it's exactly the right tool when the base is sound and the joints are just empty, crumbling, or overgrown.
Which method should you use? A quick decision guide
Before you buy anything, narrow down which jointing method fits your specific patio. The main variables are joint width, the type of surface you have, and whether you can use a plate compactor. Work through these questions in order.
- Are your joints narrower than 3 mm (about 1/8 inch)? If yes, most jointing products won't penetrate reliably. You'll need to widen the joint slightly with a plugging chisel or angle grinder before proceeding.
- Are your joints between 3 mm and 25 mm (about 1 inch)? Polymeric jointing sand or a dry sweep-in compound is the best fit. Most homeowner-grade polymeric sands work from 1/8 inch up to 4 inches wide.
- Are your joints wider than 25 mm on mortar-bedded slabs? A cementitious pointing mortar or a bagged ready-mix jointing compound (like U-CAN patio jointing repair products) becomes the right choice.
- Do you have pavers or flags on an unbound sand/gravel base? Polymeric sand or dry sweep-in compound, with compaction.
- Do you have ceramic or porcelain patio tiles on a mortar bed? Tile-specific exterior grout or a flexible jointing compound is needed. Standard polymeric sand is not appropriate for tile joints.
- Is your patio installed over an existing concrete slab (overlay)? Check the product spec carefully. Many polymeric sands limit overlay joint width to 2 inches (5 cm) and require drainage holes in the slab beneath.
- Can you access a plate compactor, or are you working on a small area only? If the area is small or tight, a hand tamper plus a rubber mallet is workable. For anything over a few square metres, a plate compactor is strongly recommended.
Tools and materials checklist
What you need varies by method. Here's a breakdown so you can gather everything before you start, rather than making three trips to the builder's merchant mid-job.
| Item | Polymeric / Flowable Sand | Dry Sweep-In Compound | Mortar Pointing |
|---|---|---|---|
| Semi-rigid street broom | Essential | Essential | Not needed |
| Plate compactor (with rubber pad or teflon plate) | Essential for areas over ~5 m² | Recommended | Not needed |
| Hand tamper or rubber mallet | For tight/small areas | For small areas | Optional |
| Leaf blower | Essential (clears surface excess) | Helpful | Not needed |
| Hose with shower/mist nozzle | Essential (activation step) | Not needed | Needed for curing |
| Plugging chisel and club hammer | For joint clearance | For joint clearance | For joint clearance |
| Stiff wire brush or angle grinder with grout rake | For old joint removal | For old joint removal | Essential |
| Pointing trowel or margin trowel | Not needed | Not needed | Essential |
| Bucket and mixing paddle (or drill attachment) | Not needed | Not needed | Essential |
| Jointing compound / polymeric sand (bags) | Per coverage table | Per coverage table | Per coverage table |
| Dust mask (P2 rated minimum) | Essential (dry handling) | Essential | Essential |
| Safety glasses and gloves | Essential | Essential | Essential |
| Waterproof sheeting / tarpaulin | For overnight protection | For overnight protection | For curing period |
| Kneeling pad | Useful | Useful | Essential |
A note on the plate compactor: you don't need to buy one. Most tool hire shops rent them for a half-day fee. For polymeric sand especially, compaction is not optional. Joints that aren't compacted properly will fail within one or two winters.
Assess your patio before you buy anything
Spend 20 minutes looking at what you actually have. Jointing is the last step in a patio repair sequence, not the first fix you throw at a problem. For step-by-step instructions, see our guide on how to repair patio joints. If the base or structure is compromised, jointing compound won't hold.
Check joint width and depth
Measure a few representative joints with a tape measure. Width matters for product selection. Depth matters just as much. Polymeric sand manufacturers typically specify a minimum joint depth of around 38 mm (1.5 inches) for reliable performance. If your joints are only 10-15 mm deep because the bedding mortar or base has risen, the sand won't have enough mass to stay put. You can check depth by pushing a thin screwdriver or a piece of wire down into the joint and marking where it stops.
Identify your substrate
- Concrete block pavers on sand/gravel base: most flexible substrate, best suited to polymeric or sweep-in sand, excellent compaction results.
- Concrete or natural stone flags/slabs on mortar bed or on compacted hardcore: mortar pointing or flowable polymeric compound, depending on joint width.
- Porcelain or ceramic tiles on mortar bed: tile-specific exterior flexible grout only. Do not use polymeric sand on tile joints.
- Pavers or slabs as an overlay on existing concrete: check the product's overlay specification before buying. Drainage holes in the slab and correct joint depth are critical.
Look at slope and drainage
A patio should drain away from the house at a fall of roughly 1:60 to 1:80 (about 15-17 mm drop per metre). If water is pooling in joints or on the surface, look at whether the fall is wrong before re-jointing. Re-jointing a patio that drains toward the house foundation is just delaying a bigger problem. If you're dealing with recurring water pooling or sunken areas, those drainage and structural issues need addressing first. Jointing compound alone can't fix them.
Check for base movement
Walk over the patio and feel for any rocking, sinking, or springy units. Press down on corners of pavers with your foot. If units move, the problem is below the surface: a failed base, compacted bedding, or missing edge restraints. No jointing compound will hold in a patio with unstable units. As ICPI technical guidance makes clear, jointing materials are not a fix for a failed base or missing edge restraint. That type of repair involves lifting and relaying, which is either a significant DIY project or contractor work depending on the scale.
Prep and cleaning: the step most people skip
Surface prep is where most failed re-jointing jobs go wrong. New compound applied over dirty, damp, or partially blocked joints will crack, wash out, or fail to bond within months. The ICPI technical bulletin Cleaning, Sealing and Joint Sand Stabilization of Interlocking Concrete Pavement (CMHA / ICPI tech bulletin) says joint sand stabilization is optional for many interlocking pavements and stresses proper cleaning, selection of cleaners, and using appropriate manufacturer products before any stabilization or sealing. Budget at least a half day for preparation on a standard garden patio before you touch the new product.
Remove old jointing material
Use a plugging chisel and club hammer to break out old mortar or hardened sand. For large areas, an angle grinder fitted with a grout rake disc is much faster. You need to clear the joint to a minimum depth of 25-40 mm for most products to work properly. Don't just scratch the surface. If old mortar is bonded hard and the joints are still in reasonable shape, you might not need to rake them all out, but any crumbling, hollow, or weed-infested sections must be fully cleared.
Weed and root removal
Pull weeds out by hand or with a long-bladed weeding tool, getting as much root as possible. Then apply a path weedkiller (glyphosate-based works well) to any remaining root material and let it work for a few days before the final clean. Sealing roots under new jointing compound just means they grow back and crack it open again within a season.
Clean and dry the surface
Brush out all loose debris from the joints with a stiff brush, then use a leaf blower to clear fine dust from the joint interiors. If the patio is dirty, wash it down with a garden hose, but be conservative with pressure washing. Too much pressure directed into joints flushes out bedding material and can loosen pavers. After washing, the patio must be completely dry before you apply any polymeric product. This means waiting at least 24-48 hours in warm weather, longer in cooler or humid conditions. Moisture on the surface or in the joints is the single biggest cause of polymeric sand failure: it triggers premature activation and leaves a white haze on the surface that's difficult to remove. Test the joint interior by pressing a dry paper towel into it. If it picks up any moisture, wait longer.
Joint size and substrate: which product works where
There's no one-size product for patio jointing. Using the wrong compound for your joint width or substrate is a reliable way to waste a weekend. Here's how to match product to situation.
| Joint Width | Substrate Type | Recommended Product | Notes |
|---|---|---|---|
| Under 3 mm | Any | None until widened | Widen joint first with angle grinder/chisel |
| 3 mm to 10 mm (1/8" to 3/8") | Pavers / flags on sand base | Dry sweep-in jointing sand or fine polymeric sand | Check product spec for minimum joint width |
| 10 mm to 25 mm (3/8" to 1") | Pavers / flags on sand base | Polymeric jointing sand (standard) | Compaction mandatory; check depth minimum (~38 mm) |
| 25 mm to 100 mm (1" to 4") | Pavers / flags on sand base | Polymeric jointing sand (wide-joint rated) or mortar | Products like Techniseal HP NextGel and Polybind G2 rated to 4" |
| 5 mm to 25 mm | Mortar-bedded slabs | Ready-mix pointing mortar or bagged jointing compound (e.g. U-CAN) | BS 7533 guidance: mortar joints 5-25 mm as a general range |
| Any width | Porcelain / ceramic tiles | Exterior flexible tile grout only | Do not use polymeric sand or standard mortar on tile joints |
| Up to 50 mm (2") | Overlay on concrete slab | Overlay-rated polymeric sand only | Check drainage holes in base slab; follow manufacturer overlay spec |
For natural stone flags, be cautious with compaction. The stone can scratch or crack under a plate compactor. Place a sheet of plywood or protective matting over the stone before compacting, or use a hand tamper for final packing.
Polymeric and flowable jointing sand: step-by-step
When it's the right choice
Polymeric jointing sand is the go-to for most concrete block pavers and flag-paved patios on a sand or gravel base. For a step-by-step comparison and to learn the best way to fill patio joints, consult the linked guide. It contains a polymer binder that activates when you wet it, setting into a semi-flexible compound that resists weeds, insects, and washout far better than plain sand. Premium products like Techniseal HP NextGel and Alliance Gator Polybind Complete G2 handle joints from 1/8 inch up to 4 inches wide on traditional bases. It's not appropriate for tile surfaces or extremely shallow joints, and it requires dry conditions and proper compaction to work correctly.
Step-by-step application
- Confirm the surface is dry. Check joints are clear of debris, old compound is removed, and weeds are gone. The patio must have been dry for at least 24-48 hours with no dew, rain, or sprinklers. Do not proceed if rain is forecast within 24 hours of activation.
- Check the weather window. Most manufacturers recommend working when temperatures are above 4°C (40°F) and below 35°C (95°F), with no rain for at least a few hours after activation. Read your specific product's data sheet for its window.
- Wear your PPE. Polymeric sand contains respirable crystalline silica. Put on your P2 dust mask, safety glasses, and gloves before opening any bags.
- Pour the sand across the patio surface in manageable sections. Use a semi-rigid street broom to sweep it diagonally across the joints in multiple passes. Work in sections of 2-3 square metres rather than trying to sweep the whole patio at once.
- Compact the patio. Use a plate compactor fitted with a rubber pad or teflon-coated plate over the surface. Make passes in two directions (perpendicular to each other). This forces the sand down into the joint and achieves the dense packing the polymer needs. For natural stone or large slabs, place plywood on the surface first to protect it.
- Sweep and compact again. After the first compaction pass, top up joints and sweep again, then make a second compaction pass. Repeat until joints are filled to within about 5-6 mm of the surface and stay full after compaction.
- Remove all surface excess. Use a leaf blower to clear polymeric sand from the paver surface. Any sand left on the surface when you wet it will bond to the paving and cause a haze. Don't skip this step.
- Activate with water. Use a hose on a shower or mist setting (not a jet). The activation sequence varies by product. As a general guide, wet the area for about 10-15 seconds, pause briefly, then apply a longer wetting pass of about 30 seconds per section. The goal is to saturate the joints without washing sand out or pooling water on the surface. Follow your product's exact TDS for timing.
- Allow to cure. Keep the surface dry and off foot traffic for a minimum of 24 hours. Full hardening takes several days. Keep off vehicles for at least 48-72 hours.
- Check joints after 24 hours. Some minor settlement is normal. Top up any low spots and re-activate if needed.
Curing times and seasonal limits
In warm, dry summer weather (above 15°C), most polymeric sands cure to handling strength within 24 hours and reach full hardness in 3-7 days. In cooler weather (5-15°C), allow at least 48 hours before foot traffic and up to 14 days for full cure. Do not apply polymeric sand if there is any chance of frost within 48 hours of application. Frost before the polymer has set will cause the joints to crumble and blow out. Autumn applications are possible if you plan carefully around the weather, but summer is the most reliable season.
Dry sweep-in jointing compounds: step-by-step
When it's the right choice
Dry sweep-in compounds are simpler to apply than polymeric sand and don't require a separate water-activation step. They're a good choice for smaller patios, tight or irregularly shaped areas where a plate compactor is hard to use, or where you just need to top up joints that have partially emptied over time rather than doing a full re-joint. They won't provide the same weed and washout resistance as a polymer-bonded product, but they're a perfectly practical repair for many domestic patios. Some branded products, including certain U-CAN patio jointing formulations, are designed specifically for this swept-in application method.
Step-by-step application
- Prepare joints as described in the prep section. Clear old material, remove weeds, brush and blow out debris. The surface should be dry or just slightly damp (unlike polymeric sand, some dry sweep-in products tolerate slightly less-than-bone-dry conditions, but dry is always better).
- Wear PPE. Dry jointing compounds also contain silica dust. Mask, glasses, and gloves on before opening bags.
- Pour the compound onto the patio surface and use a stiff broom to sweep it in broad diagonal strokes across the joints. Work in one direction, then sweep again at 90 degrees to fill evenly.
- Use a hand tamper, rubber mallet, or plate compactor to compact the material into the joints. ICPI recommends compacting with a vibrating plate compactor operating at 75-90 Hz where possible, sweeping and compacting in cycles until joints are full. For a small patio or restricted area, a hand tamper with repeated passes is acceptable.
- Continue the sweep-and-compact cycle until joints are consistently filled to just below the surface (about 3-5 mm down from the top of the paving unit).
- Sweep off all excess from the surface with a brush or leaf blower. Compound left sitting on the paving surface will trap moisture and discolour the paving.
- Some dry sweep-in products are designed to be left dry and firm up gradually through natural moisture from rain or dew. Others recommend a light watering to help them settle. Check your product instructions and follow them.
- Inspect the patio after the first rainfall or 48 hours. Some minor settlement and joint drop is expected. Top up if needed.
Curing and settling
Dry sweep-in compounds don't have a strict chemical cure time the way polymeric sand does, but they do need time to settle and compact down with a bit of moisture. Most will reach stable density within a few days of normal weather. They're typically more permeable than polymer-bonded products, which is actually an advantage for patios where drainage is important. The trade-off is that they offer less resistance to weed growth and may need topping up more regularly, perhaps every two to three years.
Mortar pointing and bagged ready-mix compounds
For mortar-bedded slabs with wide joints (typically 10-25 mm), traditional pointing mortar or a bagged ready-mix product like U-CAN patio jointing repair compound is the practical choice. For patch repairs, consider a bagged ready-mix like u-can patio jointing repair, which is formulated for mortar-style pointing and small-area fixes. For a straightforward ready-mix option for mortar-point repairs, consider easy fix patio joint mortar (e41f4402-2d3a-4ab2-9b7f-0666814dcae2). The standard mix for pointing is roughly 1 part cement to 3-4 parts sharp sand by volume, mixed to a stiff consistency that holds its shape when squeezed but isn't crumbly. Too wet and it stains the surface and cracks as it shrinks; too dry and it won't bond.
- Mix your mortar or ready-mix compound to the consistency of peanut butter. It should hold a firm shape and not slump or bleed water.
- Dampen the joints lightly with a sponge or brush before applying mortar. Dry joints pull moisture from the mortar too quickly and cause weak, crumbly pointing.
- Push mortar into the joint with a pointing trowel or a margin trowel. Work in small sections (about 0.5-1 m at a time). Pack it firmly into the joint with the trowel tip, filling from the bottom up.
- Finish the joint surface. A raked joint (slightly recessed, about 3-5 mm below the paving surface) handles movement better than a flush joint and sheds water more cleanly.
- Clean excess mortar off the paving surface immediately with a damp sponge before it sets. Dried mortar on paving is difficult to remove without risking surface damage.
- Cover with sheeting if rain is forecast, or mist lightly with water in hot/dry conditions to prevent the mortar drying too fast and cracking.
- Allow 48-72 hours before foot traffic. Full mortar cure takes 28 days, though joints are typically firm enough for light use within a week.
BS 7533 guidance on jointing suggests mortar joints should generally be between 5 mm and 25 mm wide for most paving applications. Wider than 25 mm and mortar pointing becomes prone to cracking without specific design provisions. If your joints are wider than this, think carefully about whether the original patio design had a problem that needs addressing before re-pointing.
Compaction and finishing tips that actually matter
Compaction is probably the most underrated part of any jointing job. Joints that look full after sweeping often have air pockets and loose material at depth. After one rain or one winter freeze, those pockets collapse and the joint sinks or cracks. For polymeric sand, ICPI recommends at least two full compaction passes with a vibrating plate compactor before activating, and the plate should be within 2 metres of the laying face as you work so freshly jointed sections don't dry before compaction. For large-format slabs and natural stone, put down protective matting or plywood before compacting to avoid scratching or cracking the surface. For genuinely small areas, a rubber mallet and a piece of timber worked along the joint is a workable alternative, but it takes much more effort and patience.
Routine maintenance to make your jointing last
- Check joints once a year, ideally in spring. Look for any that have settled, cracked, or been disturbed by frost. Catch problems early before weeds colonise the voids.
- Clear leaf litter and debris from the surface regularly. Organic material sitting in joints feeds weed seeds and breaks down jointing compound over time.
- When washing the patio, avoid directing a pressure washer nozzle straight into joints. Angle the jet parallel to the surface or use a rotary washer head. High-pressure direct jets can flush out joint sand even from polymeric installations.
- If you notice light efflorescence (white powdery deposits) on the surface, treat with a proprietary efflorescence cleaner rather than scrubbing or power washing. The deposits can recur until the paving materials stop releasing salts, so patience is needed.
- Top up settled joints with the same product you used originally. Mixing products in the same joints is generally fine for dry sweep-in compounds but can cause issues with polymeric products if the original binder hasn't fully cured or if products have different activation chemistry.
Troubleshooting common jointing problems
| Problem | Likely Cause | Fix |
|---|---|---|
| Polymeric sand washed out after first rain | Insufficient compaction, joints too shallow, or rain before activation set | Re-prepare and re-apply; check joint depth is at least 38 mm (1.5") |
| White haze on paving surface after polymeric sand | Surface wasn't fully dry before sweeping; excess not blown off before wetting | Use a polymeric sand haze remover/cleaner; avoid repeating the mistake on future sections |
| Joints crumbling within one season (mortar) | Mortar mixed too wet or dried too fast in hot weather; frost before cure | Rake out and re-point; damp joints before applying and protect from frost for 48 hours minimum |
| Weeds back within a few months | Root material not removed before jointing; joints not deep enough | Remove, treat with weedkiller, wait, then re-joint with full depth clearance |
| Joints settled and low after compaction | Normal settlement; or joints were not fully compacted in first pass | Top up with same product and compact again; one top-up after the first season is normal |
| Pavers rocking or moving after re-jointing | Base failure or missing edge restraint, not a jointing issue | Lift affected pavers, repair base, relay and then re-joint; jointing compound cannot fix base problems |
| Efflorescence/white powder on surface | Natural salt migration from paving or mortar | Use efflorescence-specific cleaner; may recur until salt content in materials reduces |
Realistic cost and time expectations
For a typical UK residential patio of around 20-30 square metres, expect to spend half a day on preparation and another half day on jointing and activation, spread across two days minimum. A 20 kg bag of quality polymeric sand covers roughly 6-10 square metres depending on joint width and paver size, so budget for 3-6 bags plus a hire cost for the plate compactor. Bagged ready-mix mortar compounds like U-CAN are usually available in smaller quantities suited to patch repairs. As a rough guide, the material costs for re-jointing a 25 m² patio using polymeric sand run to around £50-£120 in materials (as of mid-2026 UK pricing), plus £40-£80 for plate compactor hire if you don't own one. Dry sweep-in compounds are slightly cheaper per bag but may need topping up more regularly over time, so the longer-term cost difference is smaller than it looks at the point of purchase.
When to call a professional instead
Jointing is genuinely a DIY-friendly job when the patio structure underneath is sound. But there are situations where calling a professional is the right call, not a defeat.
- Rocking, sinking, or uneven pavers: these indicate base failure, poor compaction in the original installation, or inadequate edge restraints. Jointing won't fix this and may mask the problem temporarily.
- Widespread settlement across the whole patio: if more than 10-15% of the surface is affected, the base likely needs relaying. This is a significant job.
- Water draining toward the house foundation: this isn't a jointing problem. The fall of the patio needs correcting, which may mean a partial or full relay.
- Cracked or spalled slabs across multiple units: cracking that goes through the paving unit itself, rather than just the joint, often means base movement or structural issues below ground.
- Any patio over a basement, utility run, or drain cover: disturbing jointing in these areas can have consequences that go beyond cosmetic. Get professional advice before starting.
The honest answer is that jointing compound is a finishing product, not a structural repair. If you've done the assessment steps in this guide and found rocking pavers, drainage problems, or base failure, fix those first. Re-jointing on top of a failing structure just means doing the same job again in a year or two.
FAQ
Which jointing compound should I choose for my patio: polymeric/flowable jointing sand, dry sweep‑in compounds, cementitious/mortar pointing, or a branded product like U‑CAN?
Choose by joint width, substrate and expected movement: polymeric/flowable jointing sand (polymeric sand) is best for narrow joints on interlocking pavers and most concrete/stone patios where joints are typically 3 mm–40 mm wide and you want good weed/insect resistance and some stabilization. Dry sweep‑in jointing compounds (unbound sand) are low cost for wider, permeable joints on well‑drained pavers where some movement is acceptable. Cementitious or mortar pointing is best for rigid, narrow-to-medium joints on slabs, tiles or where you need a durable rigid seal (e.g., patios with little expected movement). Branded systems like U‑CAN (or Polybind/Techniseal variants) are proprietary polymeric/sand products — use the brand’s joint width and depth limits and follow its TDS. If the base or edge restraint is failing, none of these will fix it — that’s a structural repair and you should consider a professional.
What tools and materials do I need?
Checklist: broom (semi‑stiff), leaf blower, stiff brush, hand tamper, plate compactor with rubber/PU pad or paver roller (or protective plywood for delicate stone), jointing sand (polymeric/dry/complete sand) or mortar mix and pointing trowel, mixing bucket and paddle or mortar mixer, garden hose with spray/shower nozzle, sponge and clean water, joint raker or pointing tool, petrol/cordless saw or grinder and chisel (if removing old mortar), PPE: gloves, eye protection, dust mask/respirator (silica), kneepads. Optional: weed killer, efflorescence cleaner, sealant (if specified by product).
How do I assess joint size and substrate compatibility?
Measure joint width and depth; typical guidance: polymeric sands usually suit 3 mm (1/8") up to ~40 mm (1.5") depending on product — check TDS for min/max. Dry sweep sand suits wider, permeable joints. Mortar pointing usually requires 5–25 mm joint widths (British standard guidance) and adequate backing/bedding. For pavers on an unbound base, polymeric or dry sand are suitable; for stone slabs or tiles bedded on mortar/concrete, use mortar pointing or a flexible pointing compound designed for stone. For overlays (pavers over concrete) check manufacturer limits—many polymeric sands restrict overlay thickness and joint depth. If joints are deeper than recommended, fill to correct depth with compatible material before top‑jointing.
How do I prepare and clean the patio before jointing?
Preparation steps: remove loose sand, weeds, roots and old joint material using a stiff brush, joint raker, narrow chisel or grinder for hardened mortar. Clean surface residue with a gentle cleaner; avoid aggressive pressure washing that will remove bedding. Allow the patio to dry fully—polymeric sands require dry conditions (no dew/sprinklers/rain). Check and repair base, edge restraints and any unstable pavers/slabs; re‑set any rocking units. Sweep joints clean and vacuum or blow dust from joints; ensure joint depth meets product minimum (often ~1.5"/38 mm for some products or 25–40 mm minimum packing — check TDS).
Step‑by‑step: how to apply polymeric/flowable jointing sand
1) Confirm dry weather window (no rain/sprinklers before/during application). 2) Sweep dry polymeric sand into joints until they are fully packed and at the correct depth. 3) Compact the paved area with a plate compactor fitted with a rubber/PU pad or use a paver roller; place plywood over delicate stone to protect surface. 4) Sweep and add more sand, repeating compaction until joints are dense and full per ICPI guidance (repeat passes until joints are consistent). 5) Remove excess sand from the surface; use a leaf blower or broom at low height. 6) Activate the polymer by gently spraying with a hose using the manufacturer’s wetting pattern (short bursts then longer soak as instructed), keeping the surface from flooding and avoiding direct high‑pressure jets into joints. 7) Allow to cure per product TDS (commonly 24–48 hours) before foot traffic; observe product’s specific 'rain safe' window. Follow PPE and activation timing on the TDS for your branded product.
Step‑by‑step: how to apply dry sweep‑in jointing sand
1) Clean and dry joints and ensure a stable base and edge restraint. 2) Sweep dry jointing sand into joints until full. 3) Compact with a plate compactor (or hand tamper for small areas) to settle sand down. 4) Repeat sweeping and compaction until joints remain filled and dense. 5) Brush off excess and compact again. No wet activation is used. Note: dry sand is permeable and will not form a rigid bond; expect more maintenance (re‑sweeping after frost/washout).
Best Way to Fill Patio Joints: DIY Steps That Last
Choose and apply the right filler for patio slab or paver joints to stop weeds and washouts with lasting DIY steps.