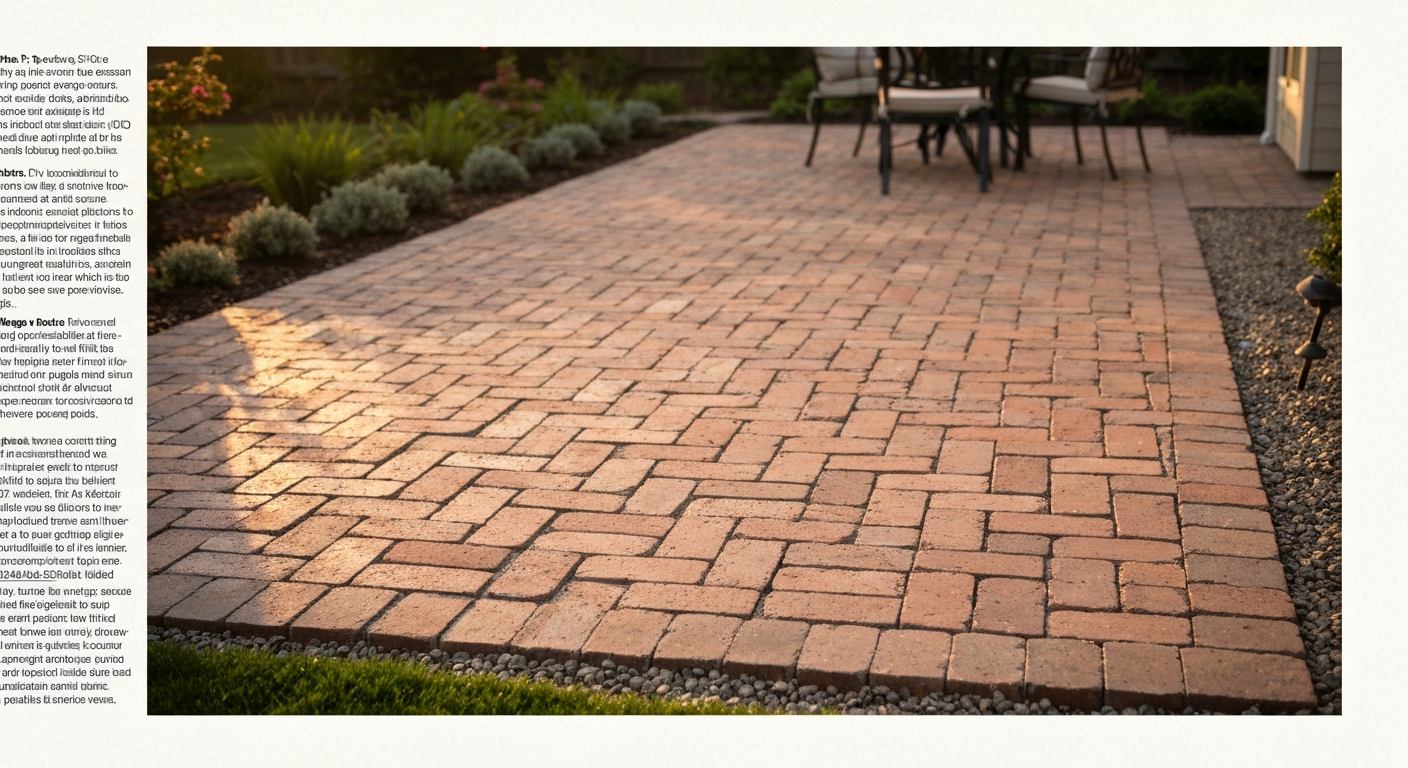
Yes, you can use old bricks to make a patio, but not every old brick is up to the job. Reclaimed clay and concrete bricks can make a genuinely good patio surface, often better-looking than anything you can buy new. The catch is that they vary wildly in quality, and a batch that spent 50 years as an internal wall will behave very differently outdoors, especially through a hard winter. Run the checks in this guide first, sort out the duds, then lay them properly on a well-prepared base and they'll last decades.
Can I Use Old Bricks to Make a Patio: Step-by-Step DIY, Tools & Cost

Talia Lang
4 Aug 2026
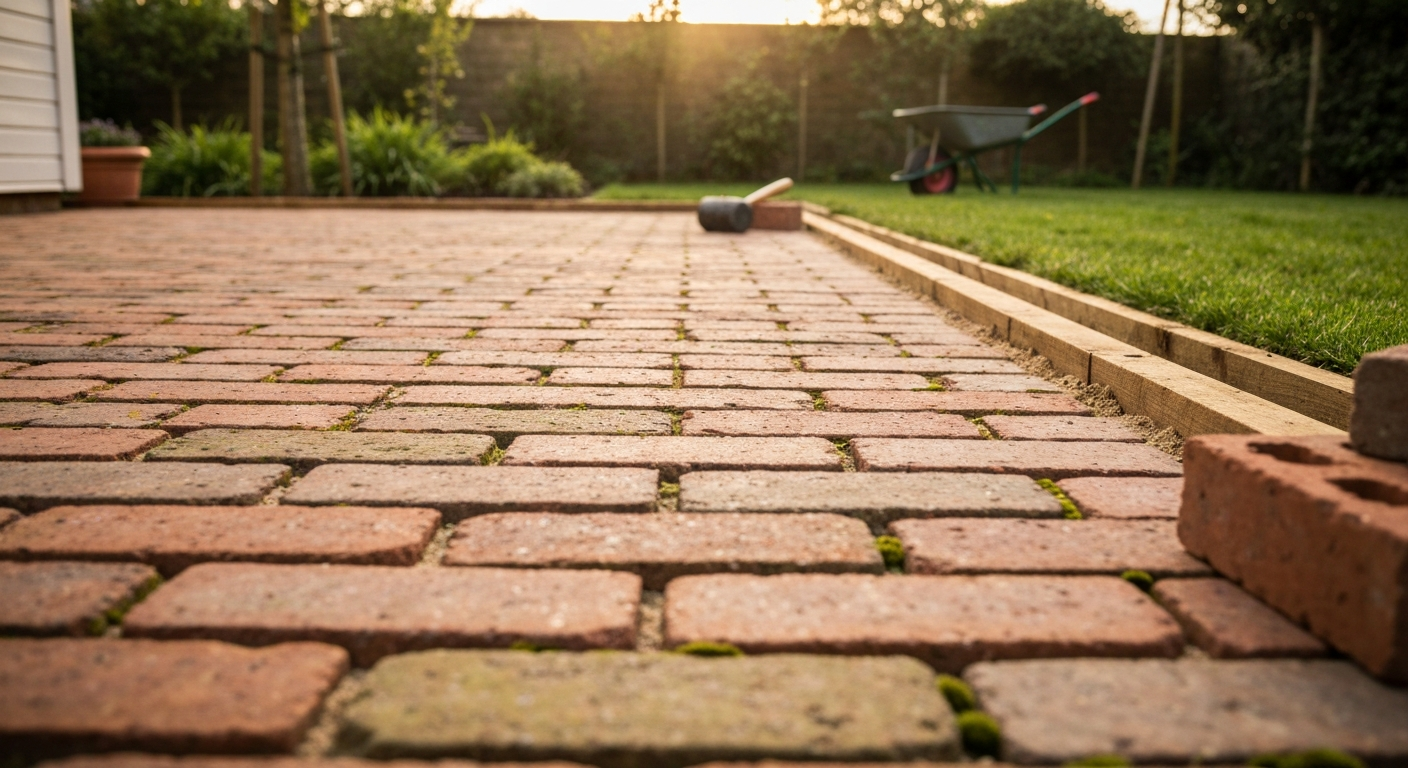
Should you actually reuse these bricks? A quick decision checklist
Before you spend a weekend cleaning mortar off a pile of salvage, work through this checklist. It won't replace lab testing on a large project, but it'll tell you fast whether the bricks you have are worth the effort.
- Do you know where they came from? External brickwork (walls, garden structures) is a better sign than internal partition walls, which were never exposed to rain or frost.
- Tap test: strike each brick firmly with a lump hammer handle. A clear, high ring means the brick is intact. A dull thud or a hollow clunk suggests internal cracking or poor density.
- Visual check: reject any brick with deep cracks running through the body, spalling (layers flaking off the face), or persistent white crystalline crust that doesn't brush off.
- Scratch test: drag a nail across the face. Heavy scratching on a clay brick suggests it's soft and underfired, which means it will absorb water and fail fast outdoors.
- Water absorption spot test: weigh a sample of five bricks dry, fully submerge them for 24 hours, weigh again. More than 15–20% weight gain is a red flag for freeze-thaw durability.
- Salt and staining check: look for heavy yellow or brown staining, powdery deposits, or evidence of damp patches. These can indicate high soluble sulfate or chloride content that will drive efflorescence and surface damage on your patio.
- Paint or coating check: identify whether any paint is old enough to contain lead, especially on bricks from pre-1978 buildings. Run a lead test kit as a screen, and follow up with lab confirmation if it tests positive.
- Do you have enough? Add 10–15% overage to your calculated quantity to account for cutting waste and rejected units. Running short of a discontinued reclaimed batch mid-job is a real problem.
- Is this a frost-exposed area? If you're in a climate with repeated freeze-thaw cycles and the bricks' history is unknown, independent laboratory certification of frost resistance is the safe call on large or permanent installations.
Inspecting reclaimed bricks properly: condition, strength, and contaminants
The on-site checks above give you a first pass, but here's what you're actually assessing and why each one matters.
Structural condition
Visual inspection and the tap test are your primary tools. You're looking for spalling, flaking, large cracks, and biological staining (green or black growth deep in the surface). Industry research confirms that for a practical on-site sort, combining the tap test with a water absorption estimate gives you a reliable first filter, even though only lab tests give definitive compressive strength and freeze-thaw classification. For a domestic patio, a careful visual and tap sort is what most experienced bricklayers actually do, and it works well if you're thorough.
Soluble salts
Soluble sulfates and chlorides are the main culprits behind efflorescence, that white crusty bloom that appears on brickwork. More importantly, salt crystallisation inside the pores is a major cause of face spalling in cold weather. Bricks with unknown history and visible salt staining should be lab-tested or simply rejected for an exposed patio position. UK guidance from the Brick Development Association is explicit: high salt content bricks are unsuitable for exposed external use without independent certification. See blank" rel="noopener noreferrer">Reuse of Clay Brickwork – General Guide (Brick Development Association) for UK guidance advising salt testing or independent laboratory checks before external reuse. NHBC Standards 2024 advises that reclaimed bricks should be assessed before use in exposed external positions and that units of unknown durability, high soluble-salt content, or previously used internally may be unsuitable without independent certification blank" rel="noopener noreferrer">NHBC Standards 2024 (Technical requirements for brickwork and reuse considerations). For a DIY project, the practical answer is to reject heavy offenders and not gamble on them.
Lead paint and coatings
If the bricks are painted and came from a building constructed before 1978, treat the paint as lead-containing until proven otherwise. Consumer-grade lead test swabs (LeadCheck, D-Lead) will catch high concentrations but can miss lower levels that are still harmful. A 2026 Consumer Reports review confirmed this limitation directly. If you get a positive DIY test result, or if the bricks came from a pre-1978 building and you're unsure, send a paint chip sample to an accredited lab or call in a certified inspector with an XRF gun. Do not grind or blast painted bricks without knowing the result.
Oil and grease
Bricks salvaged from industrial or workshop sites may carry oil contamination that soaks deep into the pores. Surface solvent degreasing can handle light contamination, but heavily saturated bricks often stain through any sealer over time. The honest advice here is to reject them unless you can verify the contamination is shallow with a test clean on a sample.
Reclaimed bricks vs new bricks vs other reuse options: how they compare
Reclaimed bricks aren't the only material option when you're starting a patio project with salvaged materials. Old patio slabs are another common reuse candidate, and new bricks are always the safe fallback. Here's how the main options stack up.
| Option | Typical cost | Aesthetic | Durability risk | Prep time | Best for |
|---|---|---|---|---|---|
| Reclaimed clay bricks | Free to ~£0.50–£1.50 each | High: aged, characterful, unique | Medium-high if frost history unknown | High: cleaning, sorting, rejection rate | Cottage, period, or rustic garden styles |
| New clay paving bricks | £1–£3 each | Uniform, clean | Low: rated for external use | Low: ready to lay | Modern or formal patio designs |
| Reclaimed concrete bricks | Free to ~£0.30 each | Utilitarian, less character | Medium: check for spalling and rebar staining | Medium: mortar removal needed | Budget patios, utility areas |
| Old patio slabs (reclaimed) | Usually free if you have them | Variable: depends on condition | Low-medium if slabs are sound | Low-medium: clean and relay | Patching or extending existing patio |
If you already have old slabs sitting in a pile, reusing them is often the quickest and most cost-effective route. Relaying and replacing existing slabs is a closely related job with its own considerations. See the guide on how to replace patio slabs for step-by-step instructions on relaying and replacing existing paving. See our short guide on how to relay loose patio slabs for step‑by‑step advice on lifting, re‑bedding and levelling old slabs. For guidance on relaying or repairing existing paving, see our guide on fix patio slabs. Where reclaimed bricks genuinely win is character. A good batch of handmade Victorian clay bricks patinated with age is something you genuinely cannot buy new, and for the right garden it's worth every hour of cleaning.
Full tools and materials list
What you need varies by which laying method you choose. Dry-lay (no mortar at all, bricks held by edge restraints and sand) is the most DIY-friendly and forgiving. A sand bed with brush-in jointing is the most popular middle ground. A mortar bed gives a firmer, more permanent result but is harder to get right and harder to fix later. Here's what each method requires.
Tools: all three methods
- Tape measure, line string, and pegs for setting out
- Spirit level (1.2 m minimum) and long straight-edge
- Rubber mallet
- Bolster chisel and lump hammer (brick splitting and mortar removal)
- Angle grinder with diamond disc (for cutting bricks accurately)
- Safety glasses, N95 respirator, thick gloves, steel-toe boots
- Wheelbarrow and shovel
- Plate compactor (hire one: about £60–£90/day in the UK)
- Stiff brush and hose or pressure washer (low setting)
- Club hammer
Additional tools: sand bed method
- Screed rails (metal or timber) for levelling the sand layer
- Long screed board (a straight 1.8 m length of timber works fine)
- Jointing brush or squeegee (for polymeric sand)
Additional tools: mortar bed method
- Bucket trowels and pointing trowels
- Mixing paddle and drill, or cement mixer (hire: £35–£50/day)
- Pointing gun or bagging brush for finishing joints
- Sponge and bucket for cleaning mortar splashes off faces
Materials list
| Material | Dry-lay | Sand bed | Mortar bed |
|---|---|---|---|
| Reclaimed bricks (sorted and cleaned) | Yes | Yes | Yes |
| Type 1 MOT sub-base aggregate (150 mm compacted depth) | Yes | Yes | Yes |
| Geotextile membrane (weed suppression) | Yes | Yes | Optional |
| Sharp washed sand (50 mm bed) | No | Yes | No |
| Kiln-dried or polymeric jointing sand | Yes | Yes | No |
| Edge restraints (treated timber, metal edging, or concrete haunching) | Yes | Yes | Optional |
| Cement (OPC, 25 kg bags) | No | No | Yes |
| Sharp sand for mortar mix | No | No | Yes |
| Jointing mortar (proprietary bagged or mix 1:4 cement:sand) | No | No | Yes |
| Patio sealer (optional but recommended for porous reclaimed clay) | Optional | Optional | Optional |
Cleaning and preparing reclaimed bricks
This is the unglamorous part that makes or breaks the whole project. Poorly cleaned bricks bond badly in mortar, hold salt, and look rough. Plan on spending more time here than you think. For a typical garden patio, cleaning 100 bricks by hand takes a full day. For 500 bricks, hire help or spread the work over several sessions.
Removing old mortar
For most reclaimed bricks, a bolster chisel and lump hammer is the right starting point. Work along the bed face of the brick, not across it, to avoid splitting. Older lime mortars (pre-1920s brickwork) come off relatively easily because lime mortar is softer than the brick. Modern Portland cement mortars are often harder than the brick itself, which means the chisel can shatter the face before the mortar moves. If you're dealing with a cement-mortared batch, try a small rotary hammer with a pointing or chisel bit, keeping it at an angle rather than driving straight into the mortar. Practice on the worst bricks first to get the feel.
Angle grinders speed things up but increase the risk of scoring the brick face, which looks bad on a finished patio and increases water absorption at that point. If you use one, fit a guarded masonry grinding disc, not a cutting disc, and keep it moving. The mortar removal guide for patio slabs on this site covers the same principles in more detail and is worth reading alongside this.
Removing efflorescence and salt deposits
White salt bloom on the surface is often just surface efflorescence that has dried out of the brick. For fresh or light deposits, a stiff dry brush followed by a low-pressure rinse is usually enough. Do not wet the brick before brushing, as you'll push the salts back into the pores. For heavier deposits, a proprietary efflorescence cleaner (available from builders merchants) diluted and applied to a damp brick, followed by thorough rinsing, is the reliable approach. Avoid undiluted hydrochloric (muriatic) acid on most clay bricks: it can react with iron compounds in the clay and leave rust staining, and it carries real chemical hazard. Industry guidance from the Brick Industry Association is consistent on this point.
Removing paint
If the paint has cleared lead testing, mechanical removal (wire brush, angle grinder with a stripping wheel) or a proprietary paint stripper works for most cases. Apply the stripper, allow the dwell time on the product label, then scrape and rinse thoroughly. Always test on a single brick first because some strippers react with iron-rich clays and cause staining. If the paint has tested positive for lead, stop DIY removal and read the safety section below before proceeding.
Pressure washing
A pressure washer is useful for the final rinse after mortar removal and cleaning, but keep the pressure low (below 1,400 psi) and the nozzle at least 300 mm from the face. High pressure on soft or underfired clay bricks erodes the face surface, opening pores and accelerating future deterioration. This is a common mistake on reclaimed brick patio projects: the bricks look great after a blast, but they're actually more vulnerable than before.
Safety, PPE, and handling contaminated bricks
Cleaning old bricks generates dust, and old brick dust contains respirable crystalline silica, which causes serious and irreversible lung disease with repeated exposure. This isn't a 'wear a mask if you feel like it' situation. Wear a properly fitted N95 (or P2/FFP2) respirator any time you're chiselling, grinding, or pressure washing reclaimed bricks outdoors.
Minimum PPE for cleaning reclaimed bricks
- N95/FFP2 or better respirator, properly fitted (not a paper dust mask)
- Safety glasses or full face shield when using power tools
- Chemical-resistant gloves when using acid or proprietary cleaners (check the product SDS for the correct glove material)
- Hearing protection when using angle grinder or rotary hammer for extended periods
- Steel-toe boots and heavy work trousers to protect against dropped bricks
- Old clothes or disposable coveralls when working with chemical cleaners
Lead paint safety
If a DIY lead test kit returns a positive result, treat the bricks as lead-contaminated. Do not dry-grind, sand, or blast the surface. Wet methods (wet scraping, chemical stripper applied to a dampened surface) reduce airborne lead dust significantly. All waste, including the wash water from rinsing, must be collected and disposed of as hazardous waste, not poured down a drain. For large quantities of lead-painted bricks, the honest recommendation is to call a licensed lead abatement contractor rather than handle this yourself. The risk-benefit calculation does not favour DIY on significant lead contamination.
Waste disposal
Broken or rejected bricks can go to a skip or recycling centre as inert waste in most cases. Chemical cleaning waste, including acid rinse water and paint stripper residues, must be collected in sealed containers and taken to a local hazardous waste facility. Check your local authority's guidance: pouring acid or solvent waste down a storm drain is illegal and can result in fines.
Preparing the site and base
A well-laid reclaimed brick patio starts well below the surface. Most DIY patio failures, including bricks that sink, rock, or frost-heave, come from inadequate base preparation, not the bricks themselves. Don't cut corners here.
Excavation depth
For a standard domestic patio on stable, well-drained ground, excavate to a total depth of around 200–250 mm below your finished surface level. This gives you room for: 150 mm of compacted MOT Type 1 sub-base, 50 mm of sand or mortar bed, and the brick thickness (typically 65–73 mm for standard UK bricks). Adjust if your bricks are thicker. Mark your finished surface level on pegs around the perimeter before you start digging so you have a consistent reference throughout.
Geotextile membrane
Lay a geotextile membrane over the excavated sub-grade before adding the Type 1 sub-base. This stops the aggregate working down into soft ground over time, which is one of the main causes of uneven paving. Overlap sheets by at least 200 mm and fold them up at the edges. For sand-bed laying, a second membrane layer between the sub-base and the sand bed is optional but adds an extra barrier against weed roots.
Sub-base compaction
Lay the MOT Type 1 aggregate in layers no deeper than 75 mm and compact each layer with a plate compactor. Running the plate over uncompacted aggregate in a single 150 mm pass does not achieve proper compaction. Two passes in different directions per layer is the minimum. A well-compacted sub-base feels rock-solid underfoot with no movement at all.
Fall and drainage
Plan a fall (slope) of at least 1:60 (approximately 17 mm per metre) away from the house or toward a drainage outlet. On a 3-metre patio, that's about 50 mm of fall across the full width. Set your string lines with this fall built in from the start. Ignoring drainage is how you end up with a patio that pools water against the house wall and creates damp problems. If the area has naturally poor drainage or a clay sub-soil, consider adding a perimeter channel drain or a soakaway at the low end. A reclaimed brick patio laid on sand is technically more permeable than a solid mortar bed, which helps slightly with surface runoff, but it is not a substitute for proper falls.
Edge restraints
For dry-lay and sand-bed patios, edge restraints are not optional: they are what prevents the whole patio from slowly spreading and loosening at the edges over years. Haunched concrete edges, proprietary metal edging pegged into the sub-base, or a mortared soldier course of bricks all work. Set the restraints before you lay the field bricks, not as an afterthought at the end.
Laying the bricks: three methods step by step
Method 1: dry-lay (no mortar)
- Install edge restraints to your finished height, accounting for brick thickness plus 50 mm sand bed.
- Screed the sharp sand bed to a consistent 50 mm depth using screed rails and a straight-edge board. Do not walk on the screeded sand.
- Lay bricks from one corner, working outward in your chosen pattern (running bond, herringbone, or basket weave). Herringbone is the strongest pattern for dry-lay as it locks the bricks together.
- Tap each brick level with a rubber mallet. Check frequently with a spirit level and straight-edge.
- For cut bricks at edges, mark with a pencil and cut with an angle grinder or brick splitter. Wear full PPE.
- Brush kiln-dried or polymeric sand into the joints, working it in with a stiff brush. For polymeric sand, lightly mist the surface and allow it to cure per the product instructions.
- Compact the finished surface with the plate compactor over a rubber mat (to protect brick faces), then top up joints with a final sand application.
Method 2: sand bed with mortar joints
Follow the same steps as dry-lay through to laying and levelling the bricks, but leave 8–10 mm joint gaps between bricks. Once all bricks are laid and checked for level, fill the joints with a dryish mortar mix (1 part cement to 4 parts sharp sand) using a pointing trowel or a bagging board. Keep mortar off the faces; clean any splashes immediately with a damp sponge. Do not walk on the finished surface for at least 24 hours, and keep it protected from rain for 48 hours while the mortar cures. For detailed guidance on cure times and when it's safe to walk on new paving, see how long before i can walk on new patio slabs.
Method 3: mortar bed (full bedding)
Mix a semi-dry mortar (1:4 to 1:5 cement to sharp sand) and tamp it down to around 50 mm on the prepared sub-base. Set out your string lines and lay bricks individually, pressing and tapping each one to the line. Check level and alignment every five or six bricks. The mortar bed should be damp enough to hold a thumb print but not wet or sloppy. Lay manageable sections at a time so the bed doesn't start to set before you reach it. Joint with a pointing mix and finish with a weatherstruck or flush joint profile. Allow 48–72 hours before foot traffic and at least a week before loading with furniture or heavy pots.
Cutting and coping with irregular bricks
Reclaimed bricks are not dimensionally uniform. In a single batch you can easily have a 5–8 mm size variation between units, which means you'll adjust joint widths slightly as you lay rather than holding a rigid 10 mm gap throughout. This is normal and actually part of the aesthetic. For cuts, mark with a pencil and square, score deeply with an angle grinder, then split cleanly with a bolster and lump hammer for a more natural edge. Use the grinder for precise cuts at the perimeter. Budget for a 10–15% breakage rate on cutting irregular salvage bricks.
Jointing and sealing options
For dry-lay and sand-bedded patios, polymeric jointing sand is the best modern choice. It hardens in the joints after activation with water, resisting ant and weed ingress and staying in place better than plain kiln-dried sand. For mortar-jointed patios, a standard 1:4 cement-sand pointing mix suits most reclaimed bricks. If you want a more period-appropriate or flexible joint for older soft bricks, a lime-based mortar (1 part hydraulic lime to 2.5–3 parts sharp sand) is kinder to the brick face and easier to repair later. Avoid using a stiff Portland cement mortar next to very soft historic bricks: the mortar is harder than the brick, and any movement concentrates in the brick face rather than the joint.
Sealing is optional but genuinely useful for reclaimed clay bricks on a patio. A breathable impregnating patio sealer reduces water absorption, slows salt migration, and makes the surface much easier to clean. Apply only to fully dry, clean bricks, and reapply every three to five years. Avoid film-forming glossy sealers on rough reclaimed surfaces: they tend to peel and trap moisture underneath.
Common troubleshooting problems and fixes
| Problem | Likely cause | Fix |
|---|---|---|
| Bricks rocking or sinking | Sand bed too deep, not compacted, or sub-base failed | Lift affected area, check and compact sub-base, re-screed sand and relay |
| White salt bloom appearing after laying | High soluble salts in bricks or in mortar mix migrating to surface | Dry-brush when dry, use efflorescence cleaner, allow to weather naturally over first season |
| Mortar joints cracking | Too much cement (too rigid), or movement in sub-base | Re-point with a slightly leaner or lime-based mix; investigate sub-base if widespread |
| Brick faces flaking or spalling after first winter | Bricks not frost-rated, high water absorption, or water trapped under surface sealer | Remove and replace affected bricks with frost-rated alternatives; check drainage |
| Weeds growing through joints | Plain sand joints with no polymeric binder | Remove weeds, sweep out joints and refill with polymeric sand or brush-in dry mortar |
| Uneven surface (lips between bricks) | Size variation in reclaimed bricks not adjusted for during laying | Lift and re-bed high bricks; grind down minor lips with a hand angle grinder |
Realistic costs and time estimates
For a typical 20 m² patio using reclaimed bricks you already have (free) and doing the work yourself, expect to spend around £300–£500 on materials: MOT sub-base, sand, cement, geotextile, edge restraints, and sealer. Hiring a plate compactor adds roughly £70–£90 for the weekend. If you need to buy the reclaimed bricks, expect to pay £0.50–£1.50 each from salvage yards, so roughly £200–£600 for 400 bricks on a 20 m² patio (bricks are typically laid at around 35–40 per m² depending on pattern and joint width). New paving-grade clay bricks for the same area would cost £400–£800 in materials alone, and you'd skip the cleaning stage.
For time: sorting and cleaning 400 reclaimed bricks is a full weekend of solid work for one person. Base preparation takes one day. Laying takes another one to two days depending on method and your experience. Allow a further day for pointing and finishing. A realistic total for a competent first-timer is four to six days of work, spread across a couple of weekends. That's honest. Anyone who tells you a 20 m² reclaimed brick patio is a one-weekend job is either very experienced or leaving things out.
When to call a professional
Some situations genuinely call for a contractor. If your sub-grade is waterlogged clay, you have a significant slope toward the house, or the area is larger than about 30 m², a professional groundworker is worth the money for the excavation and drainage design alone. If lead paint testing comes back positive on a large quantity of bricks, a licensed abatement contractor is the right call, not because the work is difficult but because the liability and health risk are real. And if you've pulled up an existing patio and found the sub-base is completely compromised, soft, or sitting over buried rubble, fixing that properly is not a task to cut corners on.
Maintenance and realistic lifespan
A reclaimed brick patio laid on a proper base with well-prepared bricks will last 20 to 40 years with basic maintenance. The jobs that matter most are: keeping joints topped up (especially in a sand-bed patio where joints erode over years), resealing every three to five years if you used a sealer, and lifting and re-bedding any bricks that start to rock before they become a trip hazard. Sand-bed patios are easier to maintain than mortar-bedded ones because you can lift and re-lay individual bricks without breaking out mortar. That repairability is one of the strongest practical arguments for the sand-bed method when using reclaimed bricks.
FAQ
Can I reuse old (reclaimed) bricks to build a durable patio?
Yes—many reclaimed clay and concrete bricks can make a durable patio, but suitability is variable. Screen bricks for intact faces (no severe spalling), low water absorption, adequate strength and low soluble salts. If provenance is unknown or bricks show heavy salt, oil, or paint contamination, get laboratory tests or choose new pavers. For exposed, frost‑affected locations, proven frost resistance or lab certification is strongly recommended.
What quick on‑site tests should I do before committing to reused bricks?
Do a visual check (spalling, cracks, biological staining), a tap test (clear ring = usually sound), and a simple water absorption test (weigh dry, submerge 24 hours, re‑weigh to estimate % absorption). Reject bricks that shatter when tapped, crumble edges, or absorb very high water (high risk in freeze climates). For salt concerns, look for efflorescence and consider sending samples for soluble salt testing if history is unknown.
When should I send bricks to a lab or hire an expert?
If bricks will be in exposed/frost zones, if batch quality is inconsistent, if you suspect soluble salts, lead paint, heavy oil/grease, or if you need reassurance for a long warranty. Ask labs for compressive strength, water absorption and salt (chloride/sulfate) tests. For health‑critical paint testing, get XRF or accredited lab testing (DIY lead kits are only screening tools).
What safety and contaminant checks should I perform?
Check for painted surfaces—test suspect paint for lead with XRF or send chips to a lab if used around homes. Inspect for oil/grease (dark staining) and test-clean a sample—reject heavily contaminated bricks. Avoid bricks with visible asbestos mortar fragments. During cleaning/powdering work use full PPE: respirator (N95 or P2+ for silica; cartridges for acids if used), eye protection, gloves, hearing protection and coveralls. Follow SDS for any chemicals.
What tools and materials will I need for a reclaimed‑brick patio?
Tools: wheelbarrow, masonry bolster/chisel and lump hammer, brick hammer, wire brush, angle grinder with diamond blade or tuckpointing wheel (for careful users), masonry saw or brick splitter, plate compactor, spirit level, string line, edging restraints, rubber mallet, pointing tools, trowels, broom, measuring tape, shovel. Materials: reclaimed bricks, Type 1 or crushed stone sub‑base, coarse sharp sand for bedding (or mortar for mortar bed), kiln‑dried sand/paver sand for joints or polymeric sand, cement if mortar bed/jointing, edging stones/steel restraints, weed membrane (optional), joint sealer or paver sealer (optional).
What are the build method options (dry‑lay, sand bed, mortar bed)? Pros and cons?
Dry‑lay on compacted sub‑base with jointing sand or polymeric sand: fastest, reversible, good for drainage, easier freeze movement but can allow weed/ant remobilisation. Sand bed (one‑part bedding mortar or screed of cement‑sand): firmer, better for narrow‑joint patterns, more stable but less forgiving for settlement. Mortar bed and pointed joints: most rigid and durable for tight joints and heavy loads but less reversible and needs good brick quality and drainage control. Choose based on brick condition, site drainage and desired final look.
Next Article
How to Use Old Bricks for Patios & Walkways: Complete Guide
Reclaim old bricks for durable patios & walkways: assess reuse, prep, repair, install, joint, seal, and troubleshoot.